Hello there!
Need Help? We are right here!
Need Help? We are right here!
Search Results:
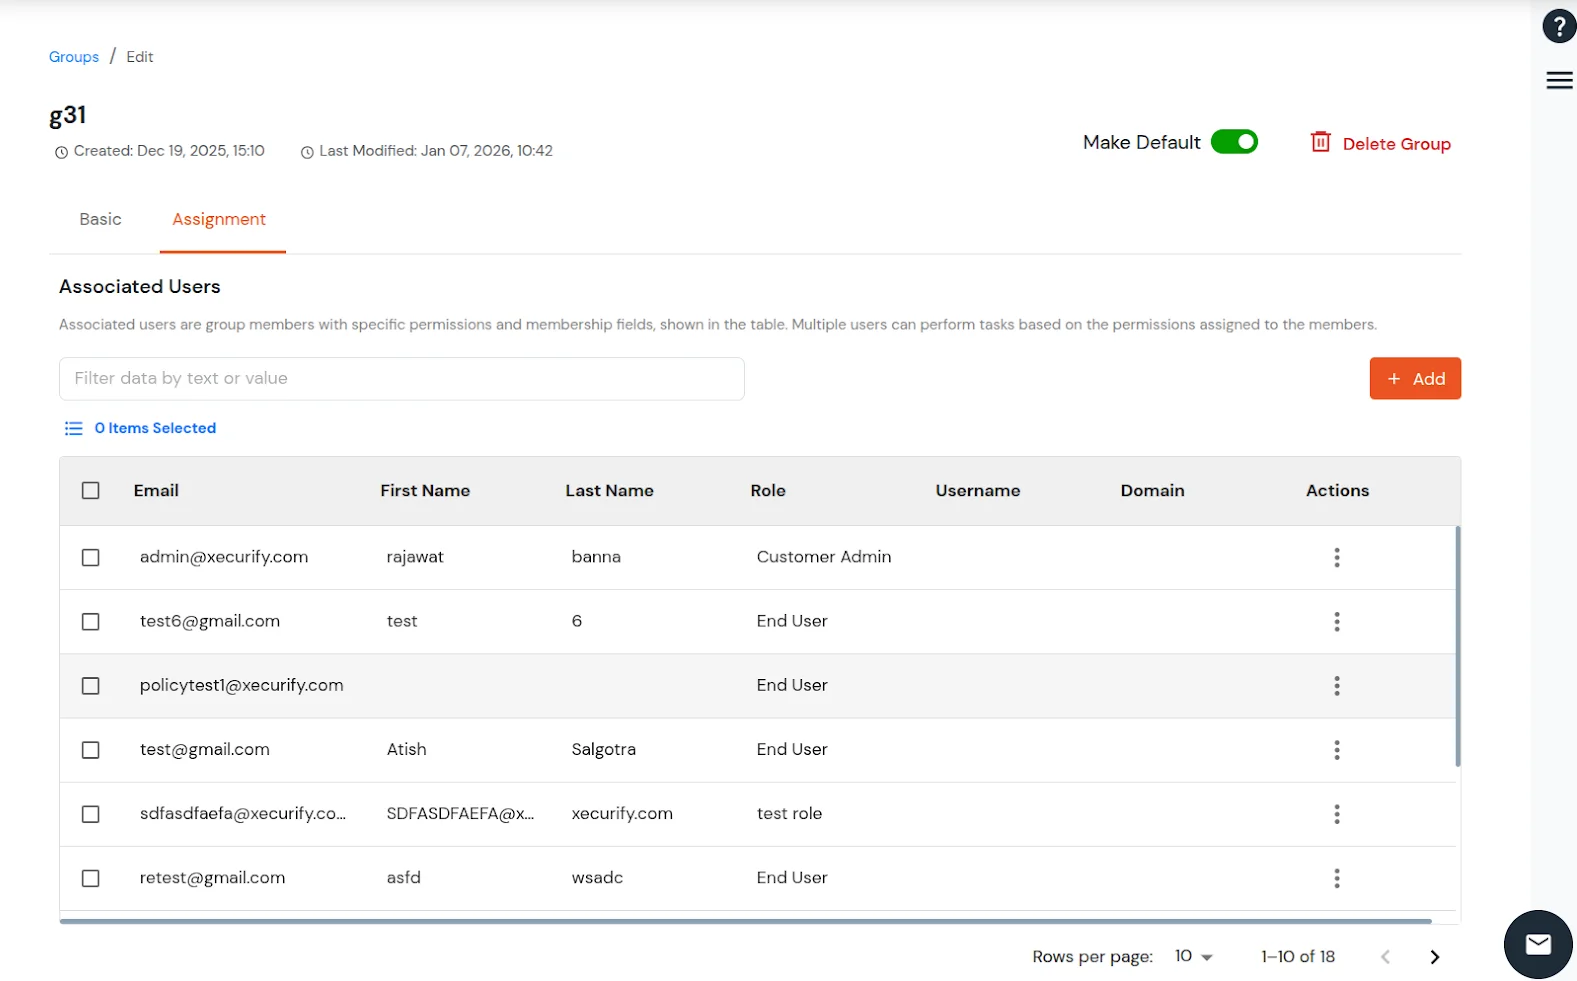
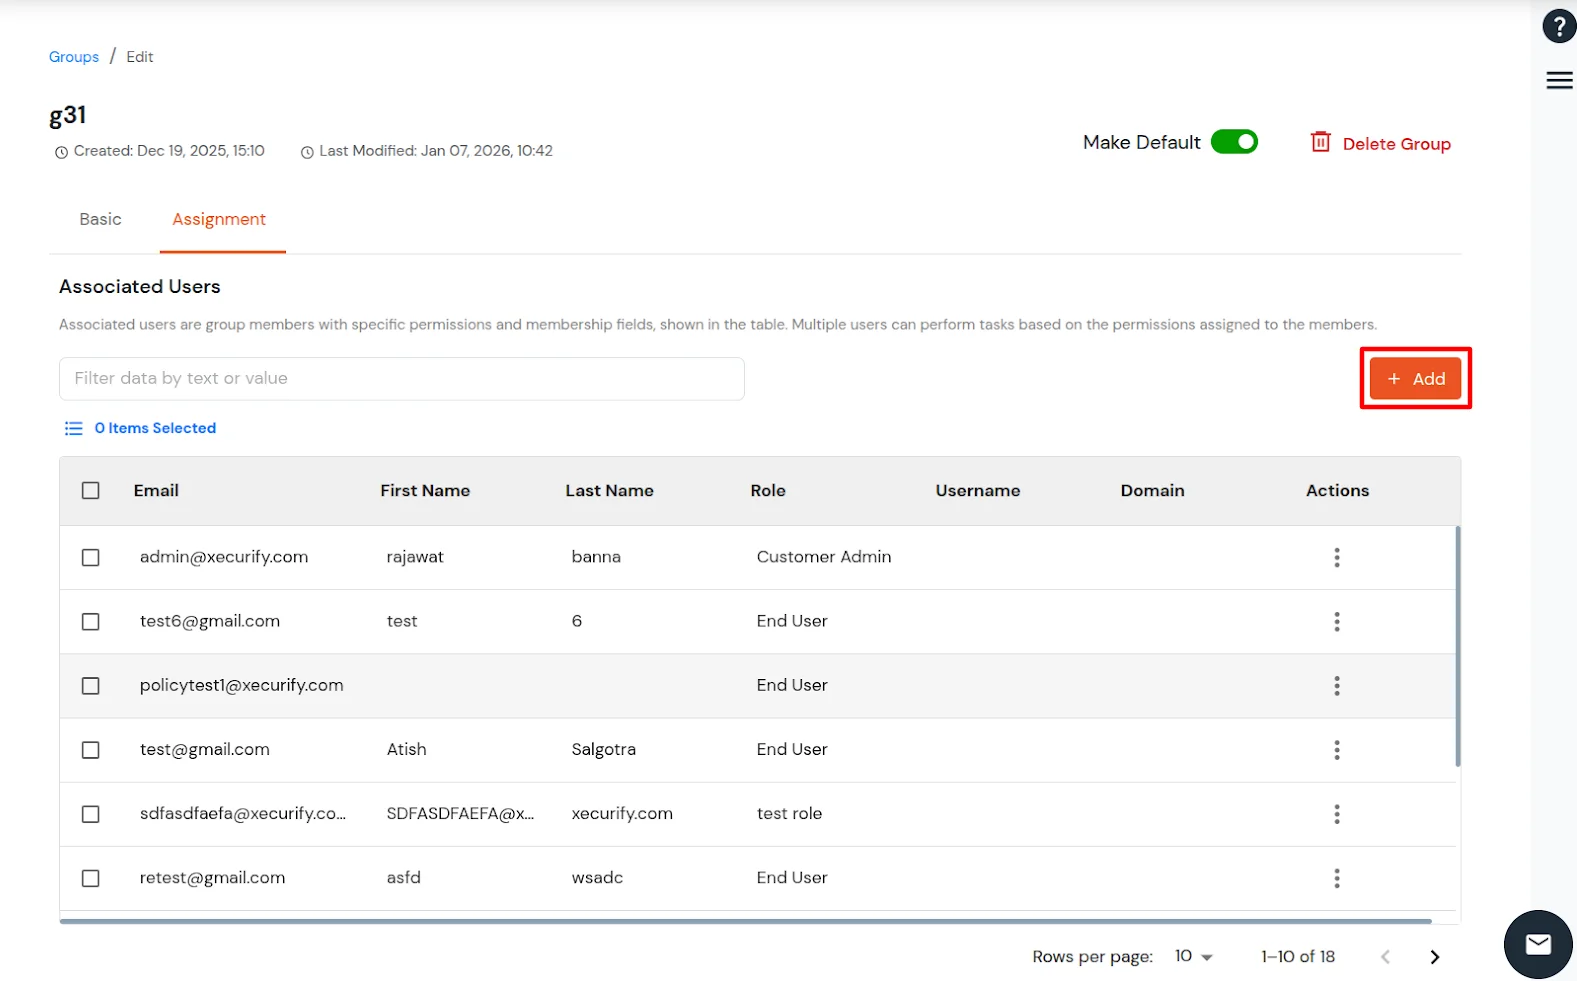
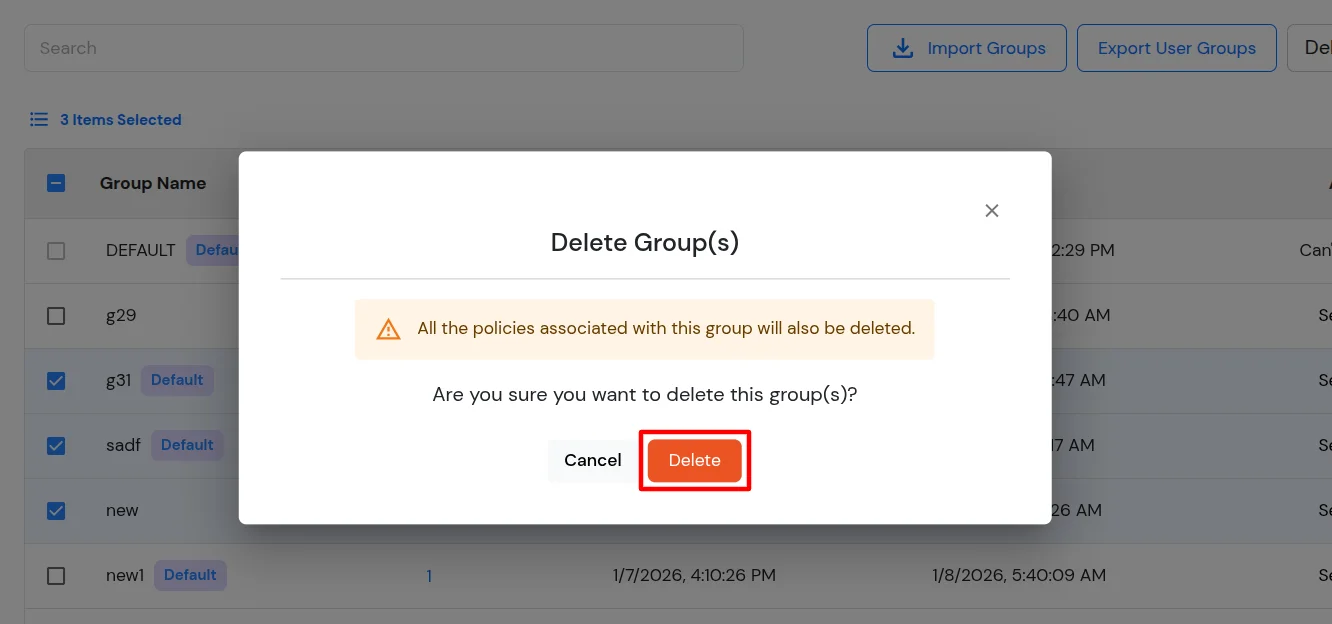
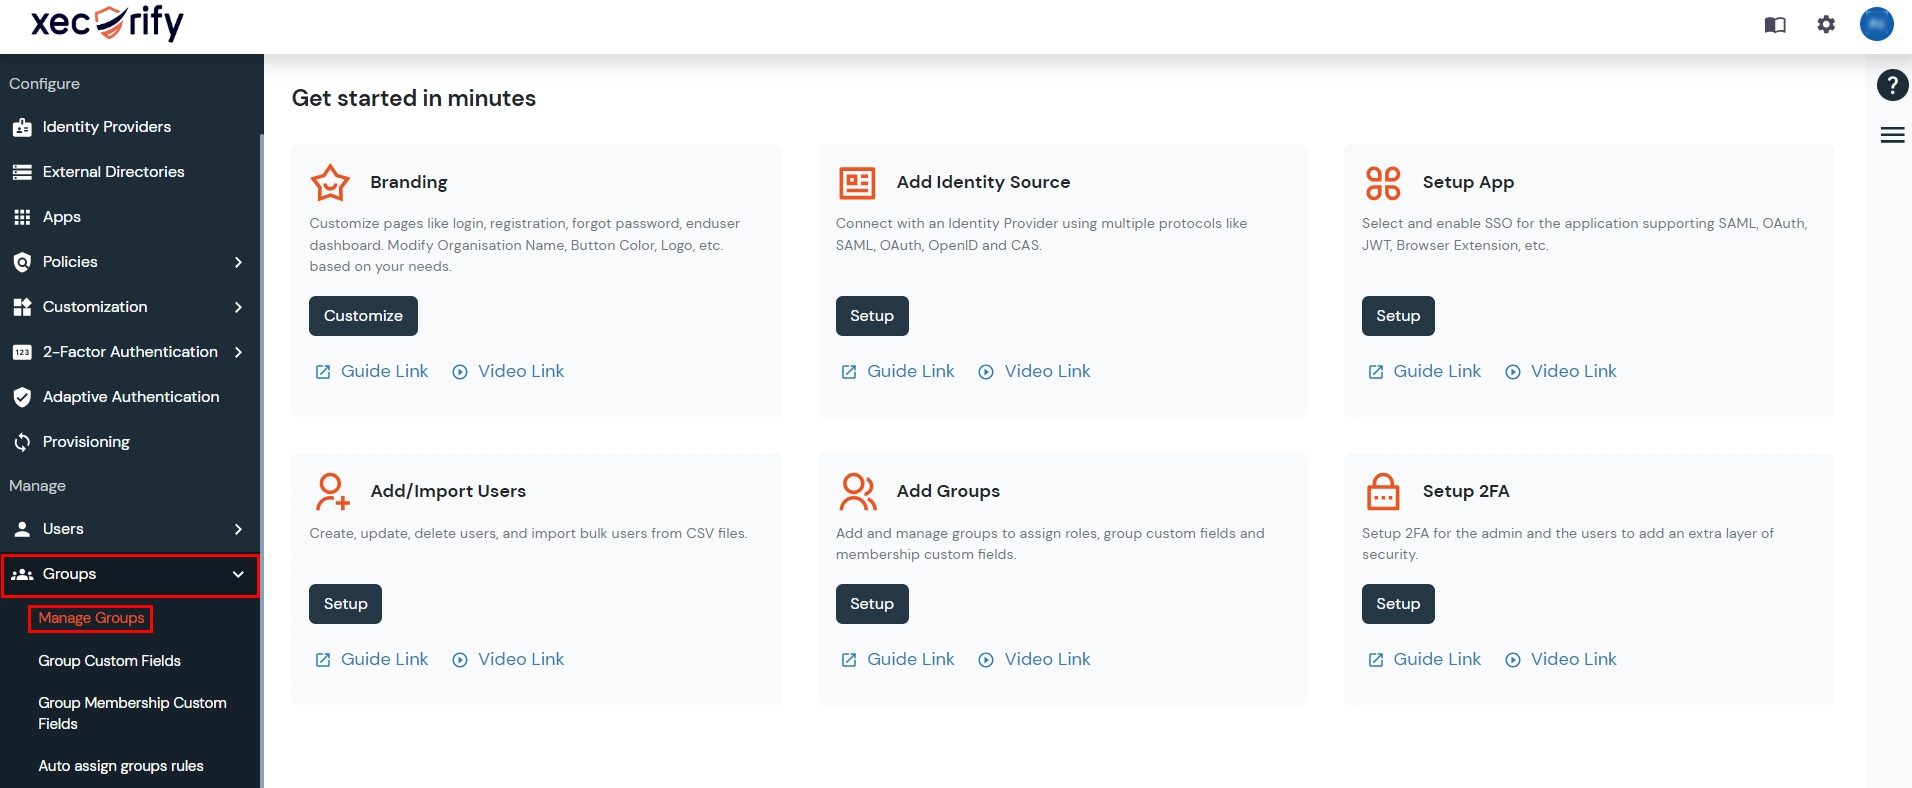
×A group is a collection of several users. Groups are used to map an application to a set of users. Groups can be used for the following purposes in miniOrange :
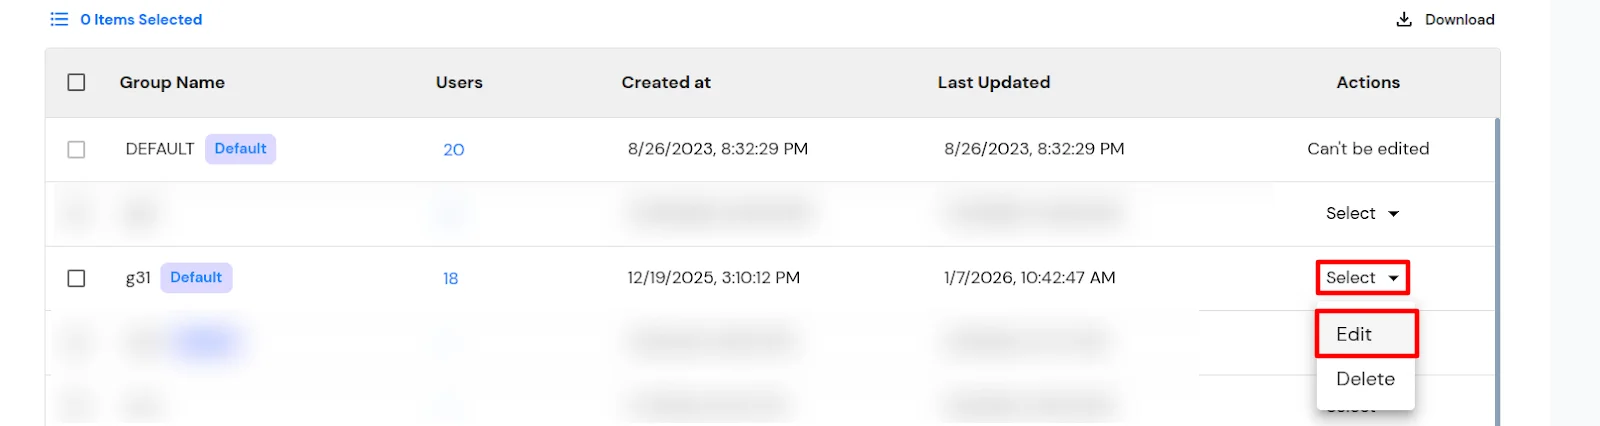
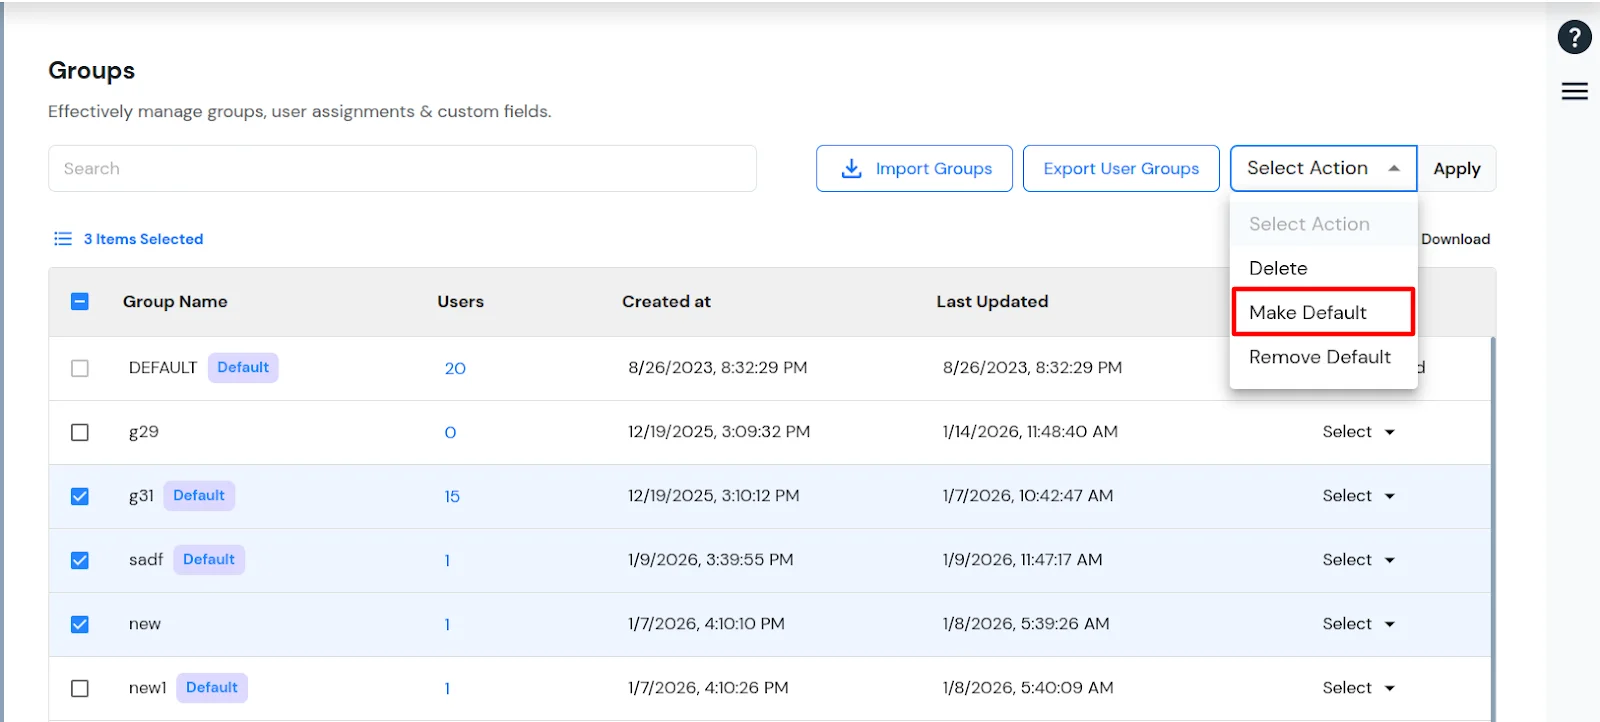
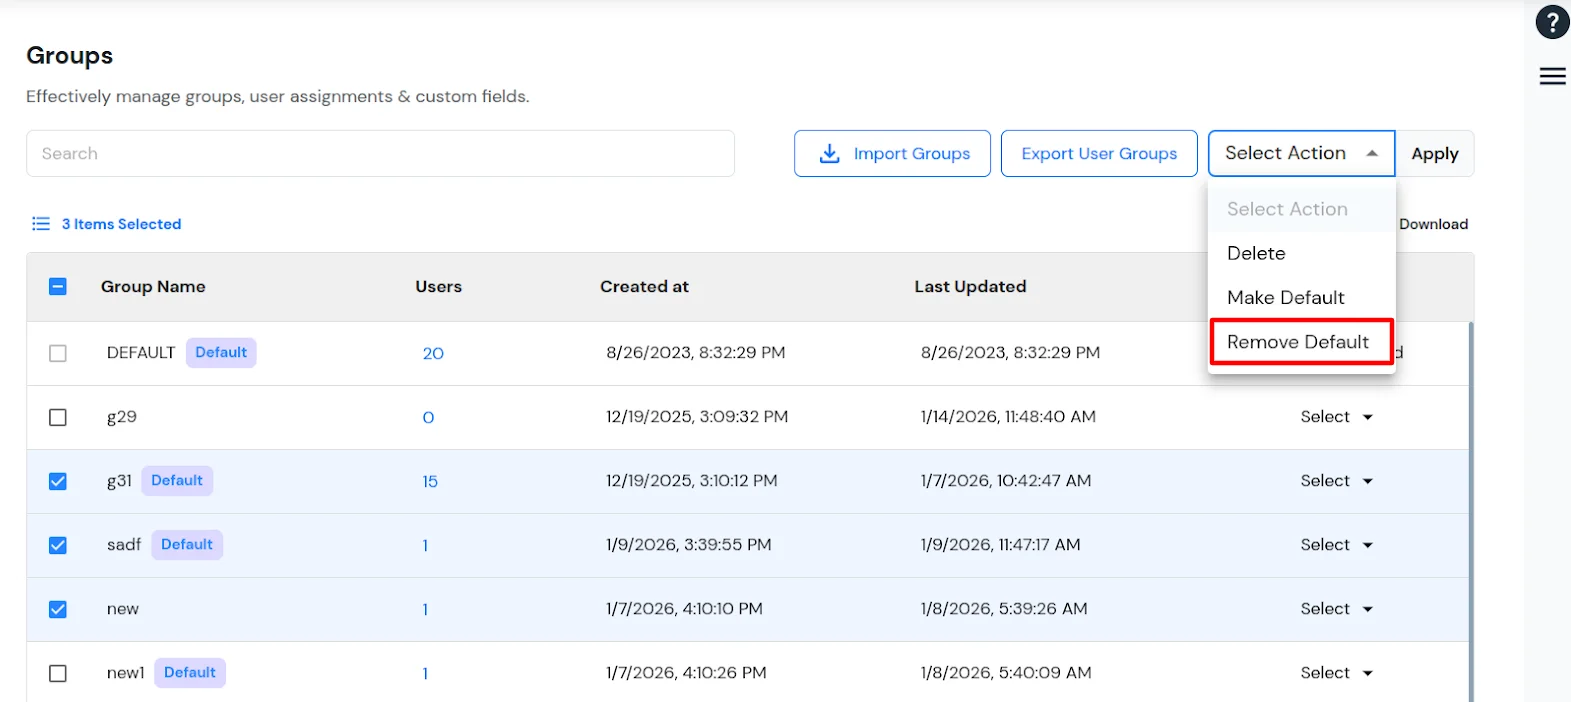
The DEFAULT group is automatically created when you complete the configuration for admin. All users under your admin account are part of the DEFAULT group. Each newly created user is assigned to the default group automatically.
A Default group can be used to enable access to an application for all of the users or if you want to enable MFA for all users.
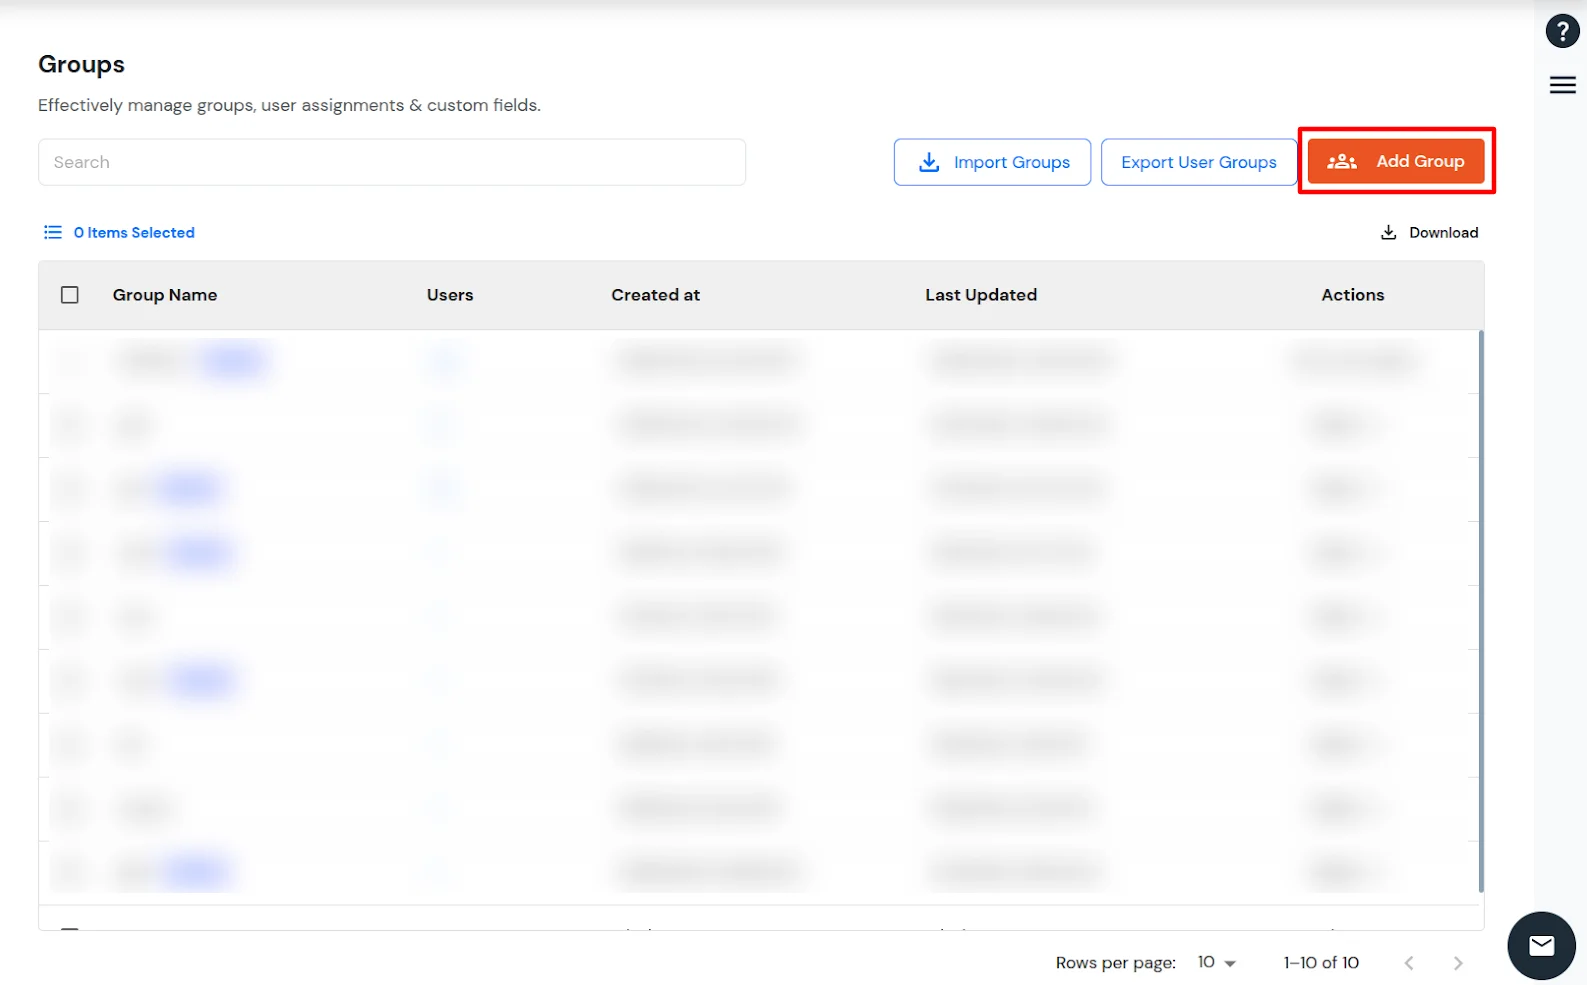
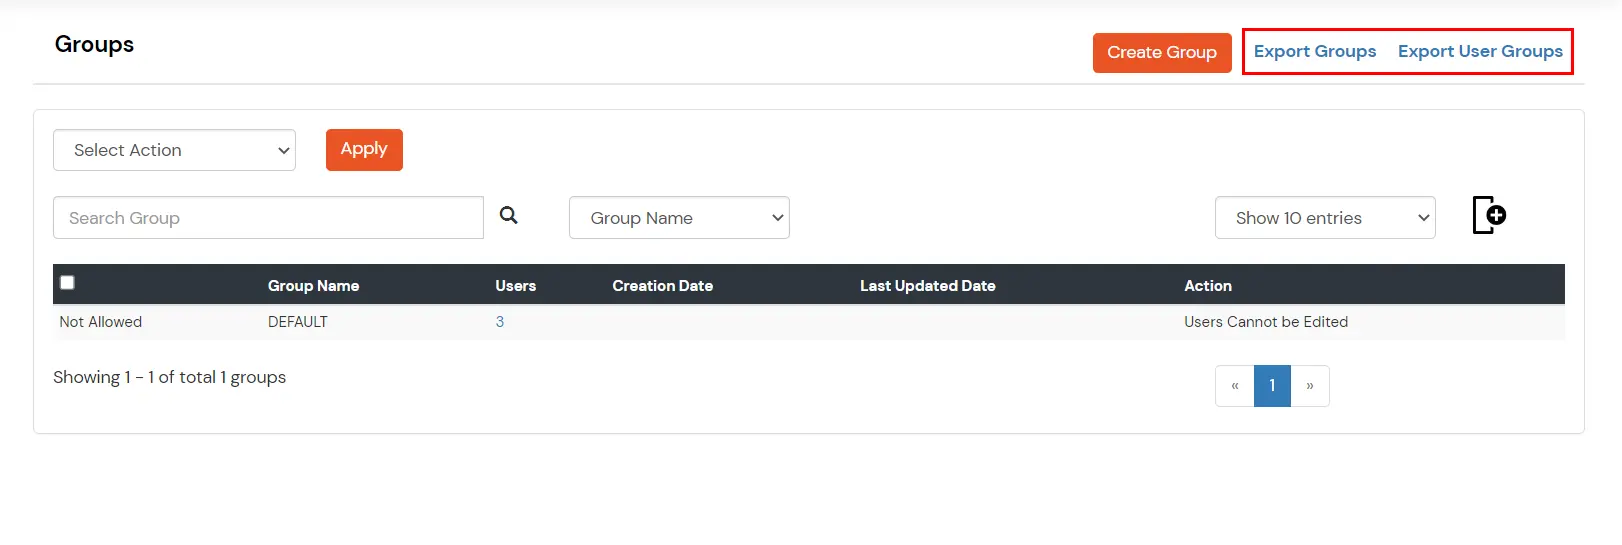
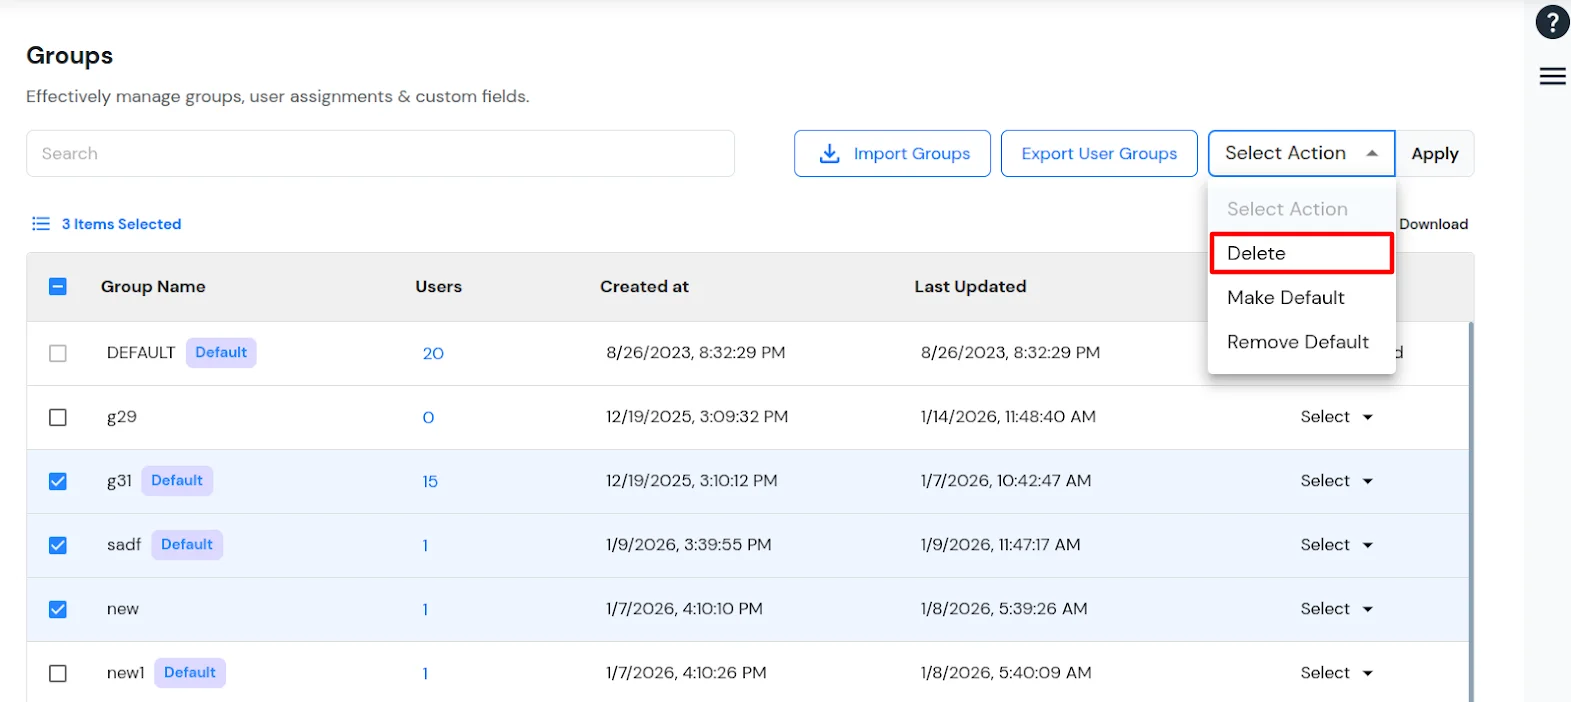
| Import Groups | Creates and downloads a CSV containing a list of all Groups under your account. |
| Export User Groups | Creates and downloads a CSV containing the User Group Mappings for all users. This exports the list of users under your account along with the groups of which the user is a member of. |