Branding and Customization
The Branding section allows you to customize the authentication experience for your organization. Every organization includes a default brand, and you can create additional brands to provide unique branding experiences for different business units, customers, or applications.
Customize various branding elements such as logos, favicons, colors, authentication page text, custom domains, endpoints, and email and SMS templates to deliver a consistent and personalized experience across your organization.
Every tenant has a non-deletable default brand, served on your organization's Xecurify subdomain. A tenant always has exactly one default brand, and it must be set up before you can add any other brands.
Whether you add a separate brand depends on your goal:
- You just want a vanity URL for your tenant. If you only want to reach your miniOrange tenant at a branded URL, with no separate theming, add a custom domain directly to the default brand.
- You want a distinct branded experience. If you want separate theming, add a separate brand on its own custom domain. It’ll work alongside the default brand’s Xecurify subdomain.
You can re-theme the default brand (swap its logo, palette, and other assets), but you cannot delete it or remove it from the Xecurify subdomain.
Configuration Steps to Customize the Organization Login Page
- Navigate to Customization >> Login and Registration Branding.
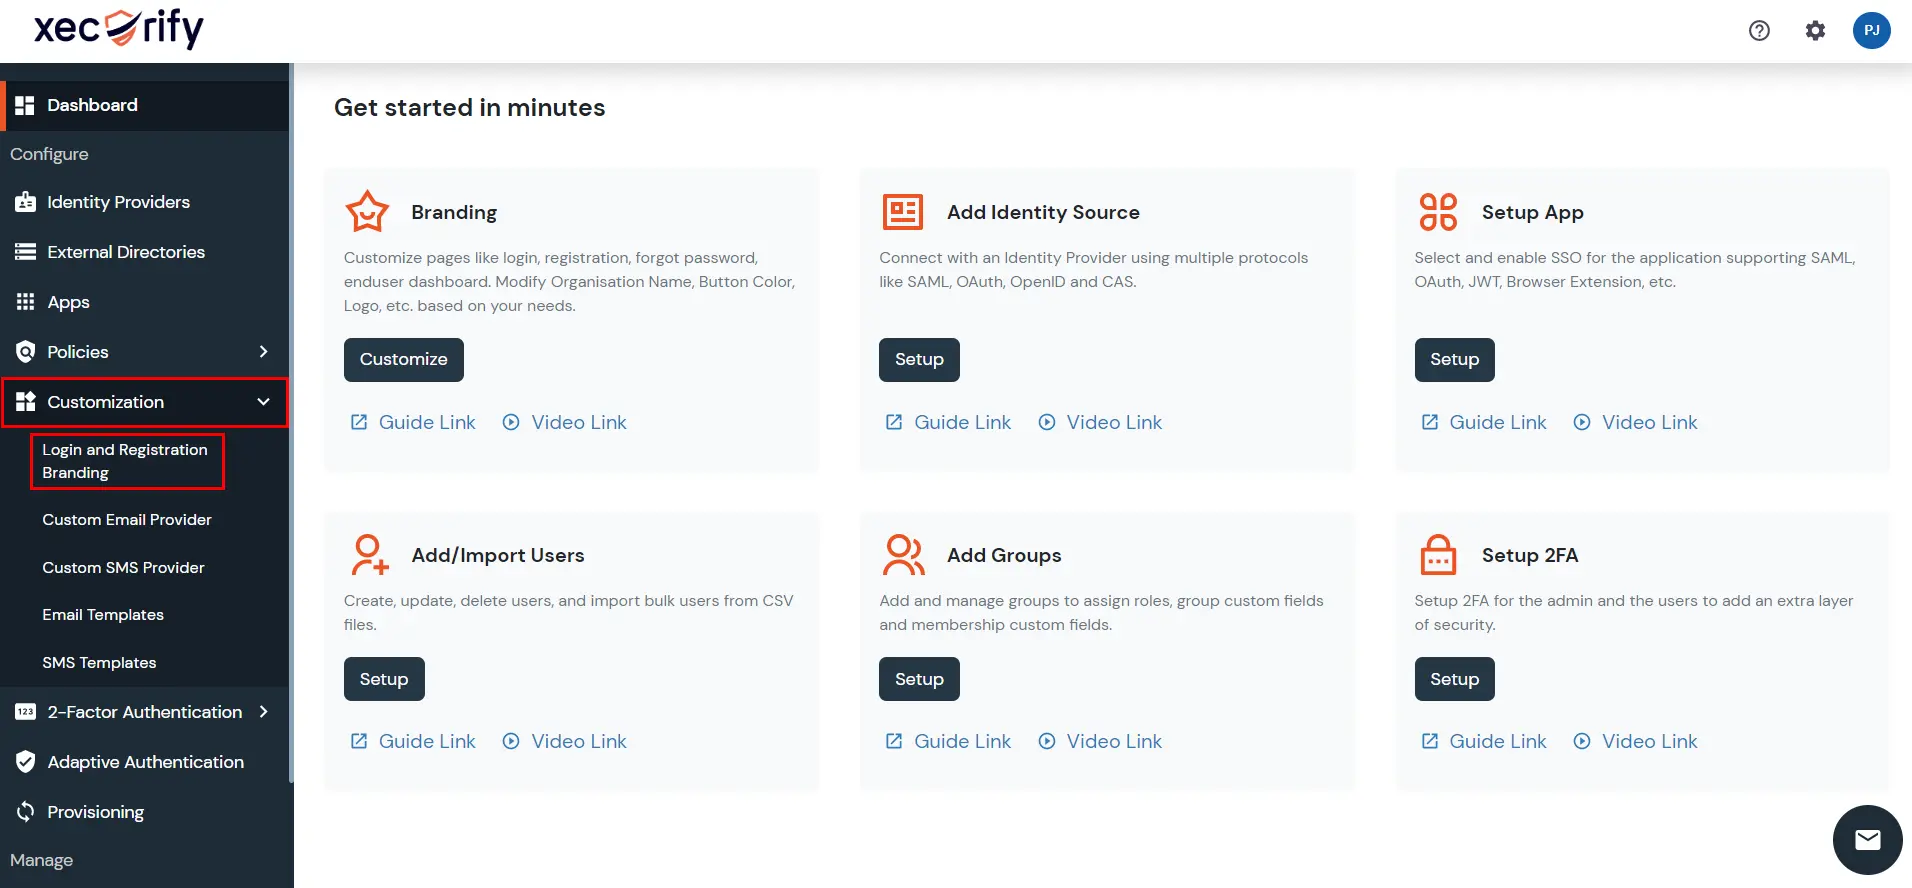
- The Brands page displays your organization's default brand. From here, you can edit the default branding configuration.
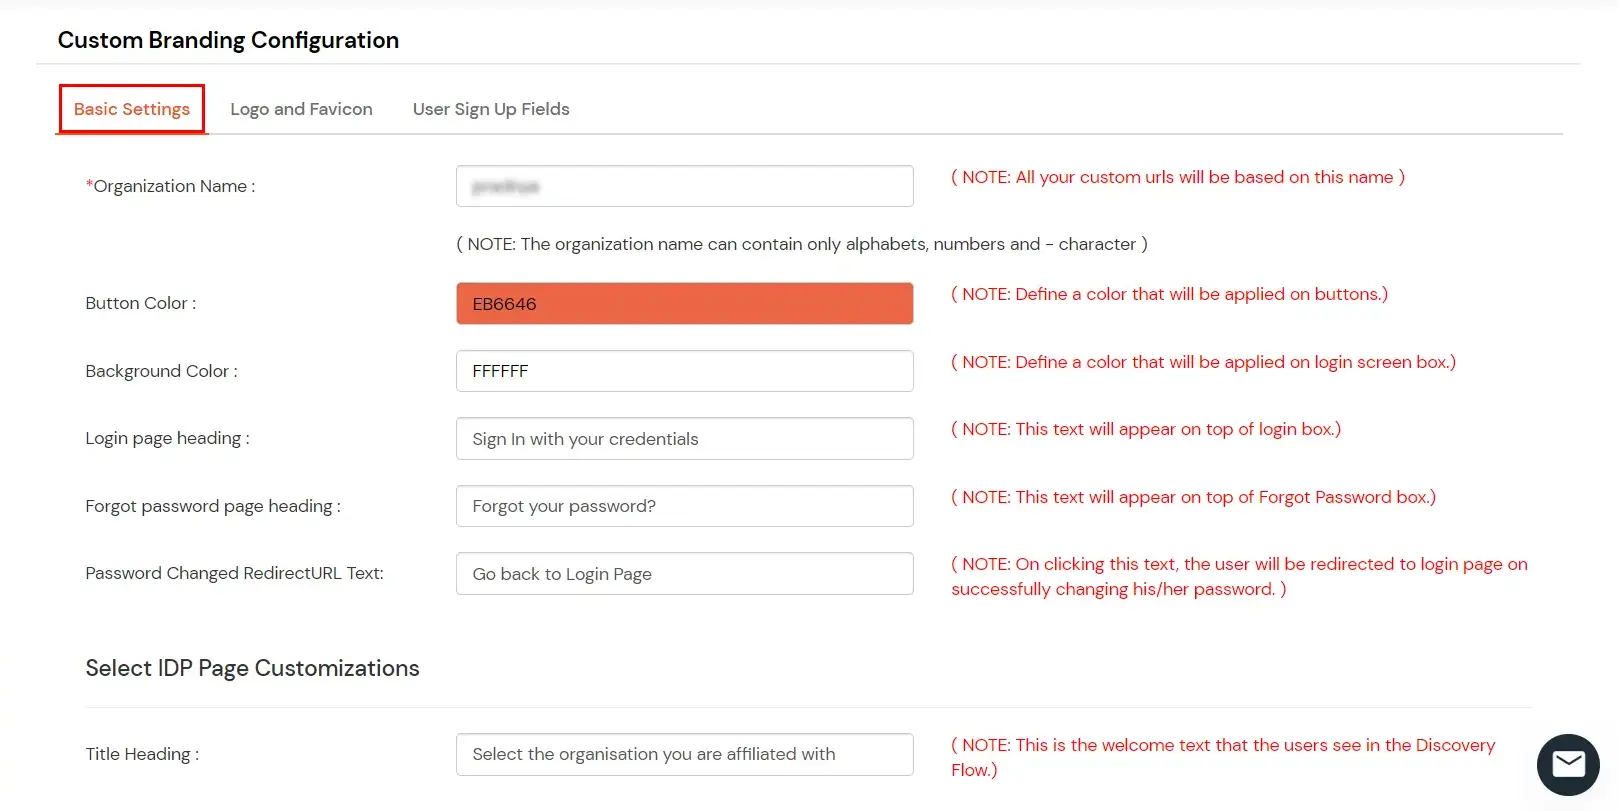
- Click on the edit button of the default brand so setup your branding:
1. Organization Name
You will be prompted to enter the organization name. Enter your organization name, it’ll be used to generate your tenant access URL. If you enter org then your tenant URL would be org.xecurify.com, on clicking continue your default brand would be set up, now you can set up a theme for your brand.
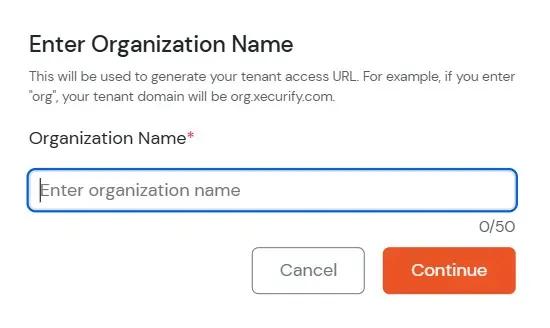
Your organization name must be set before you proceed to set up your brand experience. You can also set up or modify the organization name from the Domains tab.
2. Theme
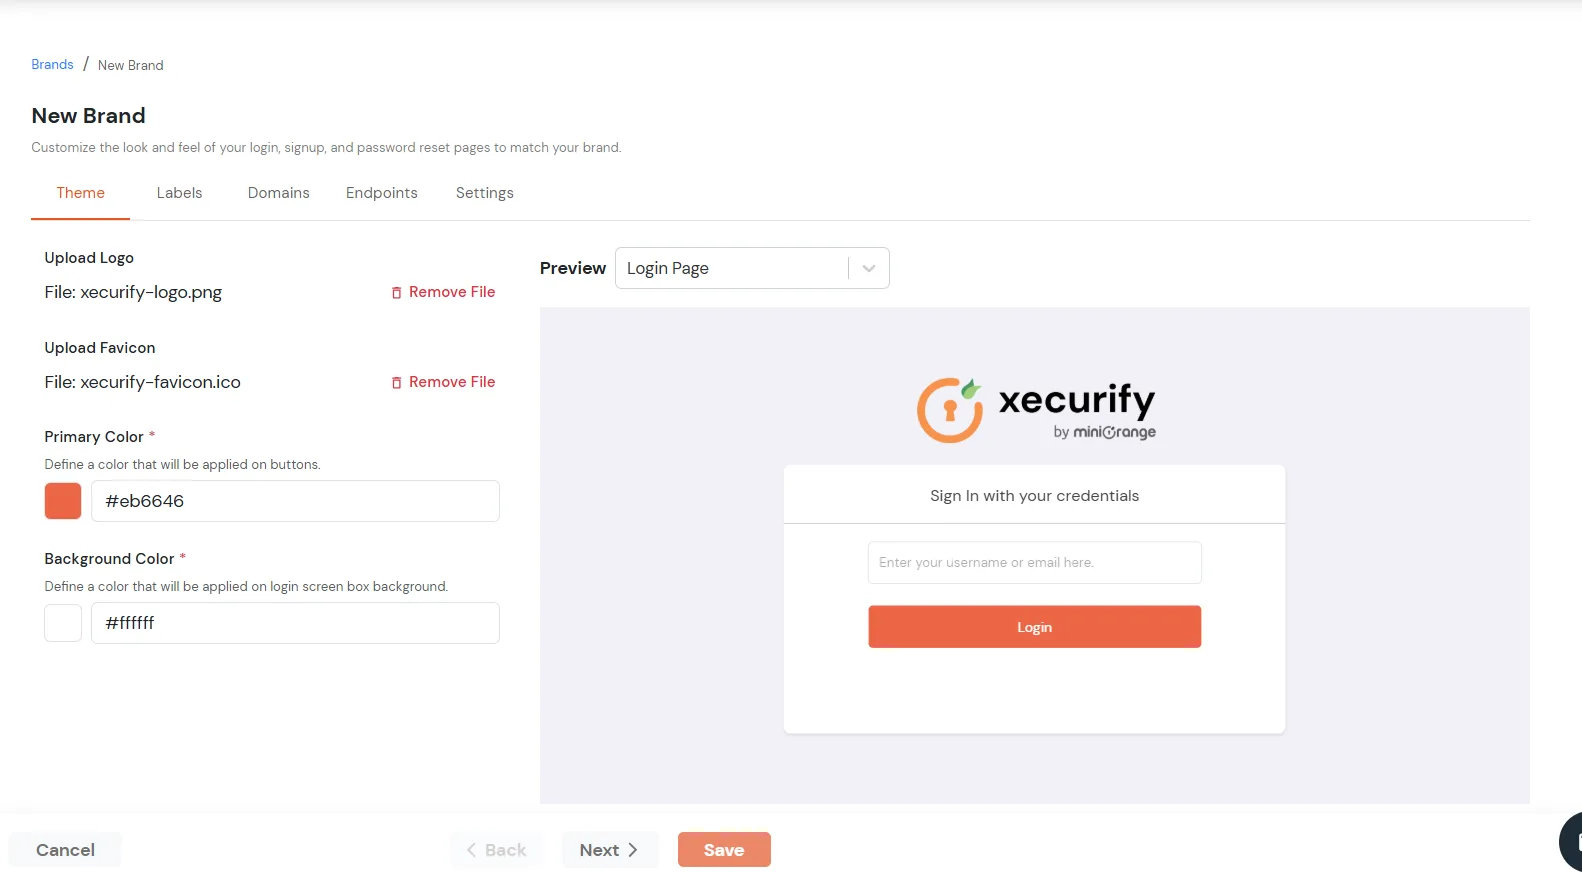
The Theme tab lets you customize the visual appearance of your authentication pages.
- Upload Logo to display your organization's branding on the login, registration, and other authentication pages.
- Upload Favicon to display your brand icon in the browser tab during authentication.
- Configure the Primary Color to customize the color used for buttons and other primary UI elements.
- Configure the Background Color to customize the background of the login panel.
- Use the Preview dropdown to view how the selected branding appears across different authentication pages before saving.
- Click Next to continue.
3. Labels
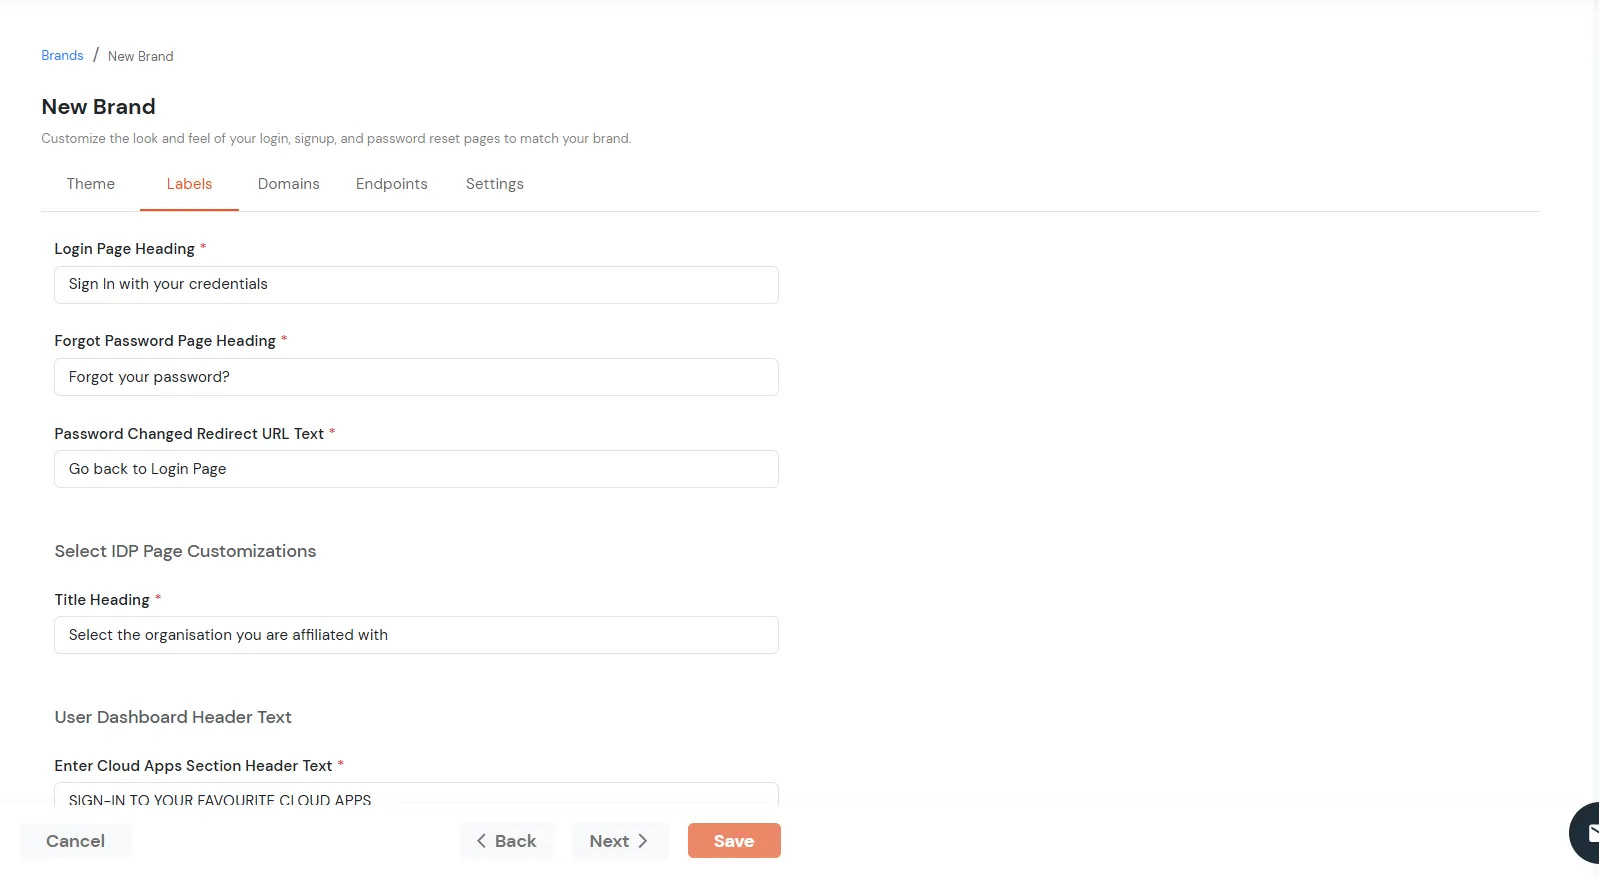
The Labels tab allows you to customize the text displayed throughout the end-user authentication experience.
- Configure the Login Page Heading displayed on the sign-in page.
- Configure the Forgot Password Page Heading displayed on the password reset page.
- Specify the Password Changed Redirect URL Text displayed after a successful password reset.
- Configure the IDP Page Title Heading displayed on the Identity Provider selection page.
- Configure the Cloud Apps Section Header Text displayed on the End User Dashboard.
- Click Next.
4. Domains
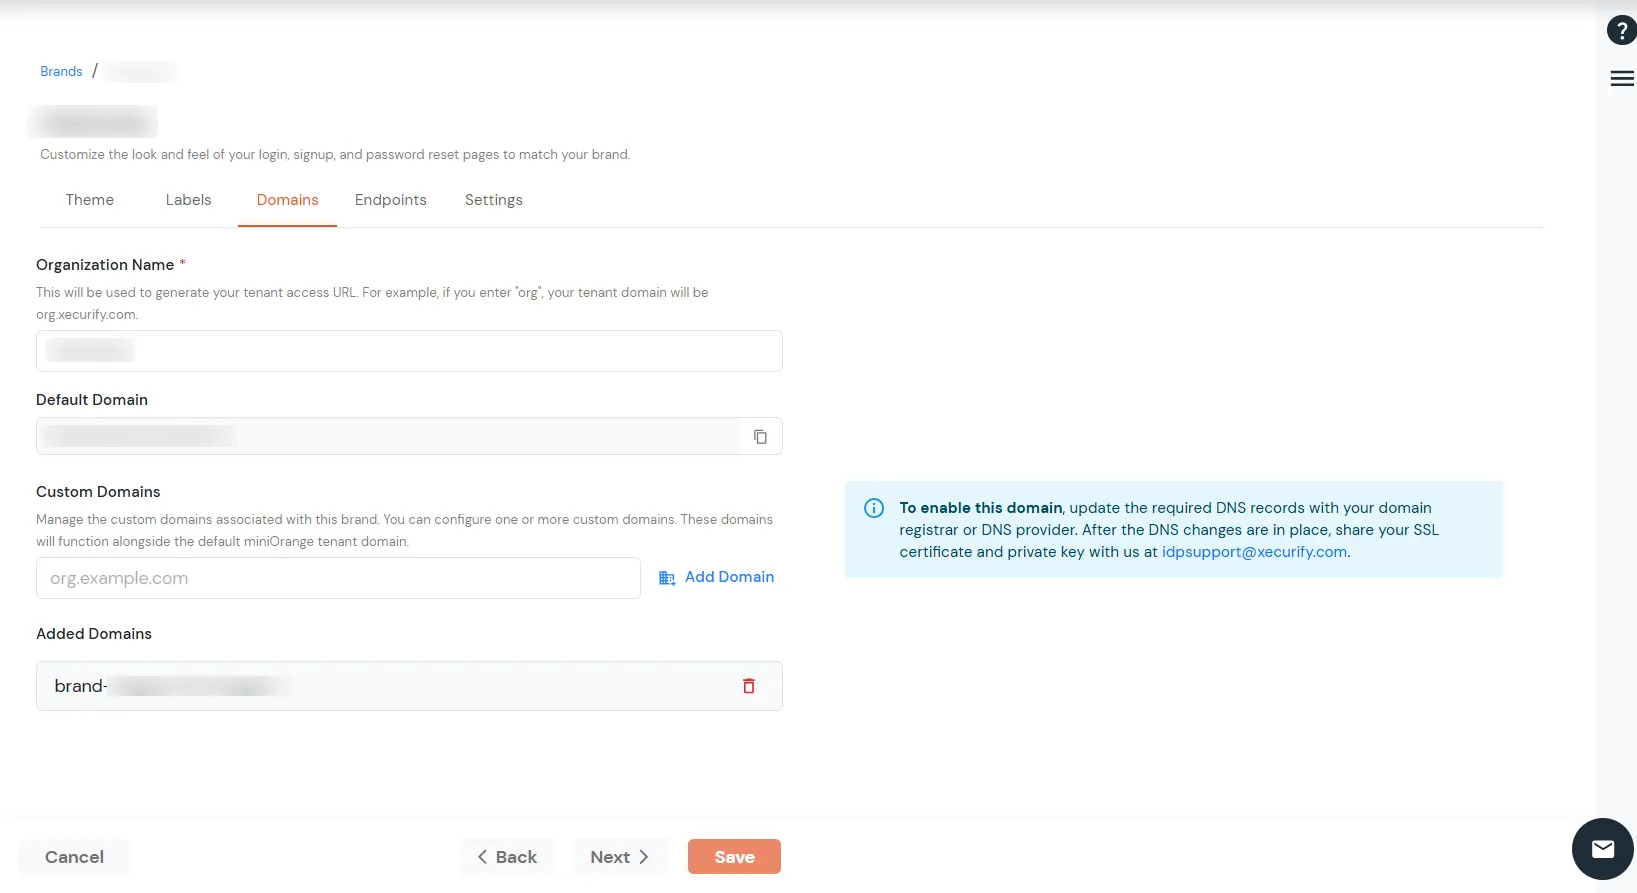
The Domains tab allows you to configure the domains associated with your organization's default brand.
- Configure the Organization Name, which is used to generate your tenant access URL (for example,
org.xecurify.com).
- Review the automatically generated Default Domain associated with your organization.
- Enter your custom domain (for example,
login.example.com) in the Custom Domains field.
- Click Add Domain to associate a custom domain with the default brand.
- Verify that the newly added domain appears under the Added Domains section.
- Update the required DNS records with your domain registrar or DNS provider.
- Once the DNS changes are complete, share your SSL certificate and private key with the miniOrange support team to enable the custom domain.
- Click Next.
Note: To create additional brands with their own themes, domains, and branding preferences, refer to the Multi-brand Branding guide.
5. Endpoints
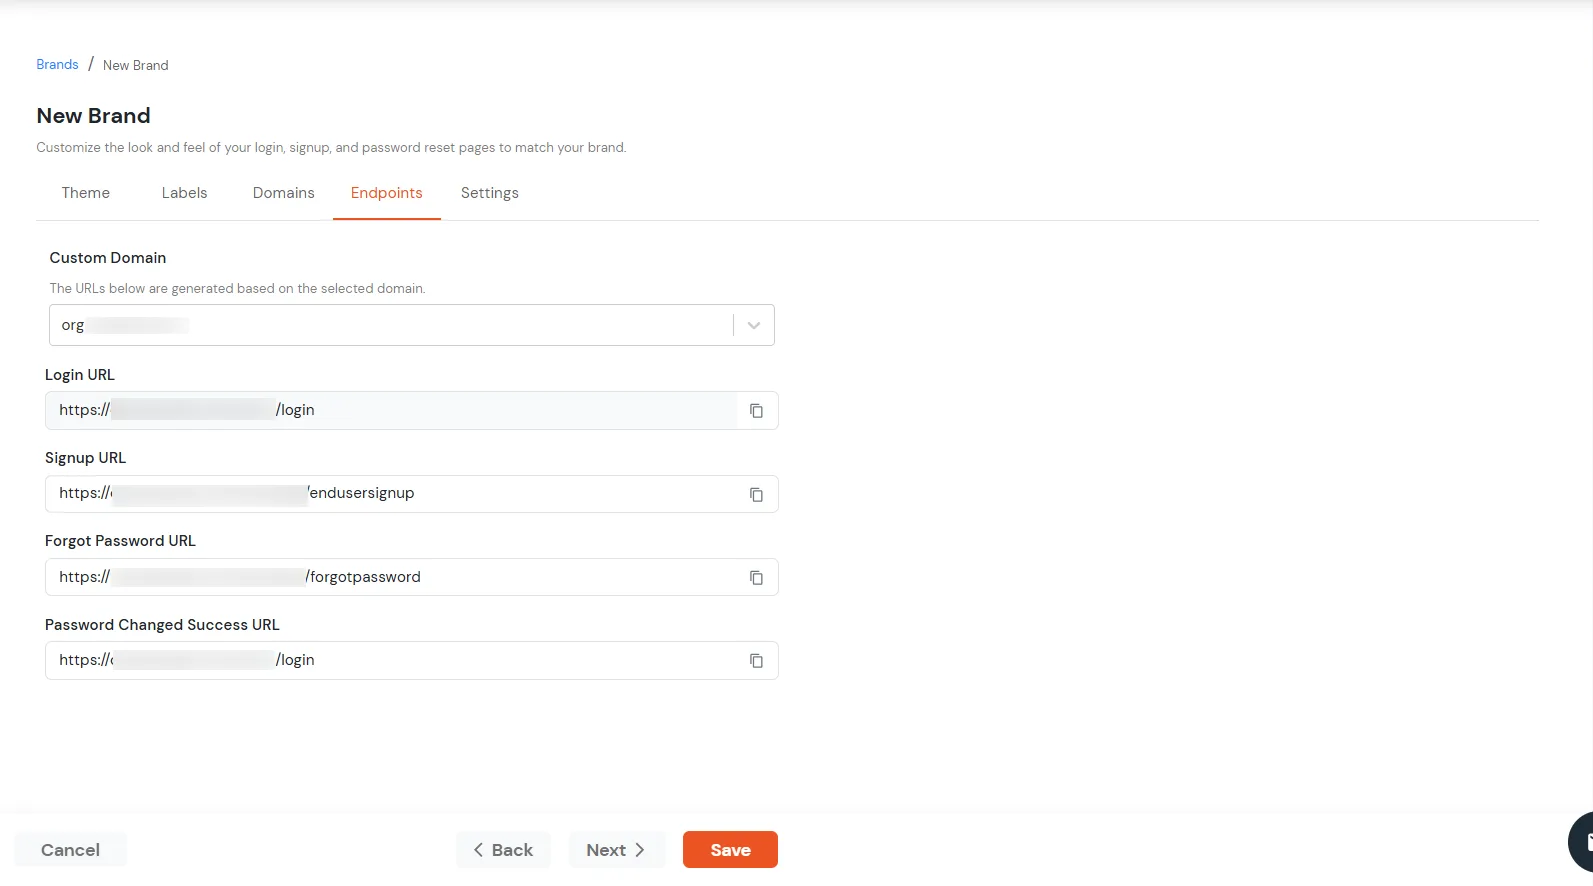
The Endpoints tab displays the authentication URLs generated for the selected custom domain.
- Select a configured Custom Domain from the dropdown.
- Review the generated Login URL, Signup URL, Forgot Password URL, and Password Changed Success URL.
- Use the Copy icon to copy any endpoint for use while integrating your applications.
- Click Next.
Note: Endpoints are generated only after at least one custom domain has been configured.
6. Settings
The Settings tab lets you configure additional branding preferences and authentication page options.
- Specify the Branding Name.
- Enable Show "Forgot Password" link to users to display the password reset option on the login page.
- Enable Allow users to register to allow self-service user registration.
- Configure the Sender Name displayed in authentication emails.
- Configure the Sender Email address used for sending authentication emails.
- Click Save.

