Hello there!
Need Help? We are right here!
Need Help? We are right here!
Search Results:
×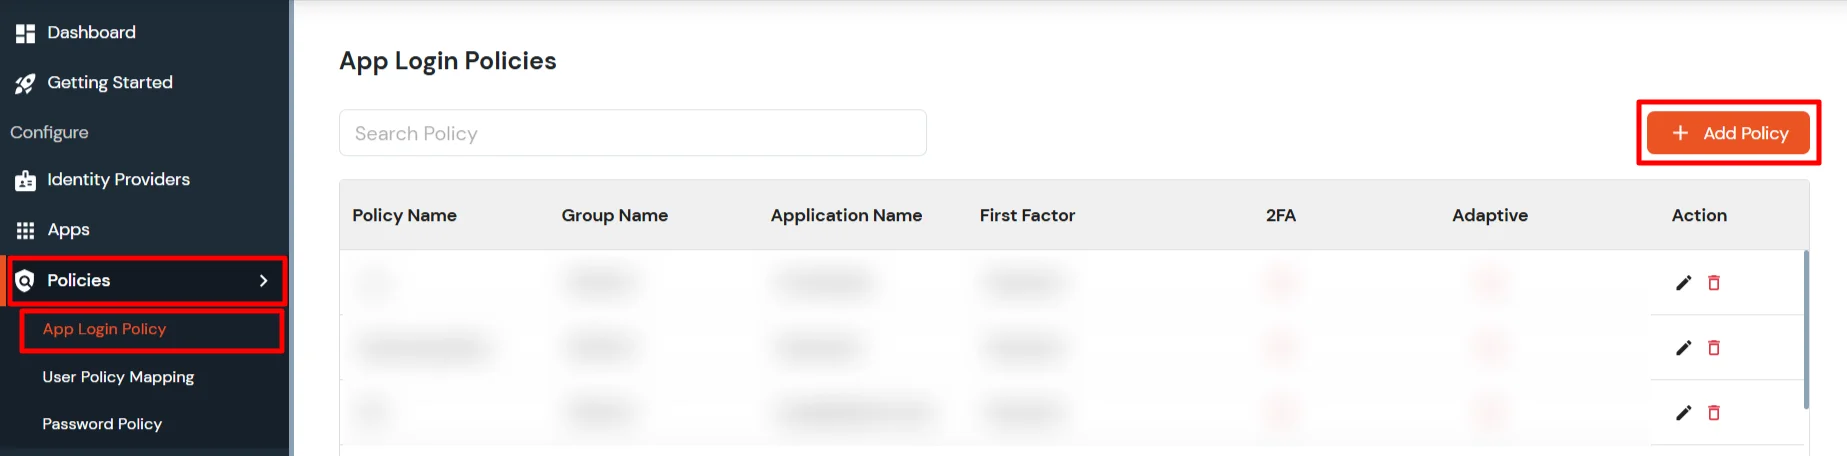
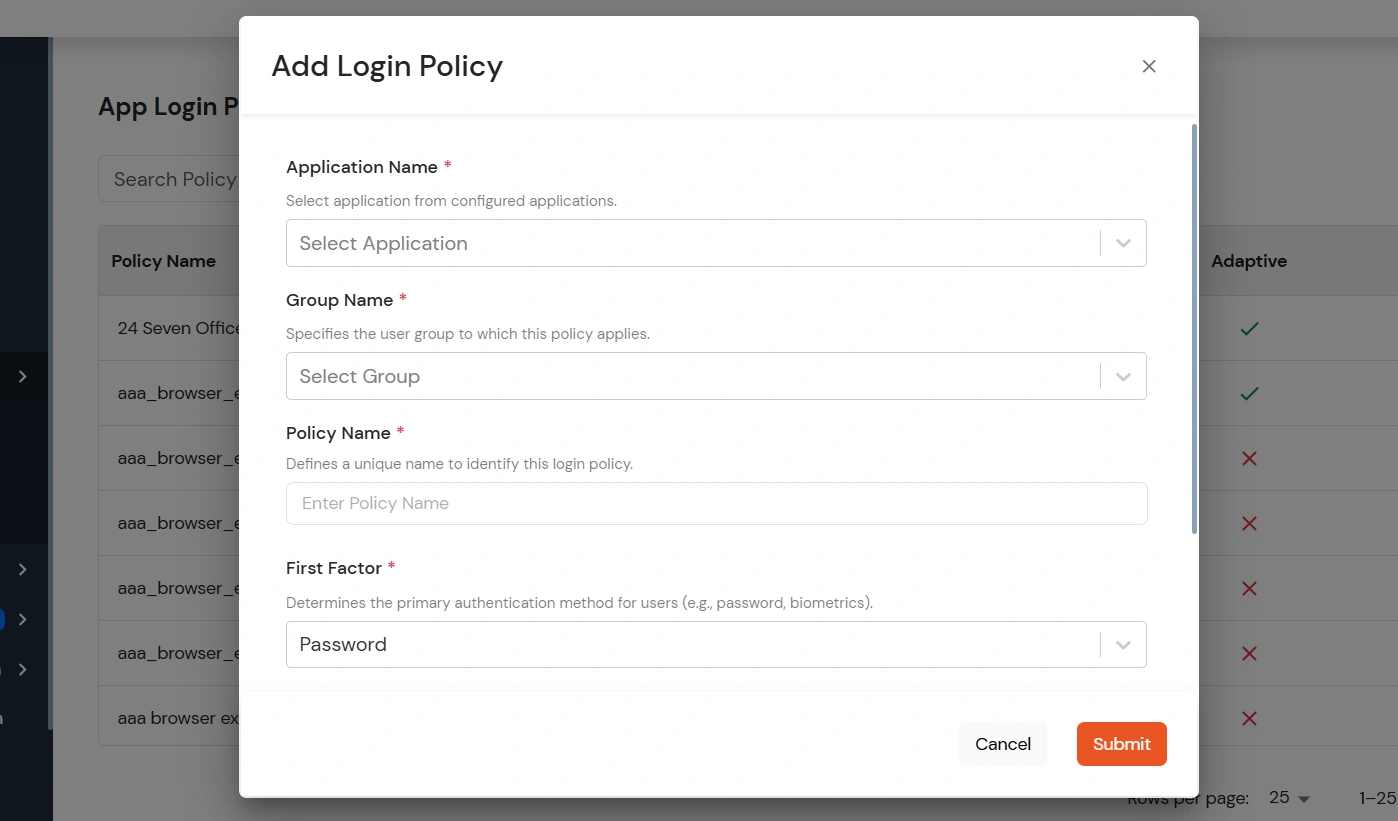
| Application Name | The application for which you want to add the policy. |
| Group Name | The group with which you want to bind the application. |
| Policy Name | A unique name for the policy so it can be identified from the list of policies. |
| First Factor | The authentication method for users. You can choose
|
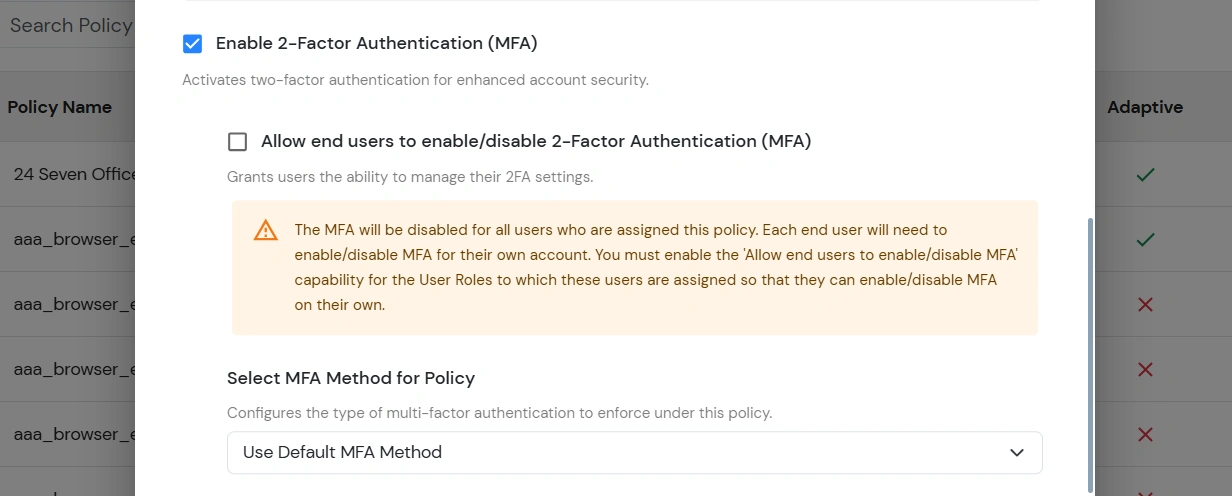
| 2-Factor Authentication (MFA) | Enable this option if you want to enable MFA on top of the user authentication.
Note: Can only be used with Password as the login method. |
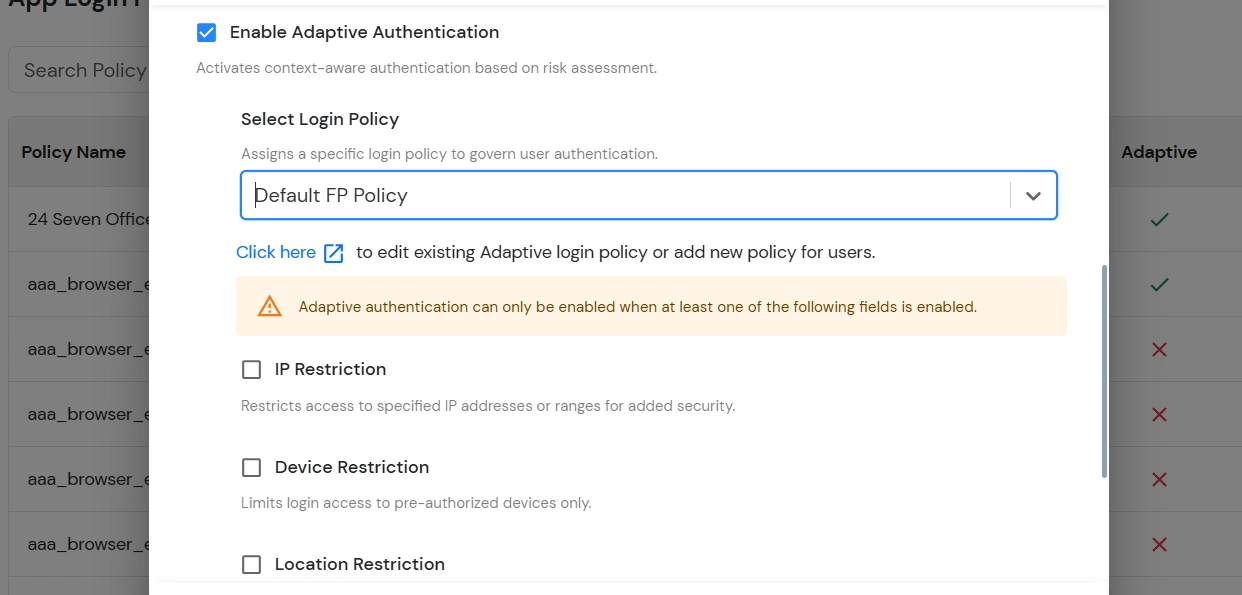
| Adaptive Authentication | Enable this option if you want to enable Adaptive Authentication on top of the user authentication. The type of Adaptive Authentication and the Adaptive Authentication Policy must be configured in this case.
Note: Either MFA or Adaptive Authentication can be enabled in a policy, but not both. |