Hello there!
Need Help? We are right here!
Need Help? We are right here!
Search Results:
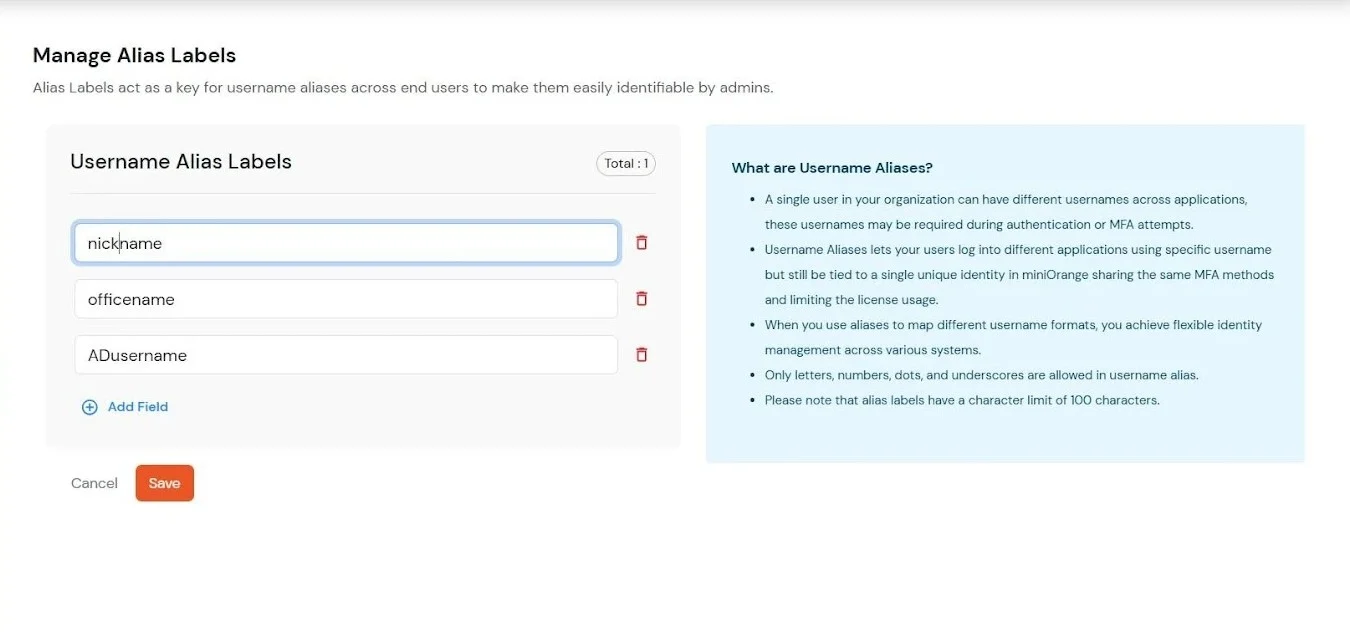
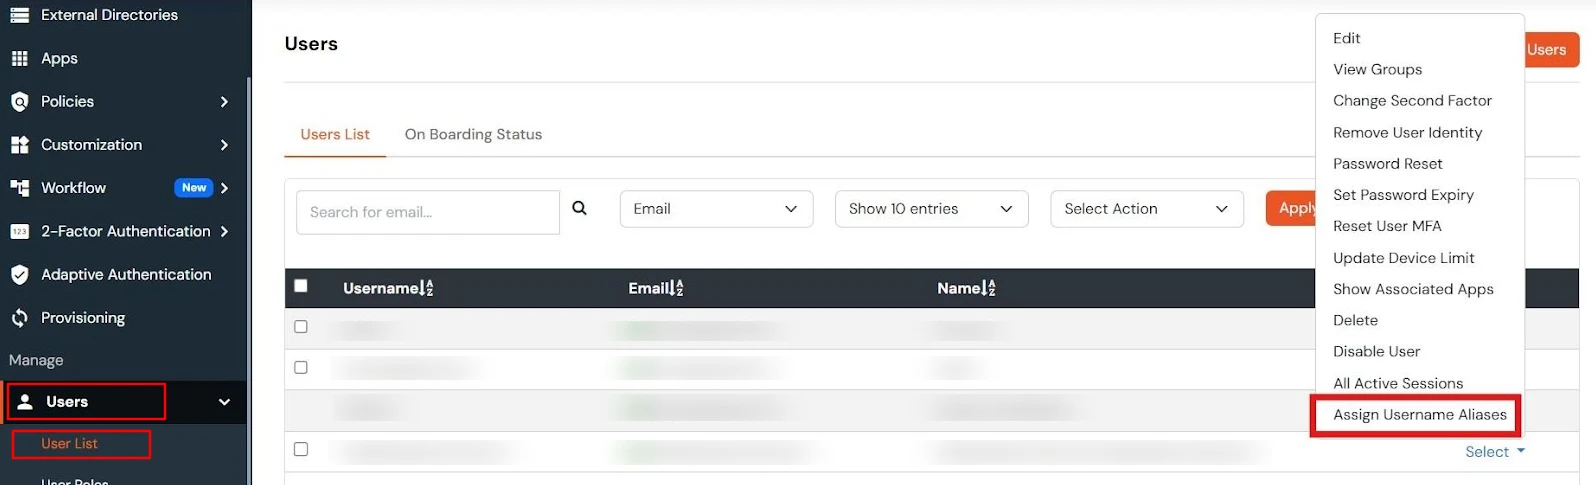
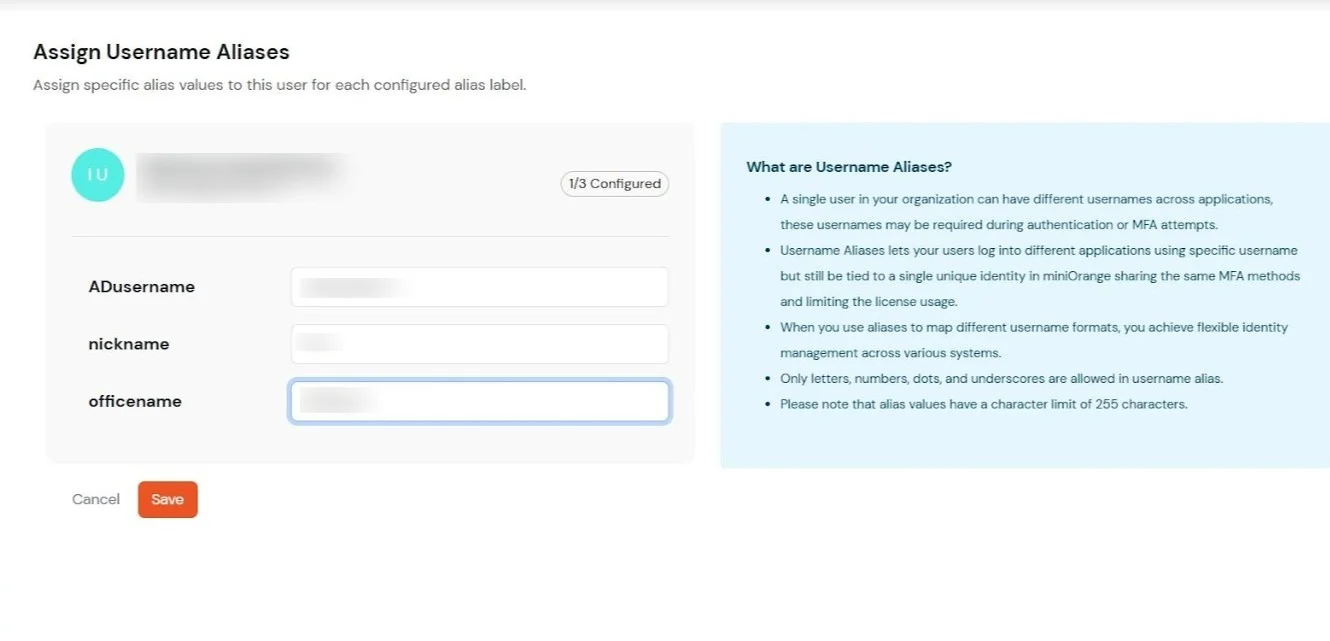
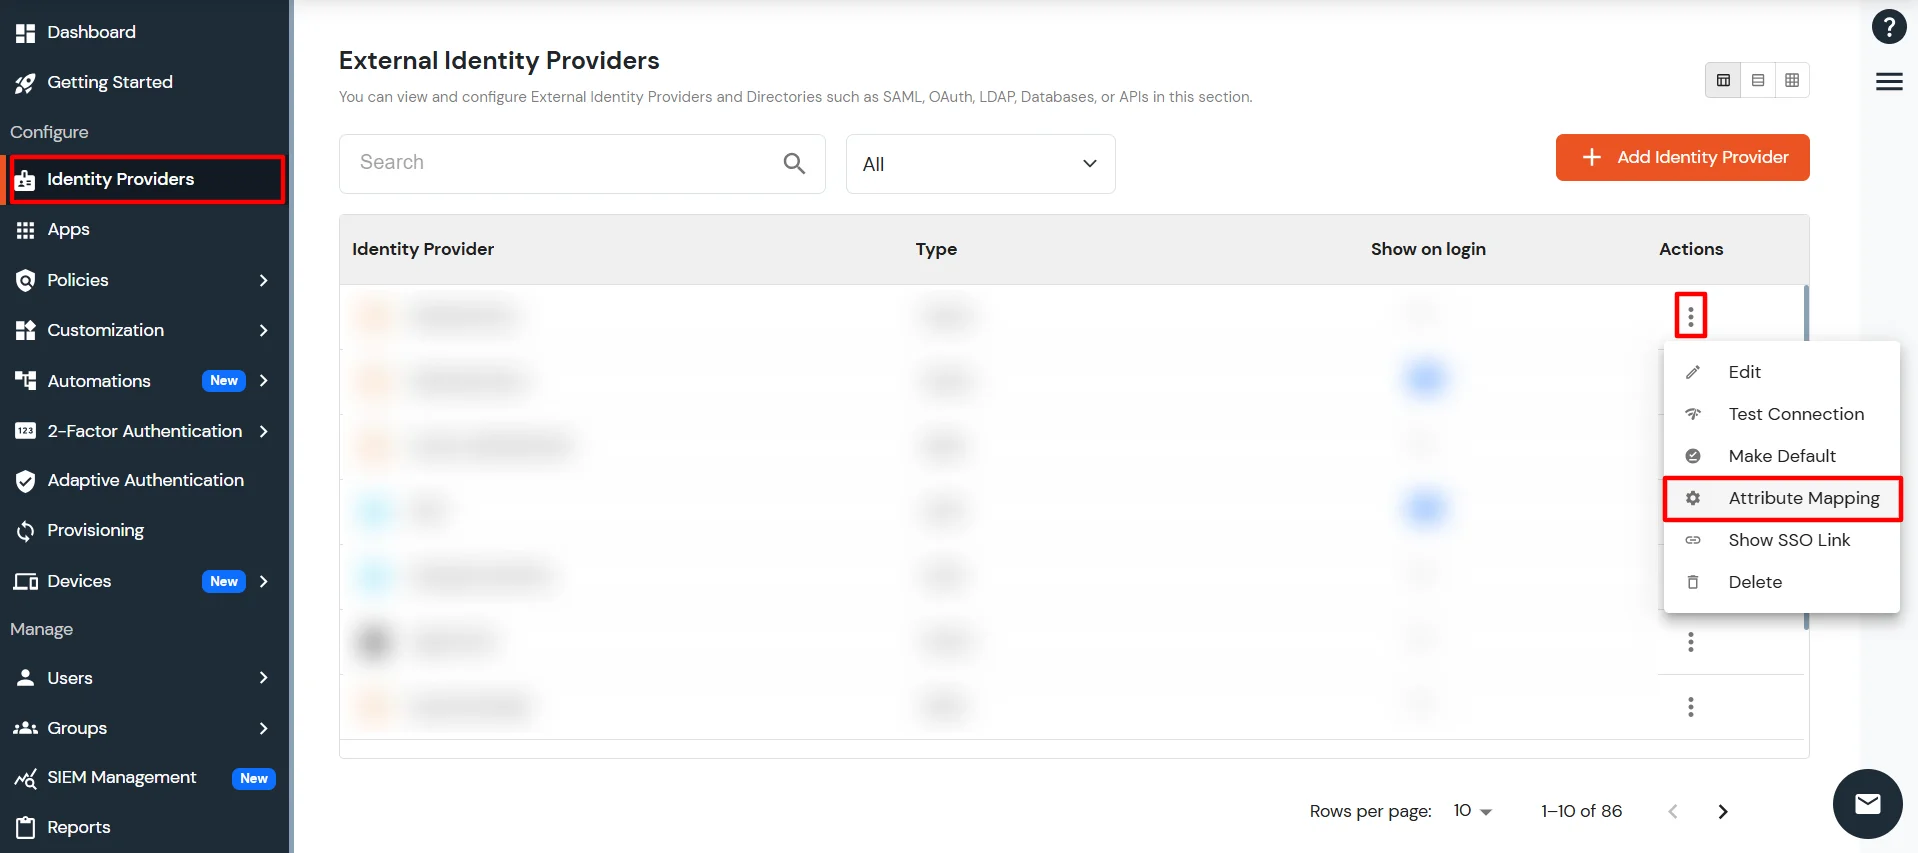
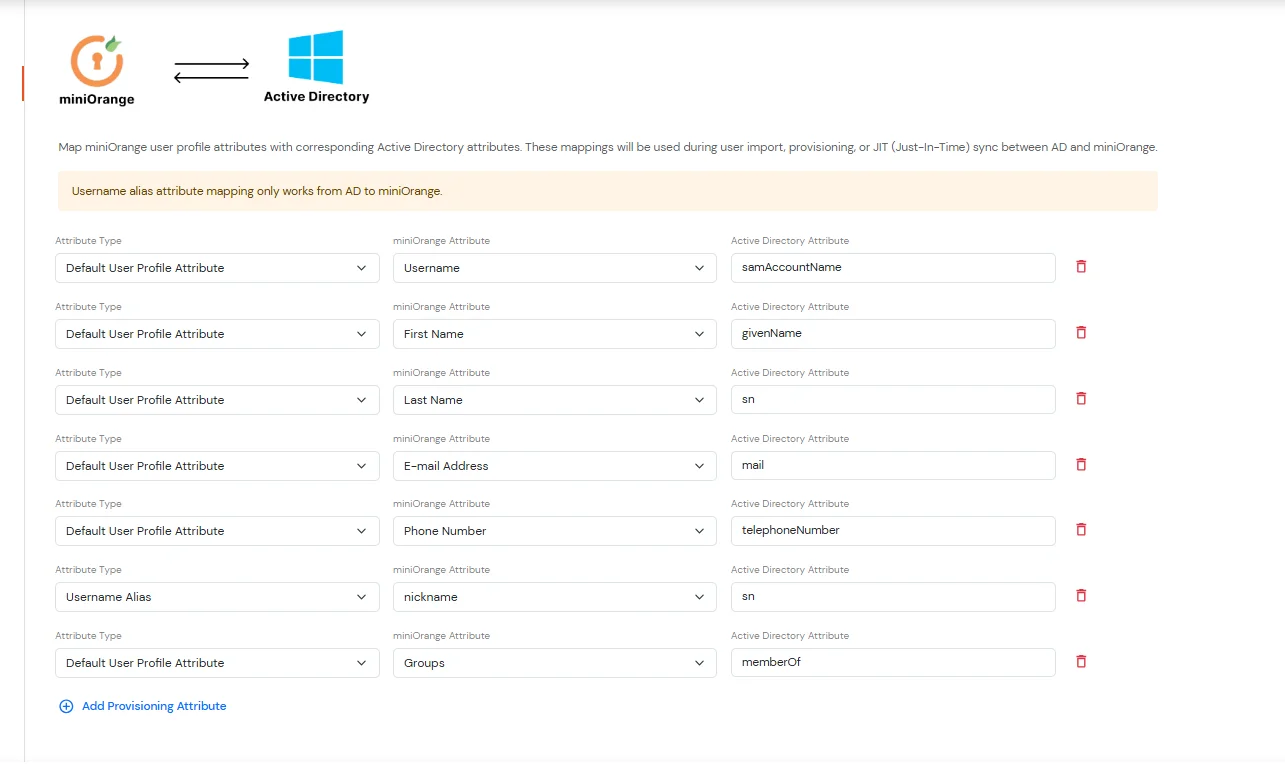
×Managing Username Aliases enables administrators to associate multiple usernames or email addresses with a single unique user identity. This ensures that end users can authenticate across different applications using their respective usernames while maintaining the same MFA methods and license allocation. Administrators can also configure Alias Labels to organize and identify aliases efficiently, providing greater flexibility and consistency in identity management.