IDP Global Settings
This section list all different IDP Product/ Global Settings and configurations available to a customer for customizations.
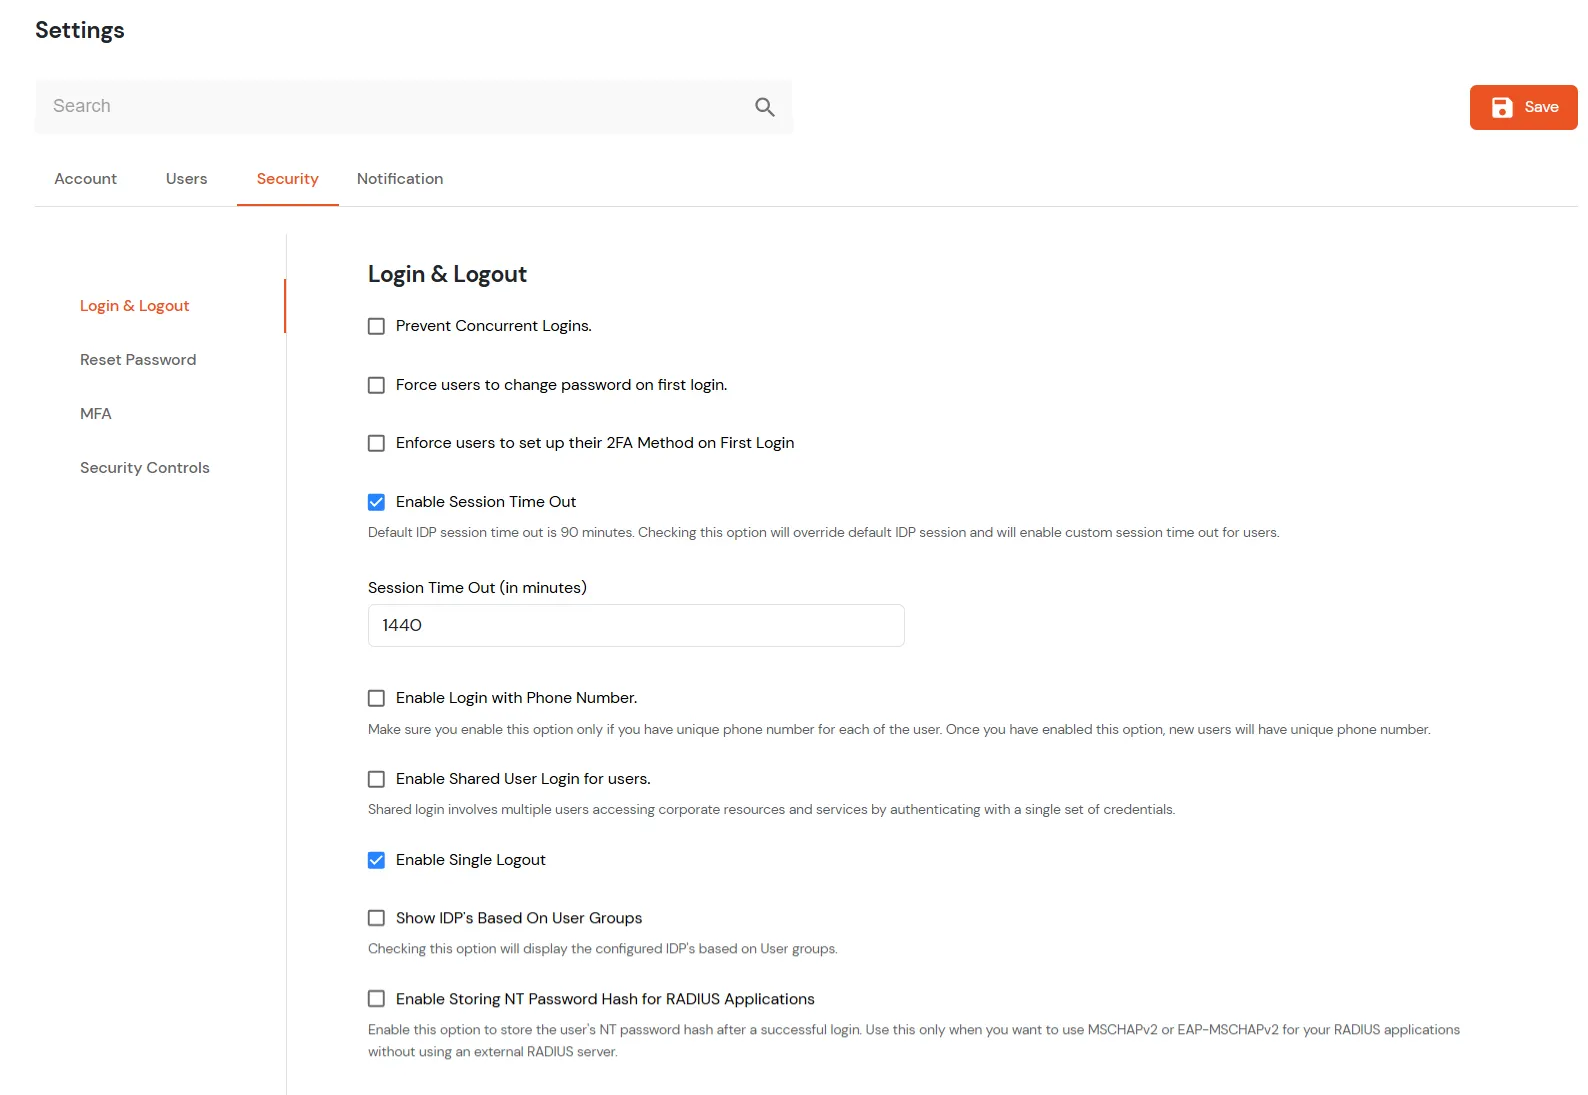
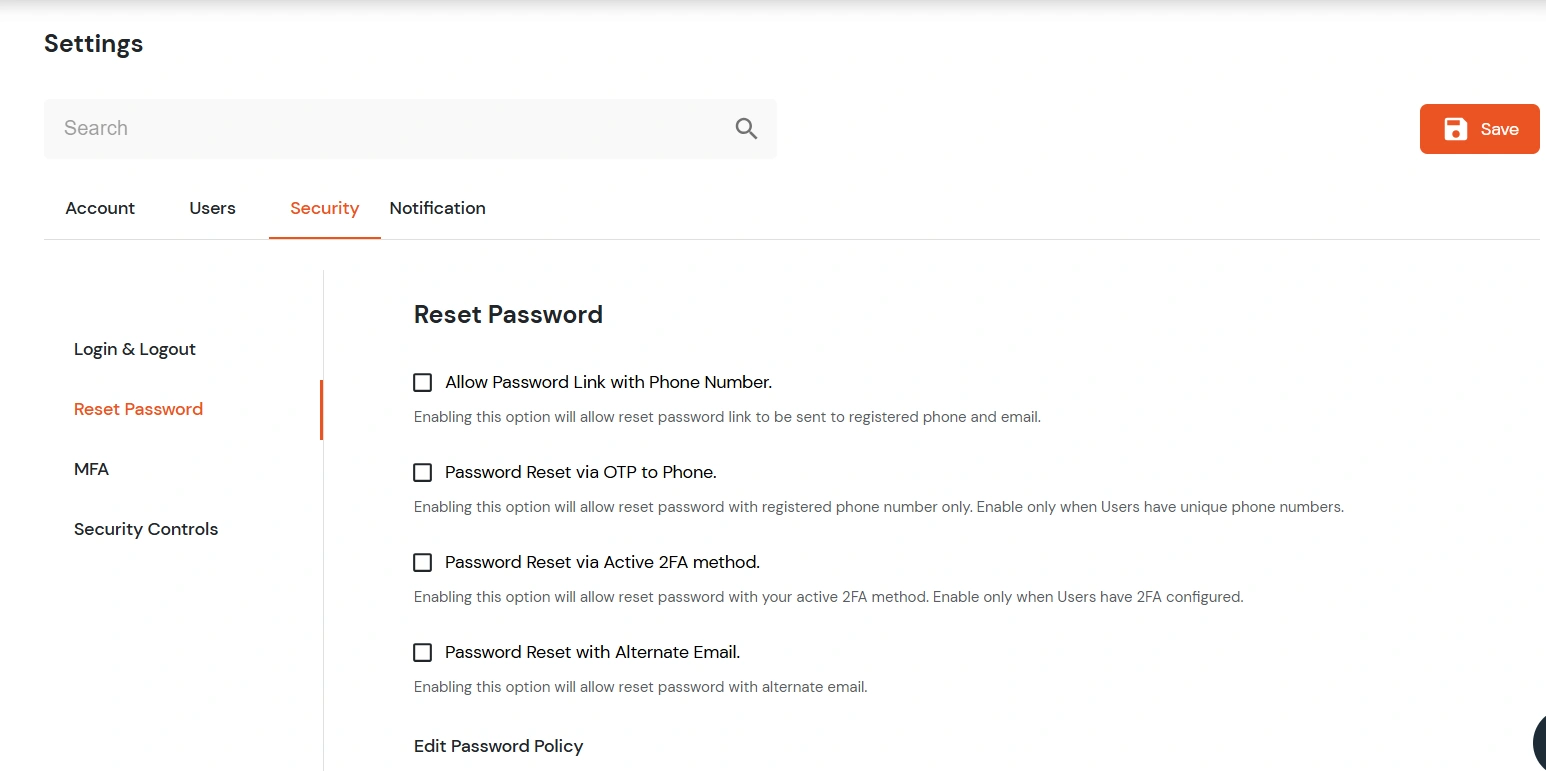
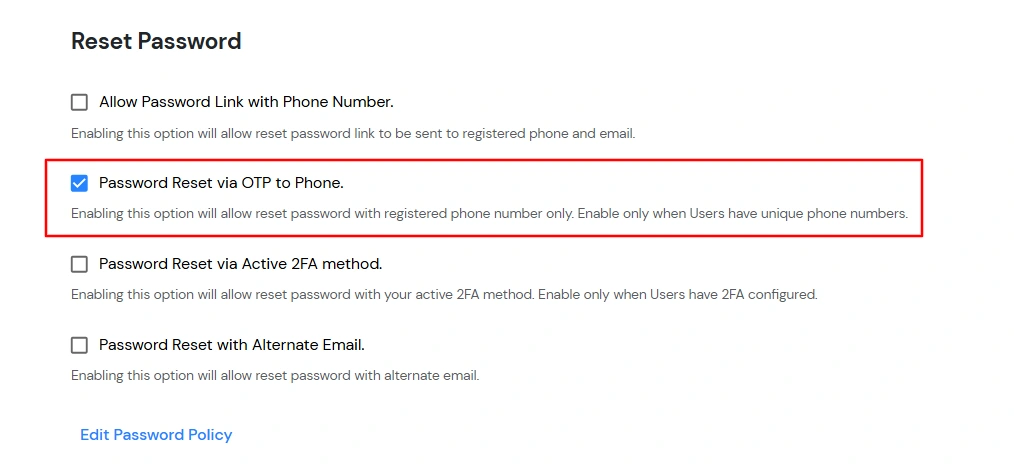
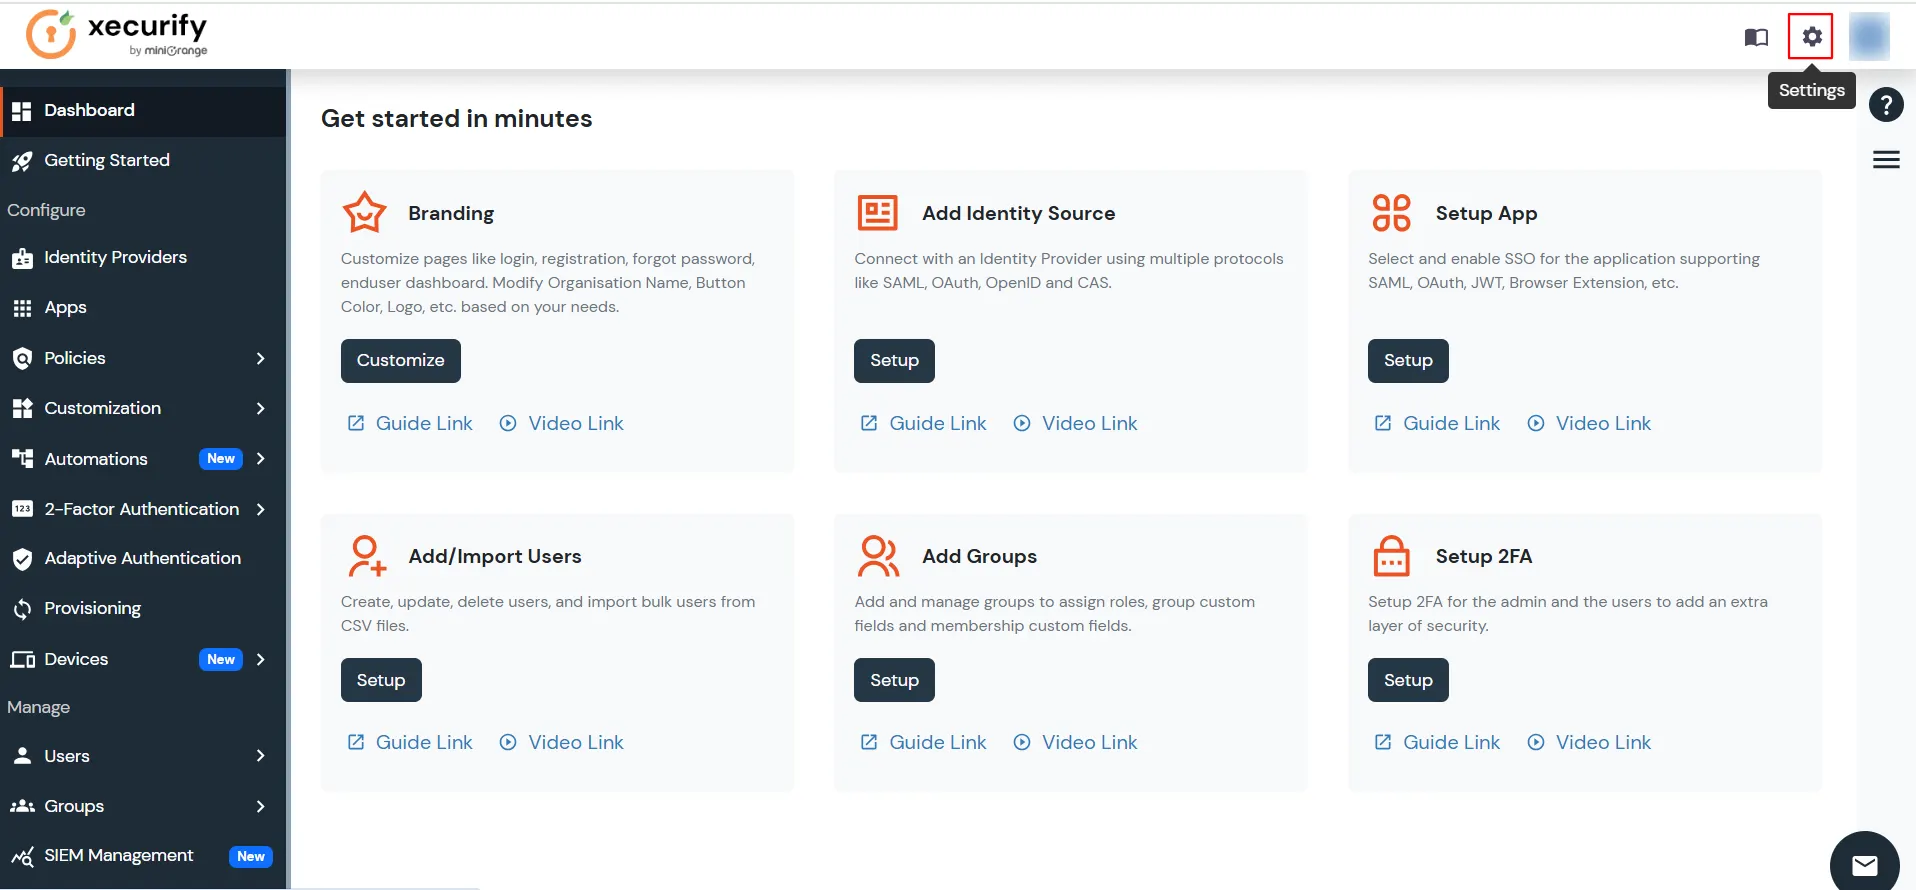
Login to miniOrange admin console. Navigate to Settings icon on the top right corner of the header to view and enable any IDP global settings.
Following Settings/Configurations are for both On-premise and Cloud:
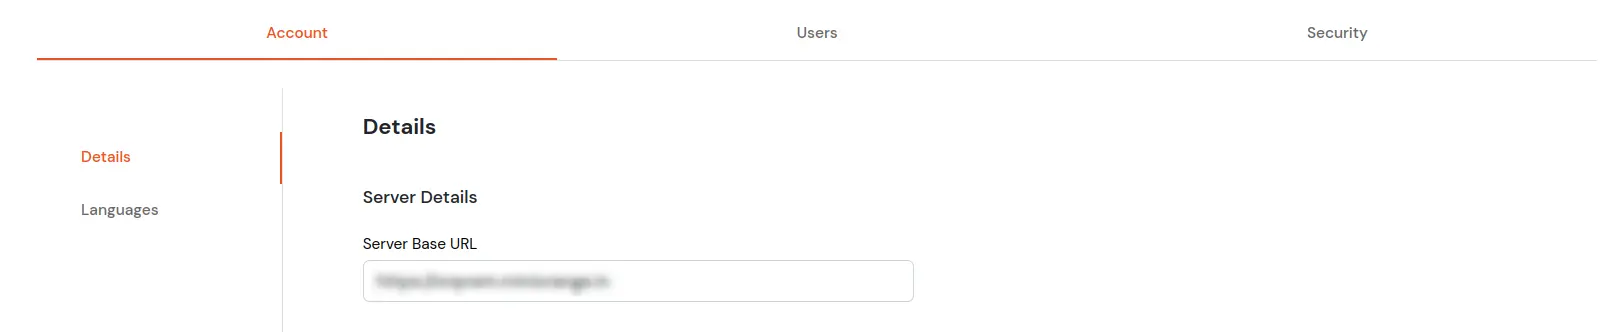
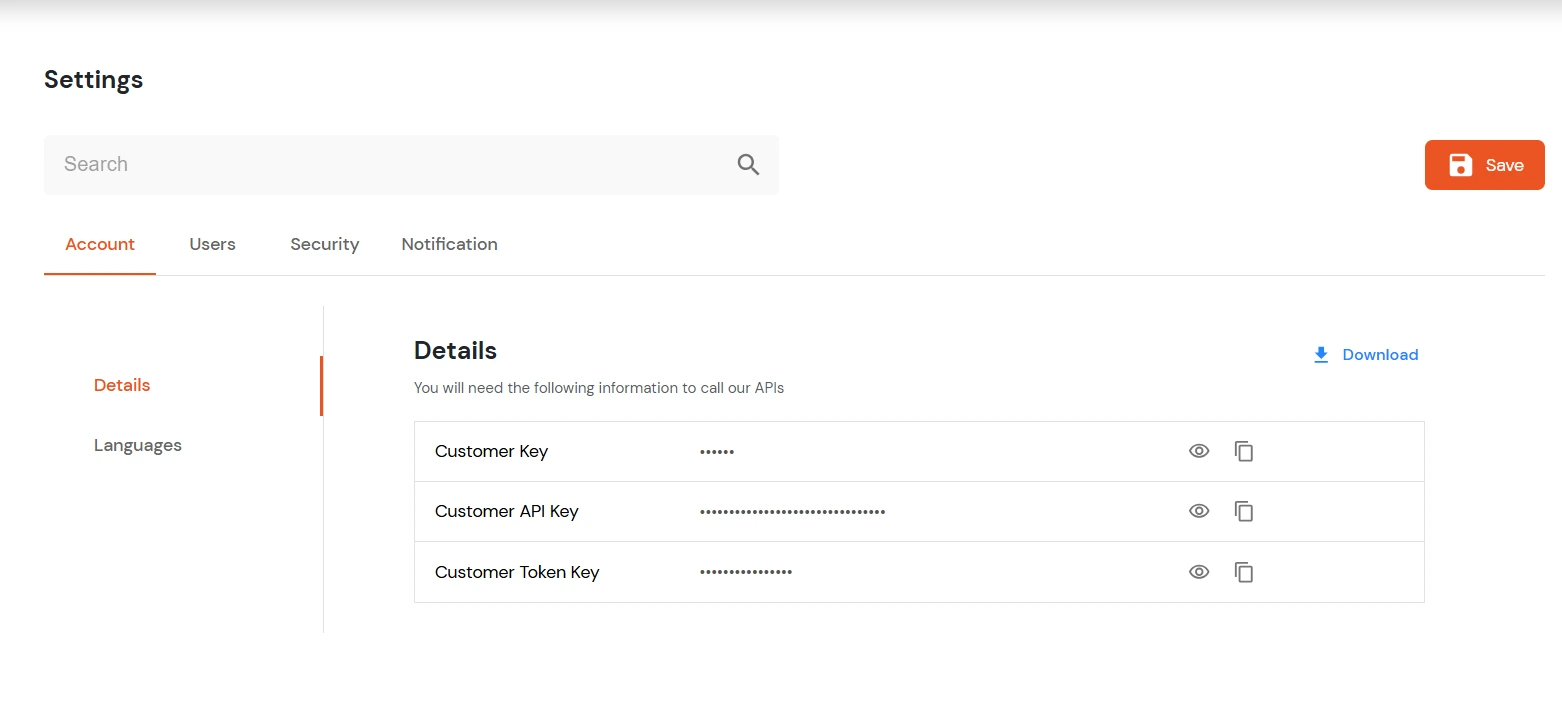
- Details:
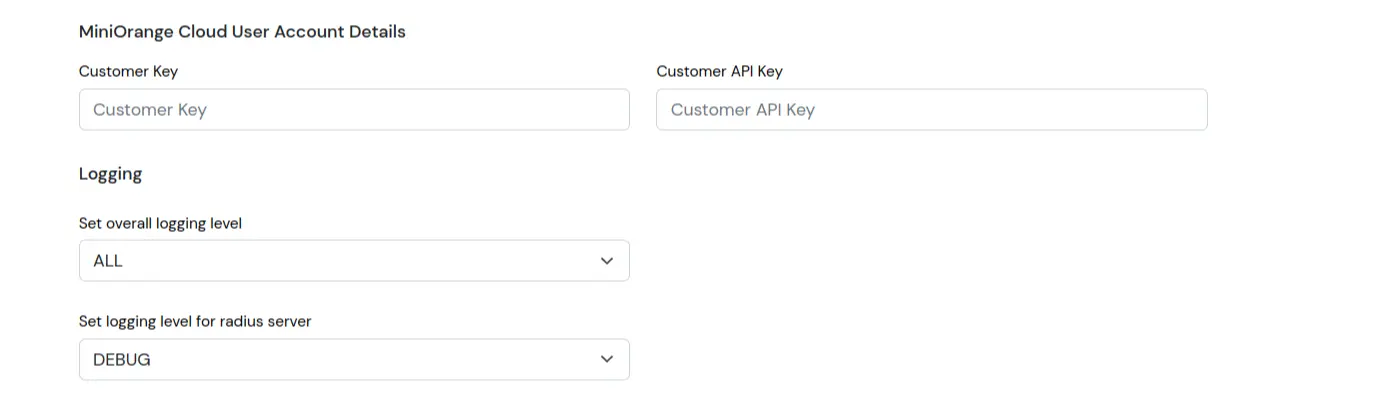
When you create an account with us, these 3 keys get generated for your account required for any API Calls for user operations/ 2FA integration using APIs, etc.

- Customer Key
- Customer API Key
- Customer Token Key
You can download the Account info from the Download icon beside the Account Details.
- Languages:

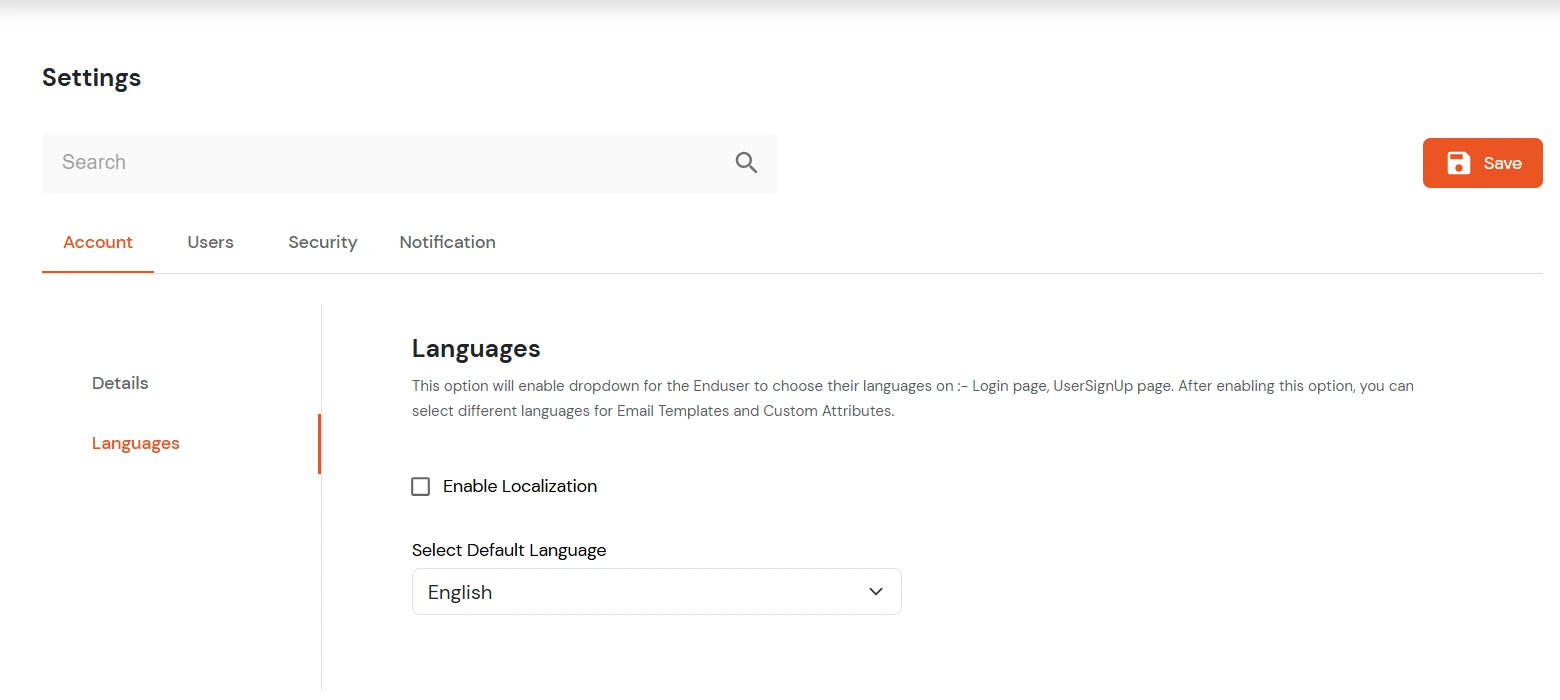
- Enable Internationalization: Checking this option will enable dropdown for the Enduser to choose their languages on :- Login page, UserSignUp page. Enabling this option would allow email templates and Custom attributes in different languages.
- Customer Preferred Language: Select the preferred language from the dropdown. miniOrange Supports English, German, Spanish, Italian, Portugues. English is default language.
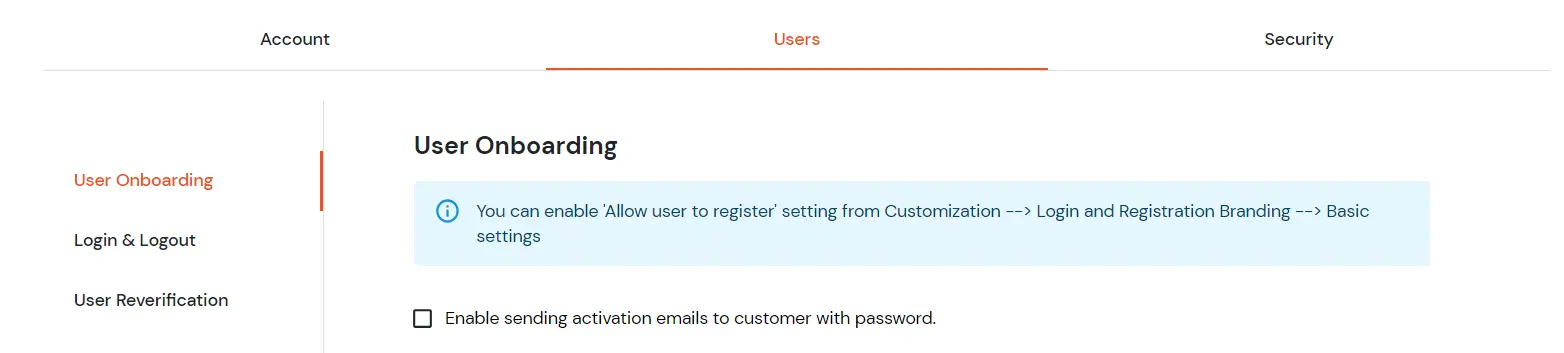
- User Onboarding:
The following settings are available while On-Boarding a user. You can enable 'Allow user to register' setting from Customization --> Login and Registration Branding --> Basic settings.

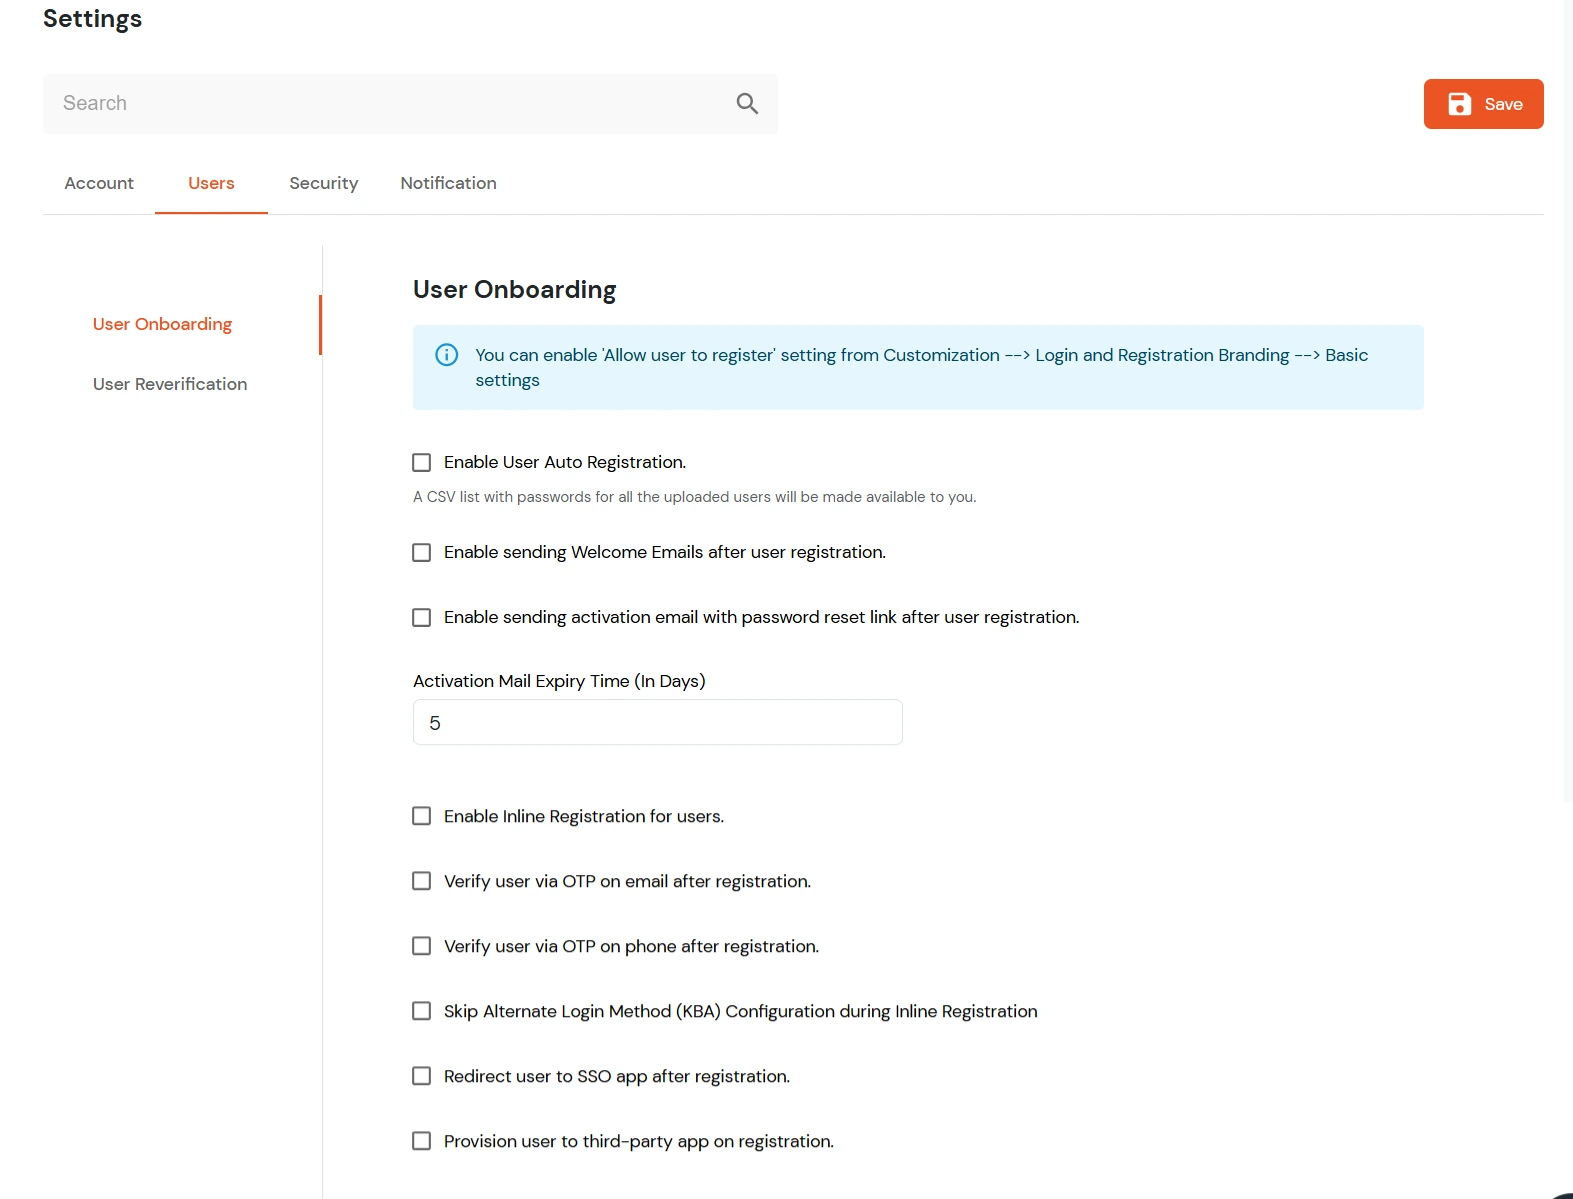
- Enable User Auto-Registration (A CSV list with passwords for all the uploaded users will be made available to you): By enabling this option, if you have not provided password for the users while uploading them then a password is generated automatically and assigned to the user and the users are registered. You can get a CSV list of all these users with their generated passwords.
- Enable Inline Registration for users: By enabling this option, if the user is not present in miniOrange then he will be asked to register when he tries to Single Sign-on into any application. The User will be registered in miniOrange.
- Enable sending Welcome Emails after user registration: On enabling this option, All the users after successful registration will receive an welcome email from miniOrange to their registered Email IDs
- Enable sending activation email with password reset link after user registration - On enabling this option, an activation email along with a link to reset password will be sent to all the user who have been newly registered. The User account will be activated only after following the process on the received link.
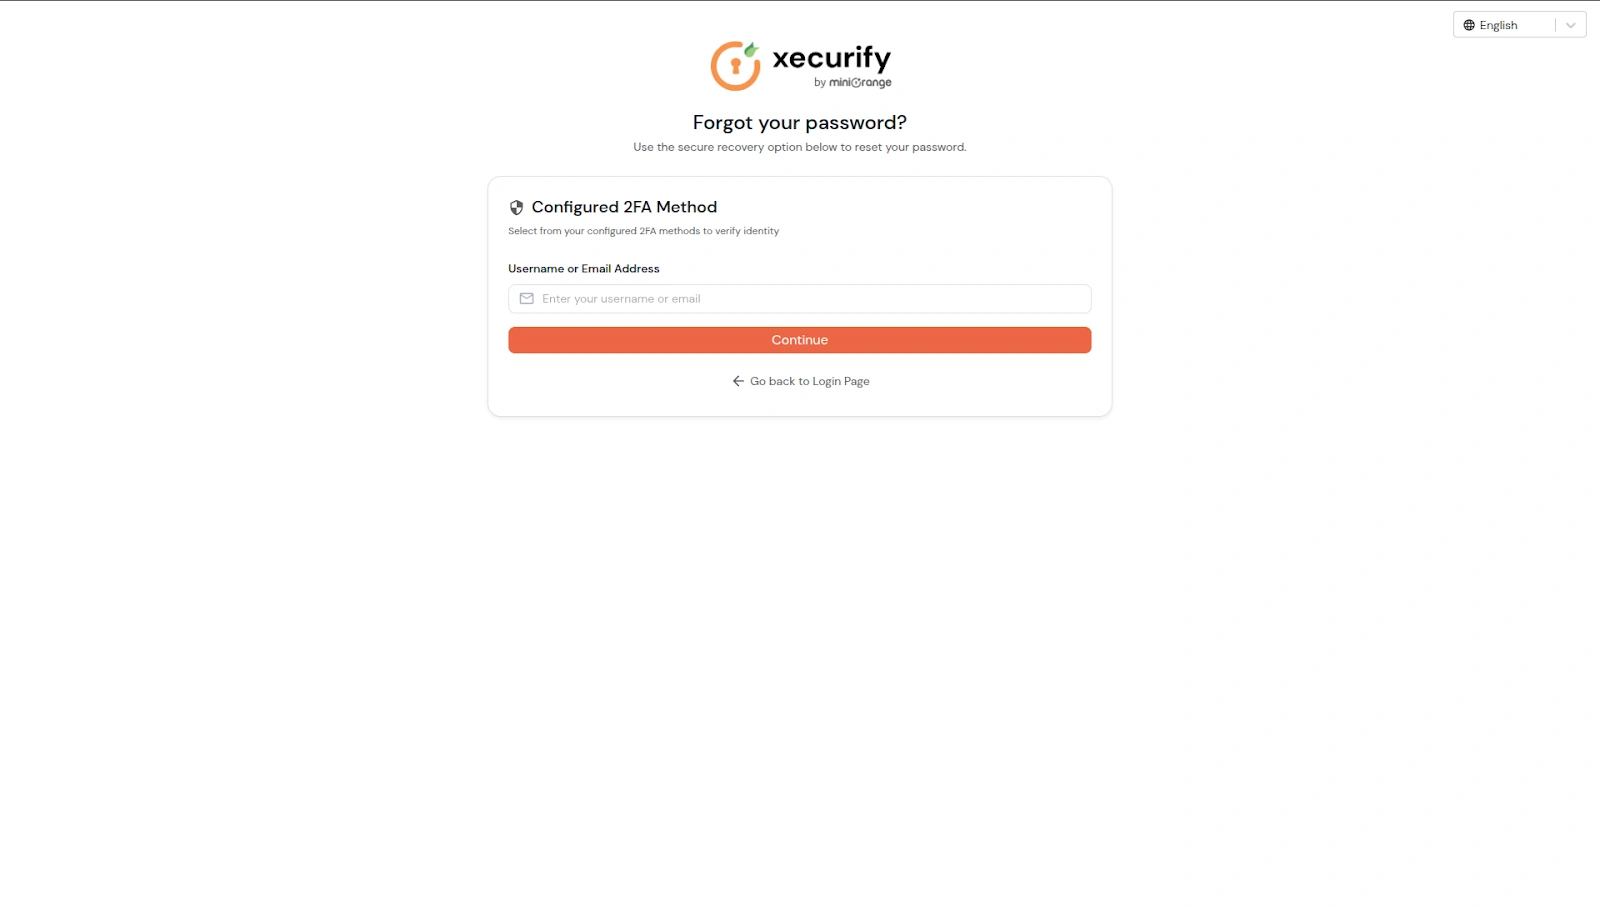
- Verify User via OTP on email after registration: You can enable this option to add a verification option before registration completion to verify user via valid email ID.
- Verify User via OTP on phone after registration: You can enable this option to add a verification option before registration completion to verify user via valid phone number.
- Skip Alternate Login Method (KBA) Configuration during Inline Registration: This functionality gives you a choice to ask the KBA questions during inline registration. Enable this option if you want to skip this.
- Redirect user to SSO app after registration: By default, after user signup, a user will see a default page showing thanks for registration message with a link to redirect to login page. Once you enable this option, if a user has first initiated sso request from his application and then clicked the create account link since he has no account. After successful registration, he will be redirected to his app and logged in as the user created.
- Provision User to Third -Party App before registration: There are few cases where customer has any CRM/AD or any user data store where all users are created first or need to be maintained always. So, in that case. You can enable this option to first create the user in your existing data store and then create in IDP using the unique identifier/username generated using the CRM.
- User Re-verification:
Checking this option will force users to re-verify themselves periodically. You can choose when users will get notified about the re-verification and also when the re-verification window will expire, after which their accounts will be disabled automatically.

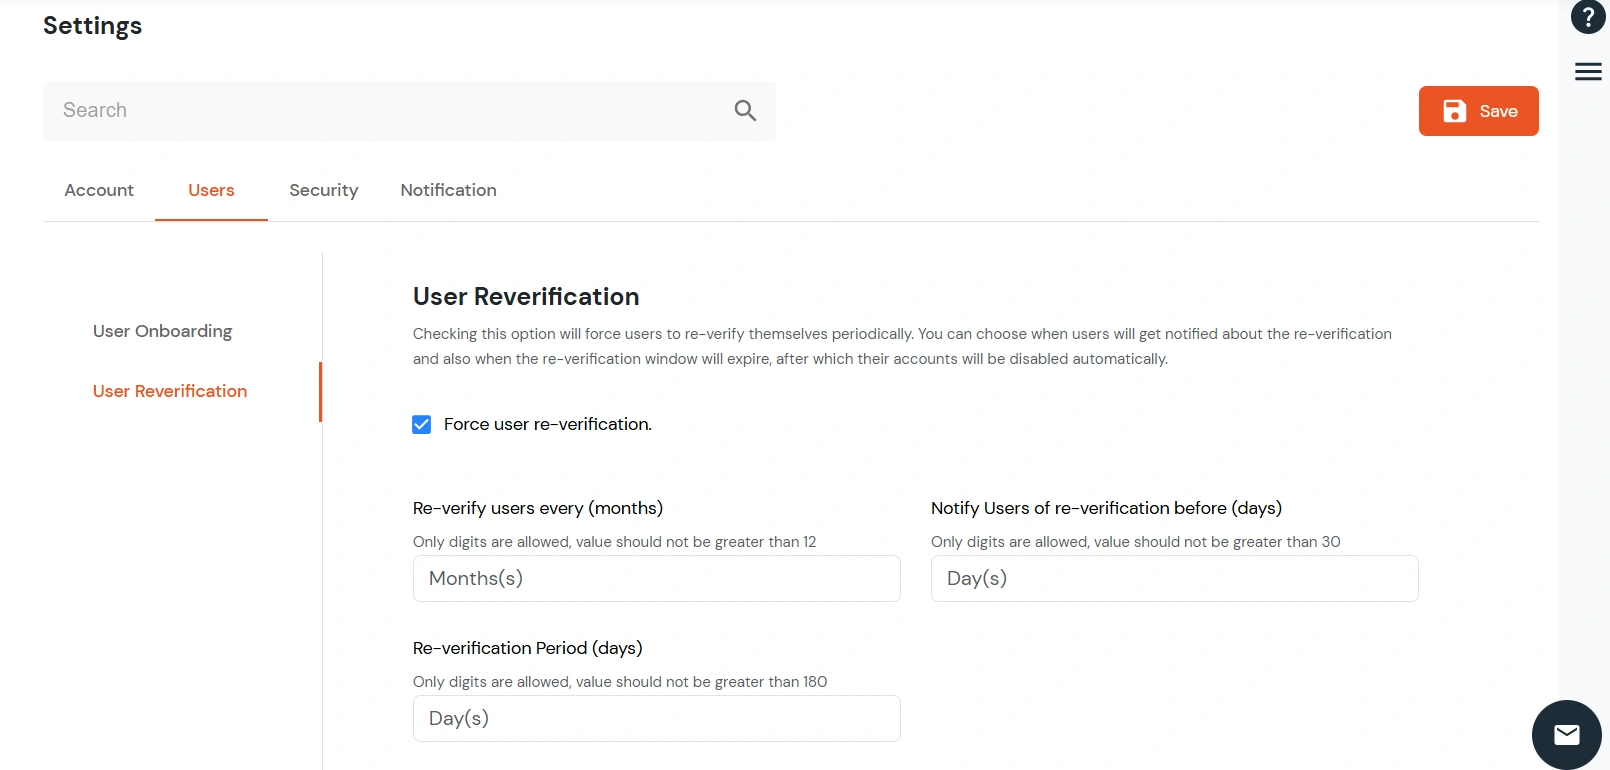
- Re-verify users every (months): You can specify the number of months after which re-verification should be invoked.
- Notify Users of re-verification before (days): You can specify the number of days before which users should be notified about re-verification.
- Re-verification Period (days): You can specify the number of days after which re-verification should be invoked.
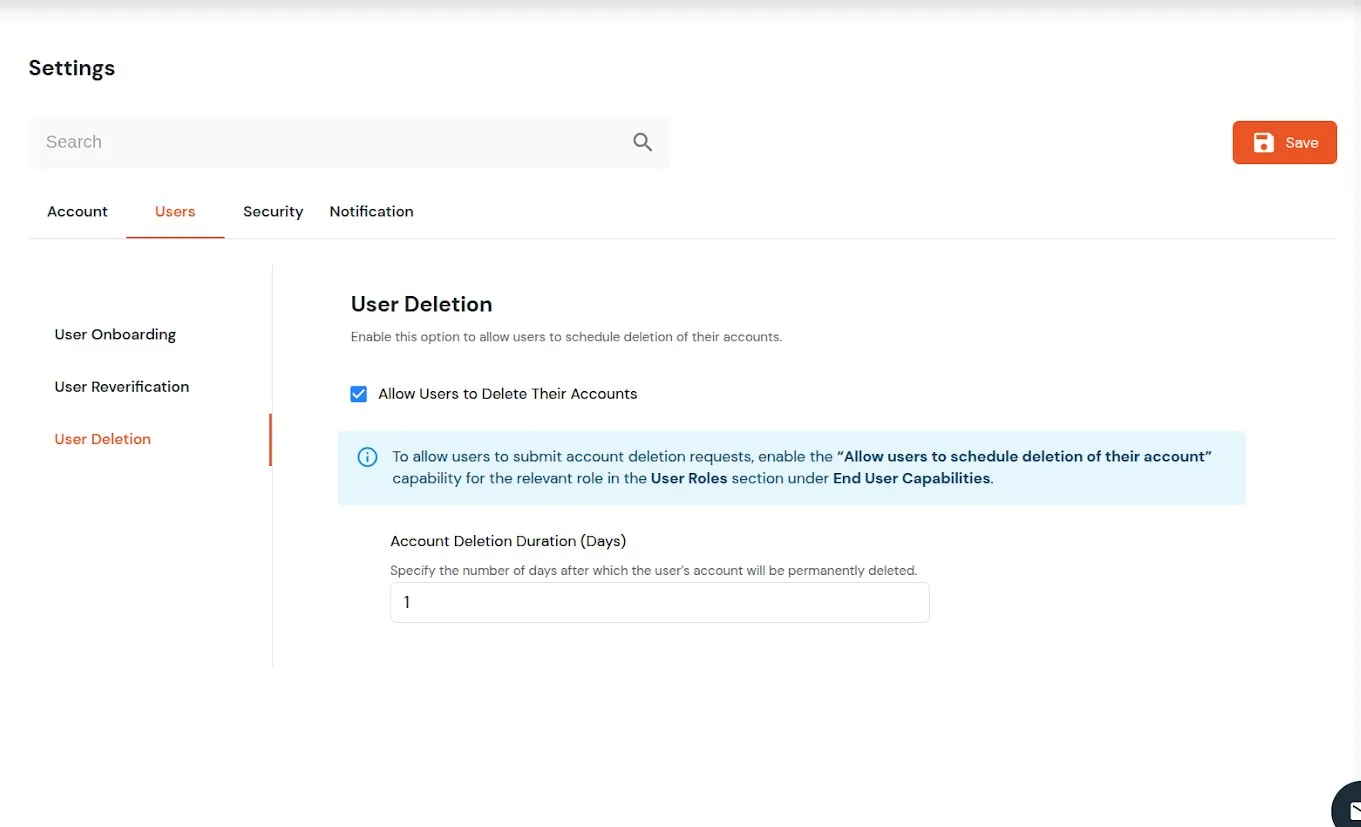
- Reset Password:
- Navigate to Product Settings >> Security >> Reset Password.
- This section allows you to configure how users can recover or reset their passwords.

- There are three password recovery methods available:
- Password Recovery via Email
- Password Recovery via Phone
- Password Recovery via 2FA

- Select a recovery method to view and configure the available options for that method.
-
Password Recovery via Email
Enable one or more of the following options:
- Send Password Reset Link to Registered Email: Enabling this option will send a password reset link to the email address associated with the account.
- Send Password Reset Link to Alternate Email: Enabling this option will send a password reset link to an alternate email address provided during account setup.
- Send OTP to Registered Email: Enabling this option will send a One-Time Password (OTP) to the email address associated with the account, which can be used to reset the password.
- Send OTP to Alternate Email: Enabling this option will send a One-Time Password (OTP) to the alternate email address, which can be used to reset the password.

-
Password Recovery via Phone
Enable one or more of the following options:
- Send OTP to Registered Phone: Enabling this option will send a One-Time Password (OTP) to the registered phone number, which can be used to reset the password.
- Send Password Reset Link to Registered Phone: Enabling this option will send a password reset link to the phone number associated with the account via SMS.

- Password Recovery via 2FA
Enable password reset using multi-factor authentication:
- Reset via Active 2FA: You will need to authenticate using their active 2FA method to reset their password.
- Reset via Configured 2FA: You will need to authenticate using their configured 2FA method to reset their password.

- End-User Password Recovery Process
- When all the above password recovery options are enabled, you will see the following reset process:
- When the user visits Login page and clicks Forgot Password, the Forgot Password page will open.

- You will be guided through a unified password reset experience with three recovery tabs:
- Email Reset
- Phone/SMS Reset
- Two-Factor Authentication
- Email Reset Tab
- Select the Email Reset tab on the Forgot Password page.

- Choose one of the available email-based recovery options:
- Send Password Reset Link to Registered Email
- Send OTP to Registered Email
- Send Password Reset Link to Alternate Email
- Send OTP to Alternate Email
- Enter the username or email address and click Continue.
- The following screen will be visible based on the selected option.
- Based on the selected recovery method:
- Send Password Reset Link to Registered/Alternate Email: After clicking Continue, a confirmation screen is displayed informing that a password reset link has been sent to the registered/Alternate email address. Open the email and click the Reset Password link to proceed.

- Send OTP to Registered/Alternate Email: After clicking Continue, you will be redirected to an OTP verification screen where a 6-digit OTP sent to the registered/Alternate email to be entered to continue.

- To prevent misuse, a warning message is displayed if multiple reset attempts are made within a short time.

- Phone / SMS Reset Tab
- Select the Phone/SMS Reset tab on the Forgot Password page.
- If Enable Login with Phone Number is enabled, the user is prompted to enter their registered phone number.

- If Enable Login with Phone Number is disabled, the user is prompted to enter their username or email address.

- Choose one of the available phone-based recovery options:
- Send Password Reset Link to Registered Phone
- Send OTP to Registered Phone
- Click Continue to proceed.
- Based on the selected recovery option:
-
Send Password Reset Link to Registered Phone:
After clicking Continue, a confirmation screen is displayed indicating that a password reset link has been sent to the user's registered phone number via SMS. The user must open the message and click the Reset Password link to continue.

-
Send OTP to Registered Phone:
After clicking Continue, the user is redirected to an OTP verification screen where the OTP sent to the registered phone number must be entered to proceed.

- Two-Factor Authentication
- Select the Two-Factor Authentication tab on the Forgot Password page.
- When Active 2FA method is selected from product setting:

- When Configured 2FA method is selected from product settings:
- Enter the username or email address and click on Continue.
- Choose from the following 2FA methods to proceed:

- Authy Authenticator.

- Display Token.

- FIDO (Biometric).

- Google Authenticator.

- Grid Pattern.

- Microsoft Authenticator.

- miniOrange QR Verify.

- miniOrange Push.

- Security Questions.

- OTP over SMS or Email.

- miniOrange OTP.

- Follow the given instructions and complete identity verification using the selected 2FA method.
- After successful verification, the Set New Password screen is displayed.

- While entering the new password, the configured password policy requirements are shown and must be fulfilled.

- Click Reset Password to update the password.
- A confirmation screen is displayed indicating that the password has been reset successfully.

- MFA:
The following options are available under Multi Factor Authentication settings.

- Security Question Limit - The number of security questions a user has to fill during registration.
- No. of Question to Verify: Out of the total number of security questions, the number of questions that should be verified for authorization.
- Enable End Users to change their Questions: You can enable/disable the permission for users to update or change the security questions.
- Enable Two Factor (MFA) at the time of login for additional admin accounts: Enable this option to enforce MFA for all additional admin accounts during login, providing an extra layer of security for administrative access.
- OTP Length: The total length of digits in the the passcode.
- OTP Validity (In mins): The time for which the OTP should stay valid. After this time period, current OTP will no longer work and you will have to request for a new OTP.
- Device Profiles Expiry Time: Device profile expiry is the time after which your registered device gets unregistered so that you can register new devices.
- Mobile App Issuer Name: Enter the name of the Mobile App Issuer.
- Security Controls:

- Enable Iframe Embedding: You can enable iframe embedding from here. By enabling this option, your organization can embed miniOrange in iframe in any of your applications and access miniOrange from there.
- Frame Ancestors: Frame Ancestors specify which websites are allowed to embed miniOrange in an iframe. You can use a URL, a domain, or a wildcard domain. Example: https://www.example.com *.example.com
- Enable captcha:
- Captcha for Login: Enable this option to enforce CAPTCHA during the user login process.
- Captcha for registration: Enable this option to enforce CAPTCHA during the user registration process.
- Captcha for Password Reset: Enable this option to enforce CAPTCHA during the password reset process.
Note: If you are using a vanity URL, please contact miniOrange Support to whitelist your domain in order to enable CAPTCHA on your site.
- Notification

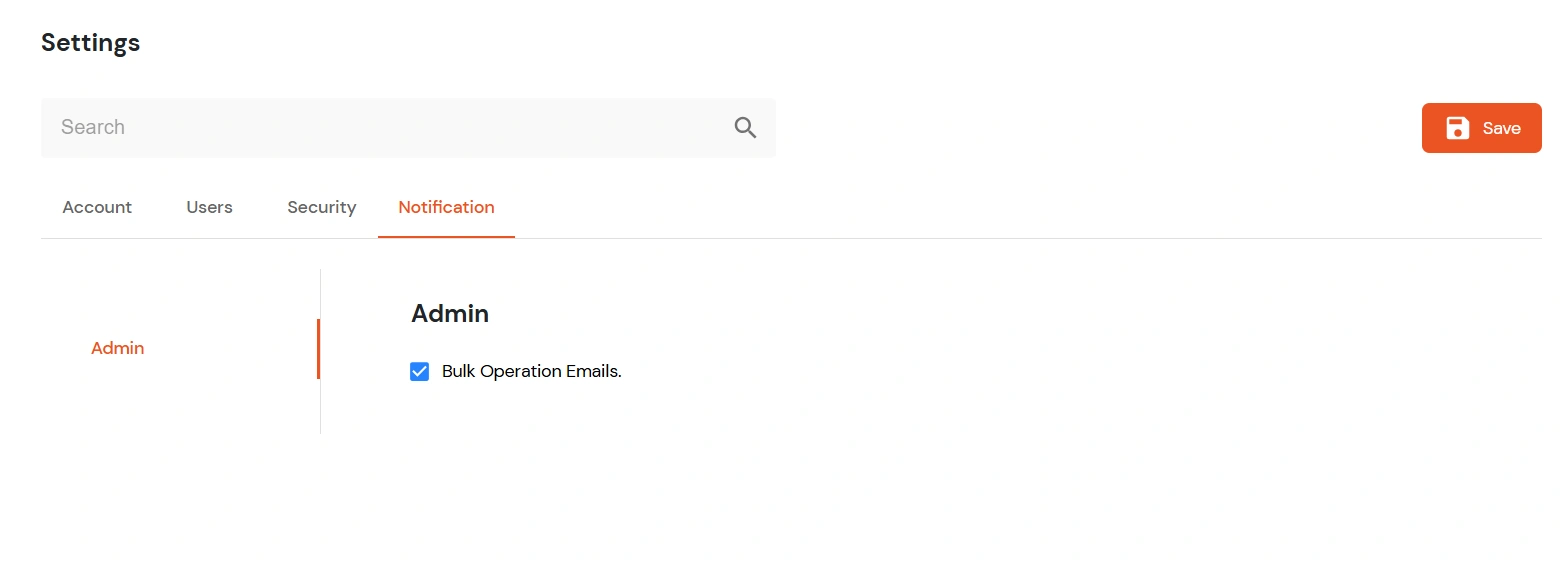
- Admin: Click Checkbox to receive email notifications whenever bulk operations are performed by the admin within the system.
Following Settings/Configurations are only for On-premise:
- Details:

- Server Details: You can change the domain URL where the On-Premise version of IdP is hosted as shown in above screenshot.

- miniOrange cloud user account details: This is required to use SMS or Email service from miniOrange instead of configuring custom SMS or SMTP provider
- Logging: You can set the logging level of the product as shown in the screenshot below. Default logging level is ALL. You can choose from the following options and change the logging level to any of them:
- ALL
- TRACE
- DEBUG
- INFO
- WARN
- ERROR
- FATAL
- OFF
It is recommended to change it to Error for production environments for best performance. Once you save the logging level there is no need to restart the server for changes to take effect but you should not perform this operation very frequently.
Note: 1. This option is available only for Main Admin and Super Admin accounts.
2. Any changes you make here are not persisted across server restarts. You will need to edit 'WEB-INF/classes/log4j.properties' to change levels permanently.
- Login & Logout:
- Enable Integrated Windows Authentication (IWA): This option allows you to login with your Windows credentials, without having to enter a username and password.
Following Setting is accessible only for Super Admin:
- User Onboarding:

- Enable sending activation emails to customer with Passwords: Super admin can enable or disable activation emails sent to customers which contains passwords.