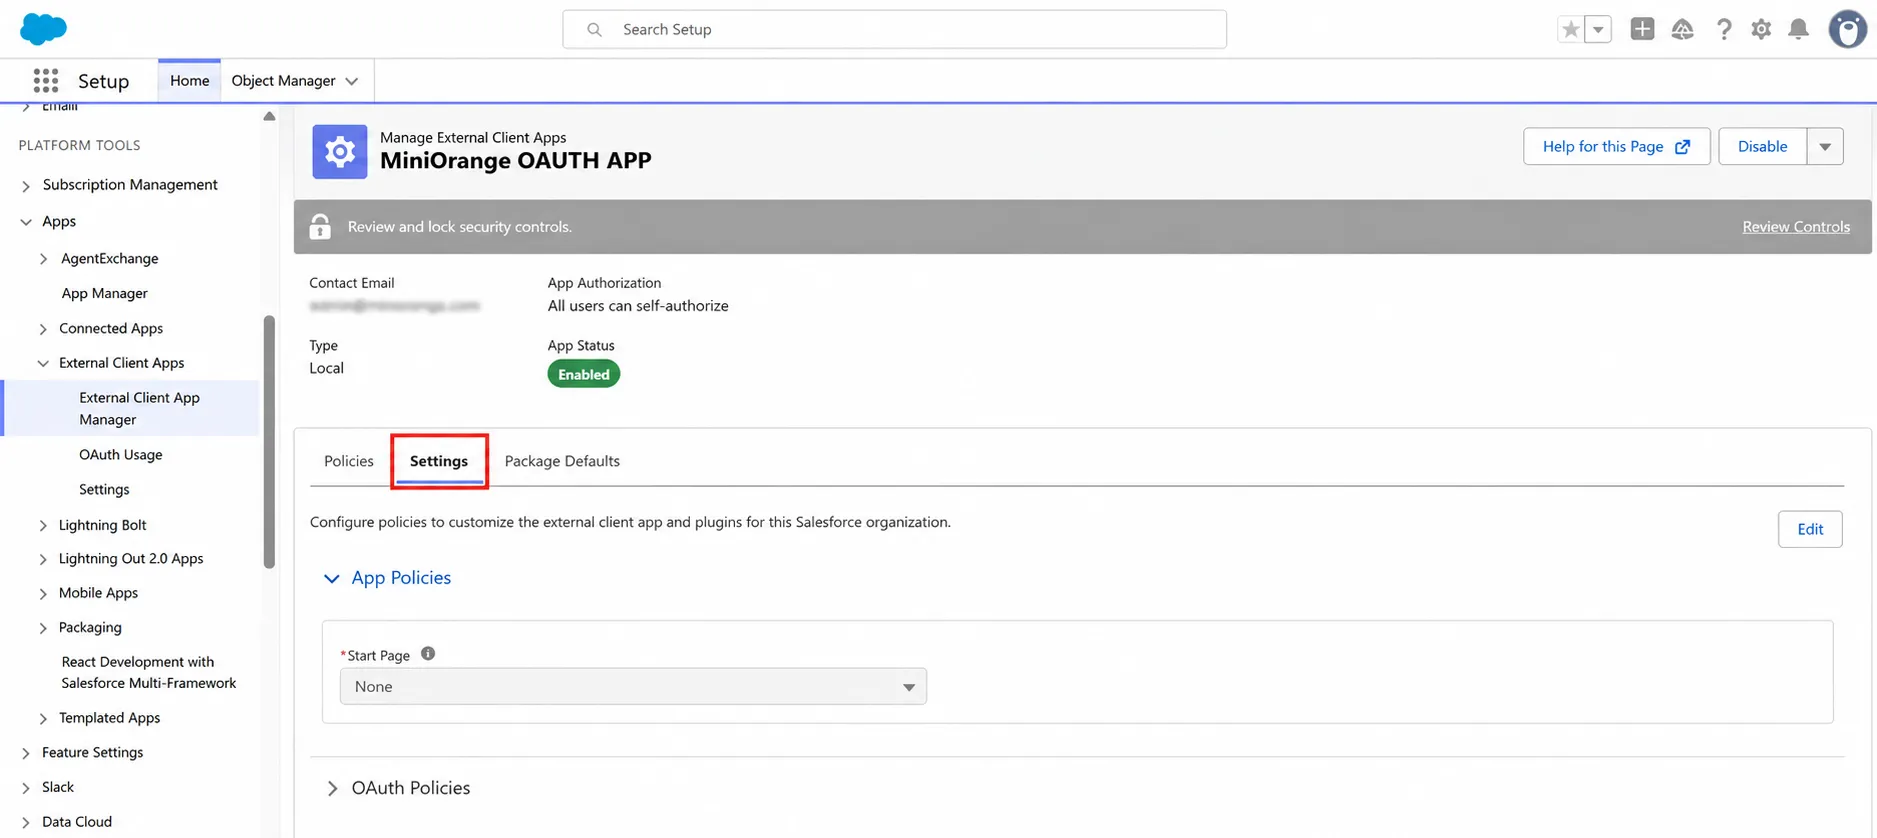
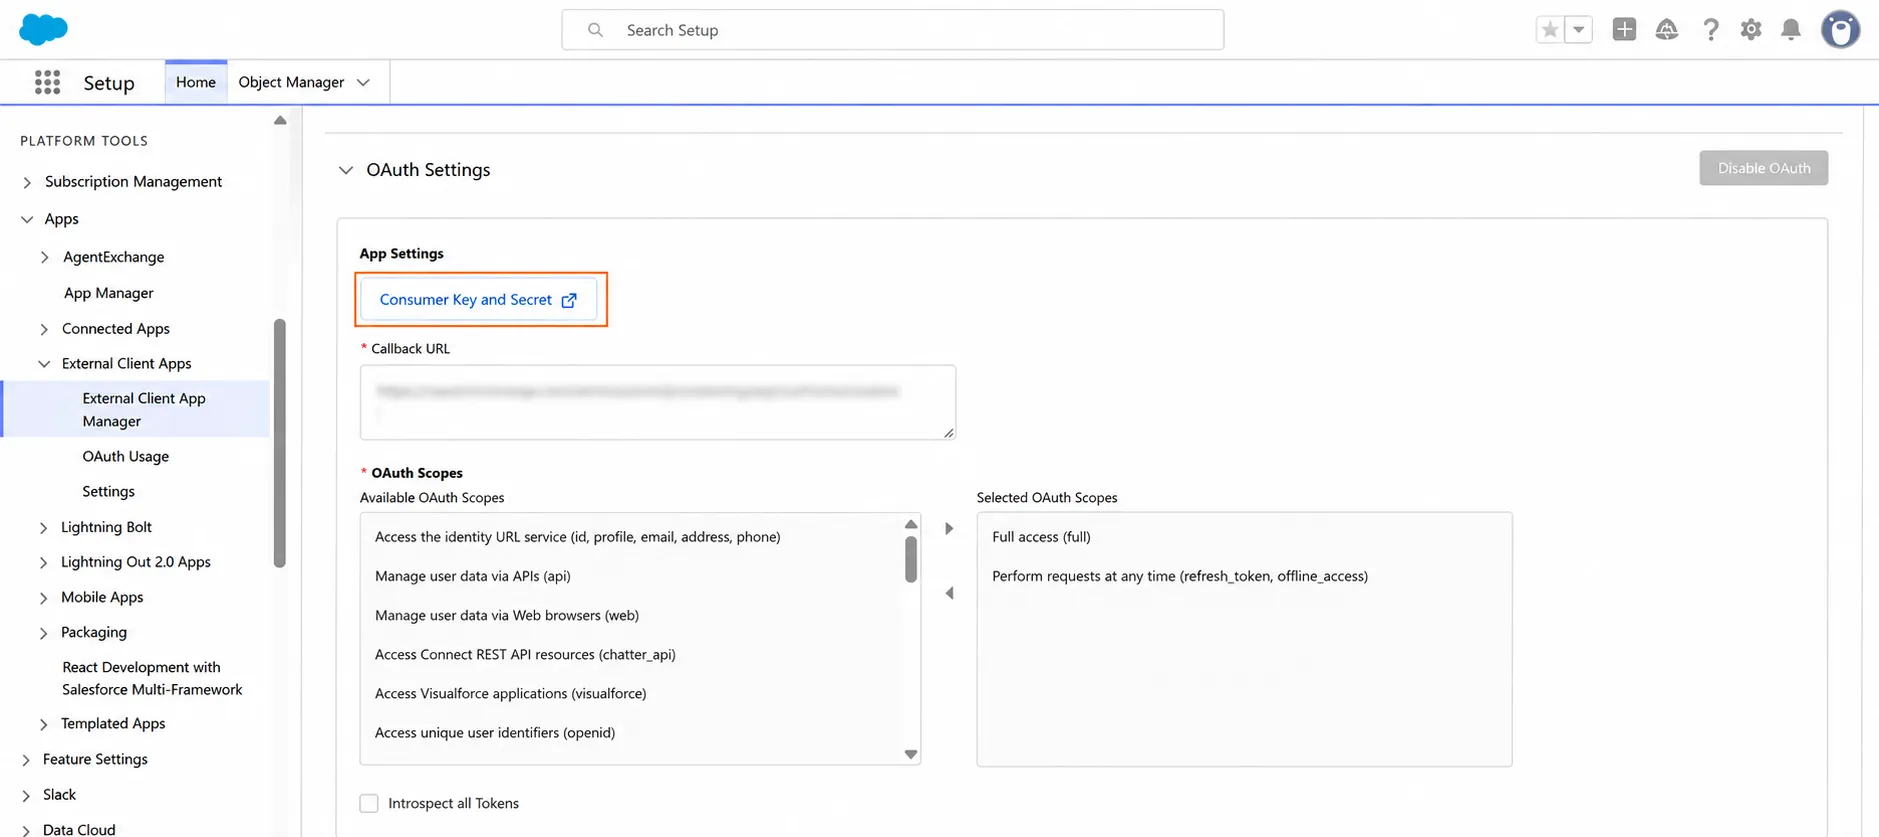
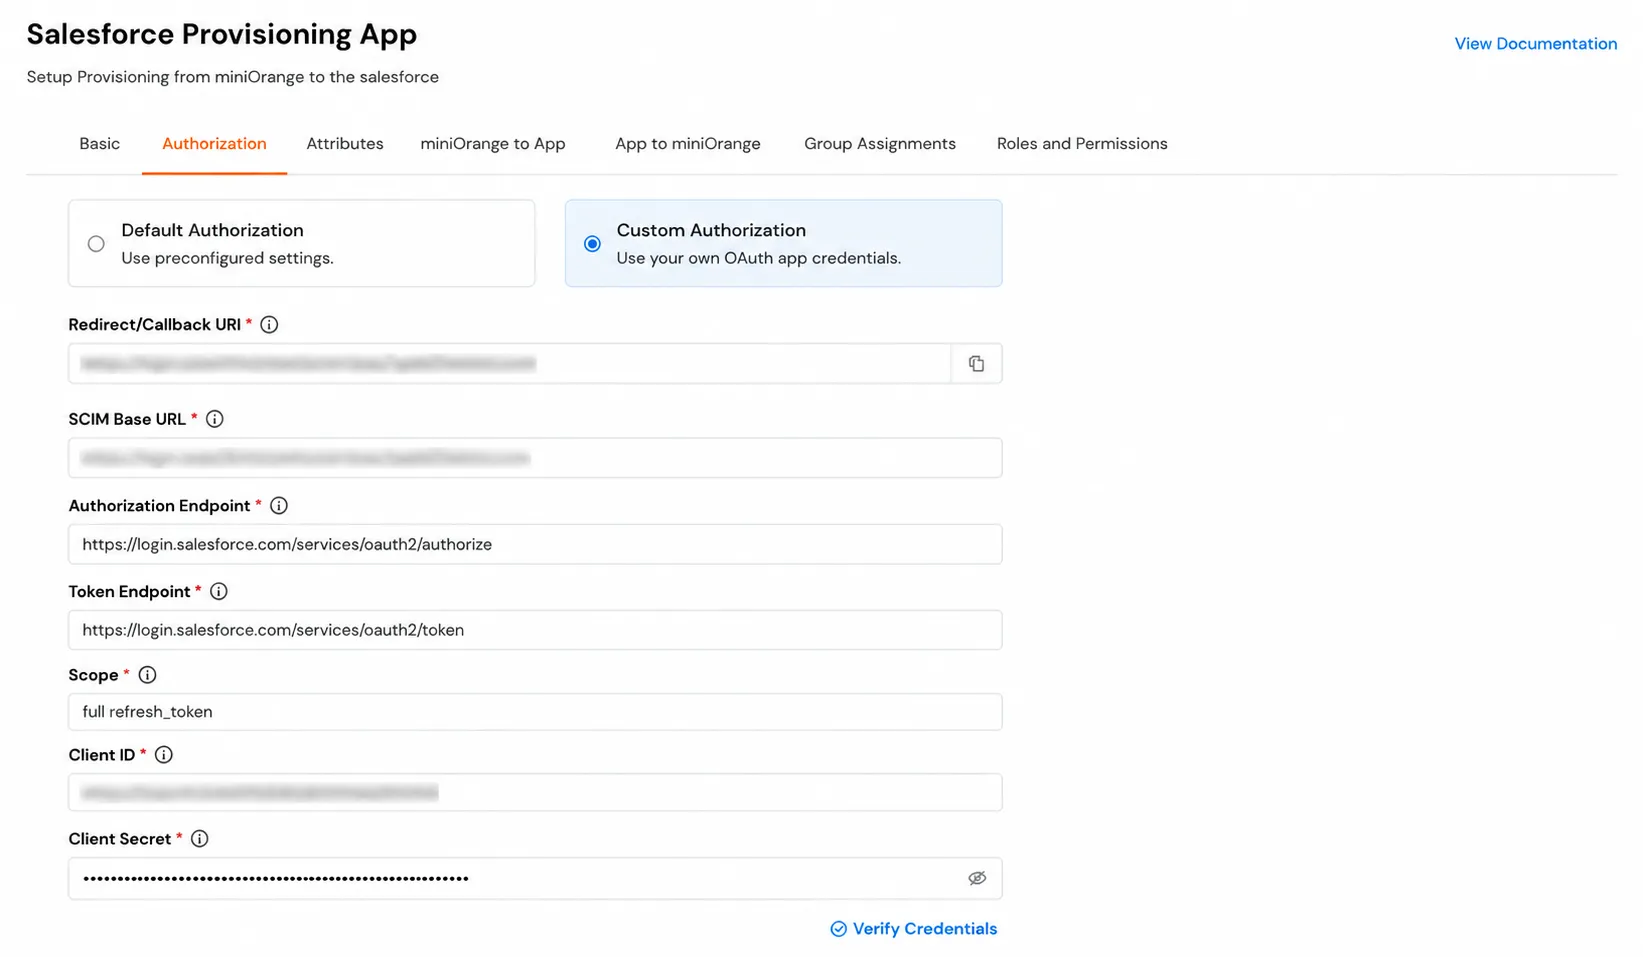
Salesforce Provisioning & Deprovisioning
Salesforce SCIM Provisioning by miniOrange helps you automatically keep Salesforce users in sync with miniOrange, so admins don’t have to create and remove accounts manually.
After setup, miniOrange can automatically:
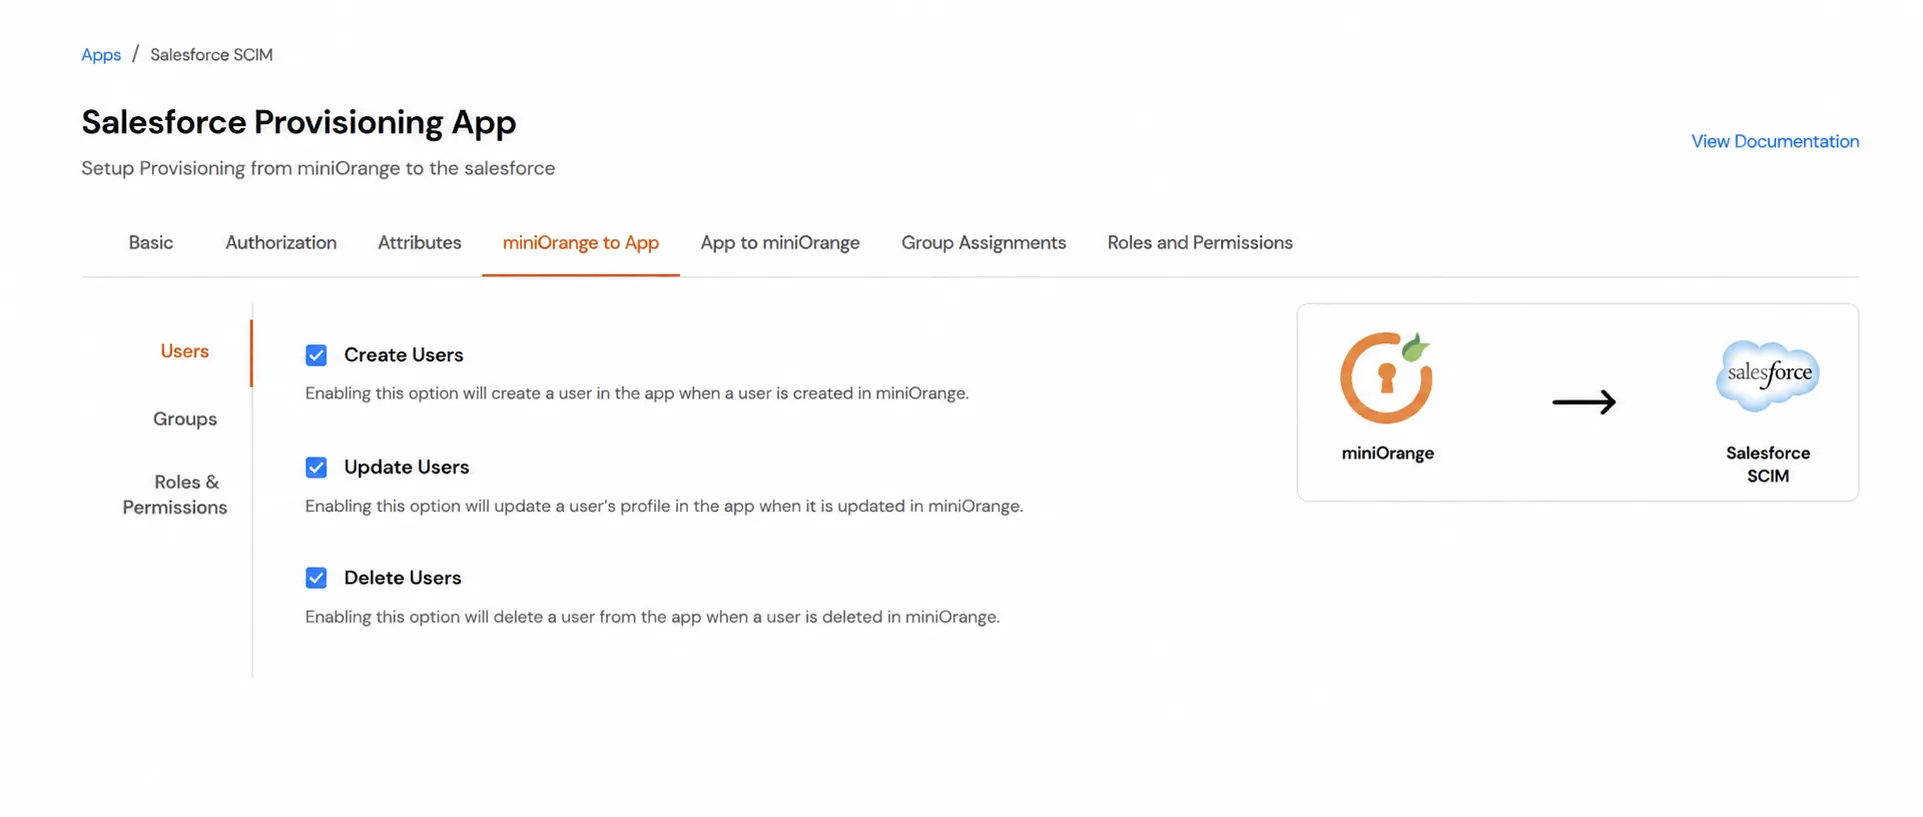
- Create Salesforce users when a new user is added in miniOrange.
- Update Salesforce users when user details change in miniOrange.
- Delete Salesforce users when a user is removed in miniOrange (offboarding).
This makes onboarding/offboarding faster and helps security by ensuring old accounts are removed on time.
miniOrange also supports Inbound Provisioning (Import):
- You can import existing users from Salesforce into miniOrange.
- This is useful for bringing your current Salesforce users into miniOrange first, before turning on automation.
Prerequisites
Follow the step-by-step guide below to setup Salesforce Provisioning
Step 1: Setup Provisioning Application in miniOrange
- Log in to miniOrange Admin Console.
- In the Configure section, select Apps.
- Under the Apps section, click on Add Application.

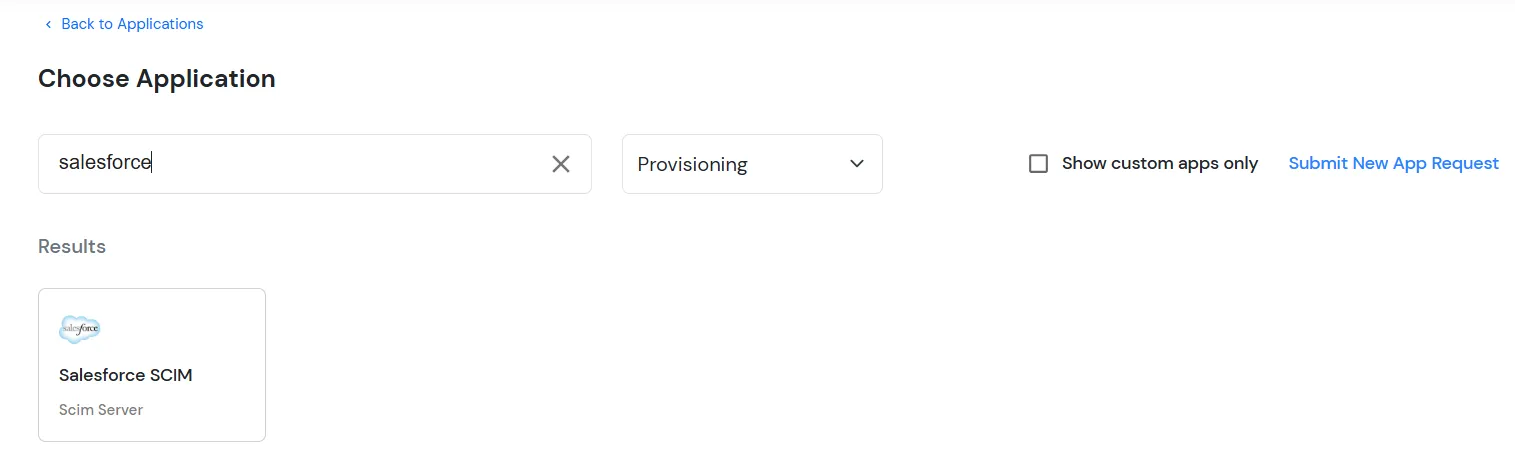
- In the Choose Application section, there is a search option and a dropdown menu next to it. By default, the dropdown is set to All Apps, change it to Provisioning.
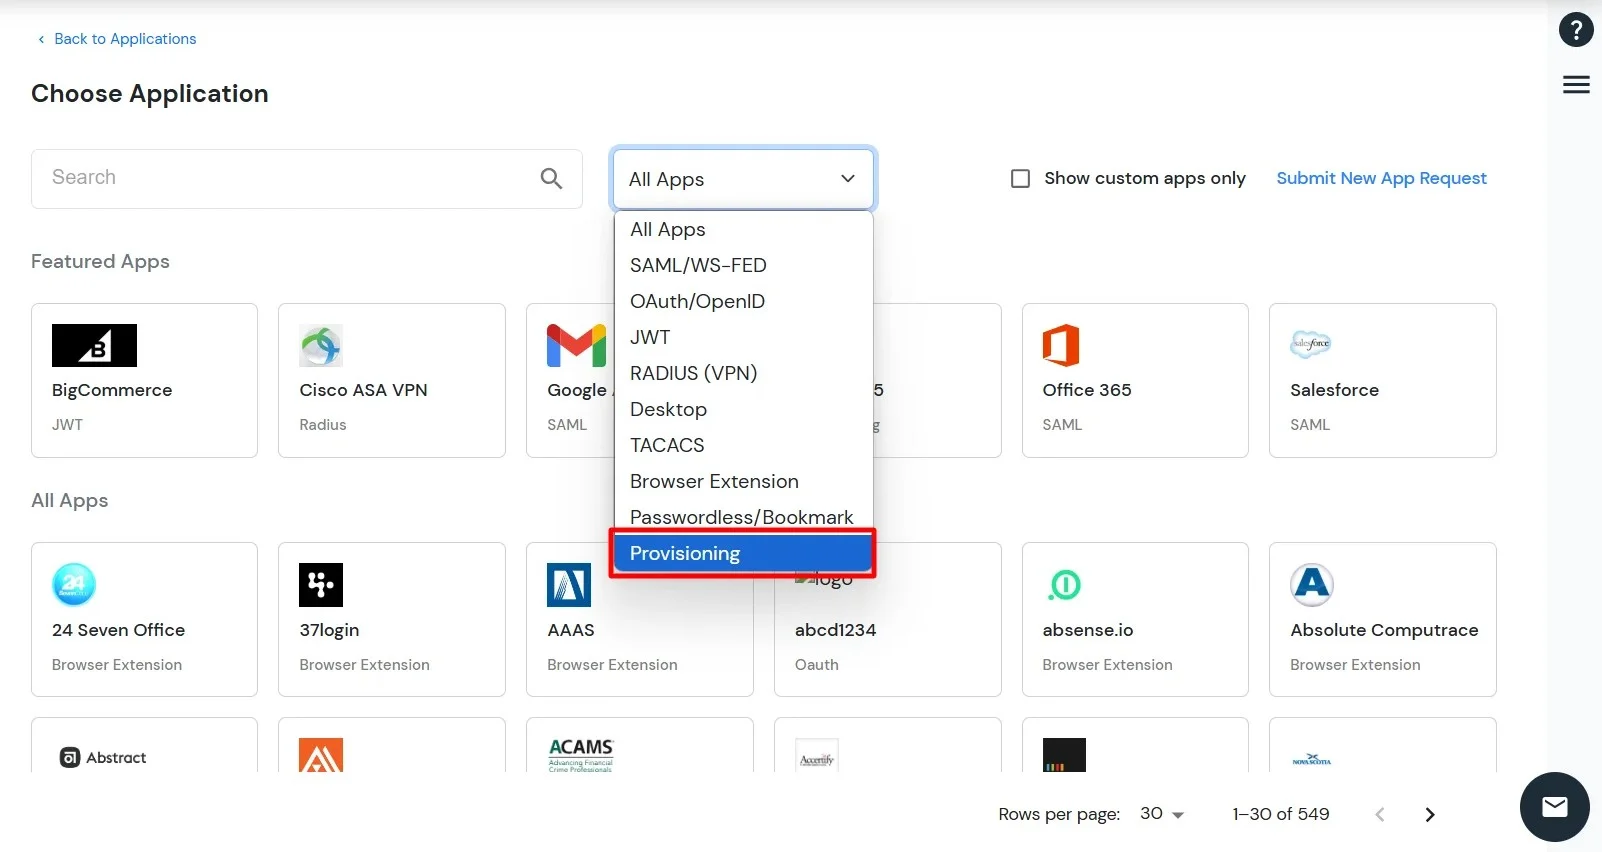
- Search for Salesforce SCIM and select Salesforce SCIM Server.
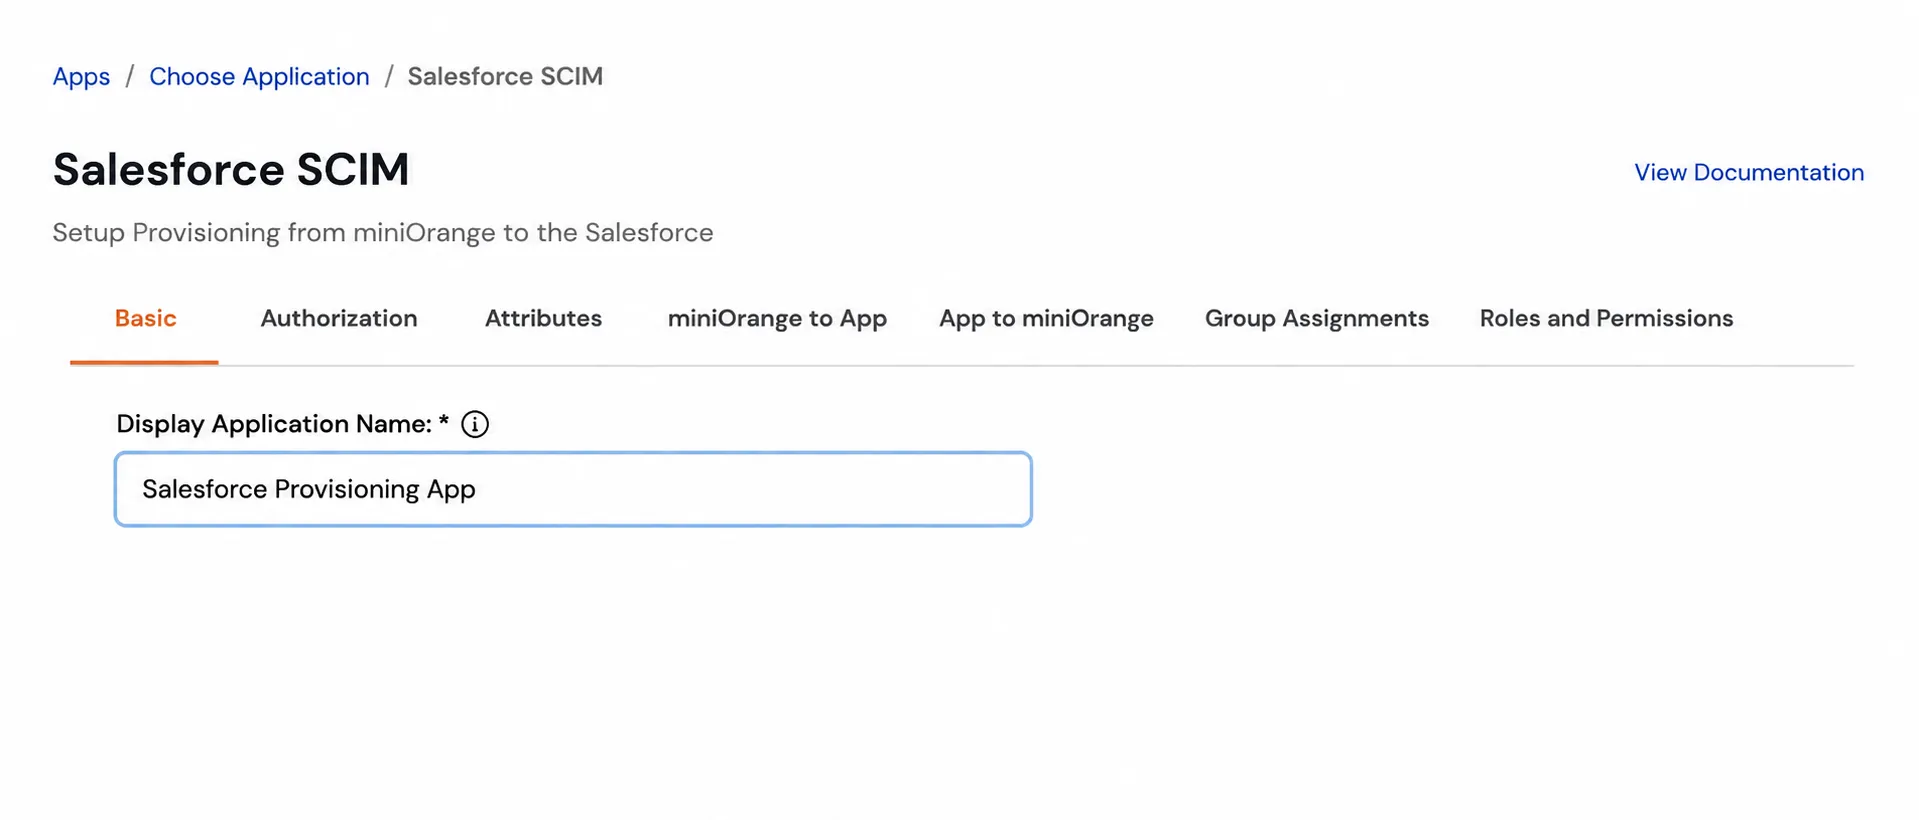
- Enter a display name for the app and click Save.
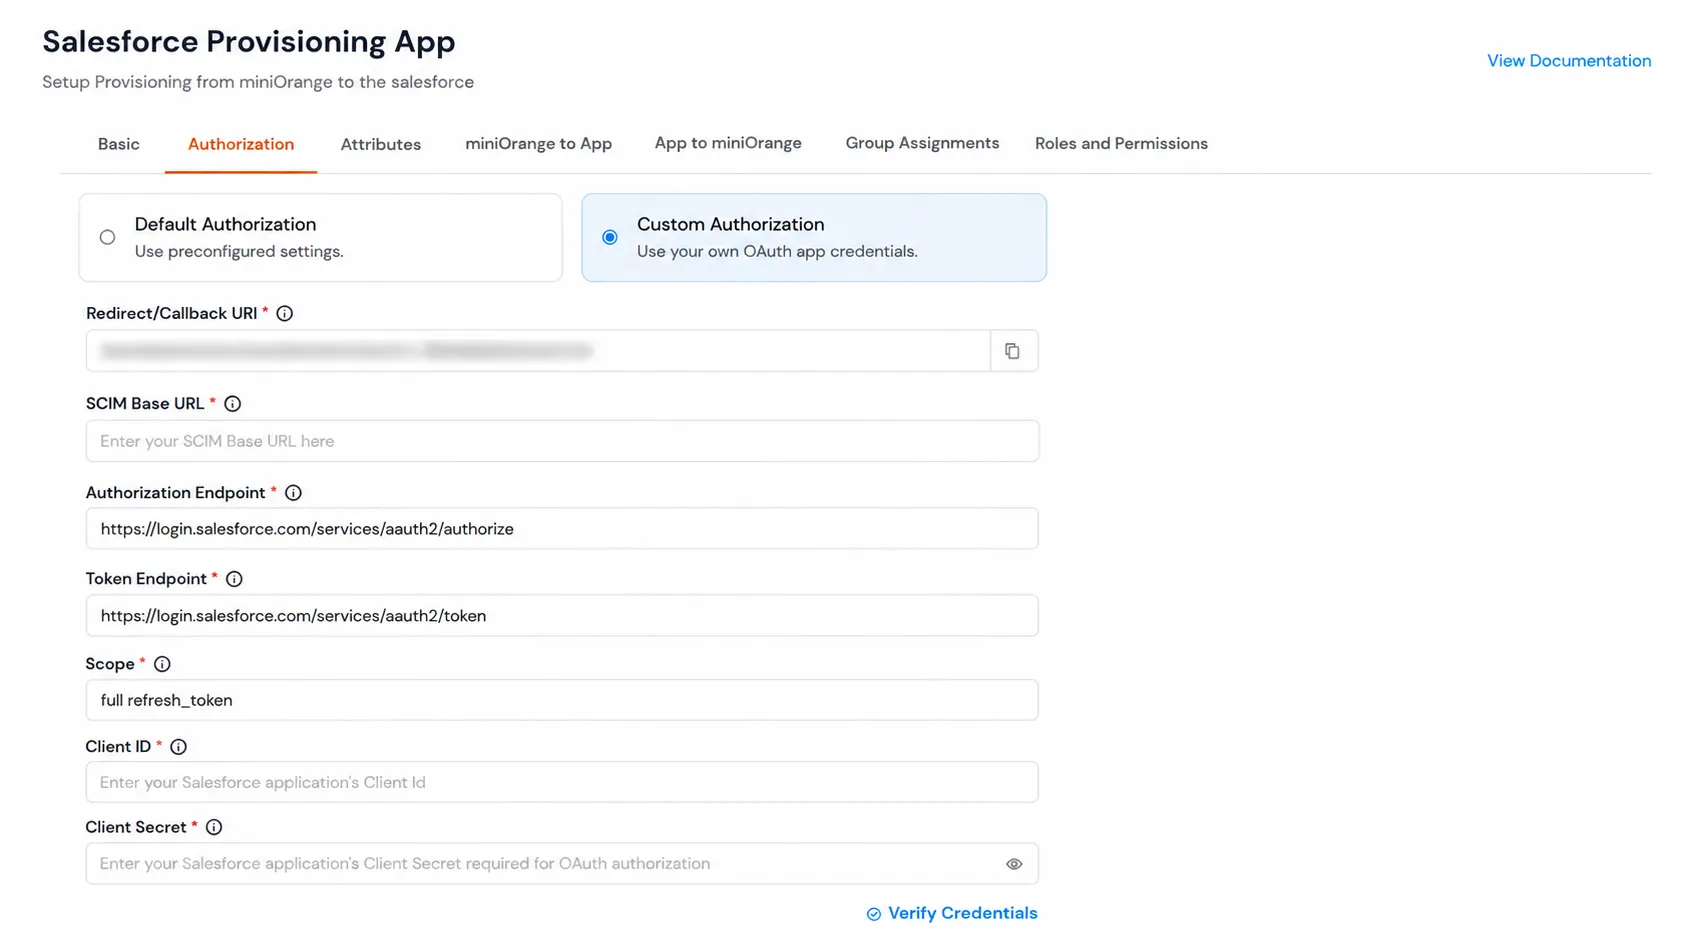
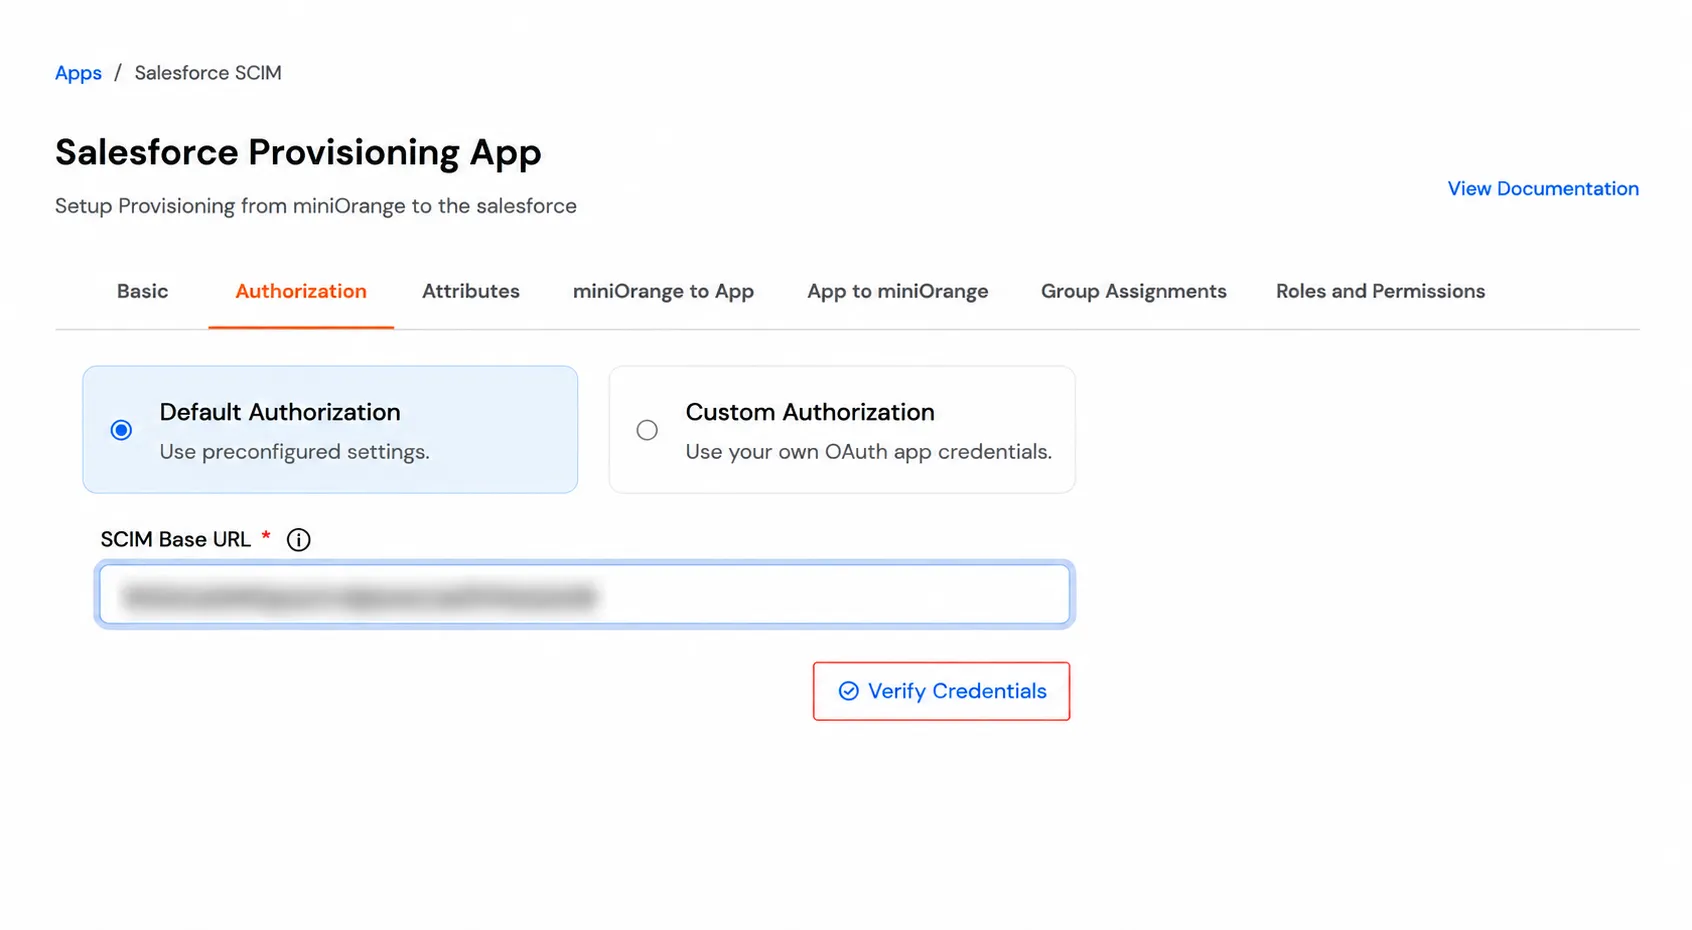
- Enter the SCIM base URL which will be in the following format:
https://<your-company-domain>.my.salesforce.com/services/scim/v2
- Click on Verify Credentials.
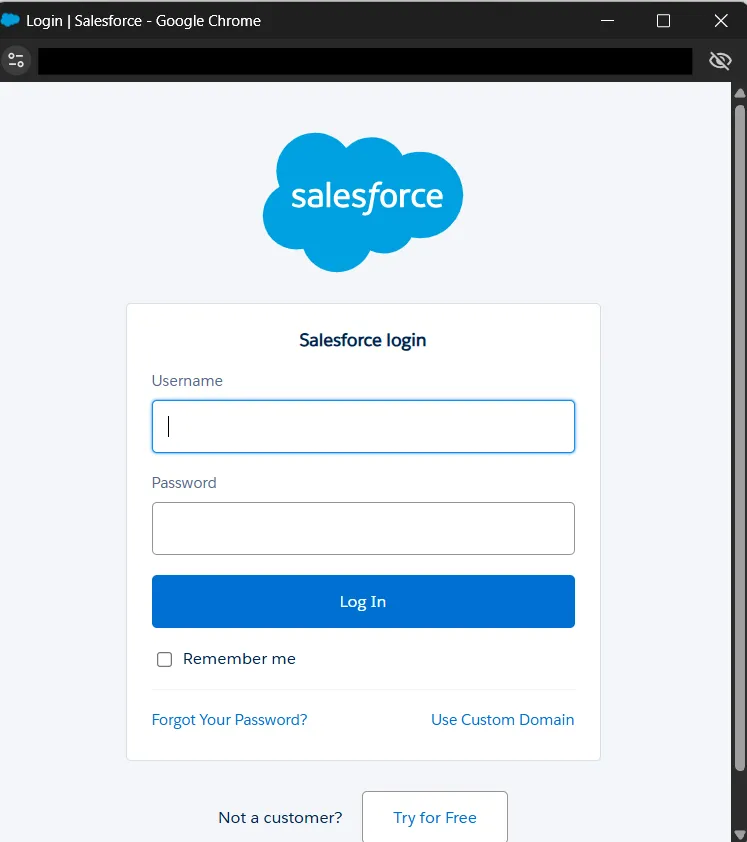
- Log in with your Salesforce Admin Account.
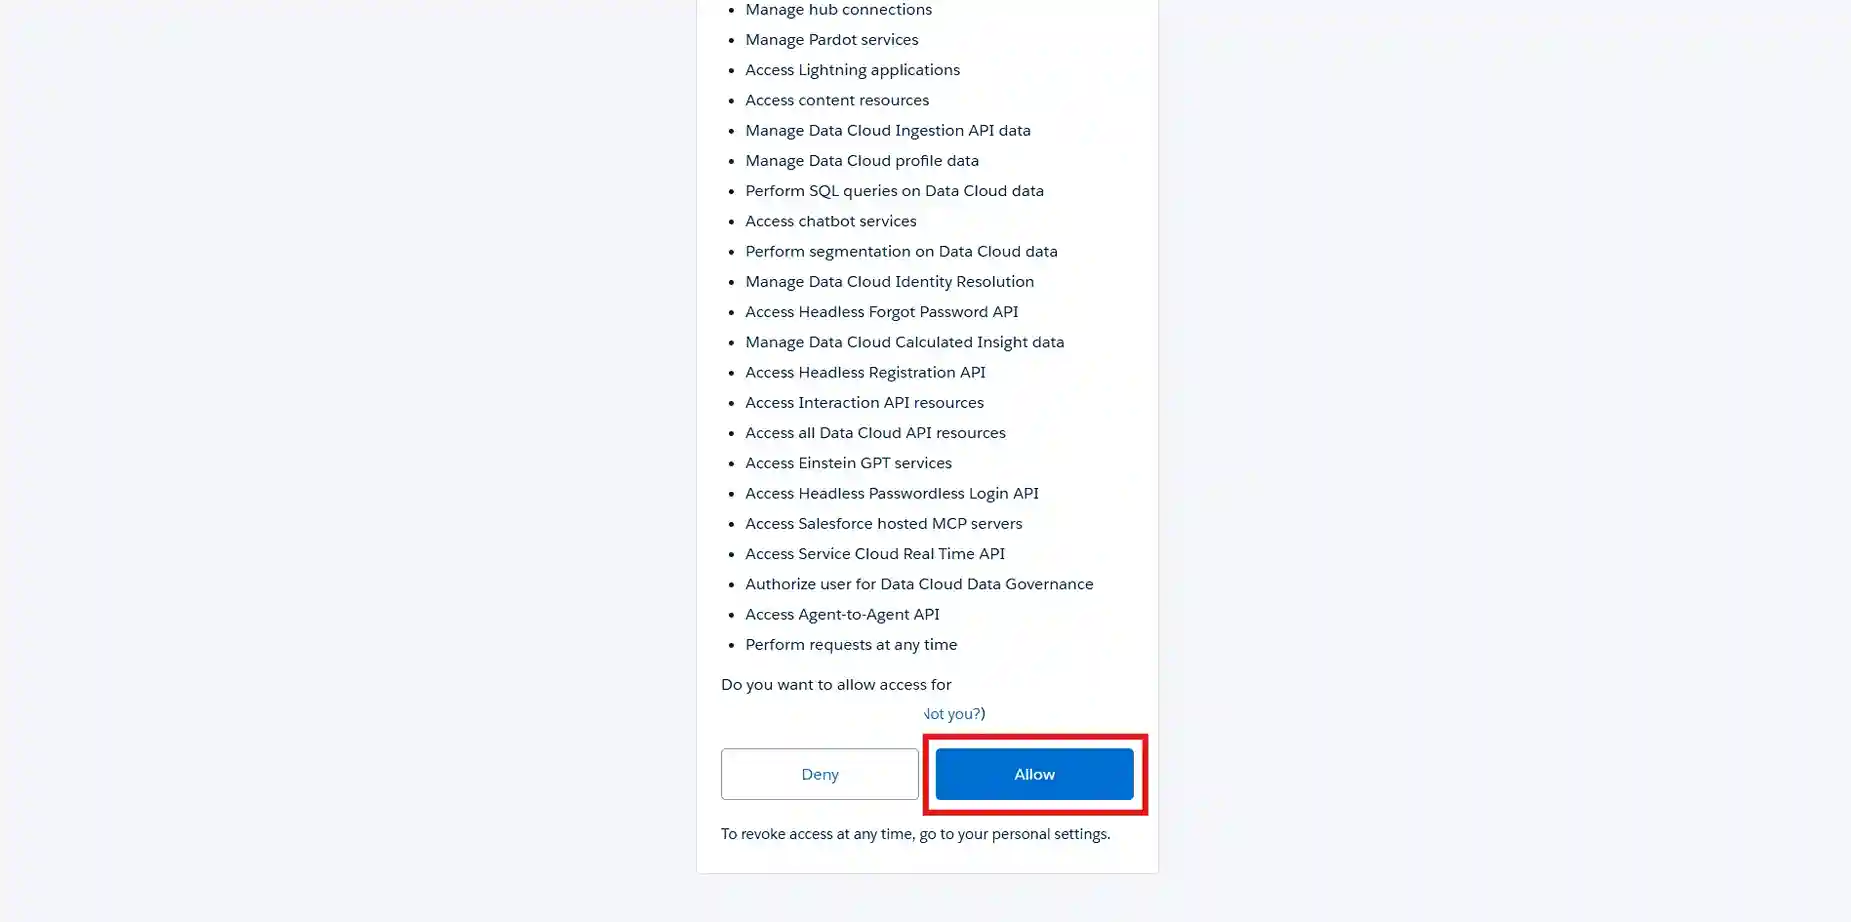
- Once logged in successfully, click the Allow button to authorize miniOrange to view and manage the provisioning of users on your salesforce.
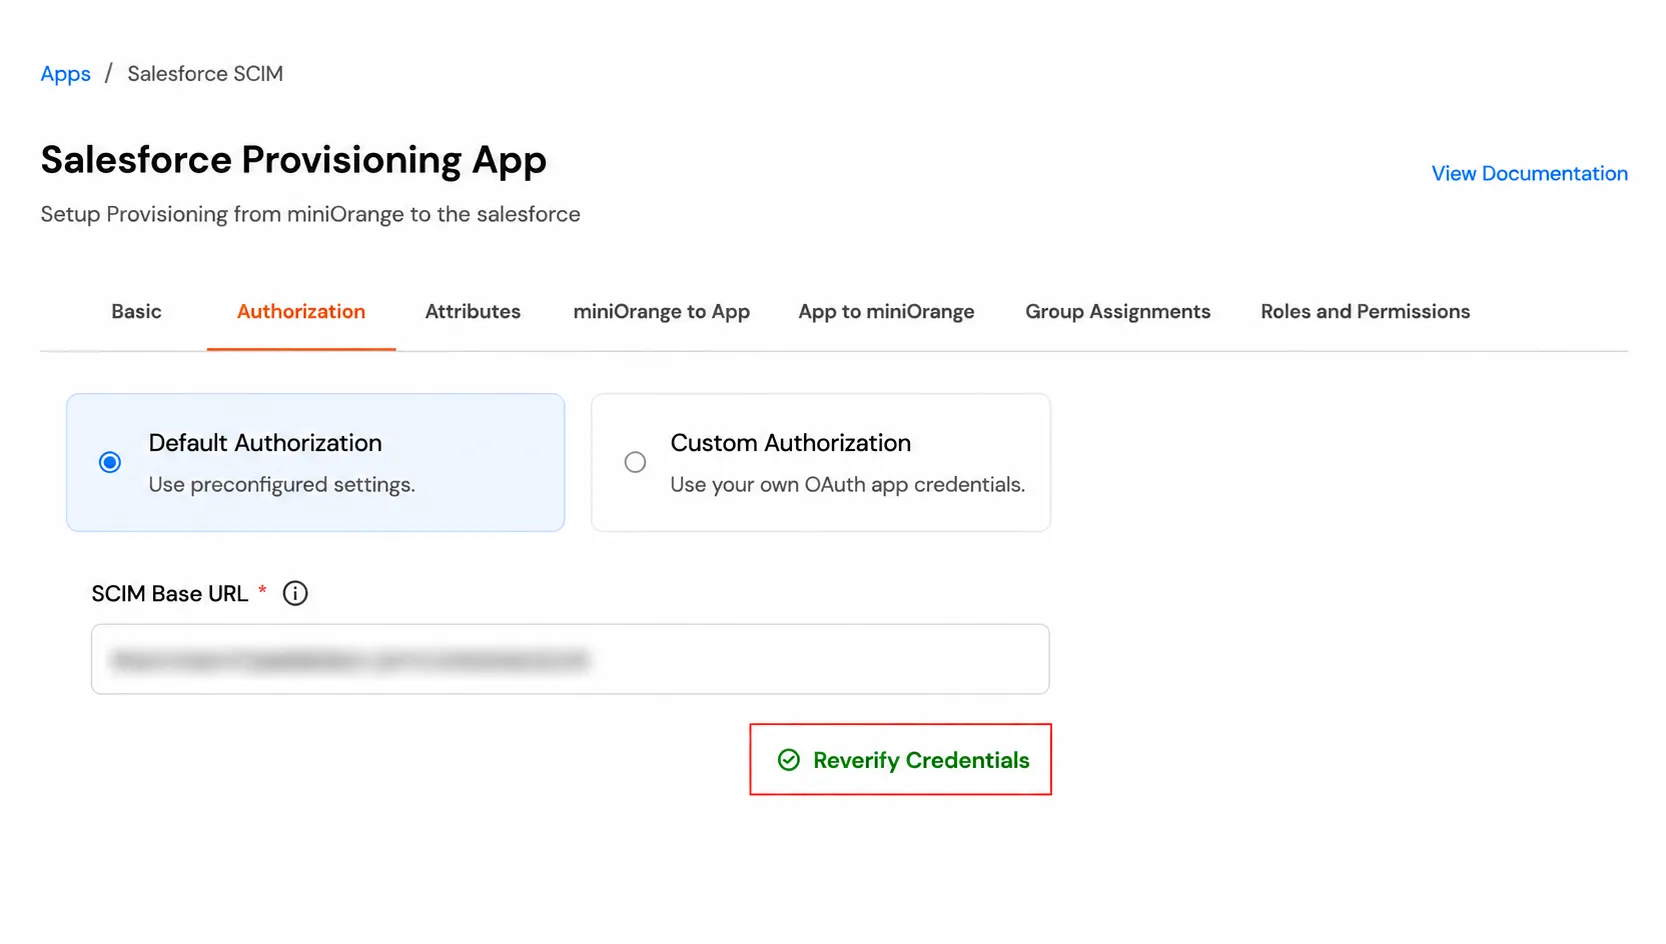
- Once verification is complete, the Verify Credential button will change to Reverify Credentials.
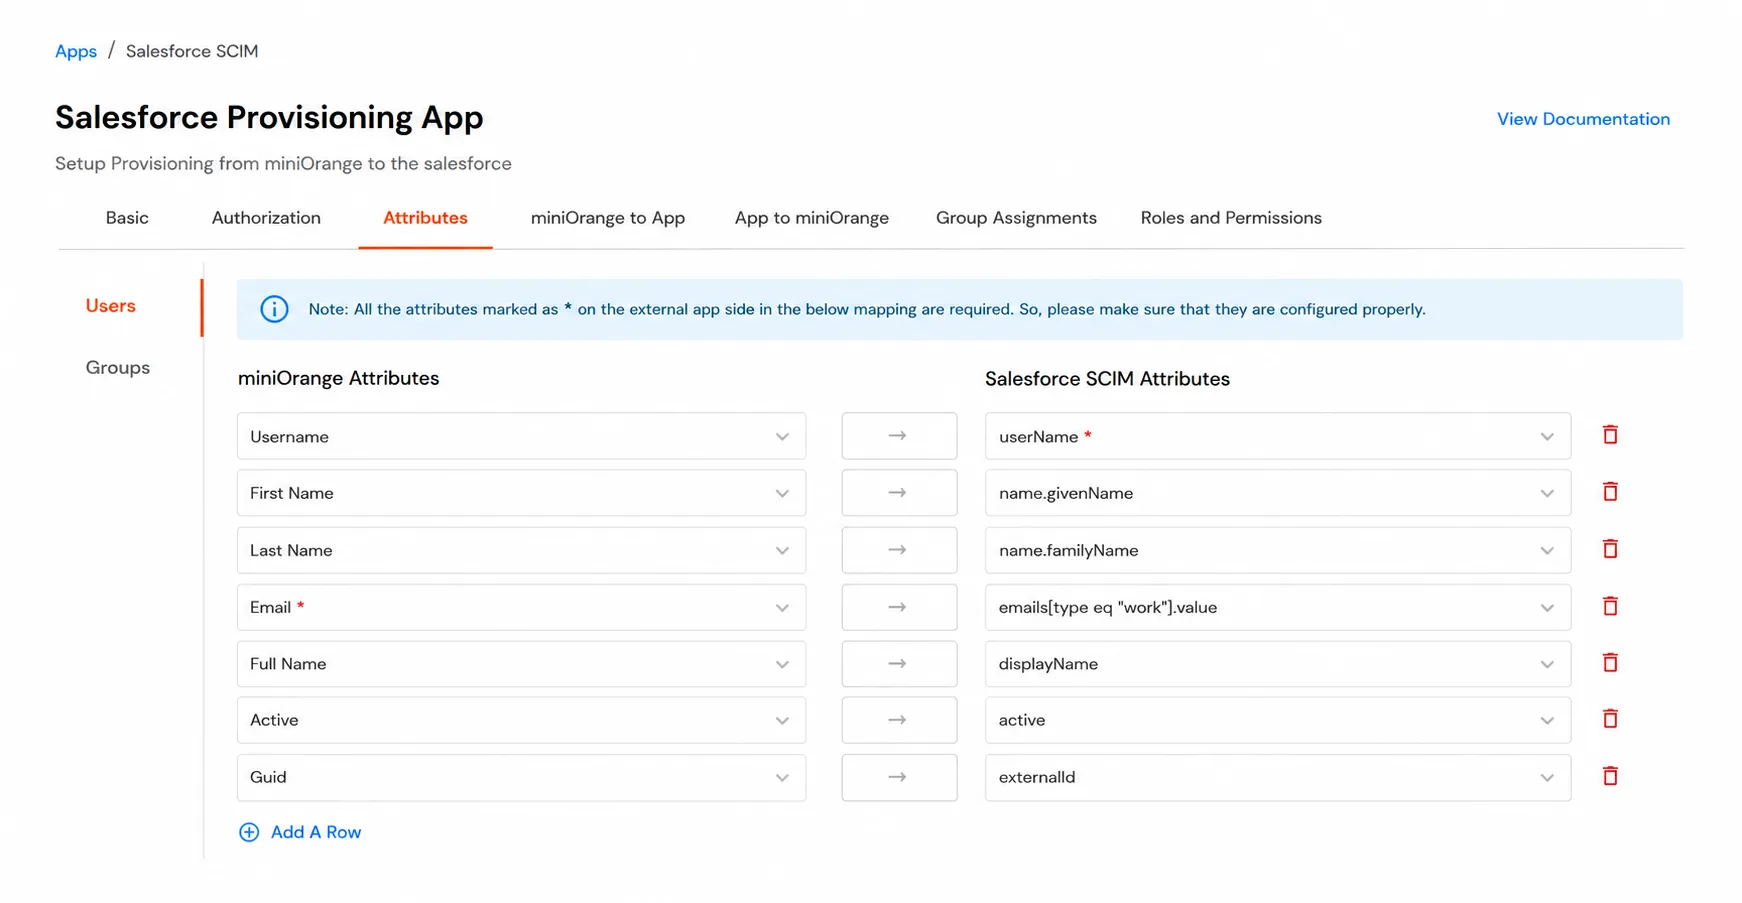
Attribute Mapping
- Map the user Attributes between miniOrange and Salesforce.
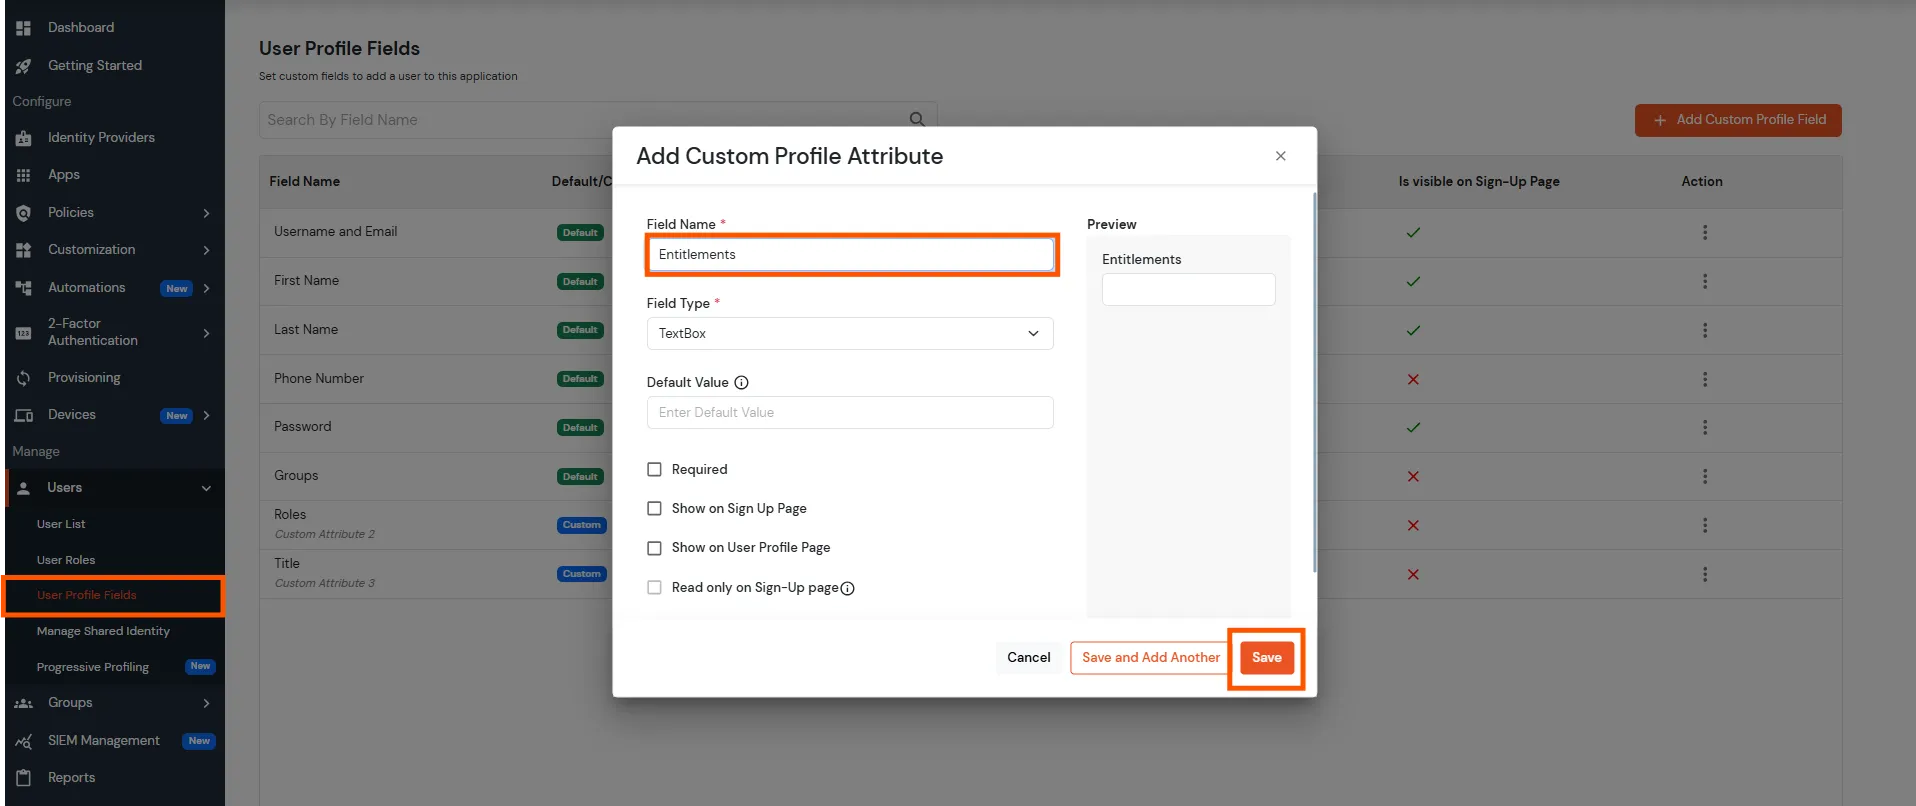
- Create a new User Profile Field under Users >> User Profile Fields.
- Add custom attributes by clicking on “Add a Row” (Compulsory).
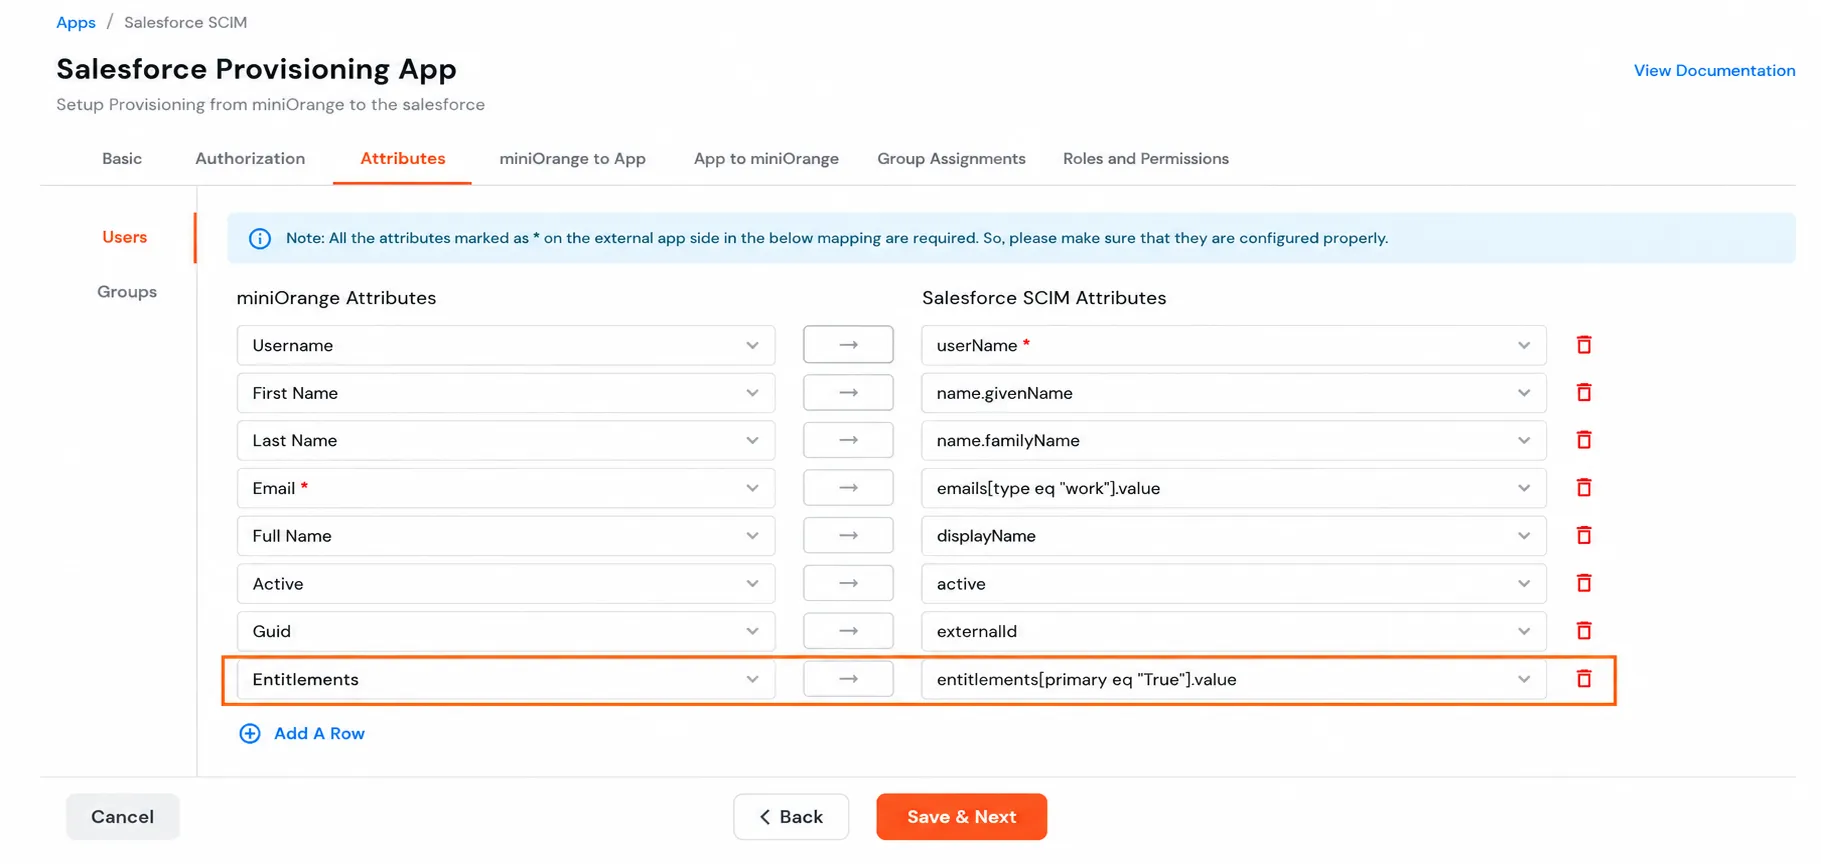
- Click on Save & Next.
Step 2: Provisioning Users and Groups from miniOrange to Salesforce (Outbound)
Group Assignments
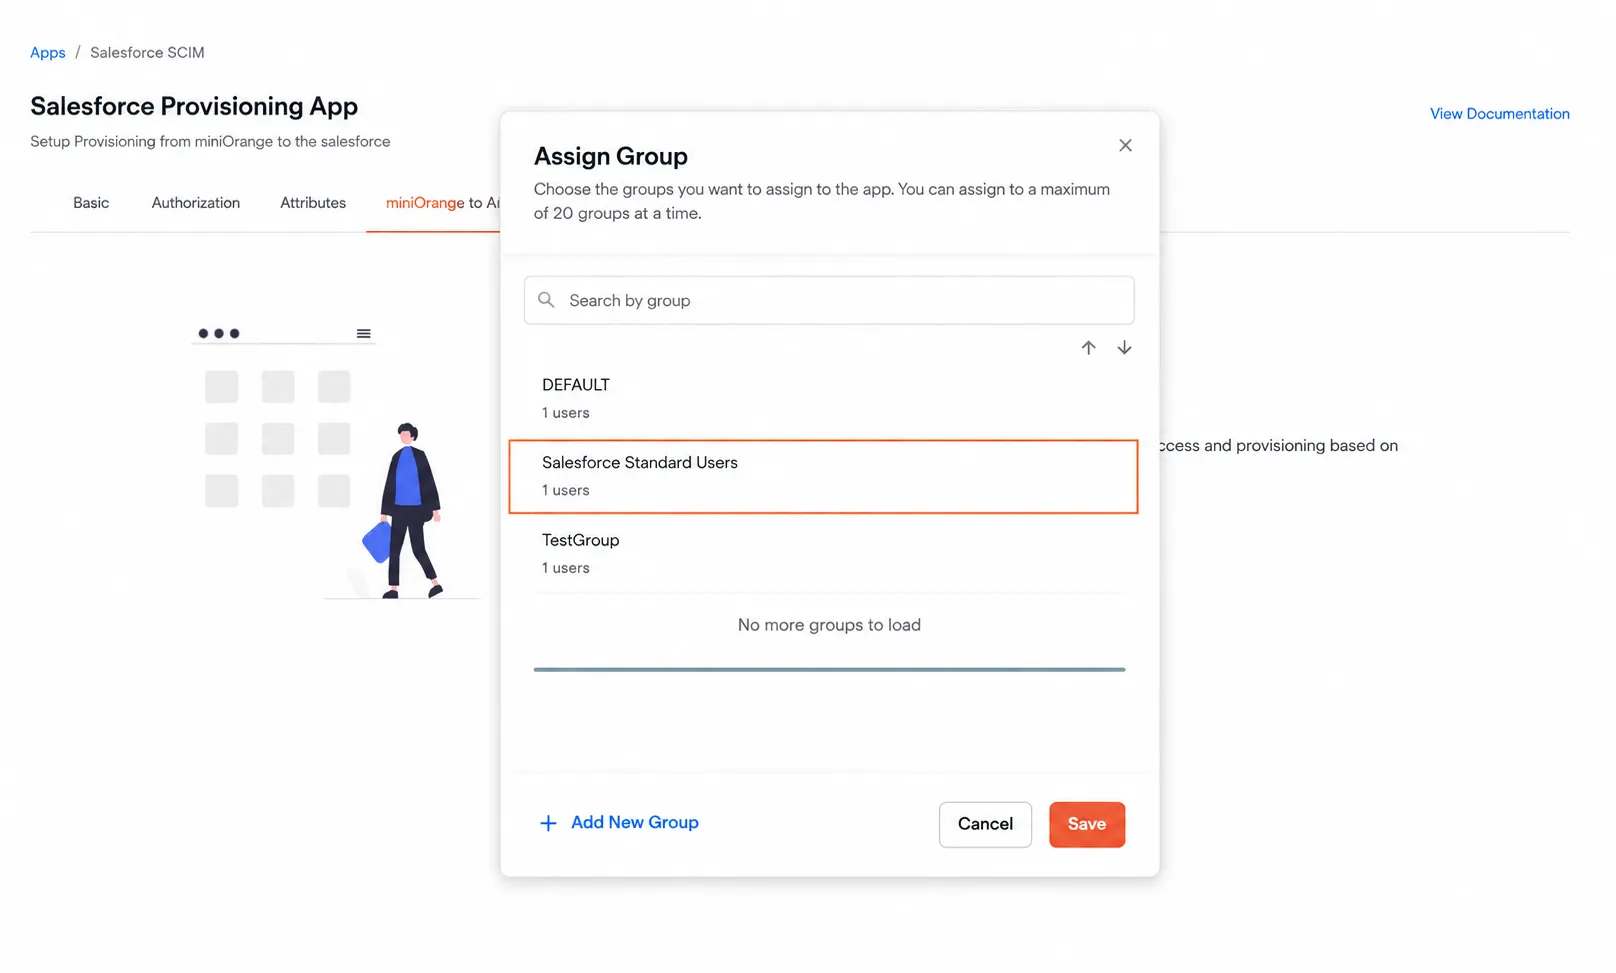
- Assign the Groups here that you want to provision to Salesforce. Only users belonging to these assigned groups will be provisioned from miniOrange to Salesforce.
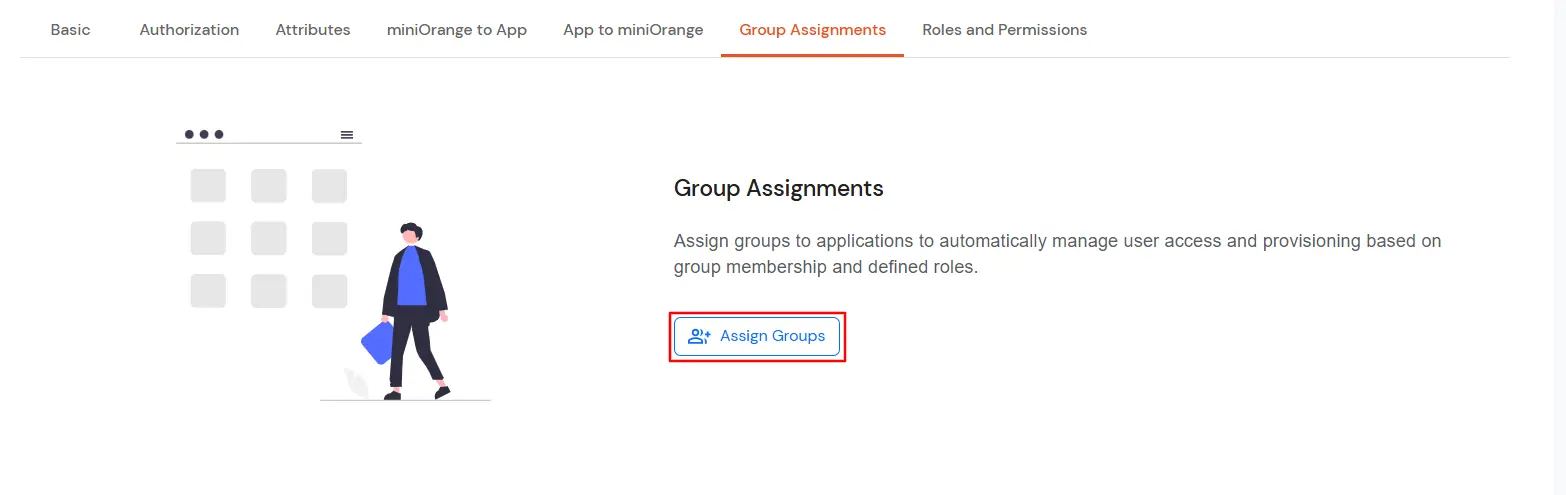
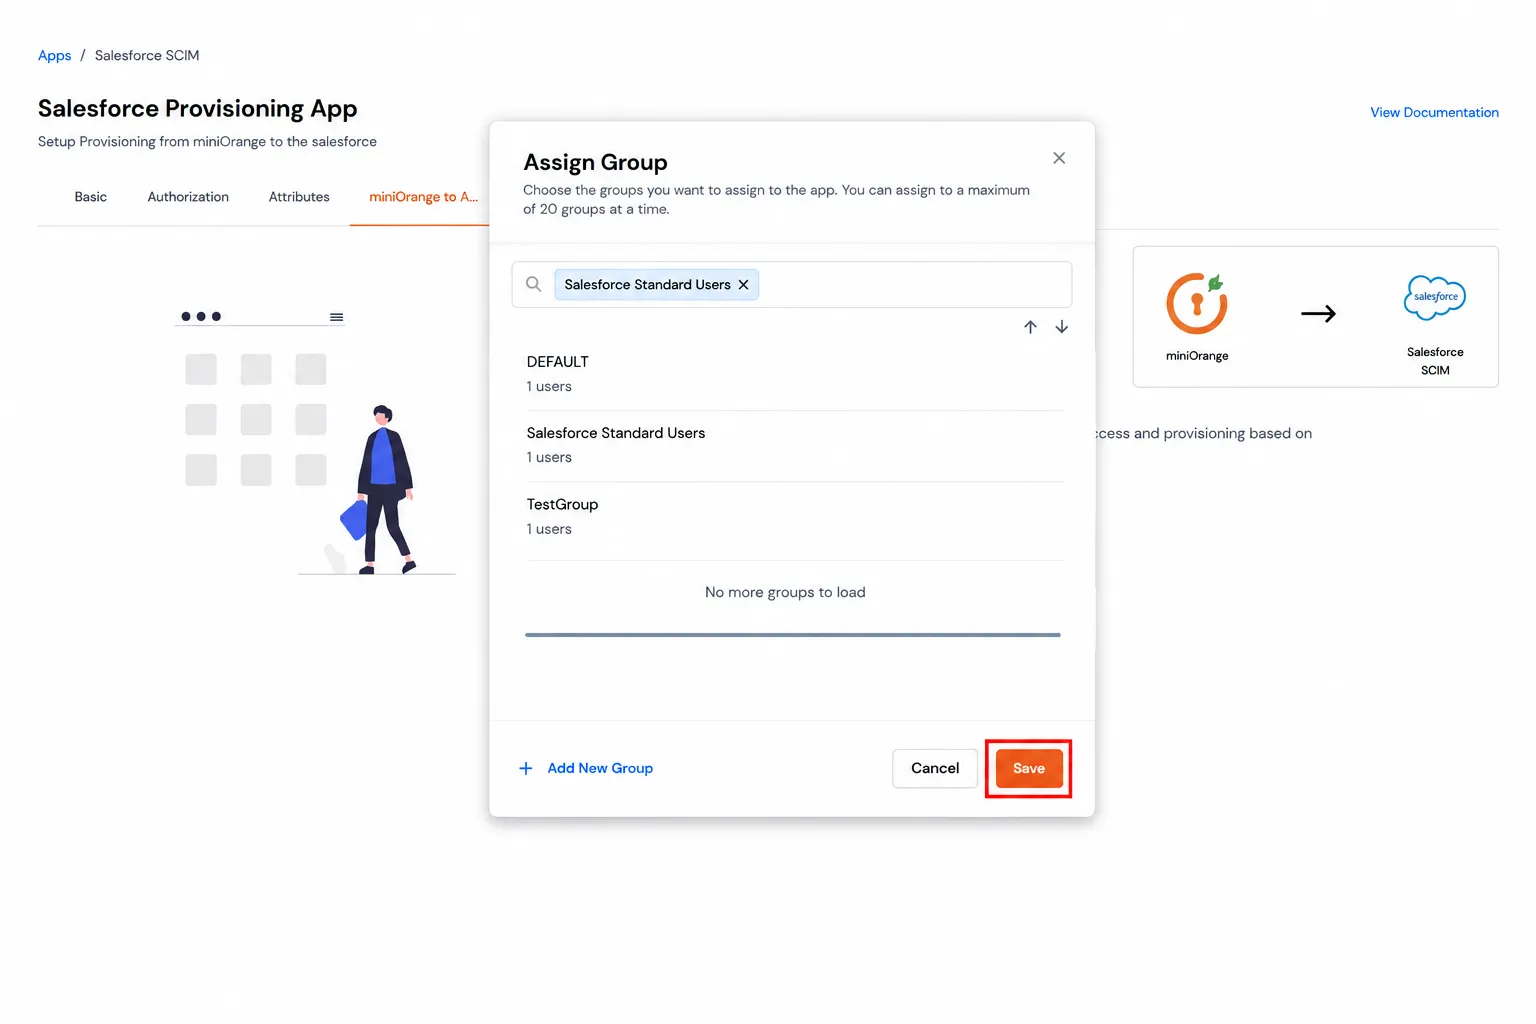
- Select groups that you want to provision and click on Save.
Create Users
- To create a user in miniOrange, Go to Users >> User List >> click on the Add User button.
- Fill out the user basic information and click on the Create User button.
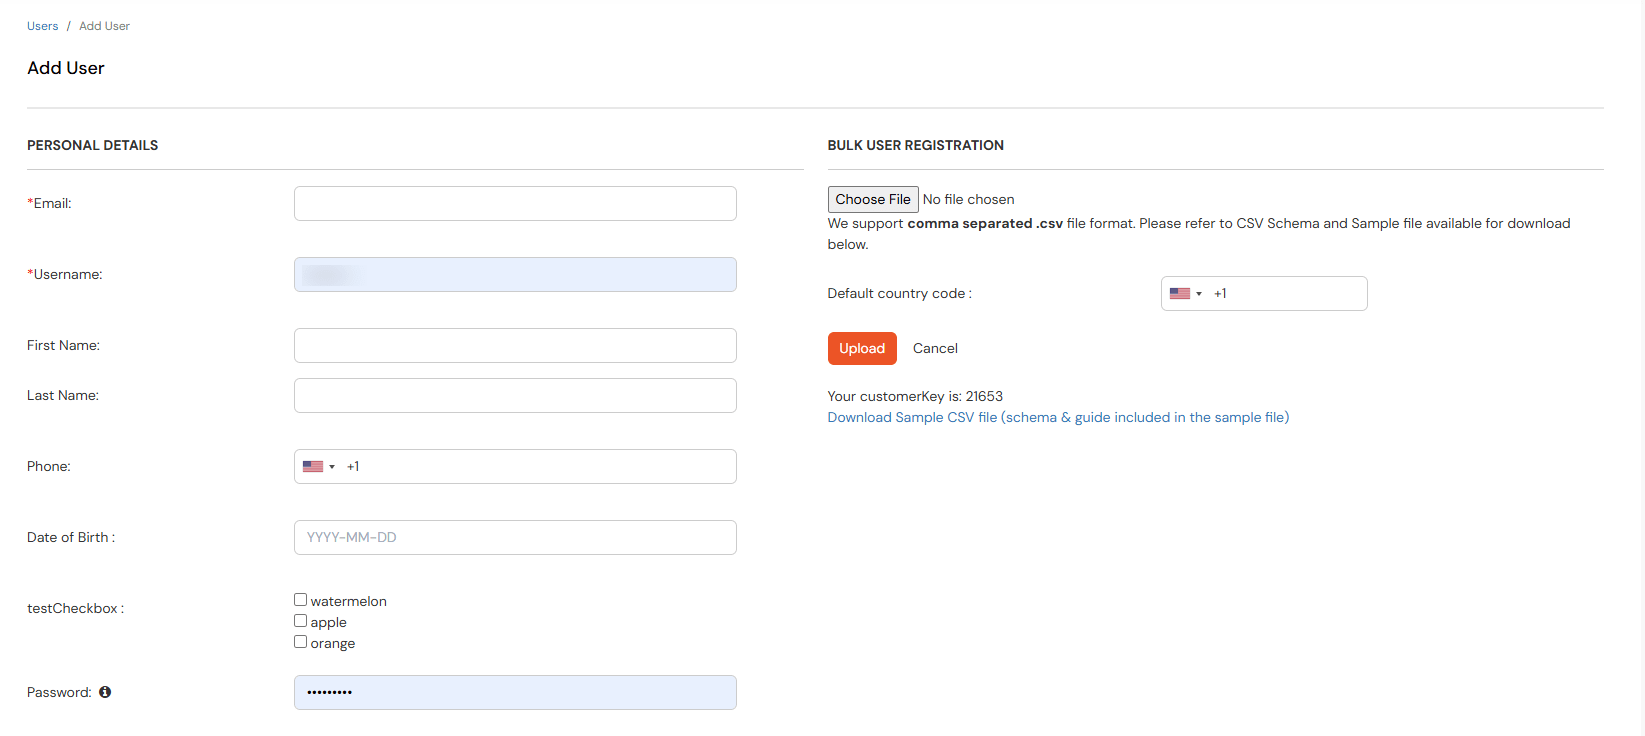
Note : It is mandatory to fill Entitlement for every user you have to provision to salesforce without the entitlement value user can’t be provisioned to salesforce.
To know Entitlement or Profile ID click here help.salesforce.com.
- After creating a user, Go to Groups >> Manage Groups.
- Select a group that you have added in Group Assignment and assign users to it.
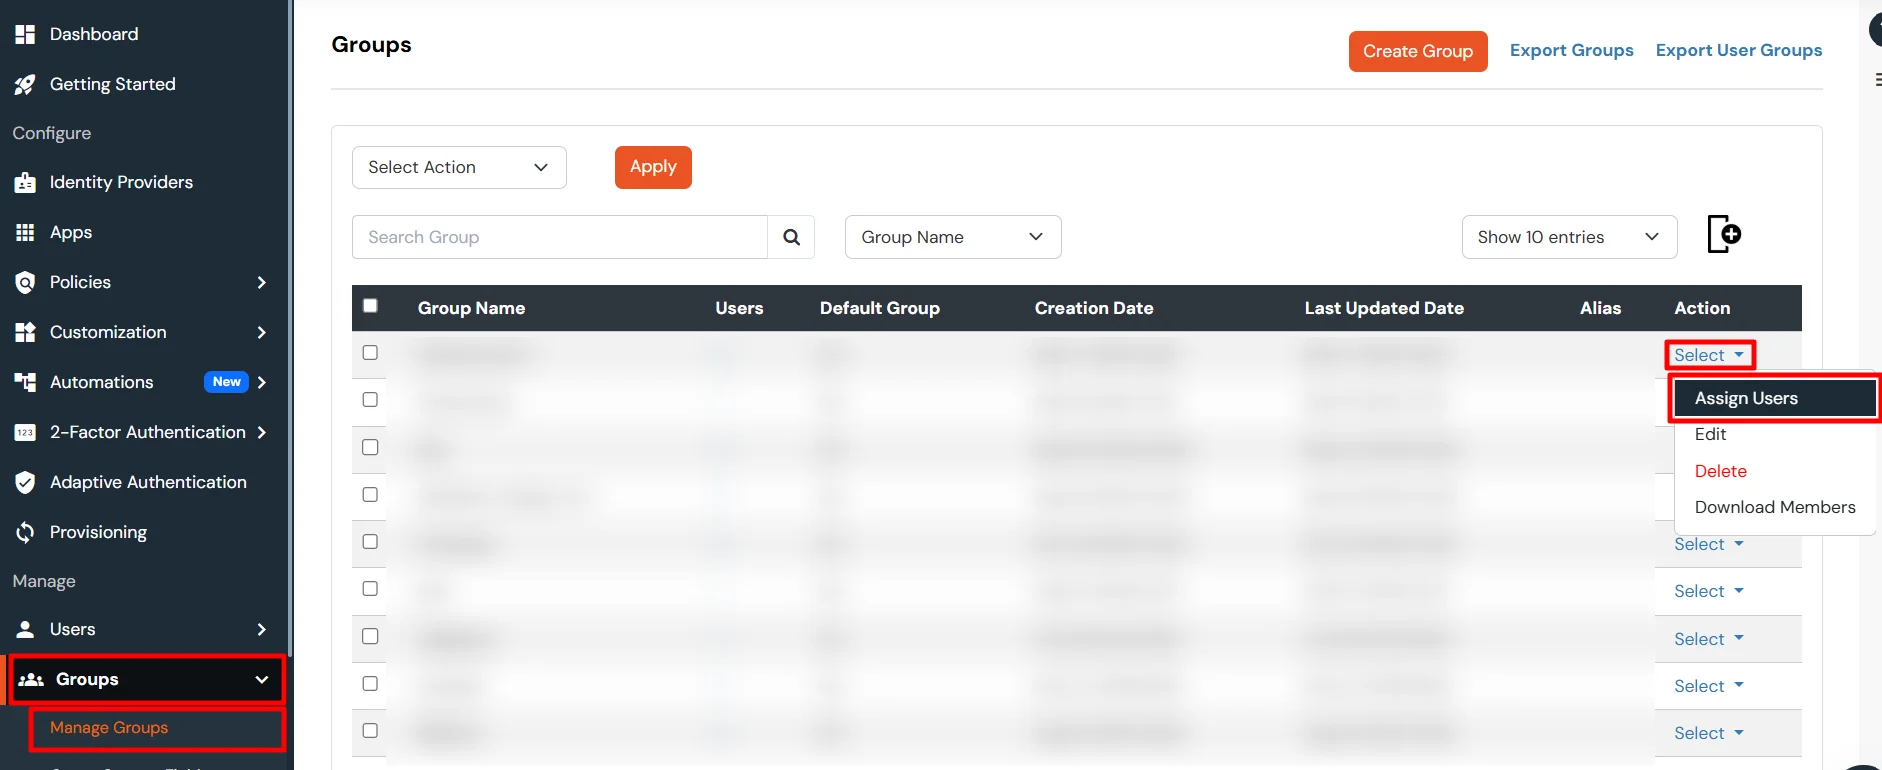
- After assigning a user into a group it will automatically create the same user in Salesforce.
Edit Users
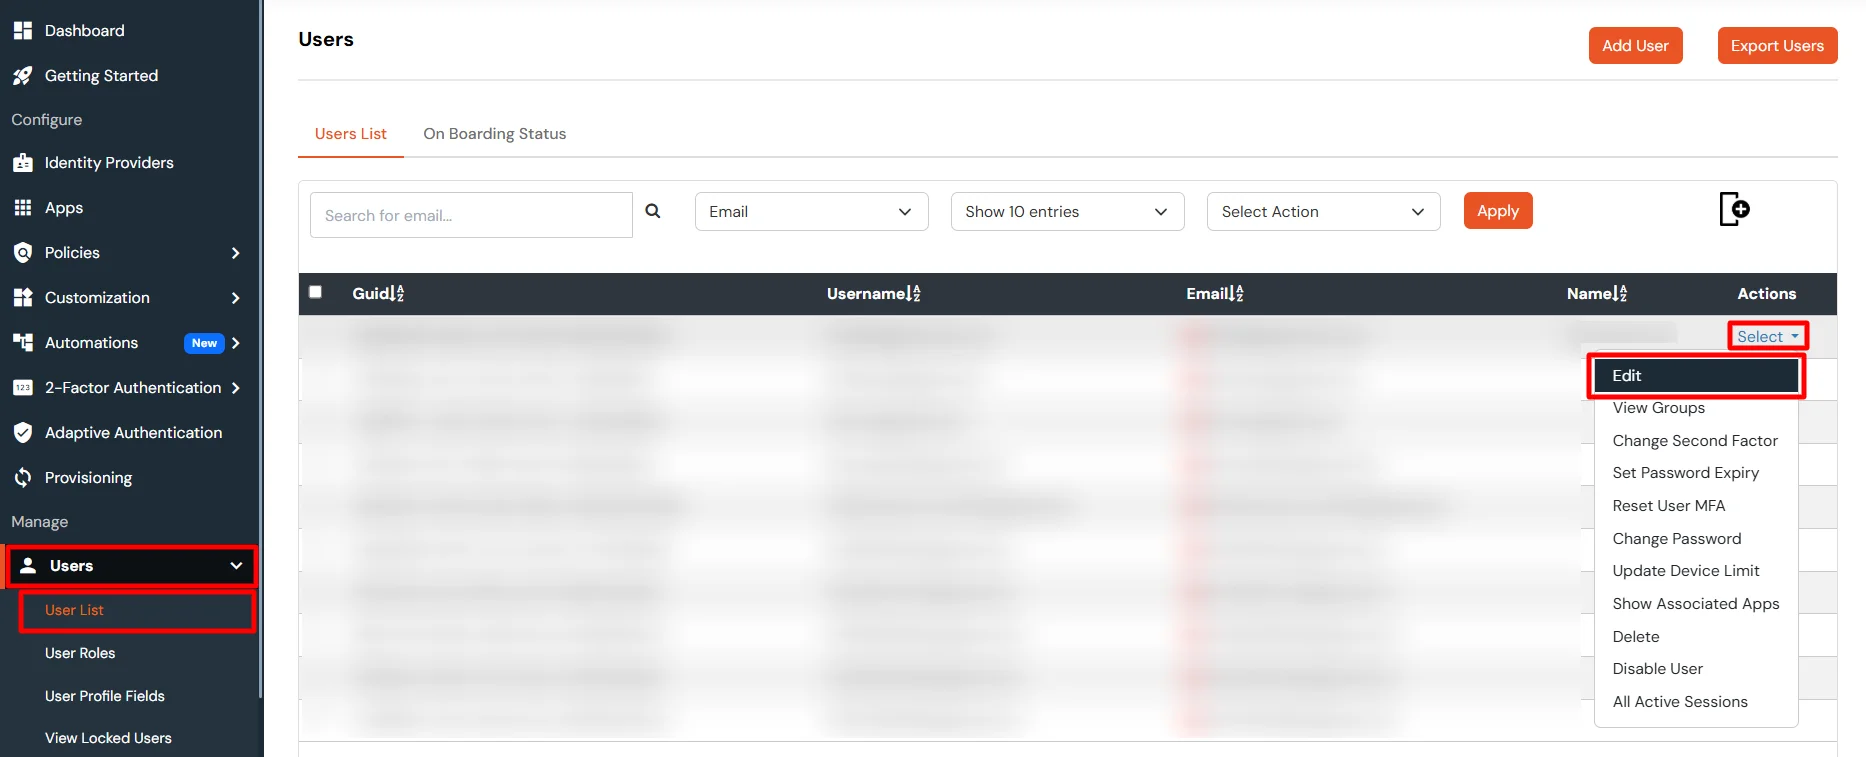
- To update the user profile, Go to Users >> User List.
- Select a particular user and in Actions dropdown select Edit.
- Fill out user updated information and click on Save button.
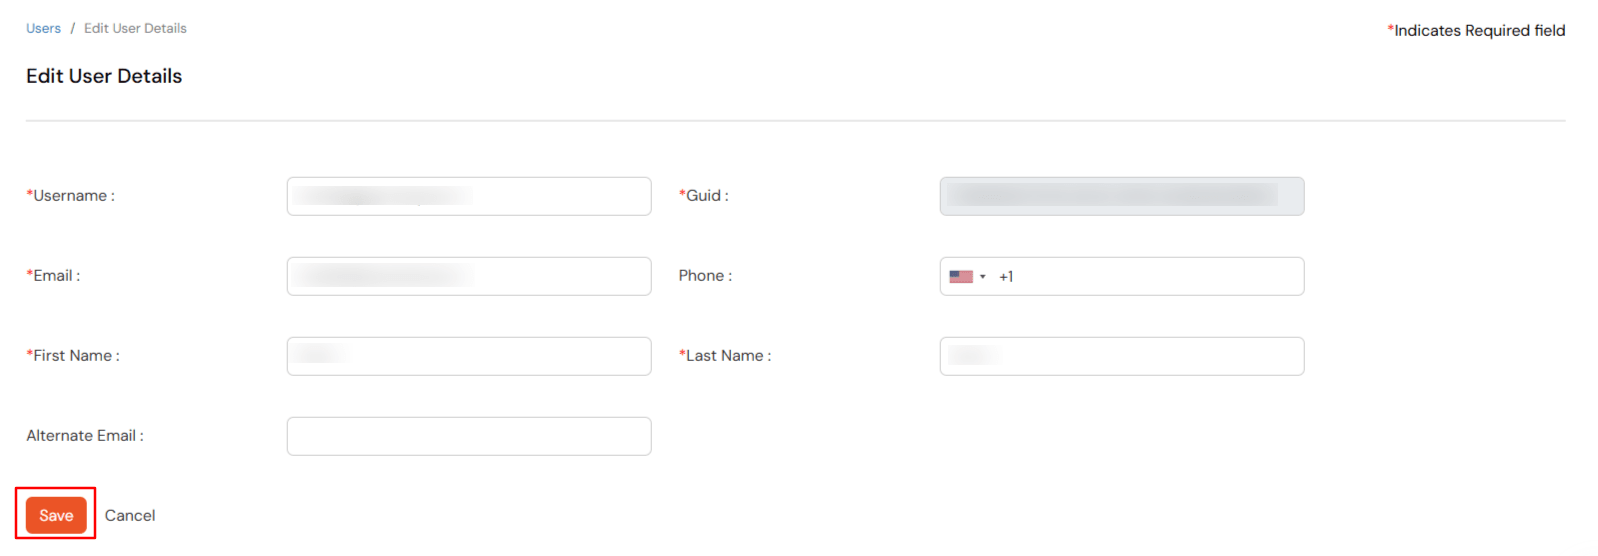
- Once the user profile is updated in miniOrange, the changes will be automatically reflected in Salesforce.
Delete Users
- To delete users, Go to Users >> User List.
- Select a particular user and in Actions dropdown select Delete.

- A pop up will appear when you click on the Yes button.
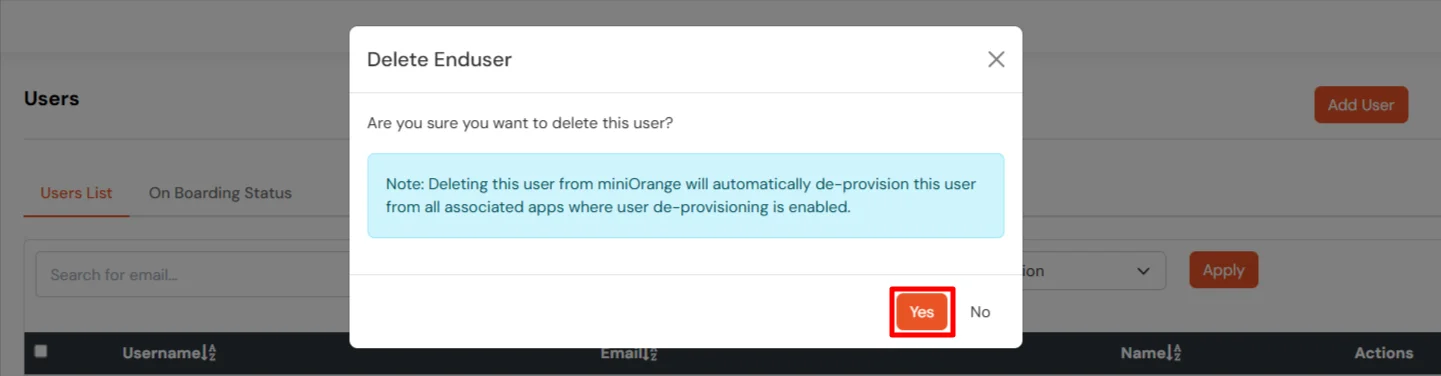
- Once the user is deleted in miniOrange, it will be automatically deleted from Salesforce.
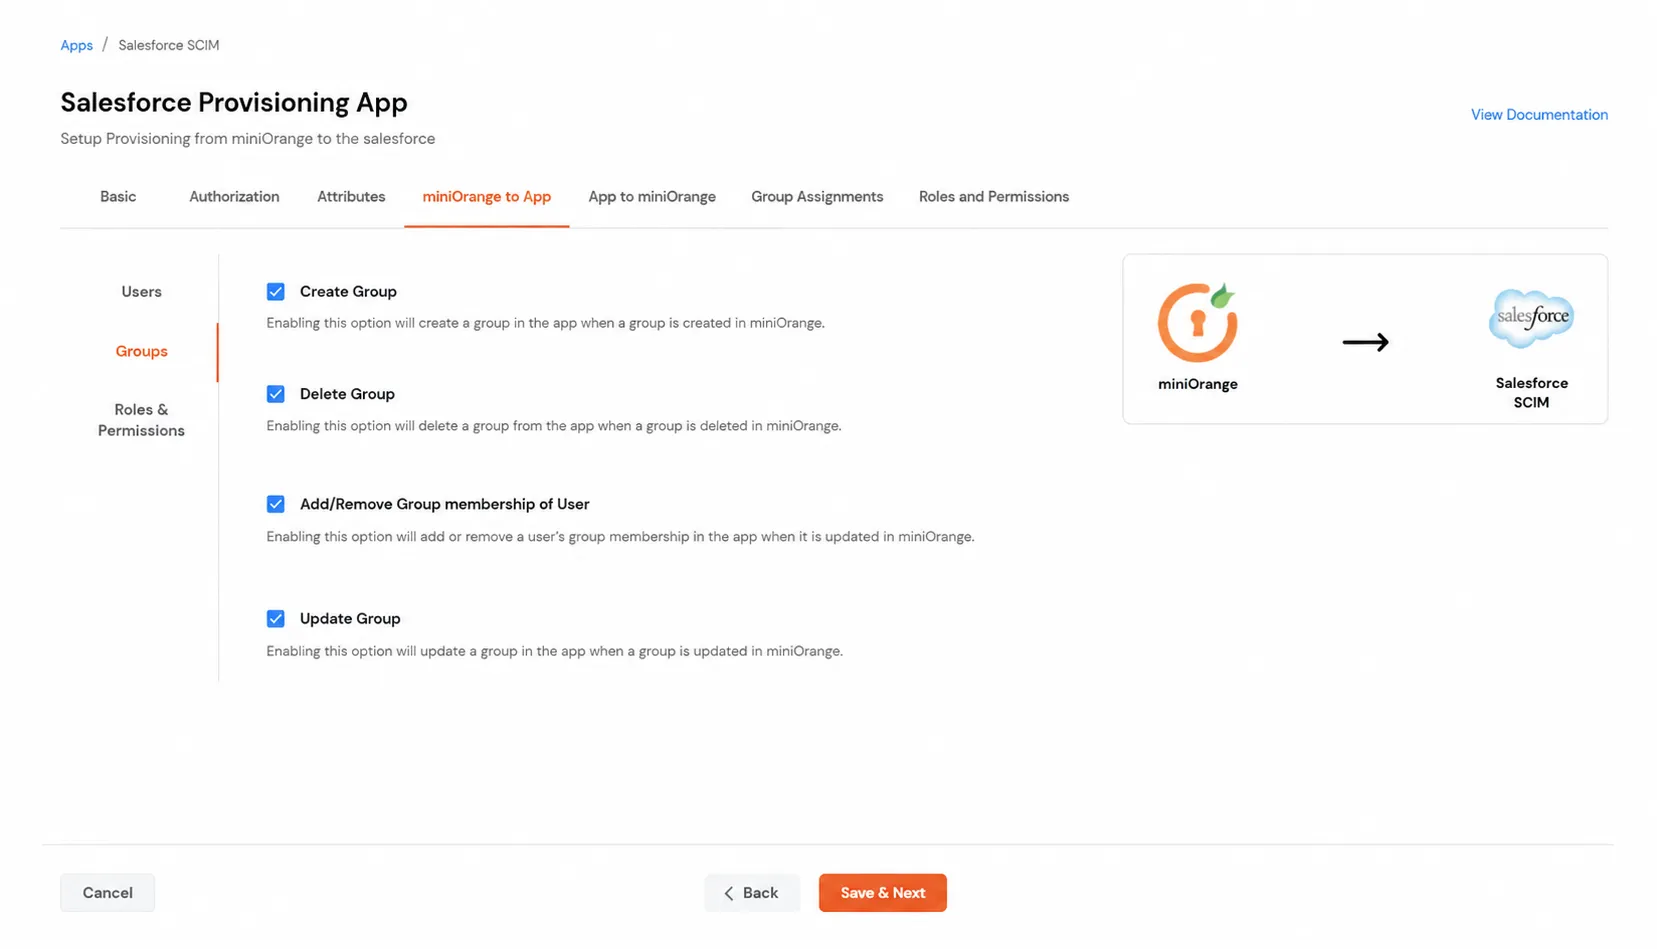
Create Group
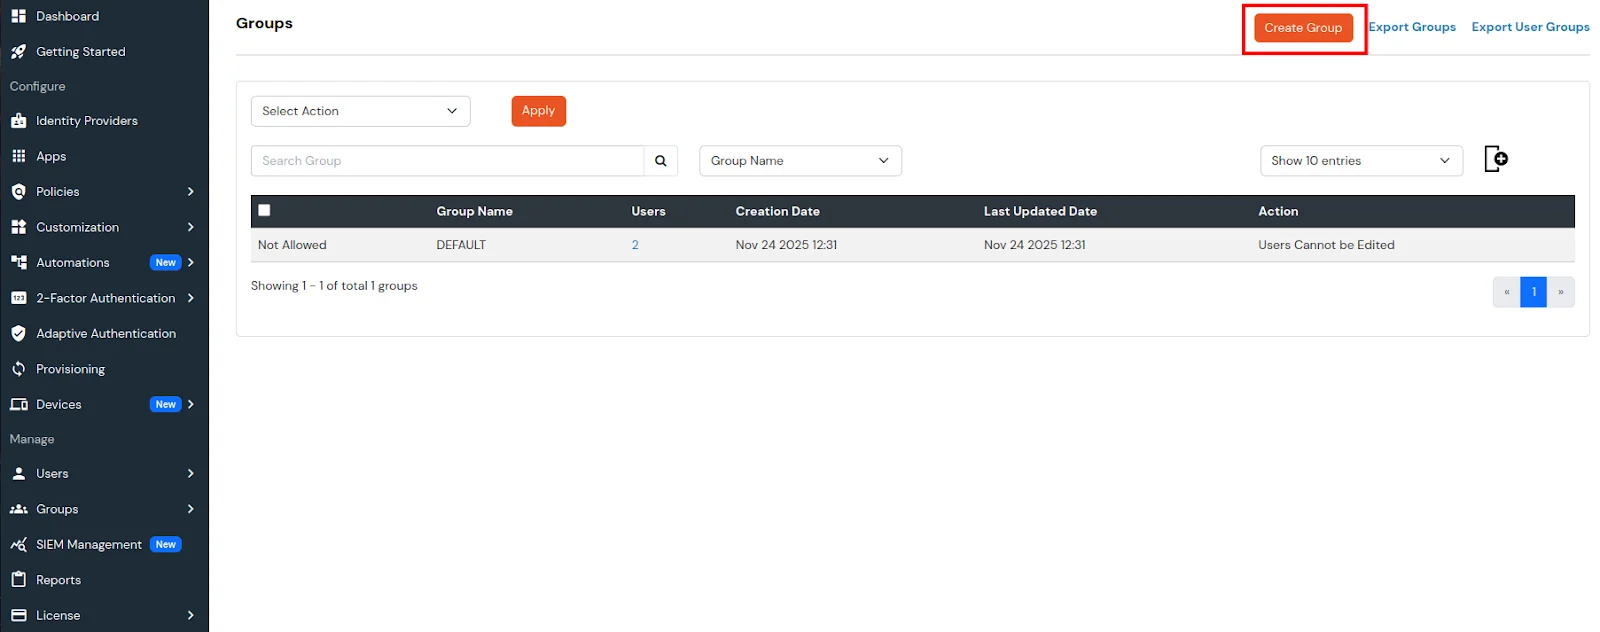
- To create a group, Go to Groups >> Manage Groups.
- Click on Create Group.
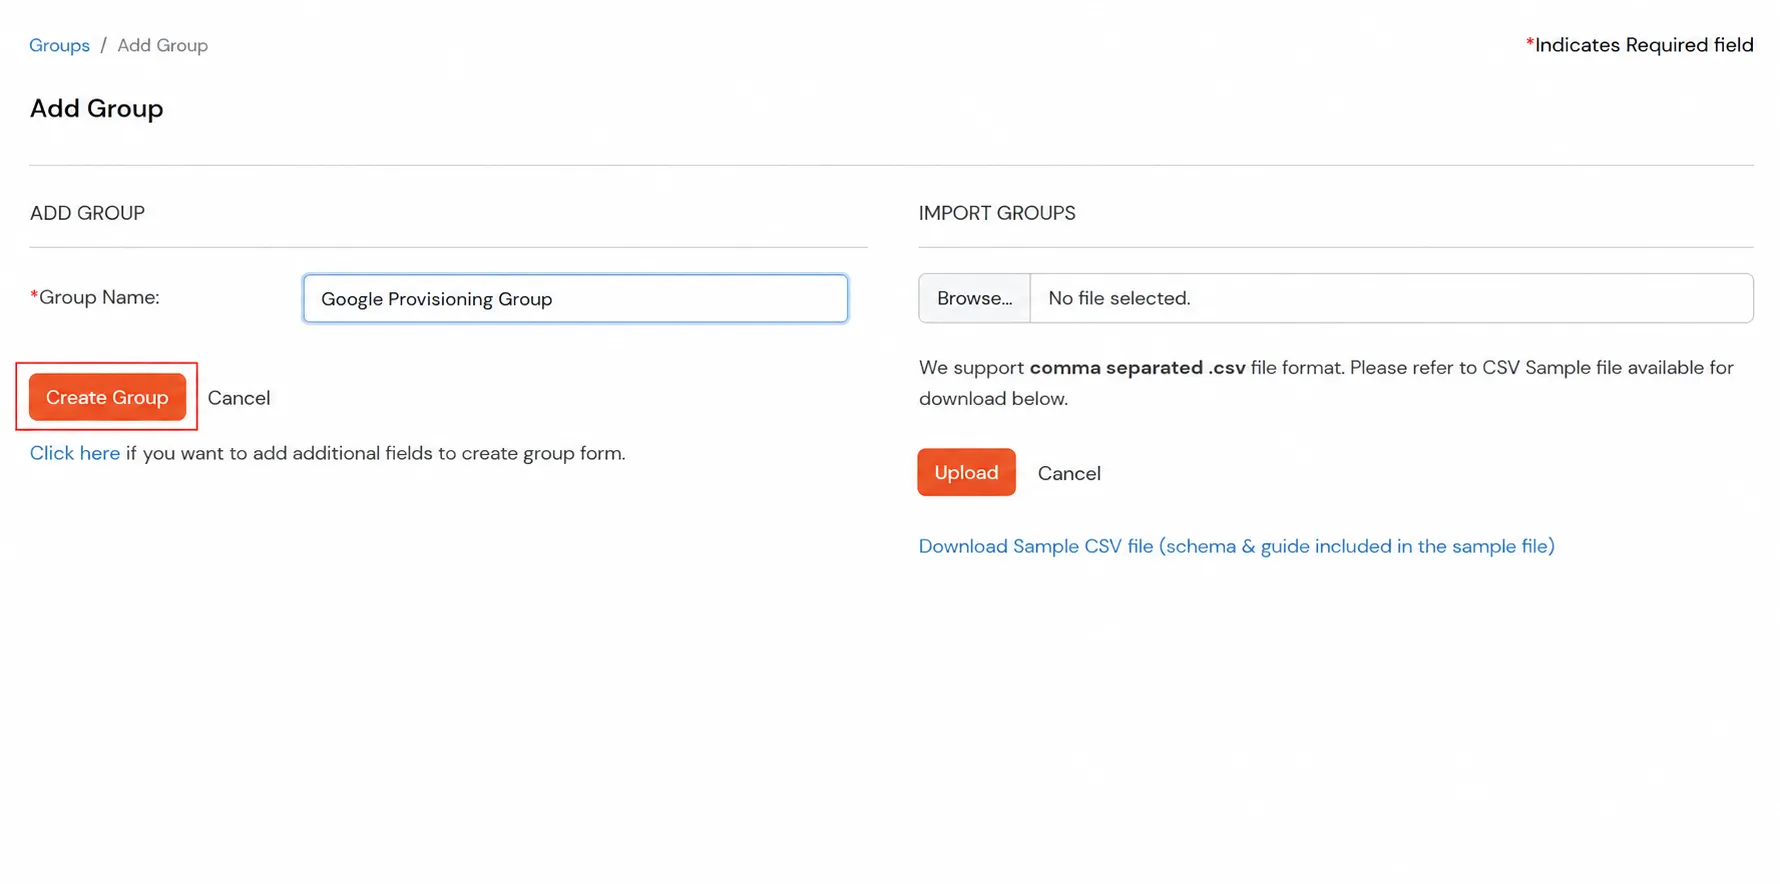
- Enter the group name and click on Create Group.
- Now go to Apps >> Select Salesforce Provisioning App Under action click on edit.
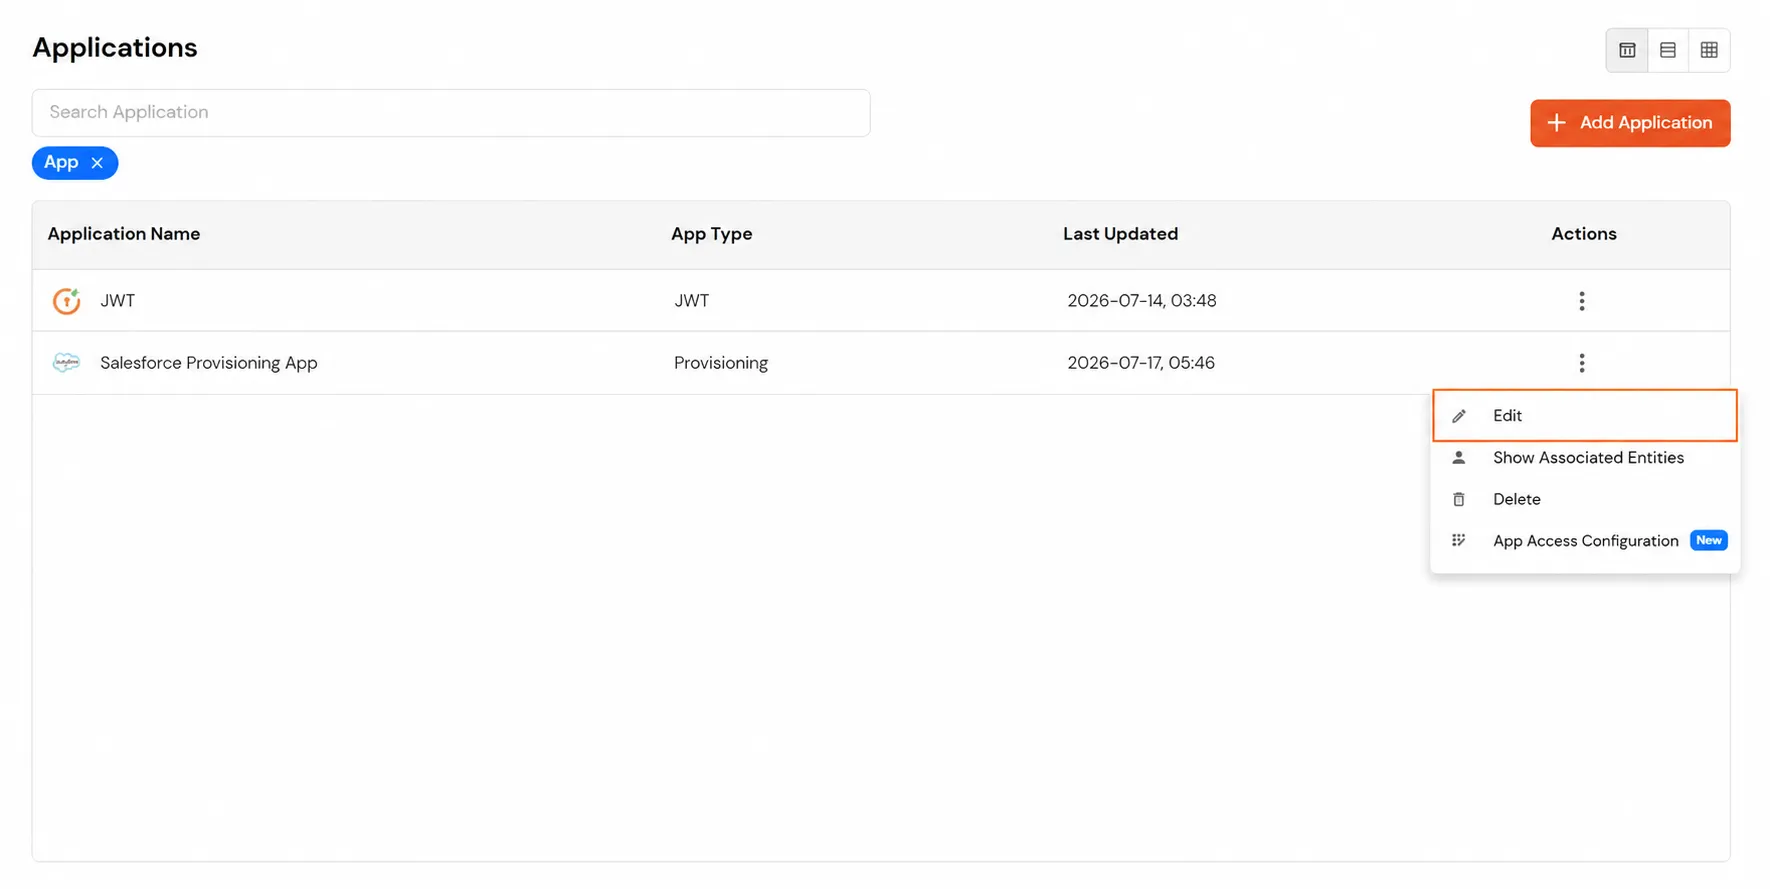
- Make sure you have enabled this Create Group Option.
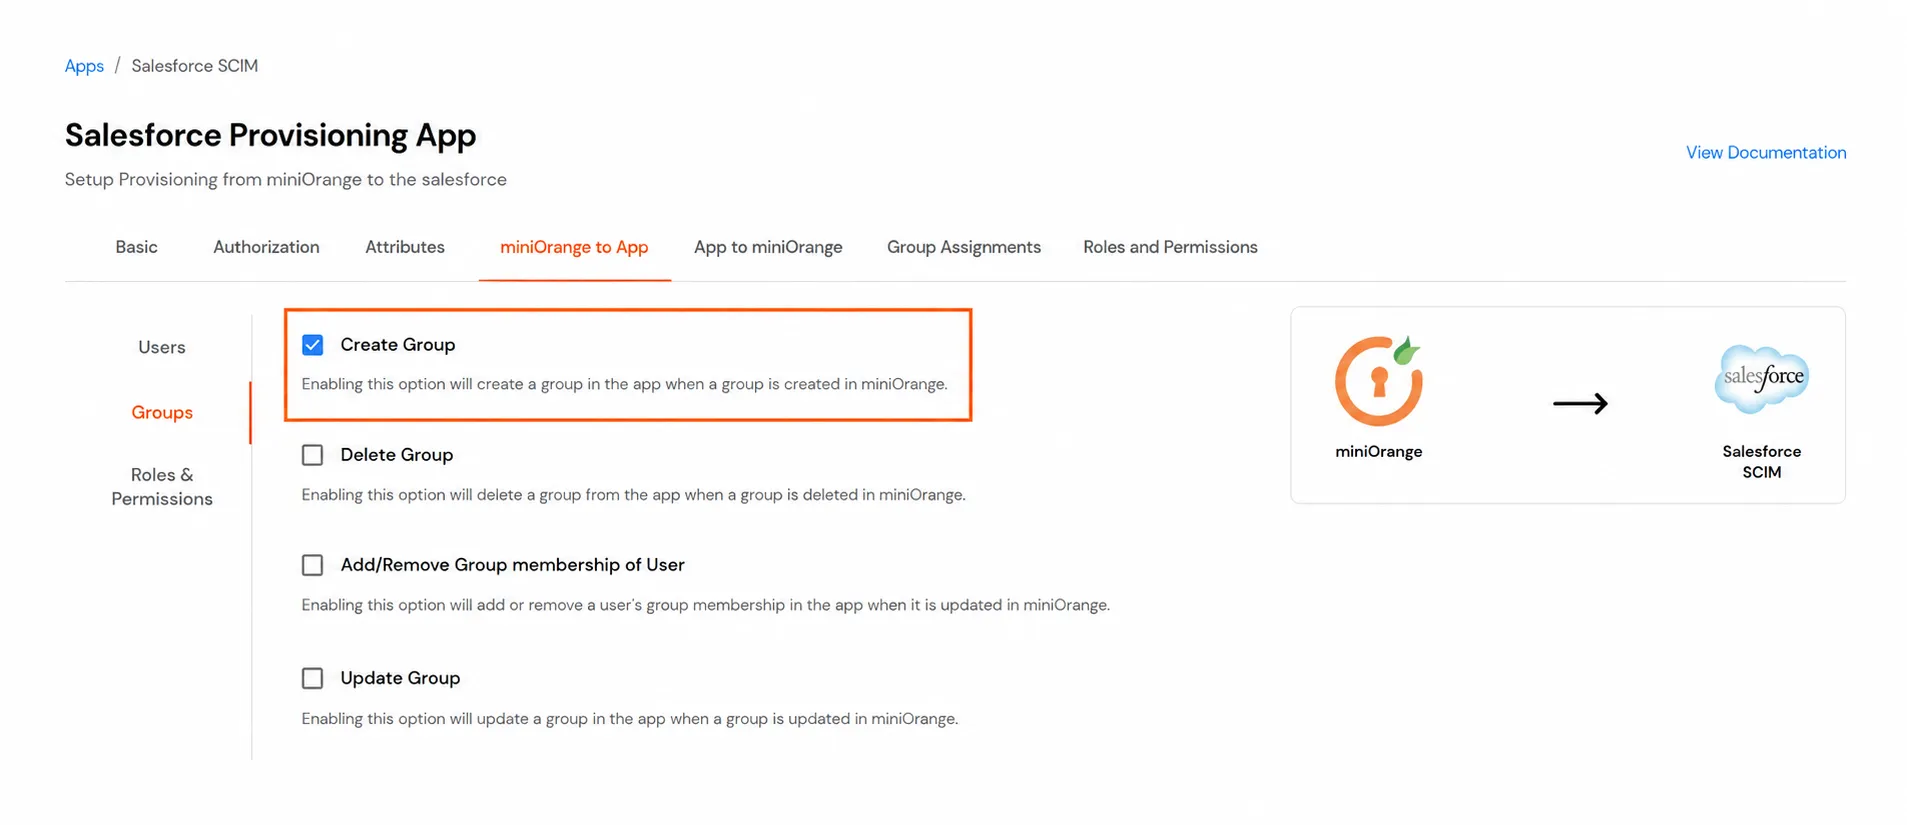
- Go to Group Assignments under that click on Assign Groups.
- Assign groups that you want to provision to salesforce and click on Save.
- Select the group and click on save.
- Now your group has been successfully provisioned to Salesforce.
Delete Group
- Make sure that you have enabled Delete Groups options in Salesforce Provisioning Apps.
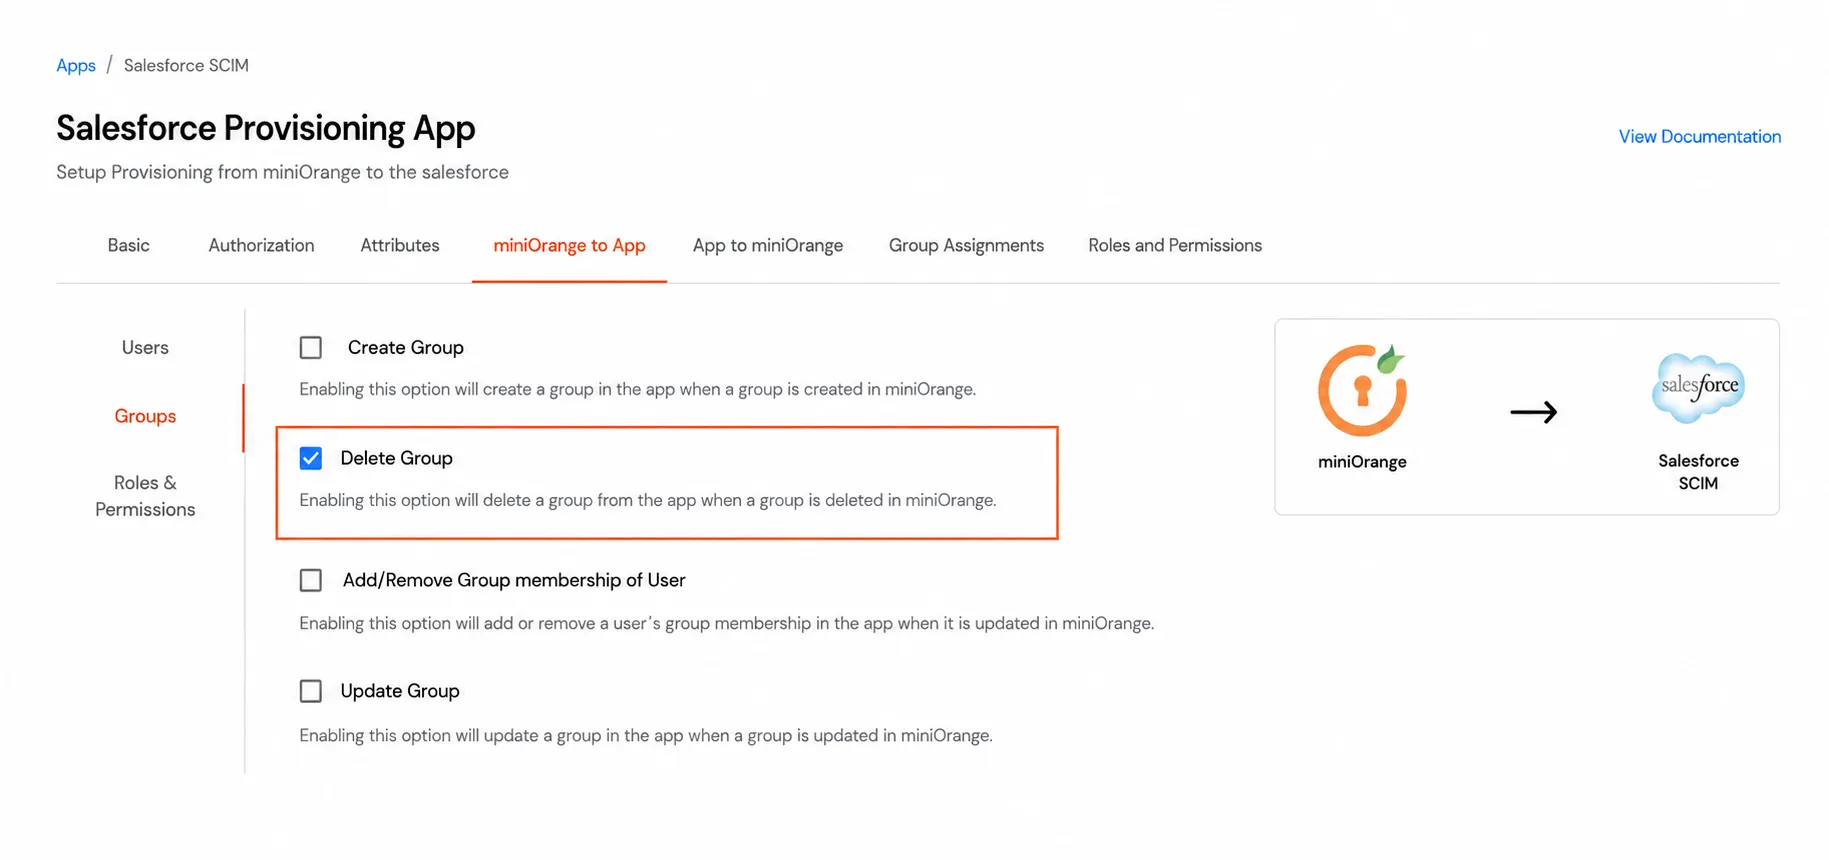
- Go to Groups >> Manage Groups.
- Delete the group that you want to delete from Salesforce.
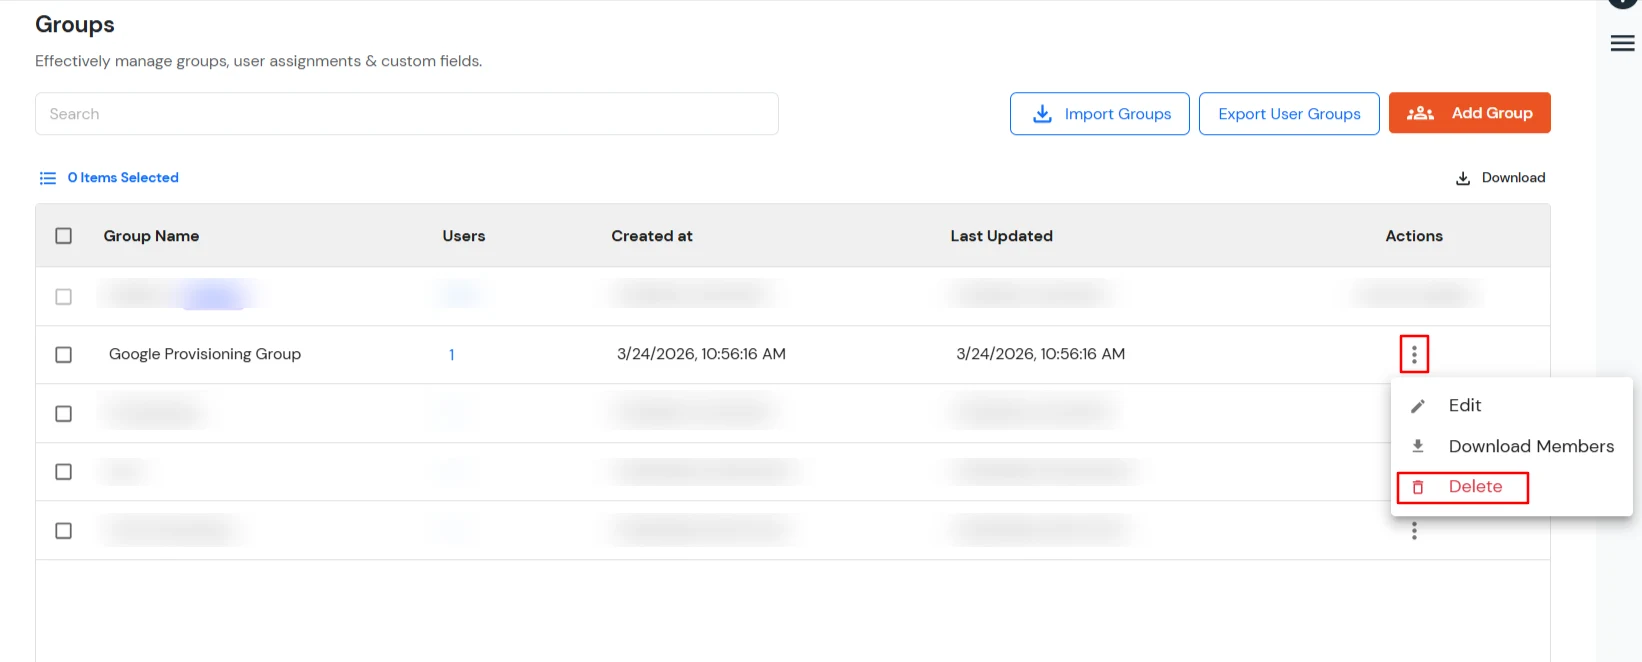
- Now your group has been successfully deleted from Salesforce.
Step 3: Importing Users from Salesforce to miniOrange (Inbound)
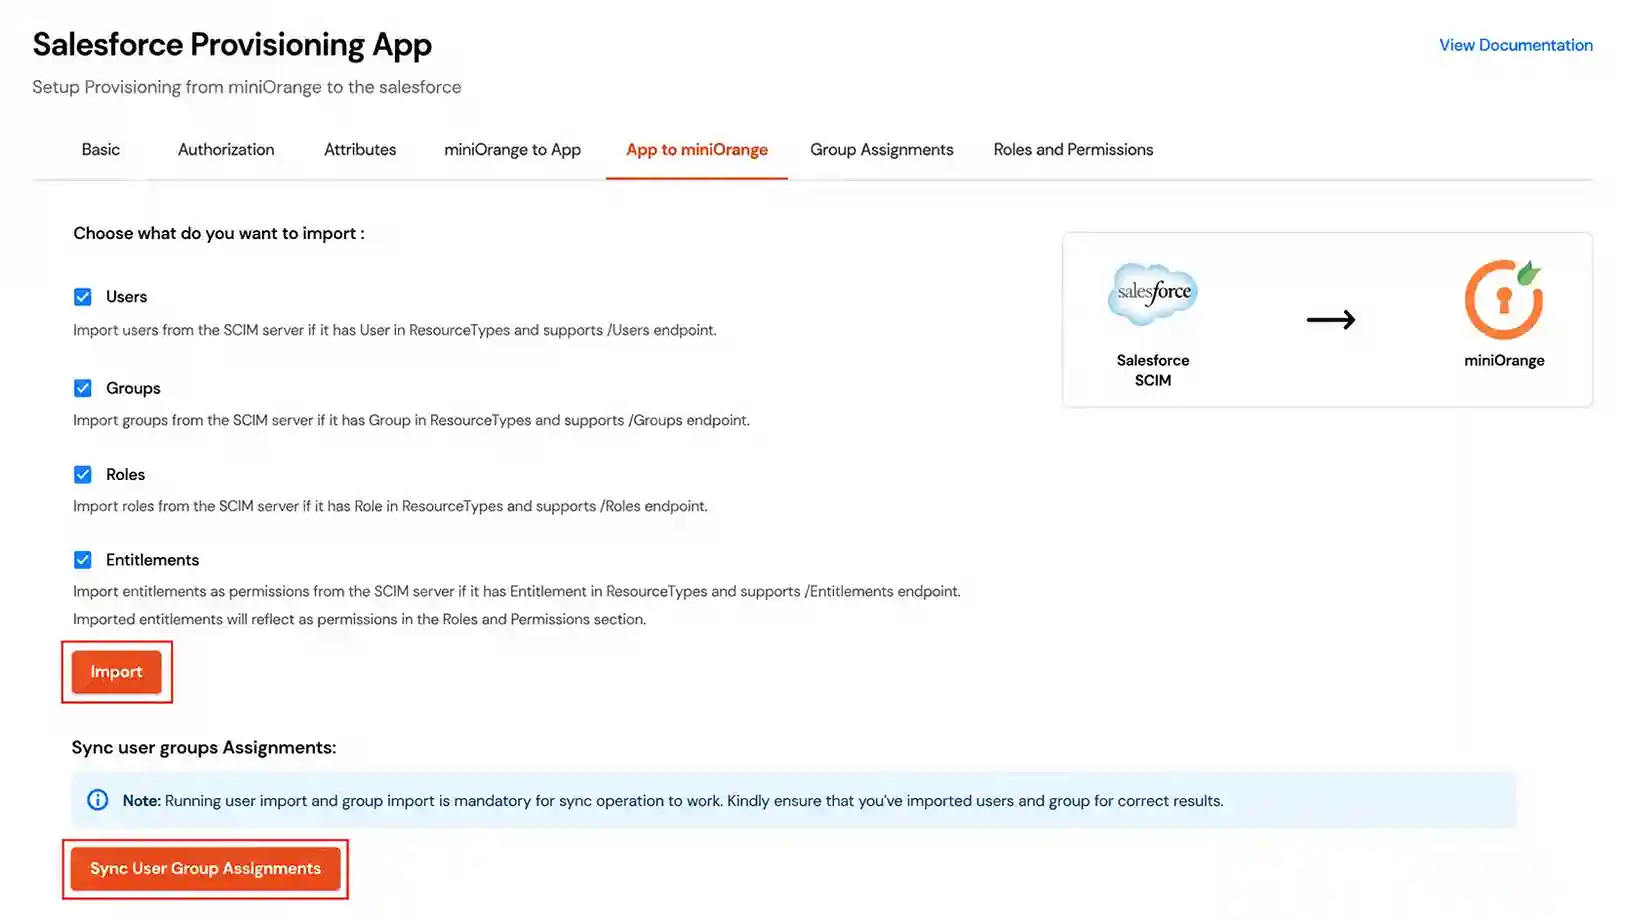
- Choose the objects you want to import from Salesforce.
- Check the required options and click on Import.
- Now users and groups are successfully imported to miniOrange.
- If you want to import users from groups, you can click on Sync User Group Assignments. Before doing this, make sure that the groups have already been imported.
4. Automatic Scheduled-Based Import
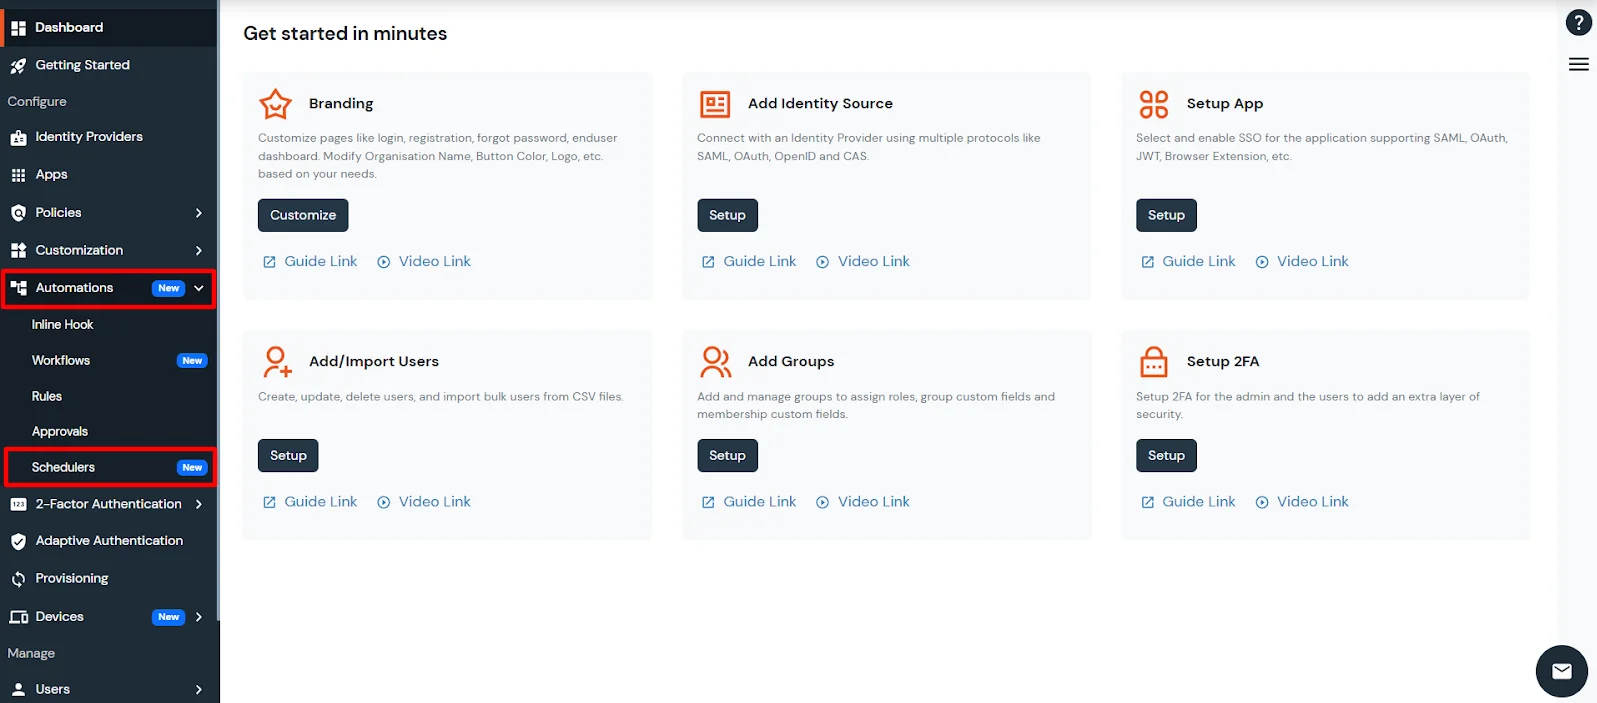
- Navigate to the Automations tab and open the Schedulers section.
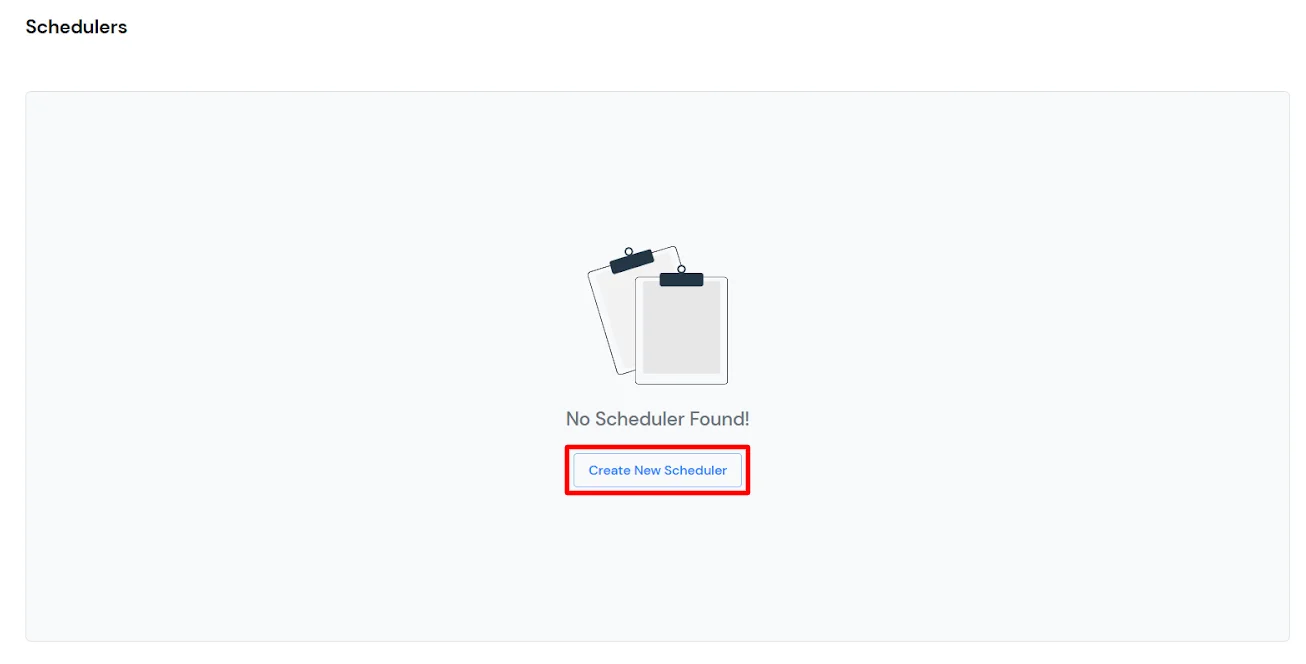
- To create a new scheduler, click on the Create New Scheduler button.
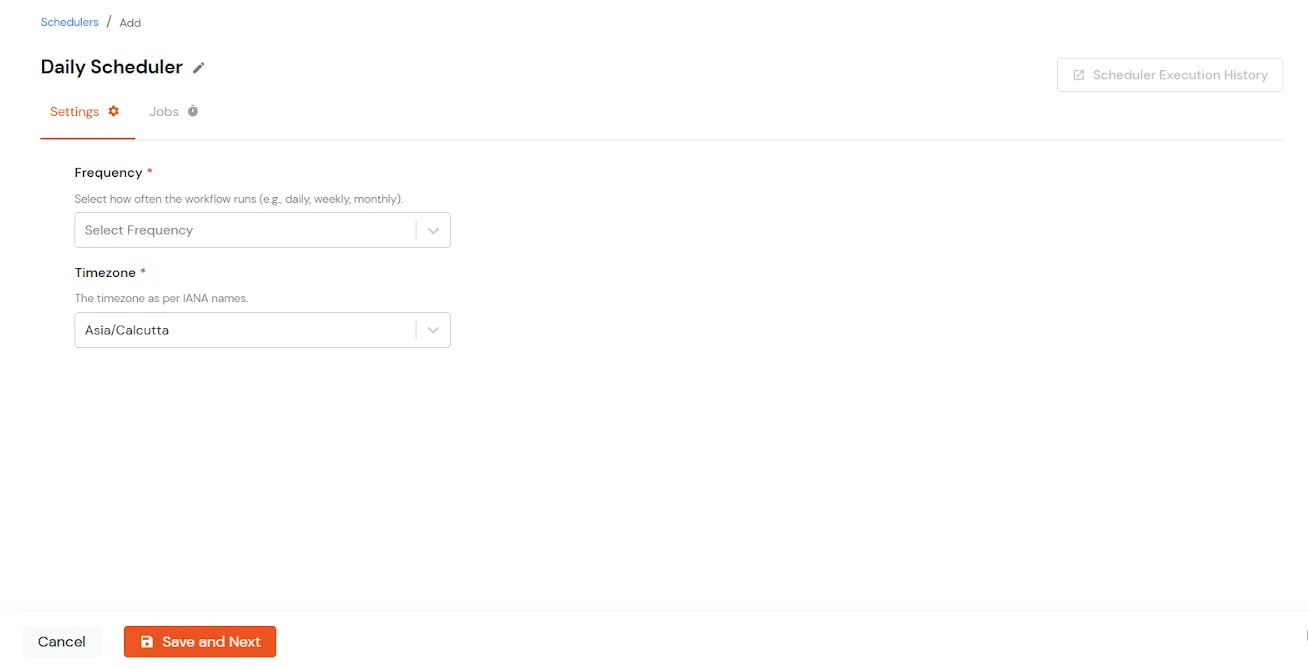
- Configure the Scheduler Settings by choosing the frequency (Once, Hourly, Daily, Weekly, Monthly).
- Specify the associated scheduling details and select the Timezone in which the scheduler should run.
- Once configured, click Save and Next.
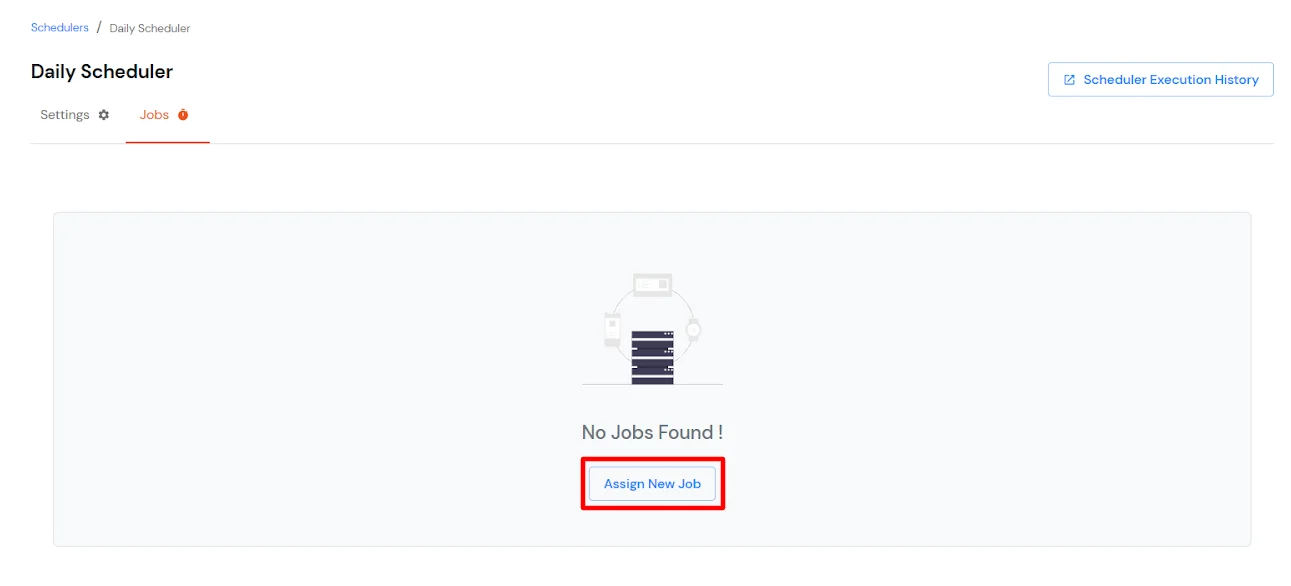
- The next step is to configure the Job and assign it to the scheduler that was created by clicking on the Assign New Job button.
- Choose the application from which the import needs to be performed, along with the job task required (Import the users, groups or user group assignments).
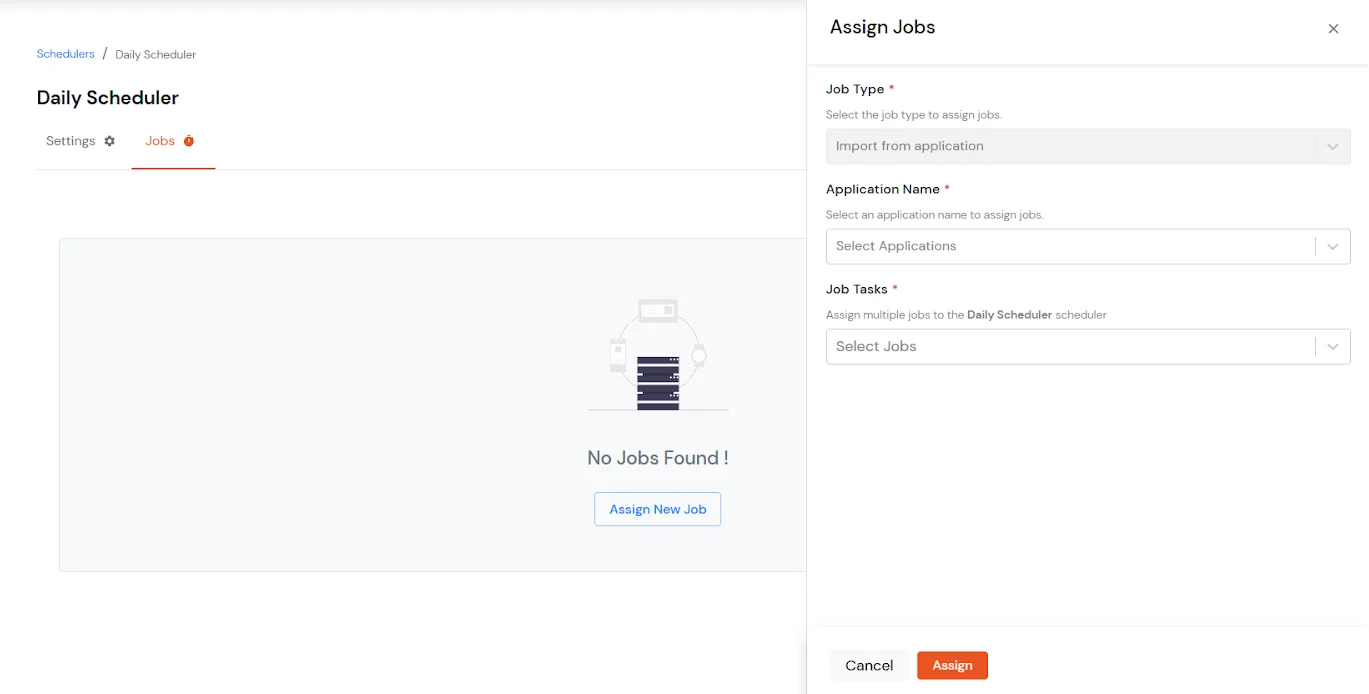
- Then click on the Assign button.
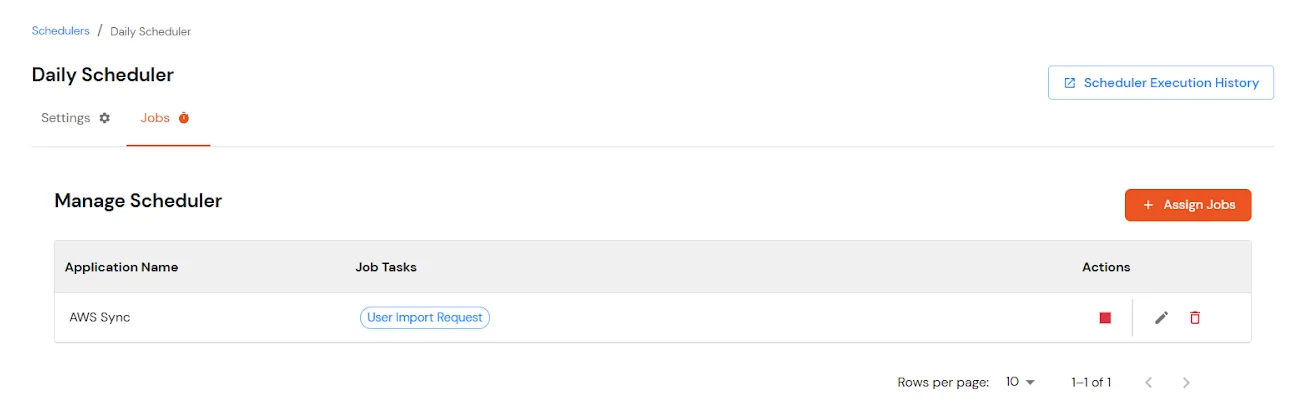
Note: If you want to import data from multiple applications, you can assign multiple jobs to the same scheduler.
- Once the configuration is complete, automated scheduled imports will run based on the defined schedule.
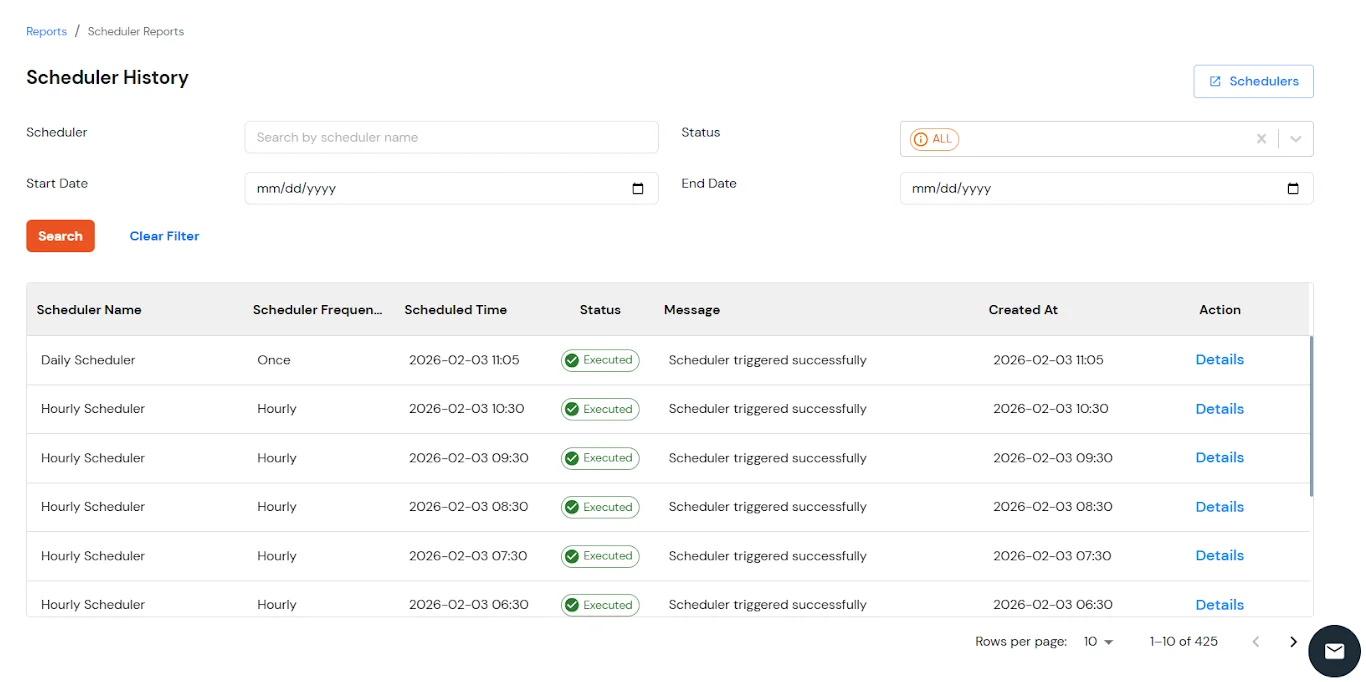
- To view scheduler execution details, navigate to Reports from the left menu and scroll down to check the Scheduler History.
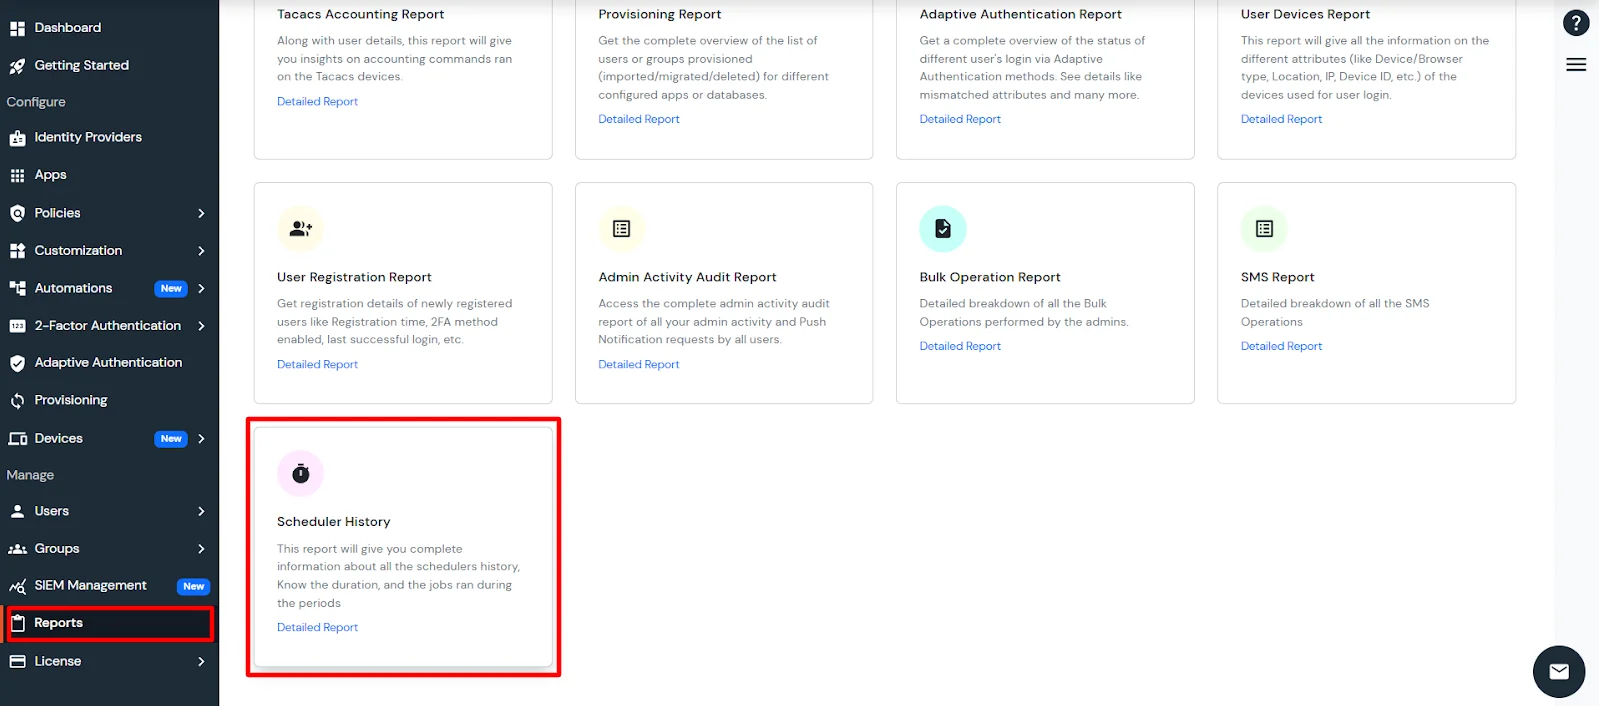
- This report will give you complete information about all the scheduler's history. Know the duration and the jobs that ran during the periods:
View Provisioning Reports
How to access Provisioning Reports?
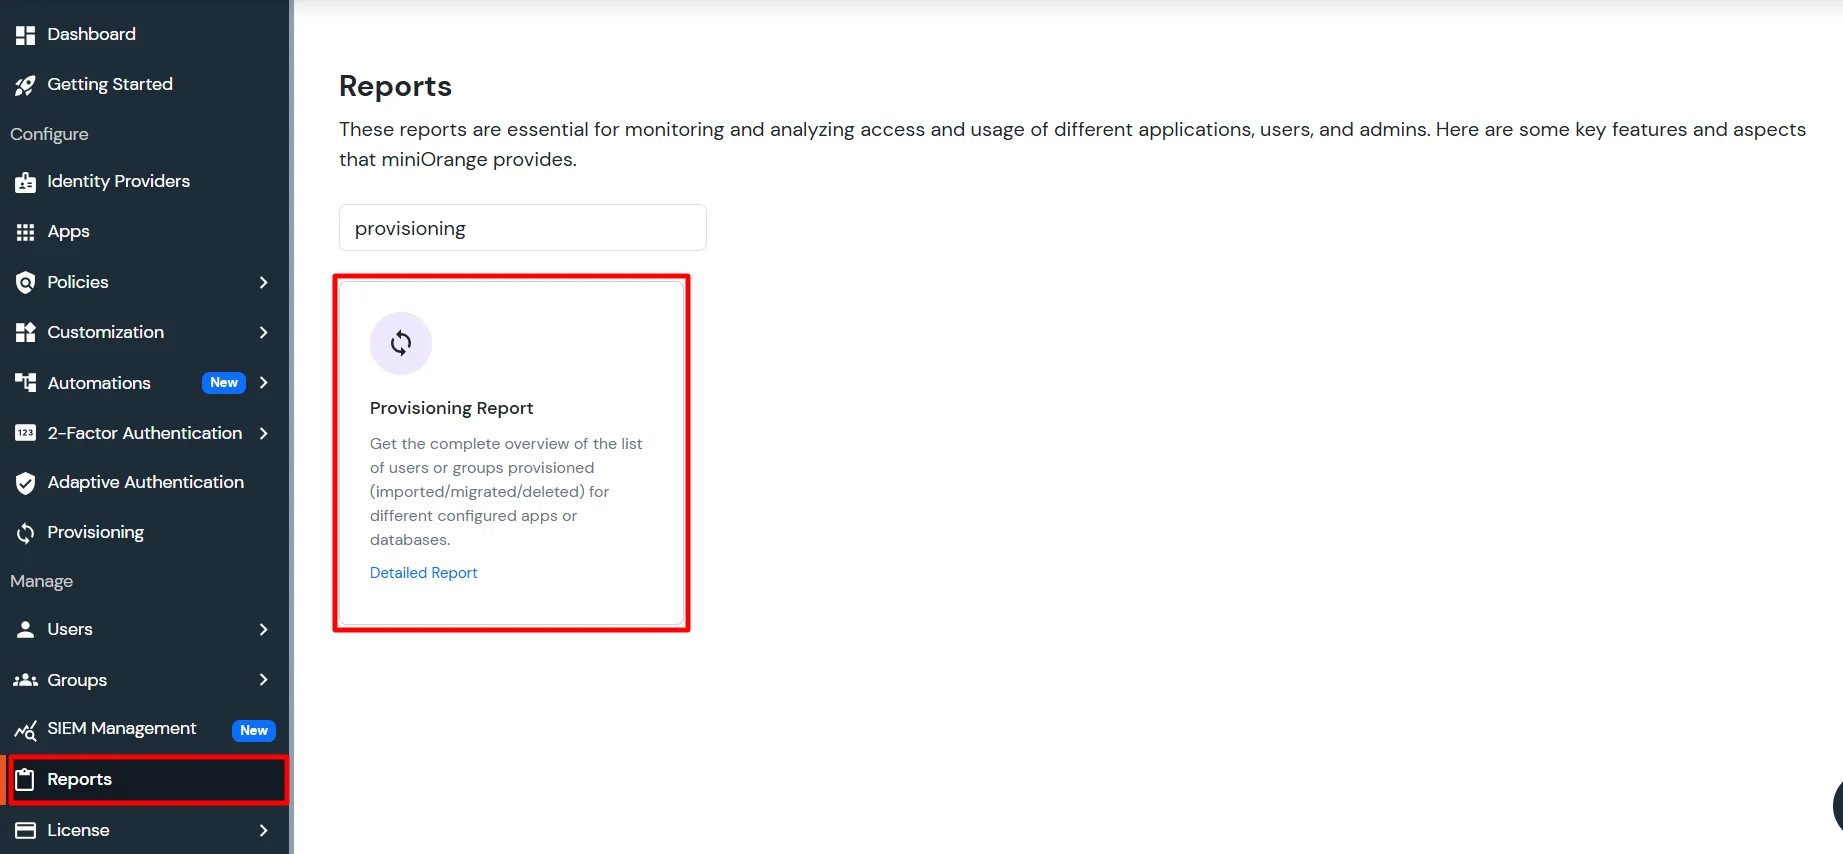
- Navigate to Reports in the left-hand navigation pane, search for Provisioning, and select Provisioning Report.
- Filter the reports by specifying Enduser Identifier and Application Name criteria. Additionally, choose the desired timespan for the reports. Once done, click on the Search.
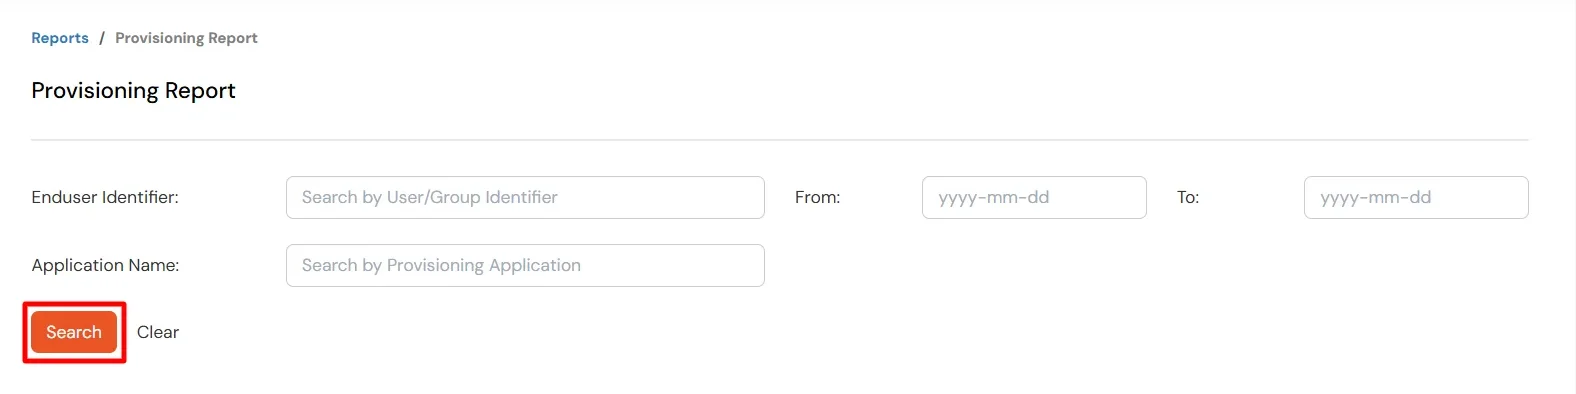
- Alternatively, you can directly click on Search to retrieve all provisioning reports based on time without applying any specific filters.
External References