Microsoft Entra ID (Azure AD) Provisioning
Microsoft Entra ID provisioning automates the process of creating, updating, and deprovisioning user accounts across applications. Using SCIM, organizations can synchronize users, groups, and attributes between Microsoft Entra ID and connected applications, reducing manual user management and improving identity lifecycle management.
Formerly known as Azure AD provisioning, Microsoft Entra ID provisioning helps IT teams automate user onboarding, attribute synchronization, and offboarding. This guide walks you through how to configure Microsoft Entra ID SCIM provisioning, set up the SCIM connection, map user and group attributes, enable deprovisioning, and verify the provisioning workflow.
Provisioning & Deprovisioning Scenarios
miniOrange provides Provisioning solutions for all scenarios of user management (provisioning), which includes AD Integration, LDAP Integration and automated provisioning for all External Applications such as Microsoft Entra ID SCIM, Google Workspace, Workday, etc
Follow the Step-by-Step Guide given below to setup Microsoft Entra ID SCIM Provisioning
1. Add SCIM Configuration for Microsoft Entra ID application in miniOrange
- Login into miniOrange Admin Console.
- Click on Apps from the left-side navigation bar. Then click on Add Application.

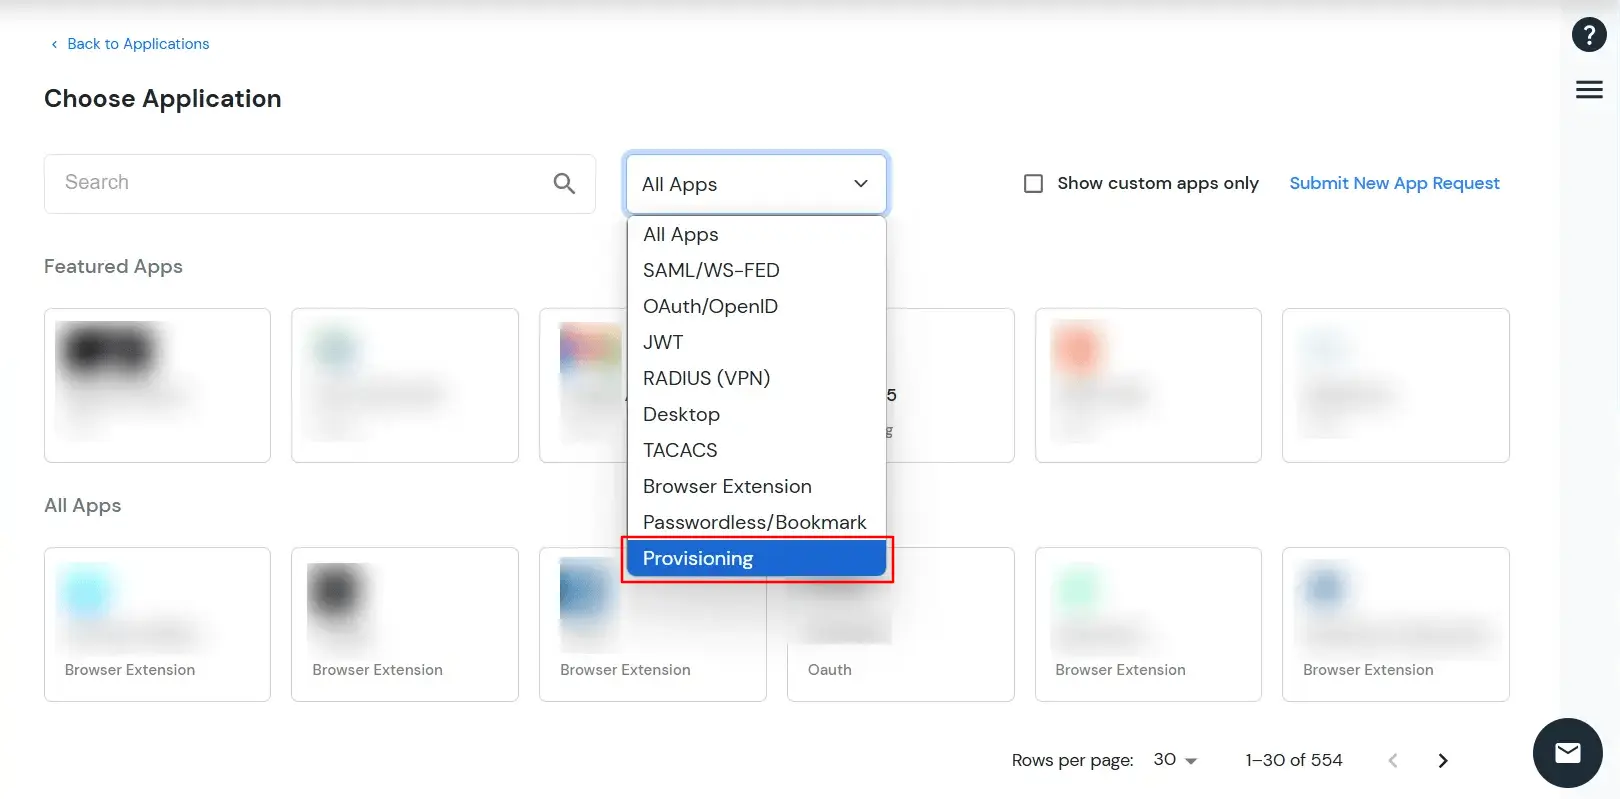
- In the Choose Application section, select Provisioning from All Apps dropdown.
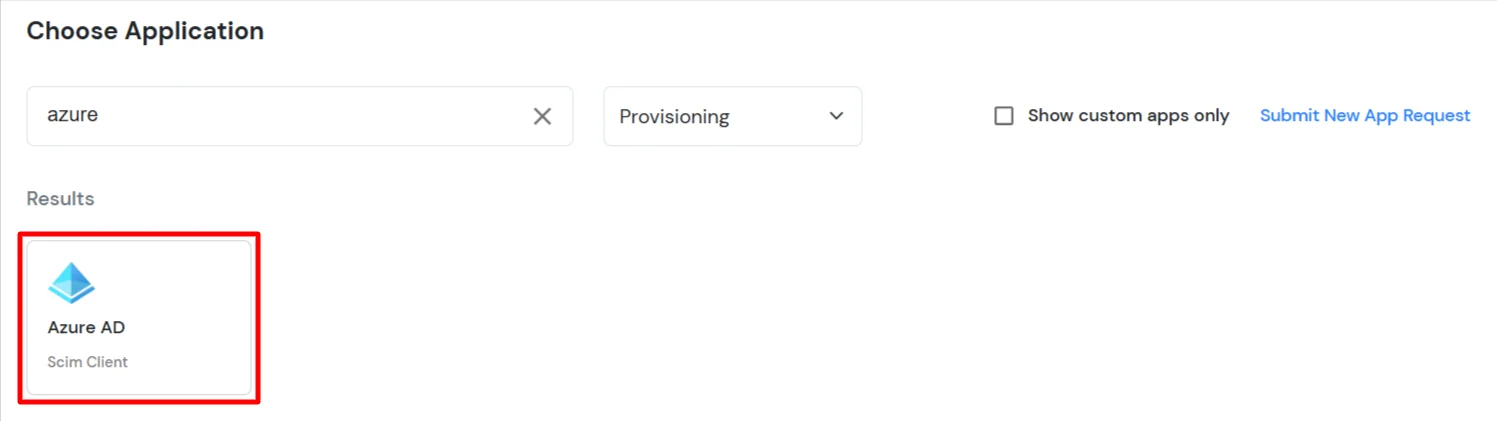
- Search for Azure in the search bar and select the Azure AD (Microsoft Entra ID) application.
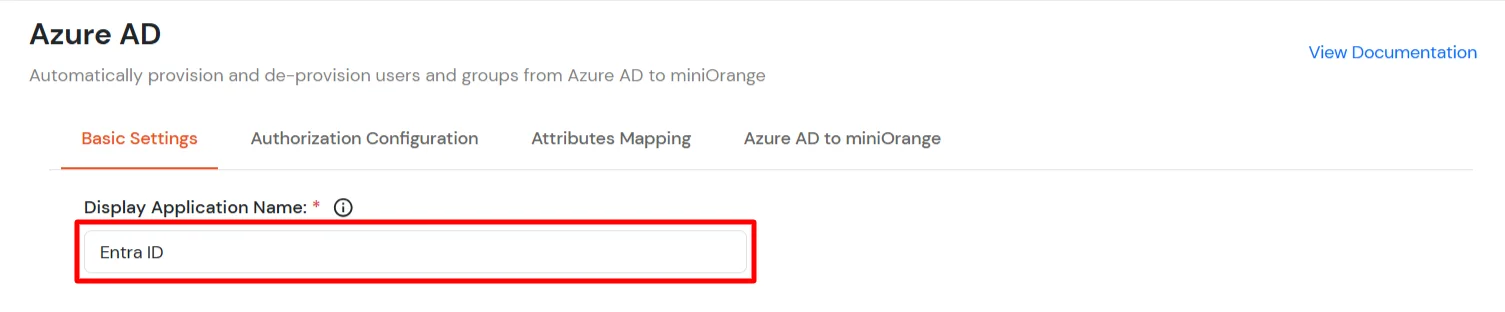
- In the Basic Settings tab, enter a Display Application Name and click Save.
- Switch to the Authorization Configuration, keep the SCIM Base URL and Bearer Token which will be used in this step.
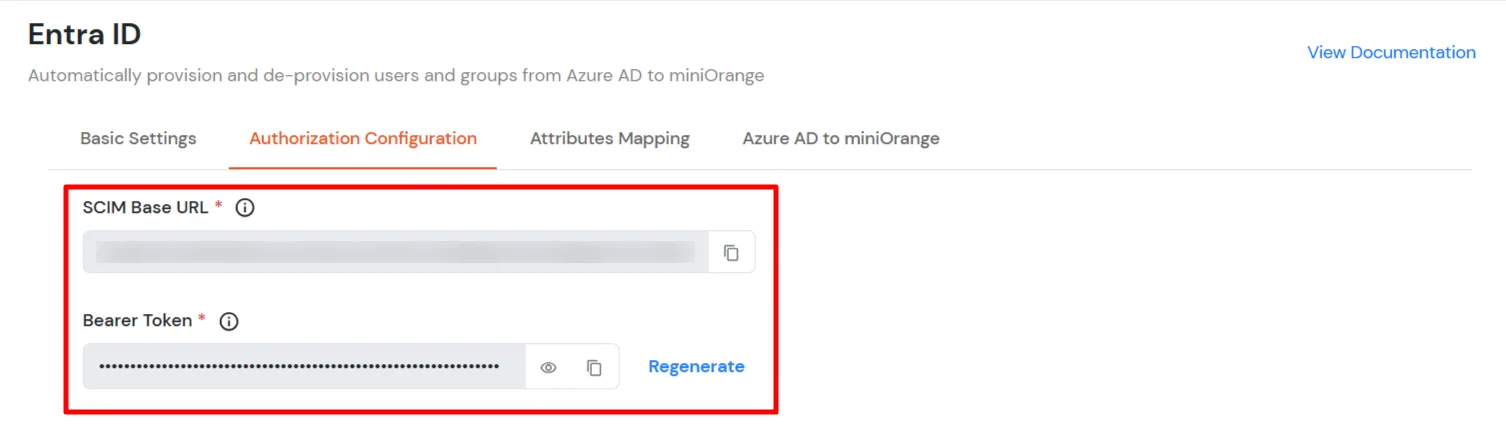
2. Setup SCIM Provisioning for Microsoft Entra ID
- Log in to your Azure portal, go to Microsoft Entra ID > Enterprise applications.
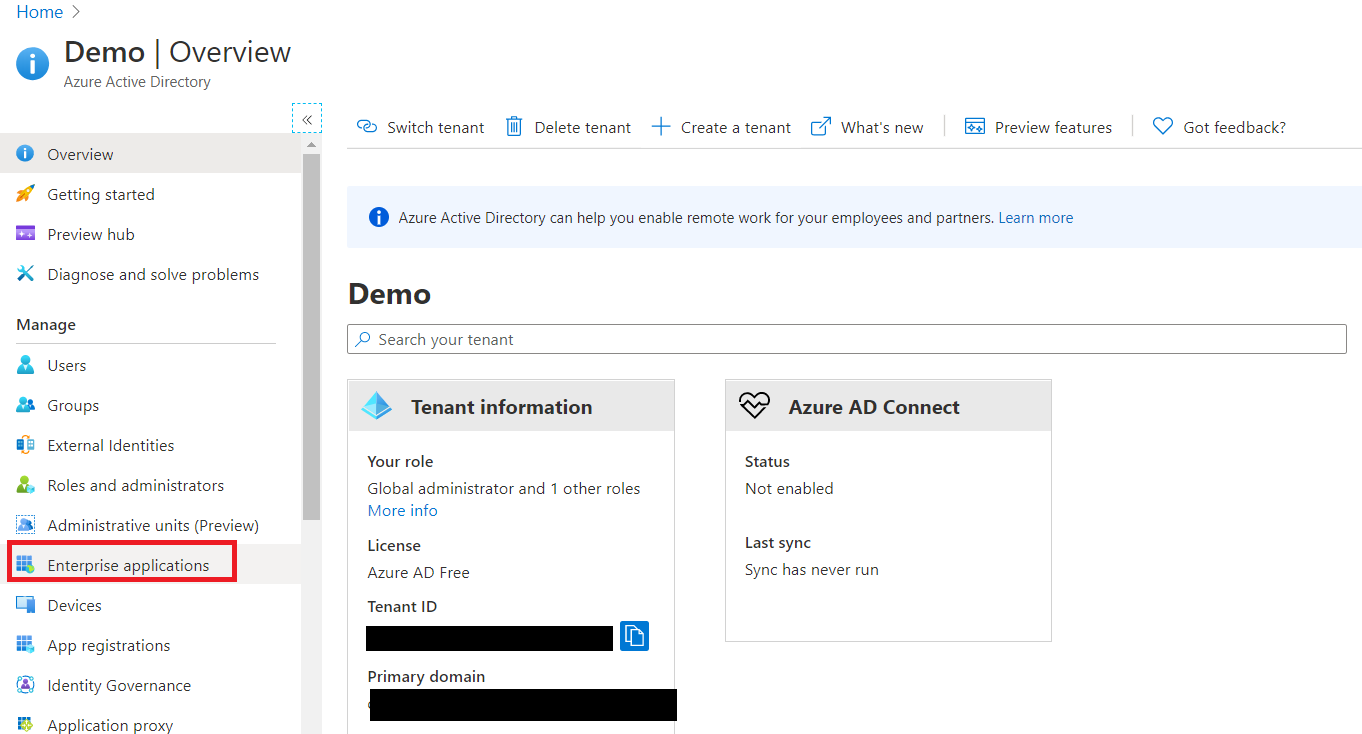
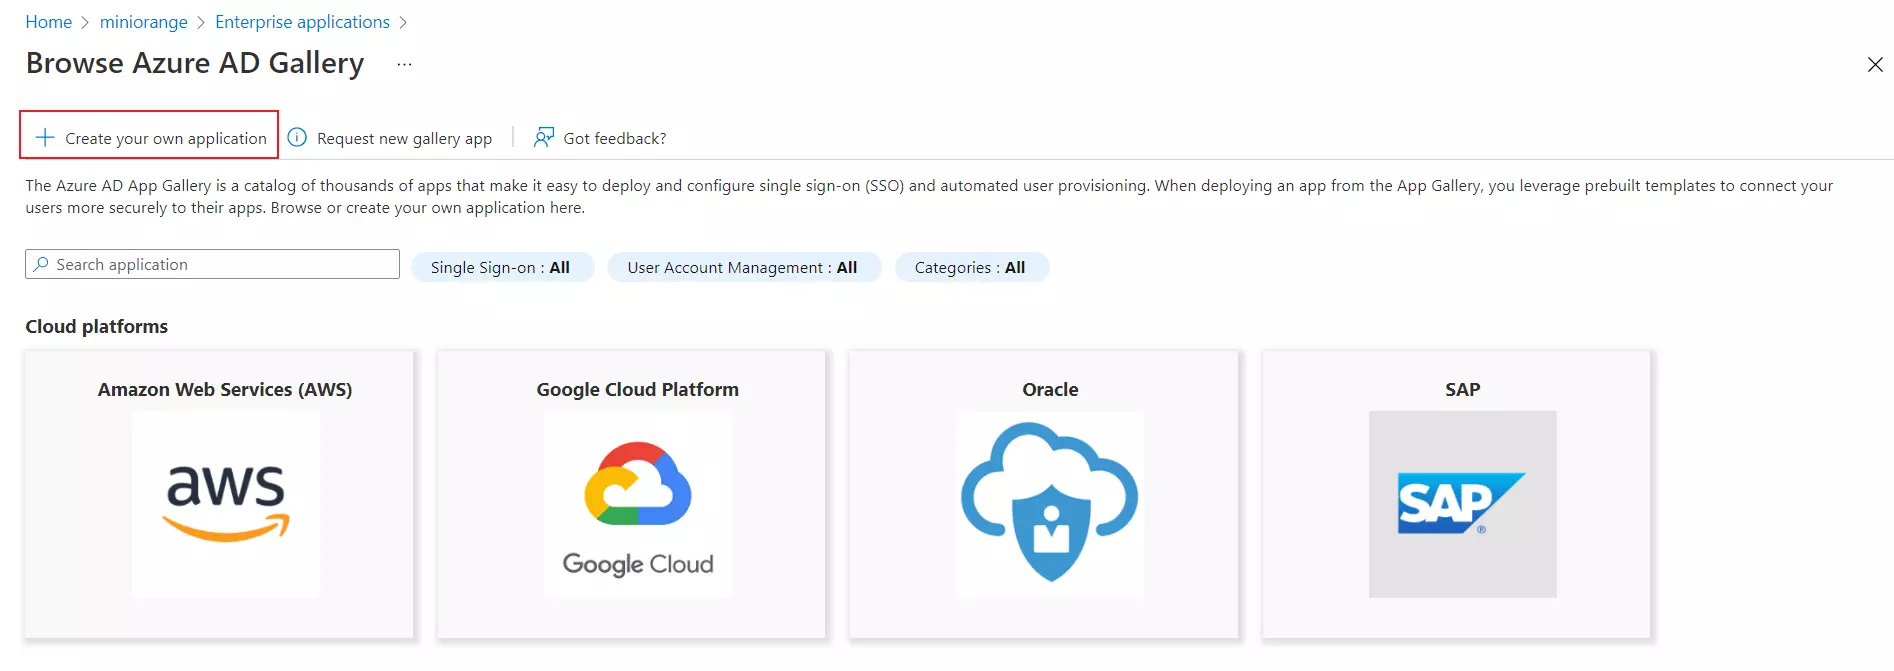
- Click on New Application and select non-gallery application. If you already have an enterprise application and want to enable provisioning in it then jump to this step.
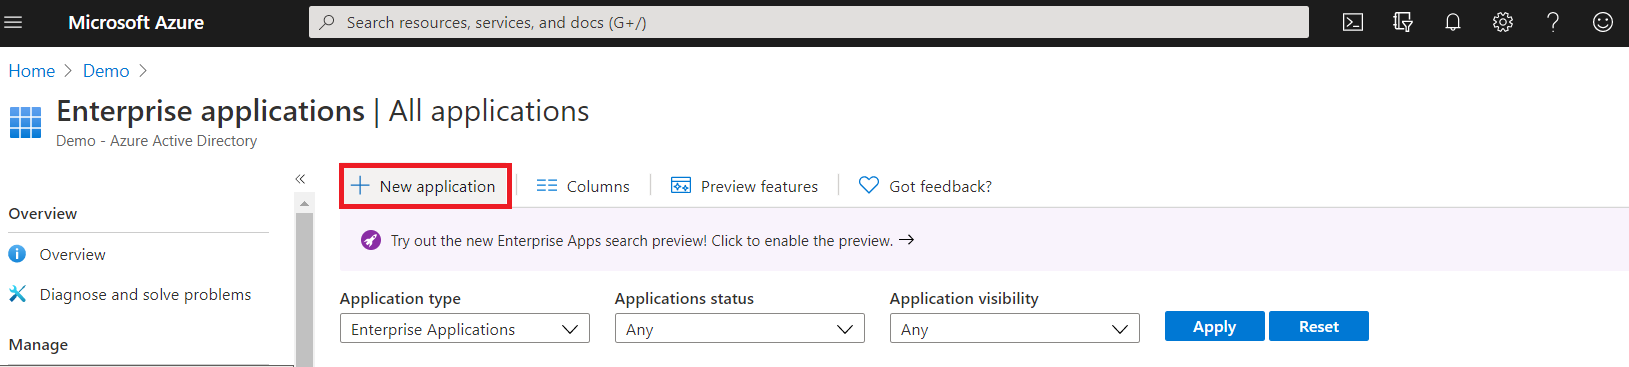
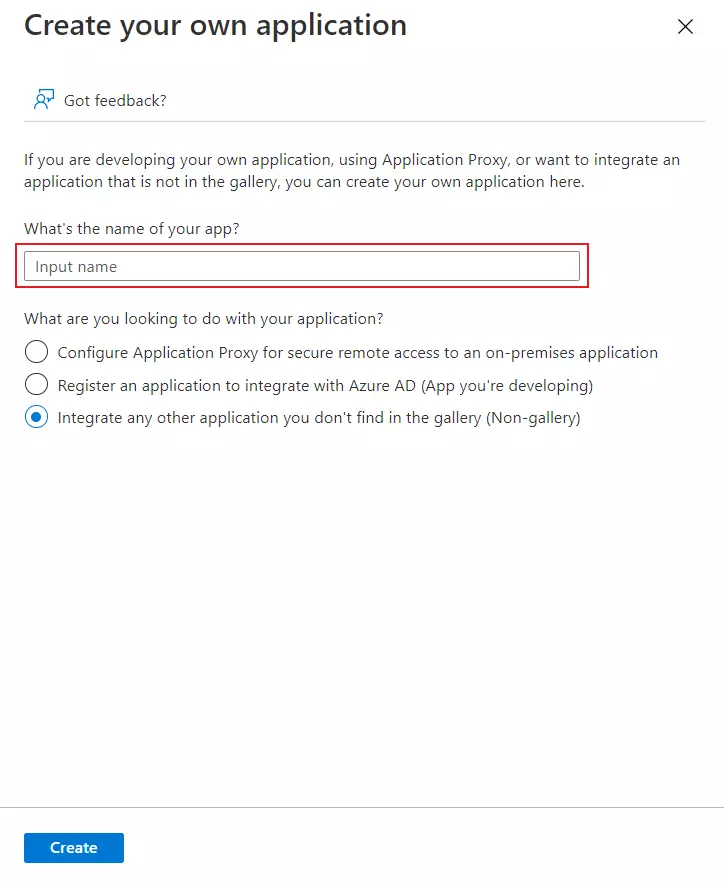
- Give suitable name to your user provisioning application.
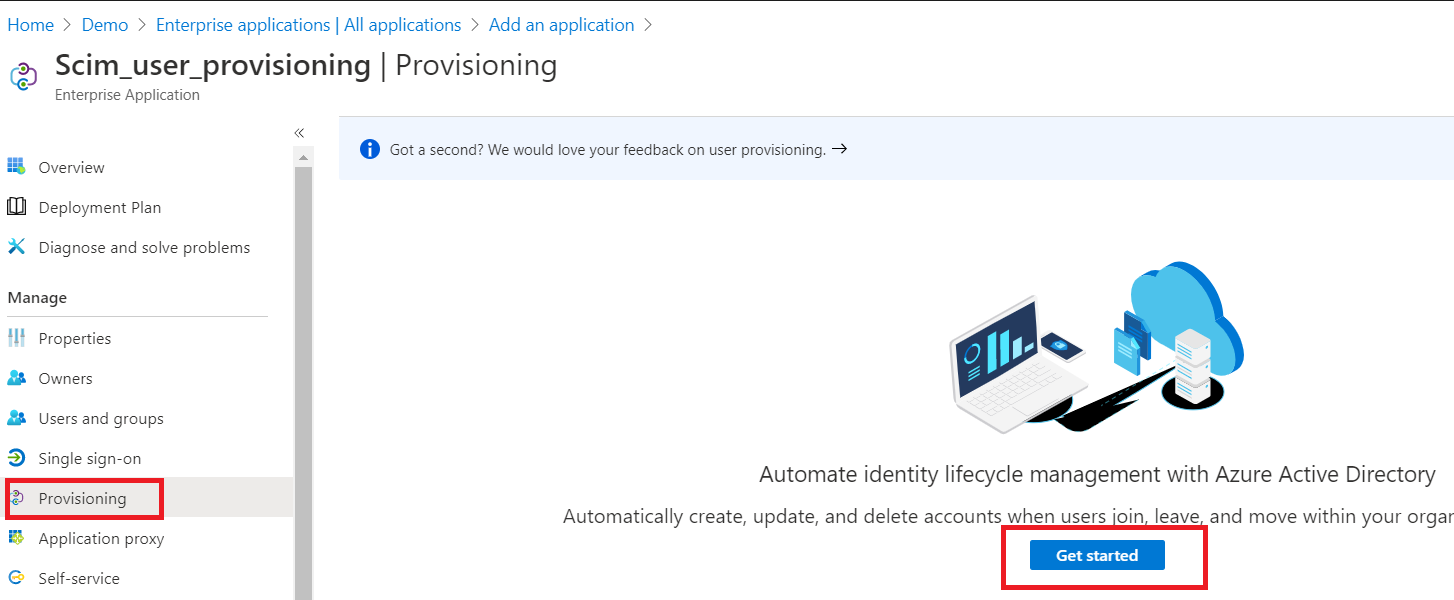
- Click on Provisioning in left menu and click on Get started.
- Select the Provisioning Mode as Automatic.
- Under Admin Credentials, enter the SCIM Base URL (as Tenant URL) and SCIM bearer Token (as Secret Token) as provided by miniOrange.
- Click on Test Connection. If the connection is established, it will show a success message.
- Click on the Save button.
- Then go to the Users and Groups menu and add Users that you want to provision into your application.
- Now, again open the Provisioning menu and set the Provisioning status to On.
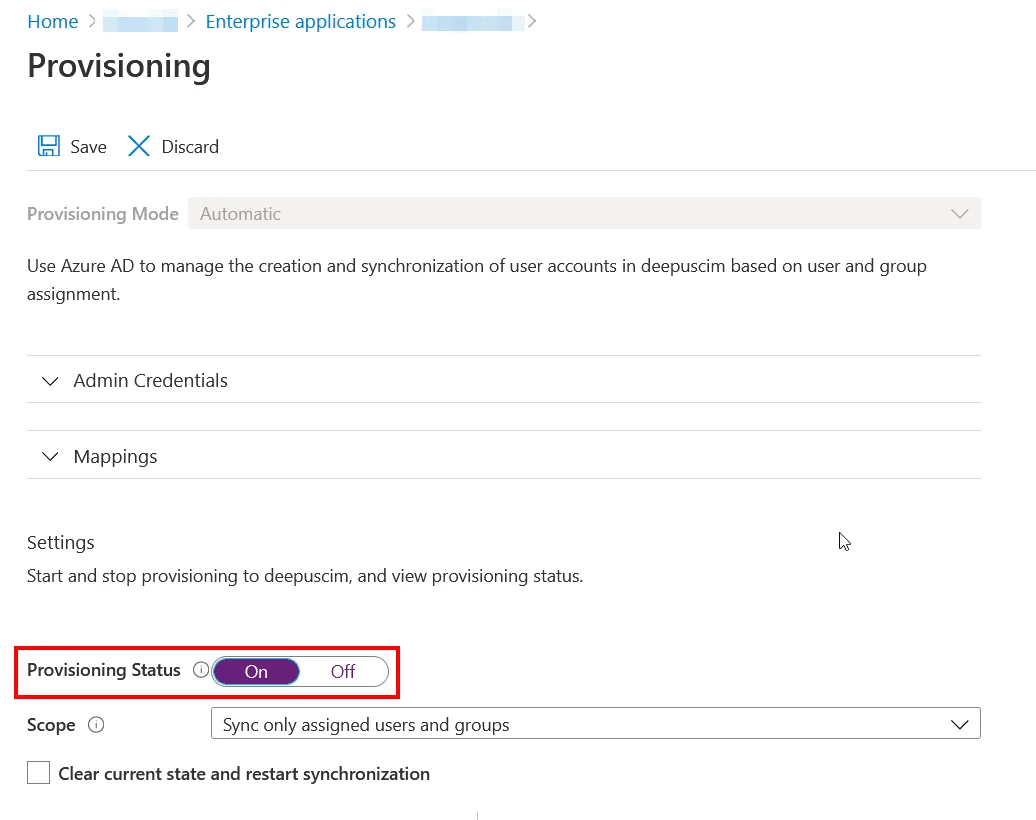
- Select the Scope as per your requirements and click on the Save button.
3. Add Attribute Mapping
- Navigate to the Attributes Mapping tab in your Azure AD provisioning configuration.
- Under this tab, you'll find two sections: Users and Groups, where you can map miniOrange attributes to Azure AD attributes for synchronization.
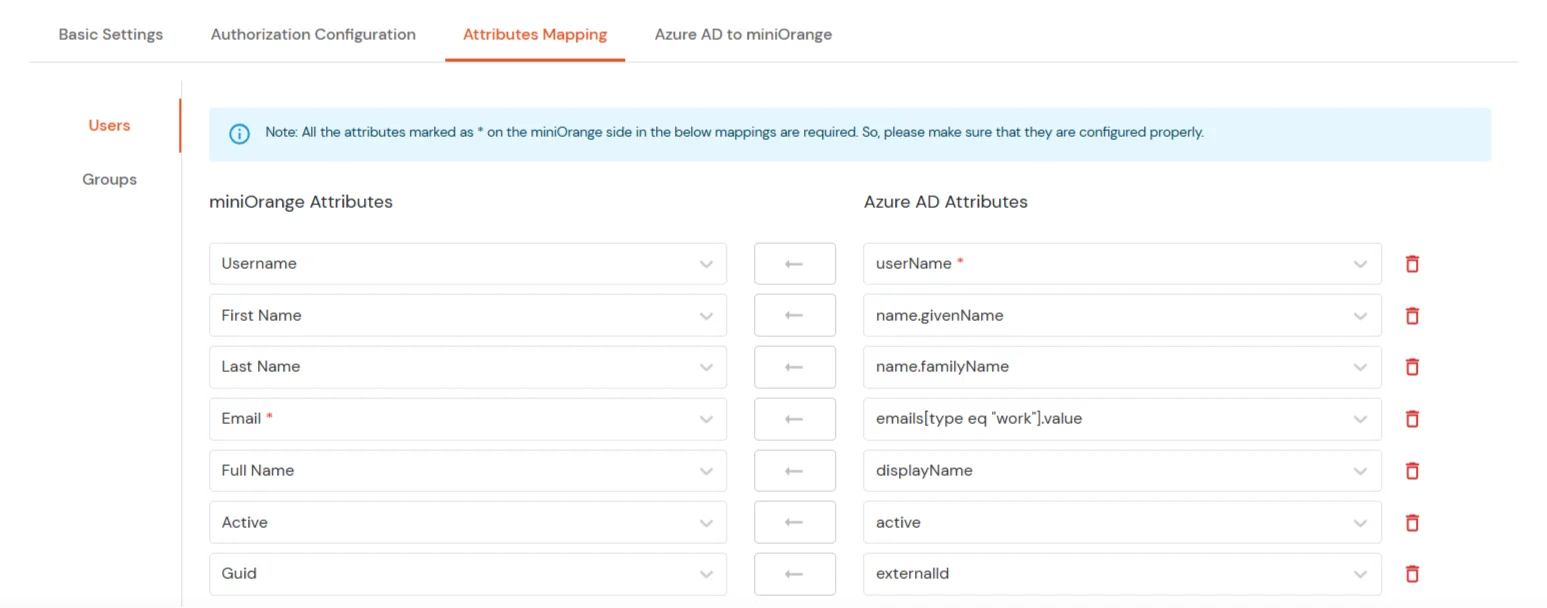
Users Mapping:
Note: The userName, name.givenName, name.familyName, emails[type eq \"work\"].value, displayName and active fields are required.
- In the Users section, map the attributes from miniOrange Attributes to the corresponding Azure AD Attributes.
- Once all required mappings are configured, click the Save & Next button to proceed.
Groups Mapping:
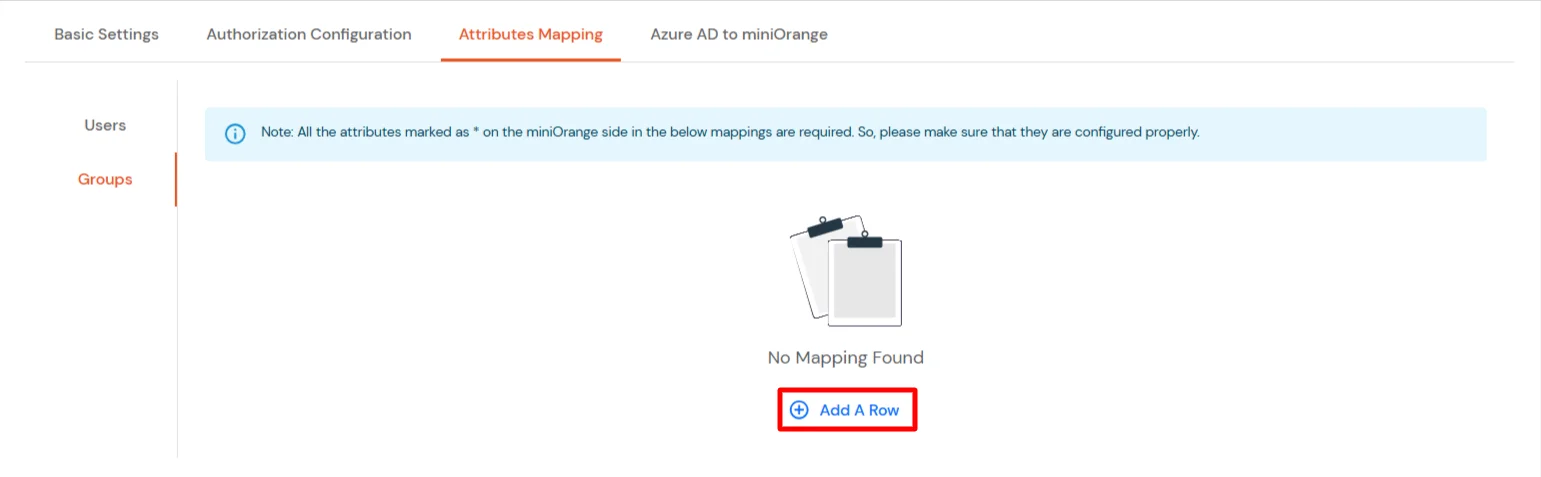
- Click on the Groups tab.
- Click Add A Row to add a new mapping.
- From the miniOrange Attributes dropdown, choose an attribute (like Group Name).
- In the Azure AD Attribute field, type the Azure AD attribute (like displayName).
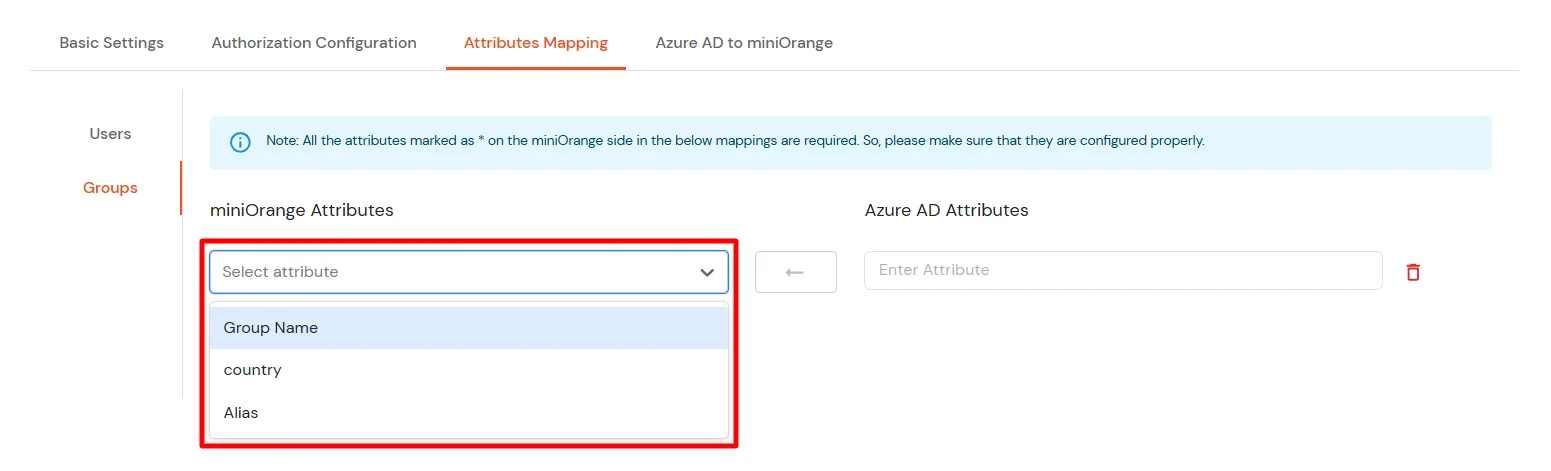
- Click Save & Next when done.
4. Azure AD to miniOrange
- Click on the Azure AD to miniOrange tab.
- In the Users section, enabling this option will delete the user if the user is deactivated/suspended/inactive in Azure AD.
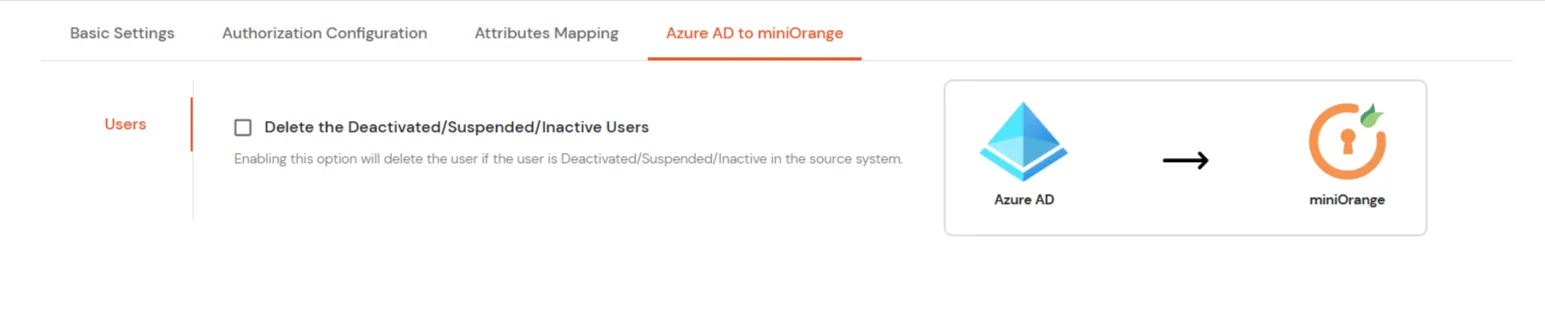
- Click on Save.
5. Test Configuration
- When the initial cycle run from Microsoft Entra ID, you can see the user details from Microsoft Entra ID in miniOrange.
View Provisioning Reports
How to access Provisioning Reports?
- Navigate to Reports in the left-hand navigation pane, search for Provisioning, and select Provisioning Report.
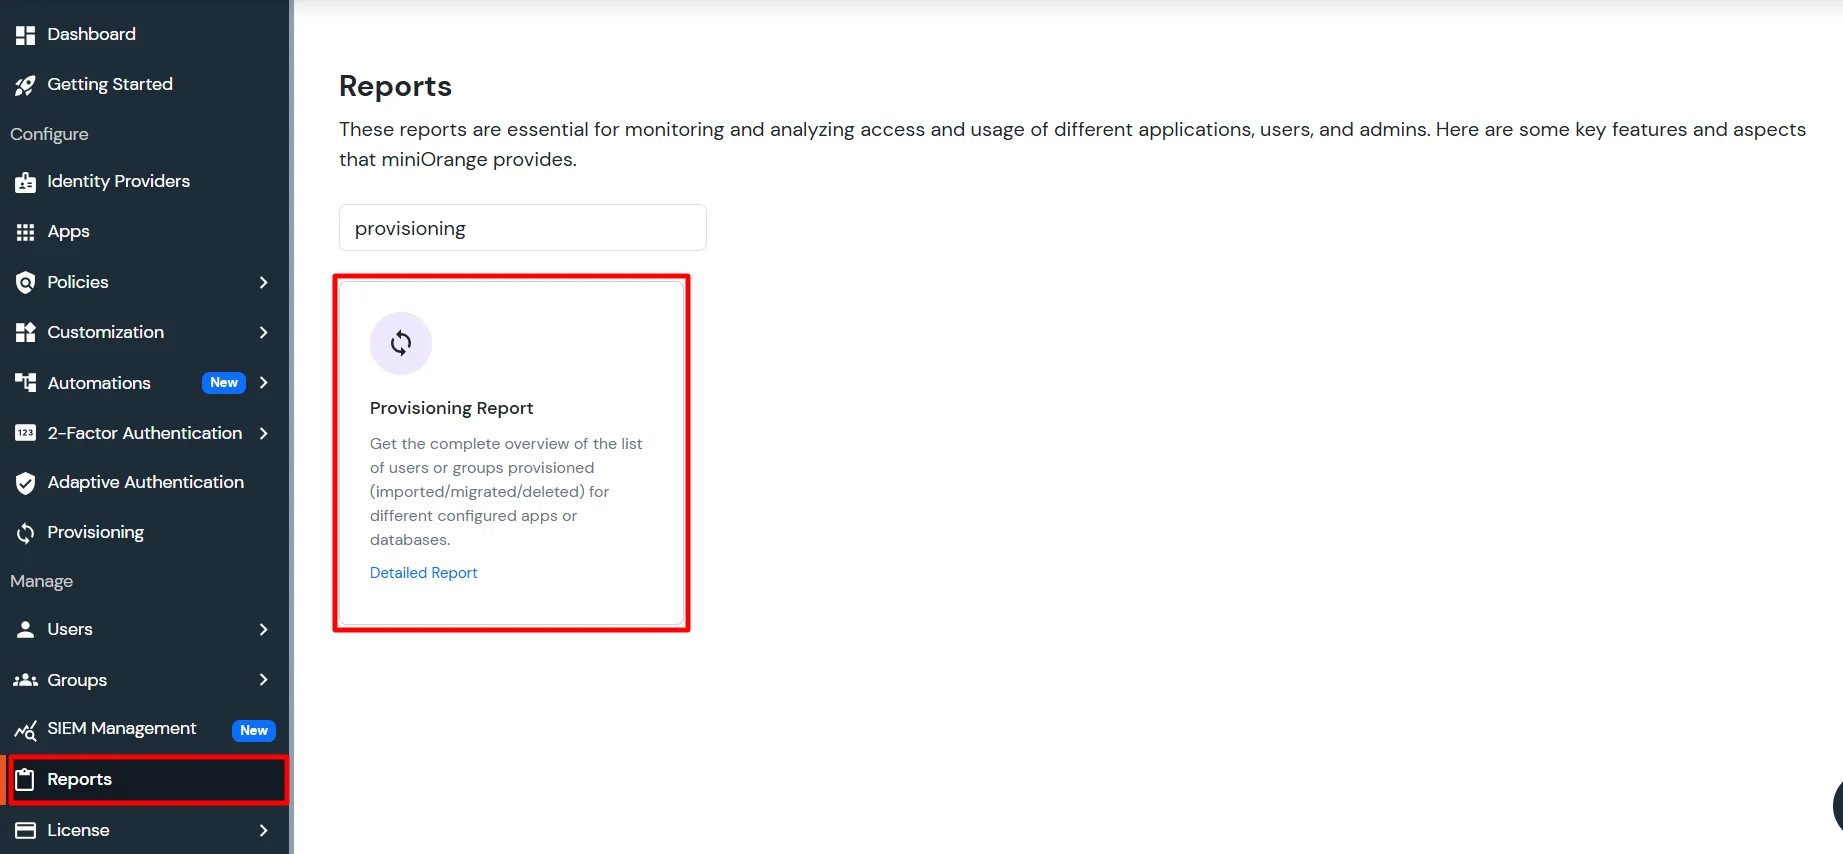
- Filter the reports by specifying Enduser Identifier and Application Name criteria. Additionally, choose the desired timespan for the reports. Once done, click on the Search.
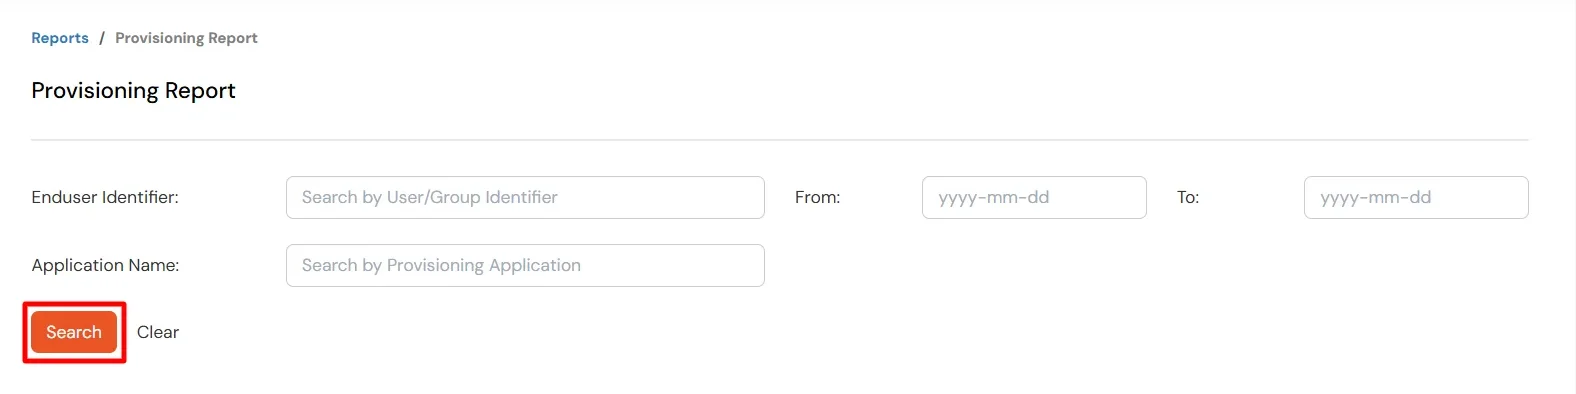
- Alternatively, you can directly click on Search to retrieve all provisioning reports based on time without applying any specific filters.
External References