Resource Allocation in PAM Dashboard
Resource allocation in the PAM dashboard is essential for securely managing privileged access to enterprise resources, such as servers and databases. Administrators can add resources via the Resources section, then allocate
them to users or groups using the Allocate option, streamlining access control.
Note: Before allocating resources, you must configure the Resource. Refer to the guide.
How to Allocate Resources with Advanced Options
Step 1: Go to Allocate Resources
- Log in to the miniOrange PAM Dashboard.
- Go to Resources and click on All Resources.
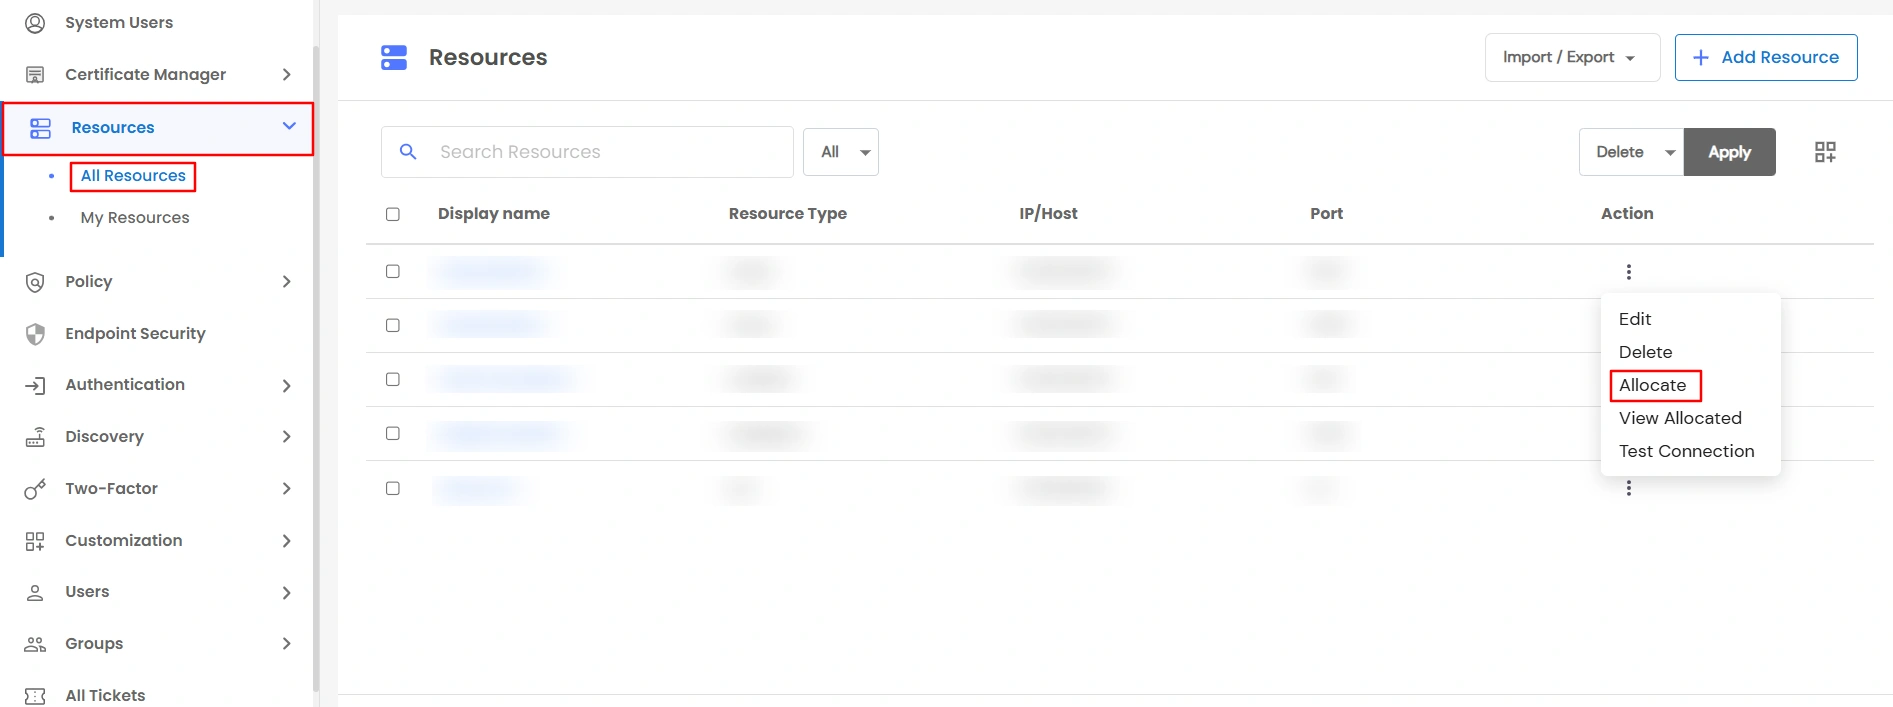
- Select the resource you want to allocate.
- Click Allocate.
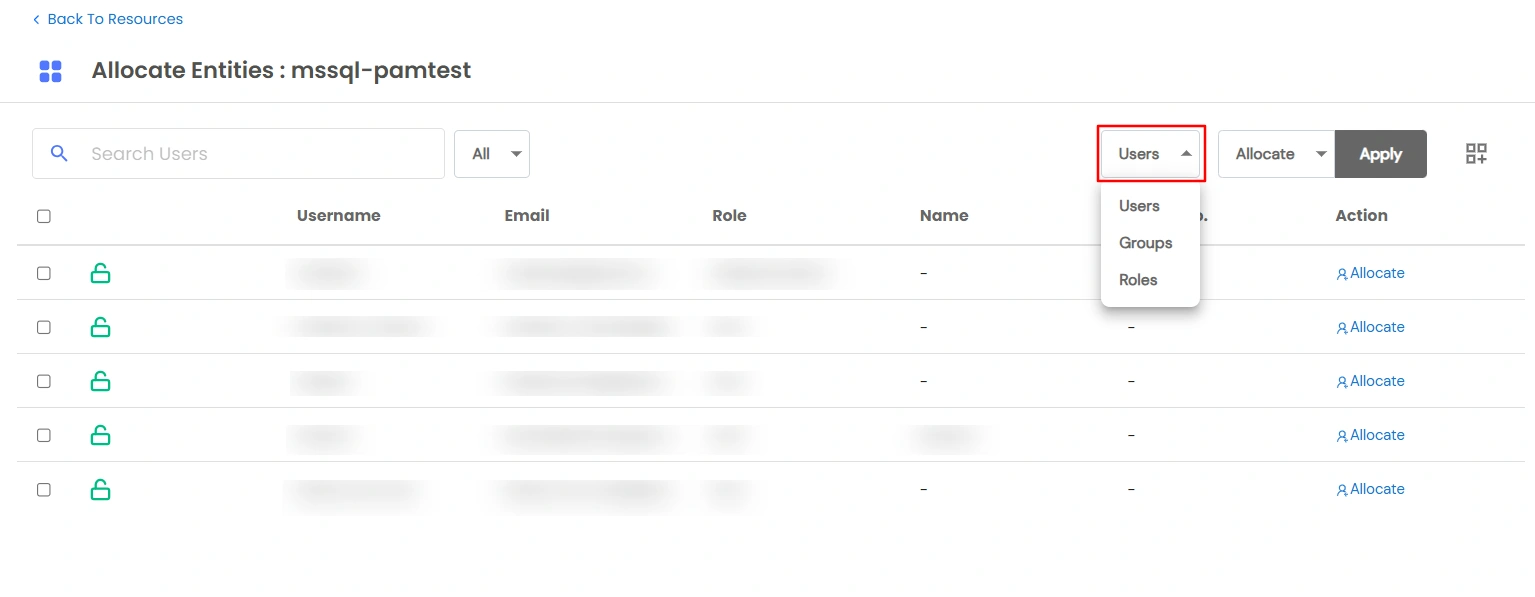
- Choose whether to assign it to a User, Role, or Group.
Step 2: Choose Allocation Type
Select one of the standard allocation types:

- Custom : Admin can define a specific start and end date/time for allocating the resource to the user.
- One-time : The resource is allocated for a single use, and access is automatically revoked after it is used once.
- Lifelong : The resource remains allocated to the user permanently unless manually revoked by the admin.
- Zero-day : The resource is allocated to the user record, but access to the resource is not granted. (Note: Zero-day is not available with Advanced Options)
Step 3: Open Advanced Options [Optional]
When to Use the Resource Allocation Advanced Feature?
- If you want resources available only during office hours.
- If you manage users in different timezones.
- If you need extra control beyond the standard start/end date allocations.
When Advanced Options are enabled, you will see 4 additional fields:
| Field |
Description |
| Allowed Days |
Choose the weekdays (e.g., Monday–Friday) |
| Start Time |
Set the daily start time (e.g., 09:00) |
| End Time |
Set the daily end time (e.g., 18:00) |
| Timezone |
Auto-detected from your browser, but you can change it if needed |
Step 4: Select System User and Policy
- Choose the System User the credentials that will be used to access the resource. These credentials remain hidden from the user accessing the resource, ensuring secure and seamless access.
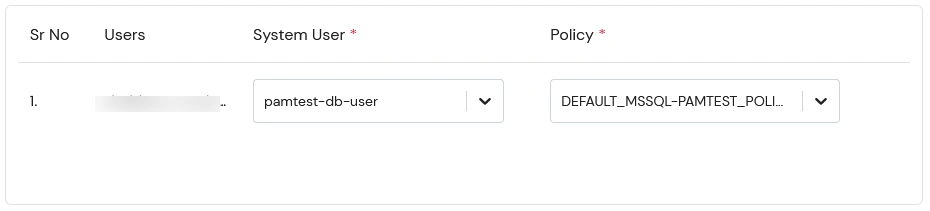
- Next, select the Policy you want to apply to this allocation, which will govern the user’s access whenever they use the resource.
Step 5: Save Allocation
- Once saved, the resource will be accessible only within the defined time period.
- Once the allocation is completed, the user will be able to view the assigned resources in the My Resources section of their PAM dashboard.