Hello there!
Need Help? We are right here!
Need Help? We are right here!
Search Results:
×A secure database environment is essential for effective Privileged Access Management. Databases hold sensitive information, requiring hardened infrastructure, strict authentication, and integration with PAM controls. Proper configuration ensures privileged credentials are protected, access policies are enforced, and audit mechanisms are reliable, strengthening security while maintaining compliance and operational efficiency across critical systems.
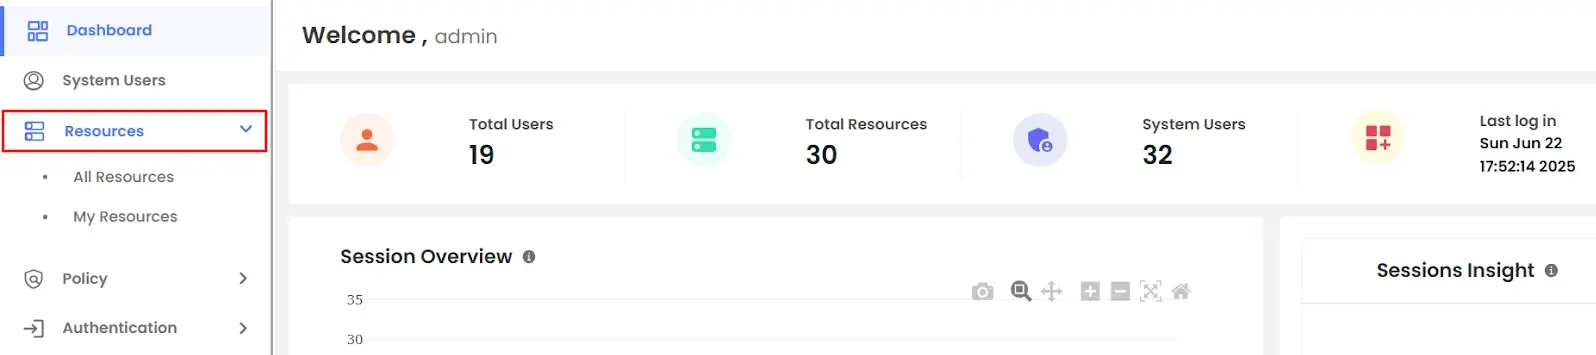
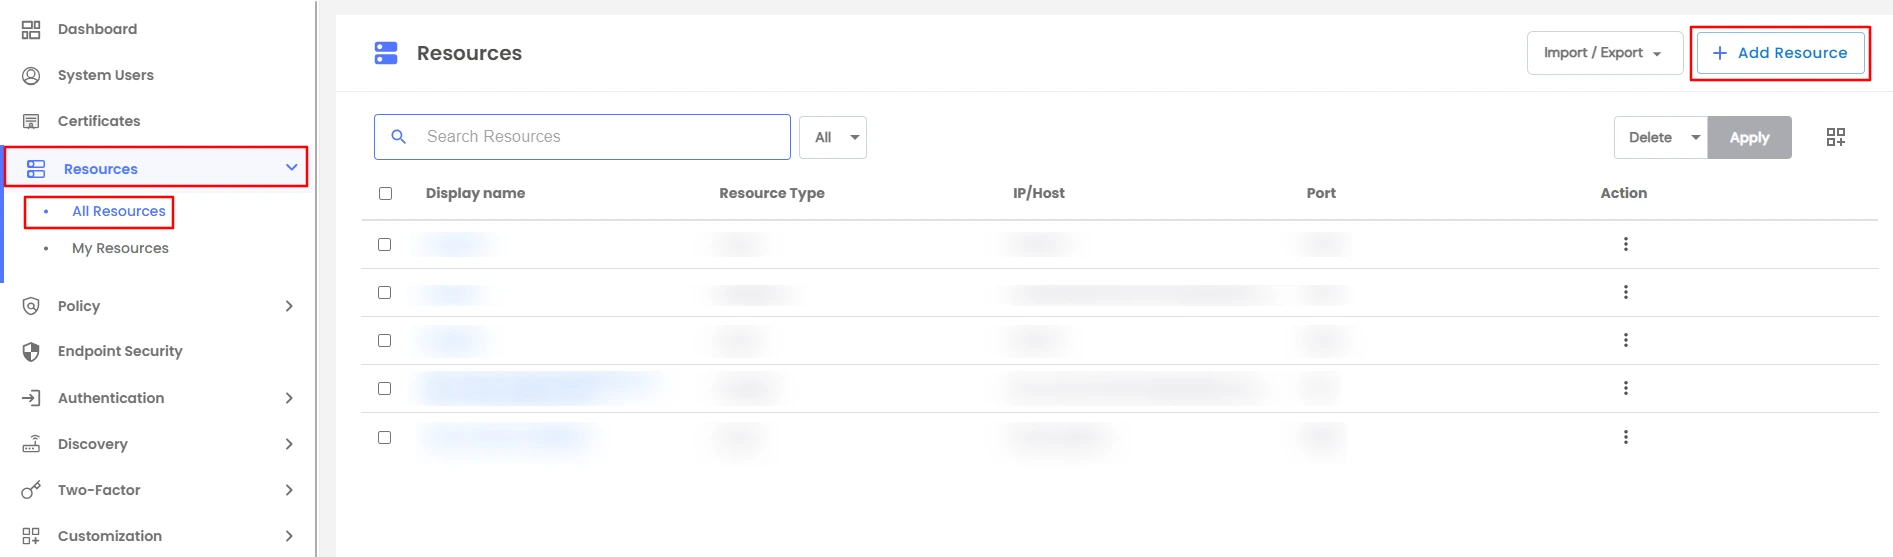
In this section, we will understand how to integrate a server or database into the PAM environment. In the miniOrange PAM dashboard, you can configure the following databases:
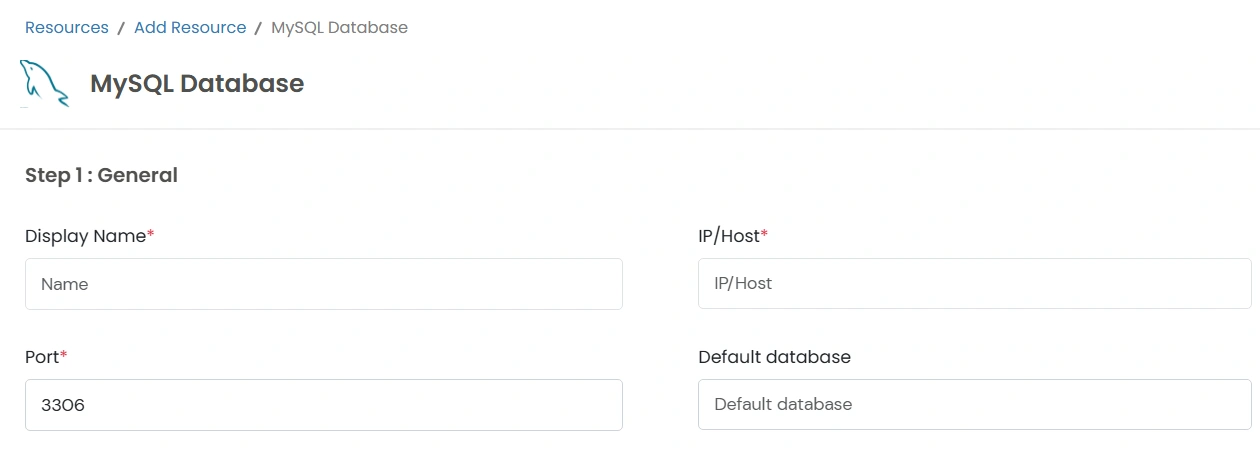
Note: In 3 simple steps, configure the database. Begin by selecting the MySQL database to integrate.
This will include the display name, Port, and IP address.
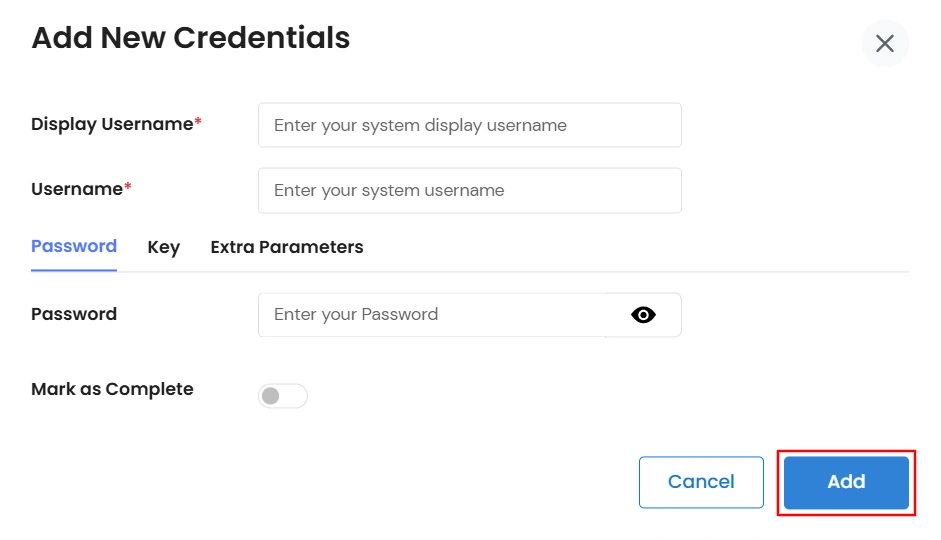
You will be required to include system users and new credentials details here.

Note: In 3 simple steps, configure the database. Begin by selecting the PostgreSQL database to integrate.
This will include the display name, Port, and IP address.

You will be required to include system users and new credentials details here.
Note: In 3 simple steps, configure the database. Begin by selecting the MS SQL database to integrate.
This will include the display name, Port, and IP address.
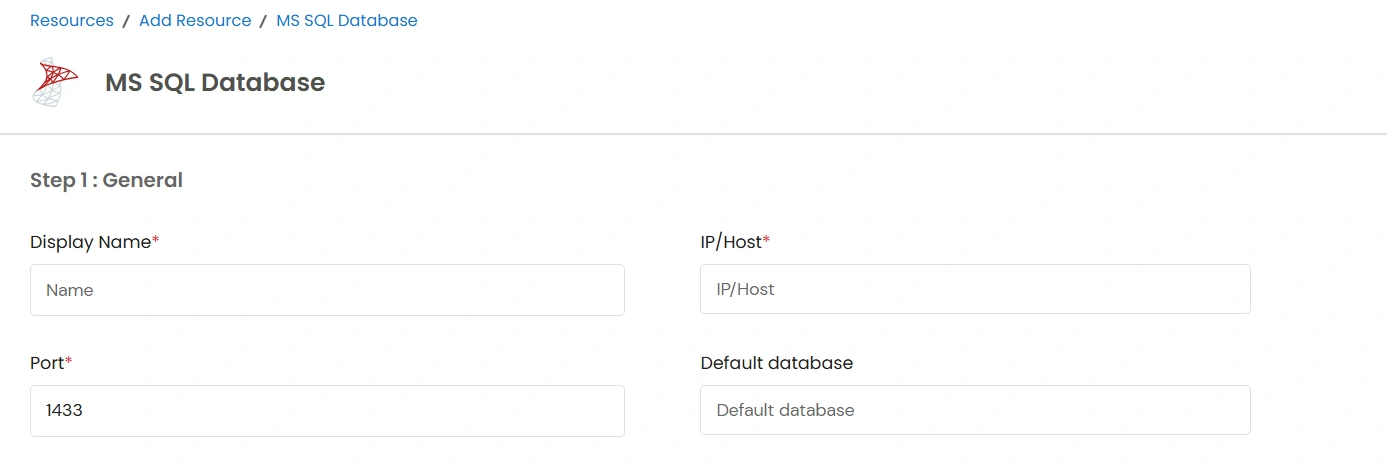
You will be required to include system users and new credentials details here.
Note: In 3 simple steps, configure the database. Begin by selecting the Oracle database to integrate.
This will include the display name, Port, and IP address.
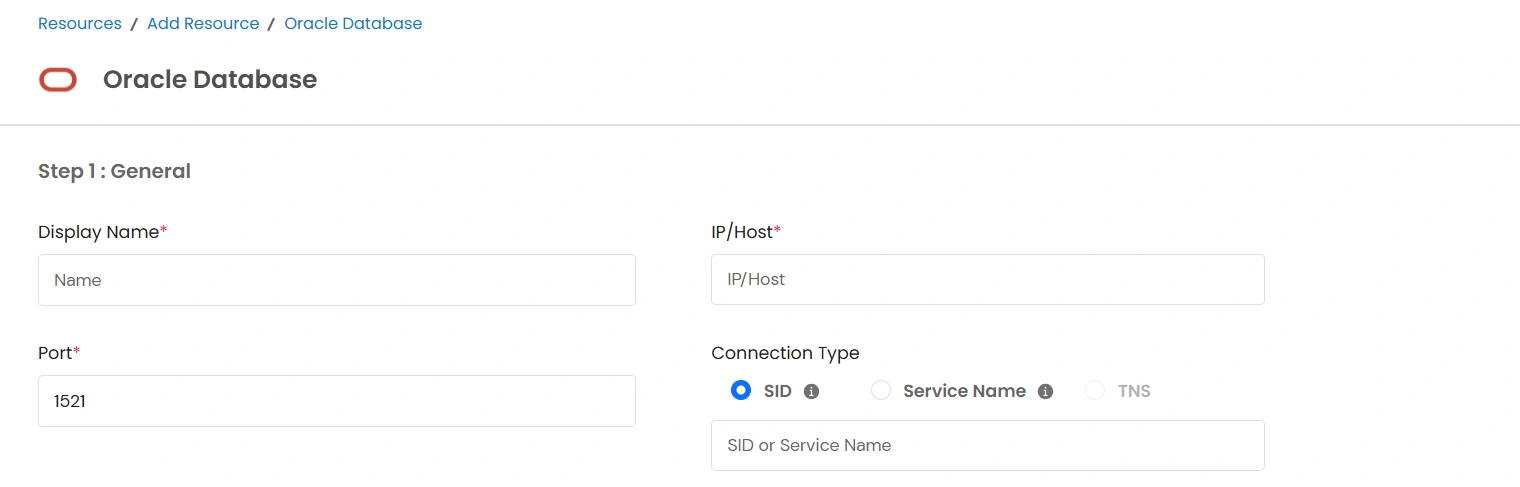
You will be required to include system users and new credentials details here.
Note: In 3 simple steps, configure the database. Begin by selecting the SAP HANA database to integrate.
This will include the display name, Port, and IP address.
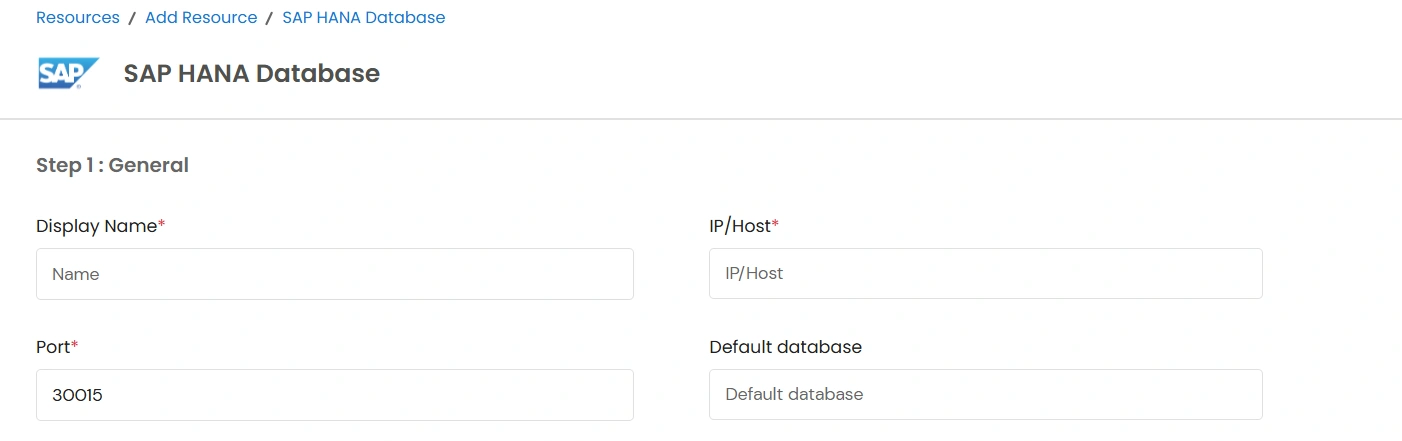
You will be required to include system users and new credentials details here.