Setup Trusted IP Ranges and Login Hours in Salesforce
miniOrange allows you to control and manage access by
Salesforce restriction on login IP ranges using policies to provide access, challenge the user with 2FA/MFA or deny access to the users based on trusted login IP Addresses or trusted login IP ranges.
- For the Salesforce trusted login IP access restriction to work, the Admin must create a policy specifying permitted login IP address range which allows the access to the application.
- miniOrange supports IP addresses range in three formats i.e. IPv4, IPv4 CIDR and IPv6 CIDR.
- To block the access, Admin must specify an action which needs to be performed when a user tries to login from a non trusted IP address (Such as Deny or Challenge the user with 2FA).
- Once the restriction policy is configured, it can be applied to any application’s login policy to enable login IP restriction for that application (Salesforce)
Connect with External Source of Users
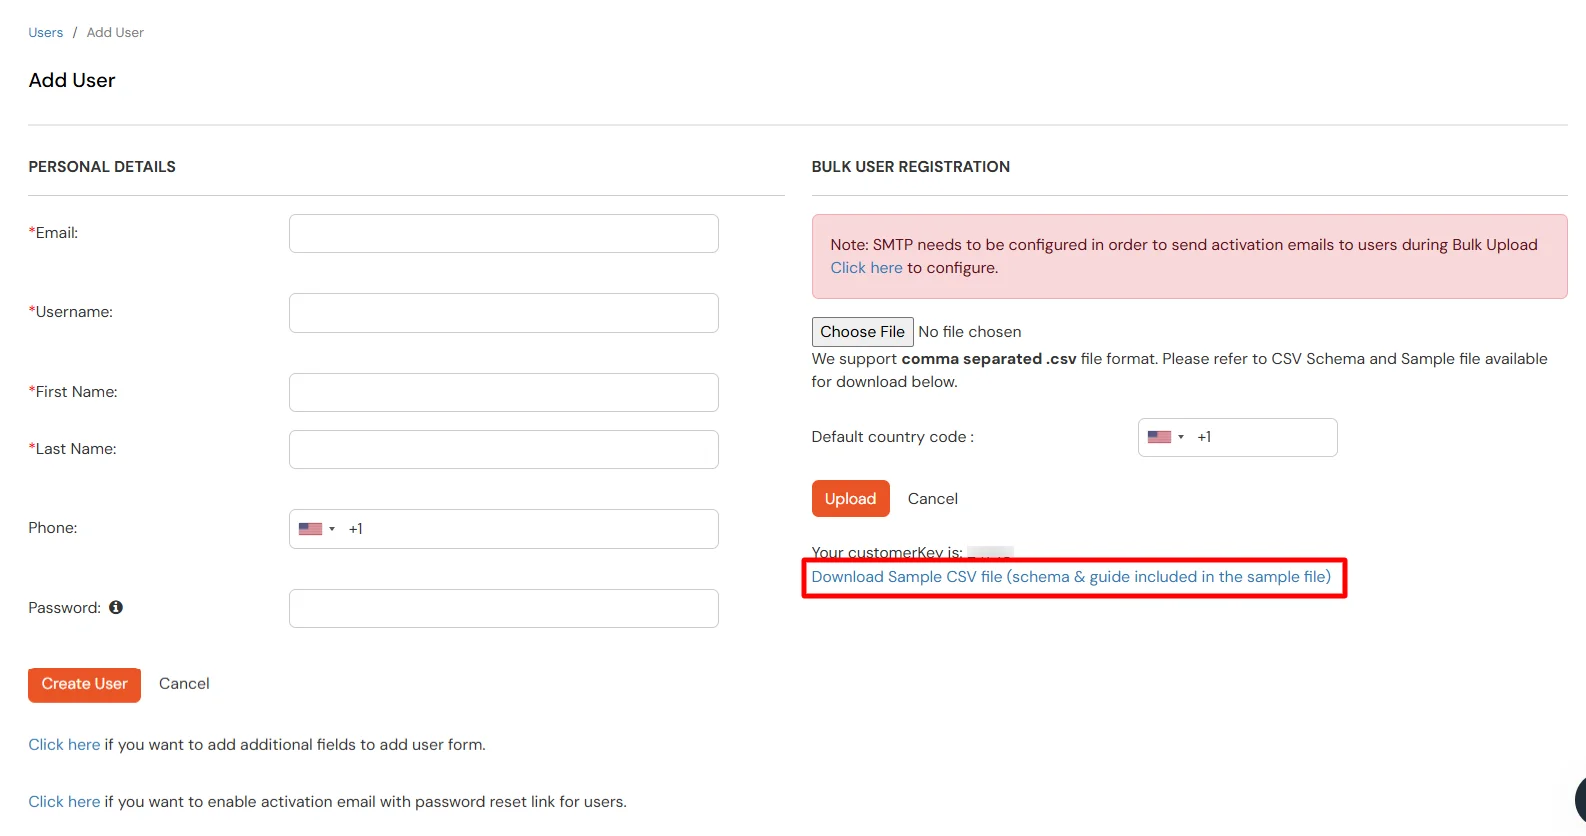
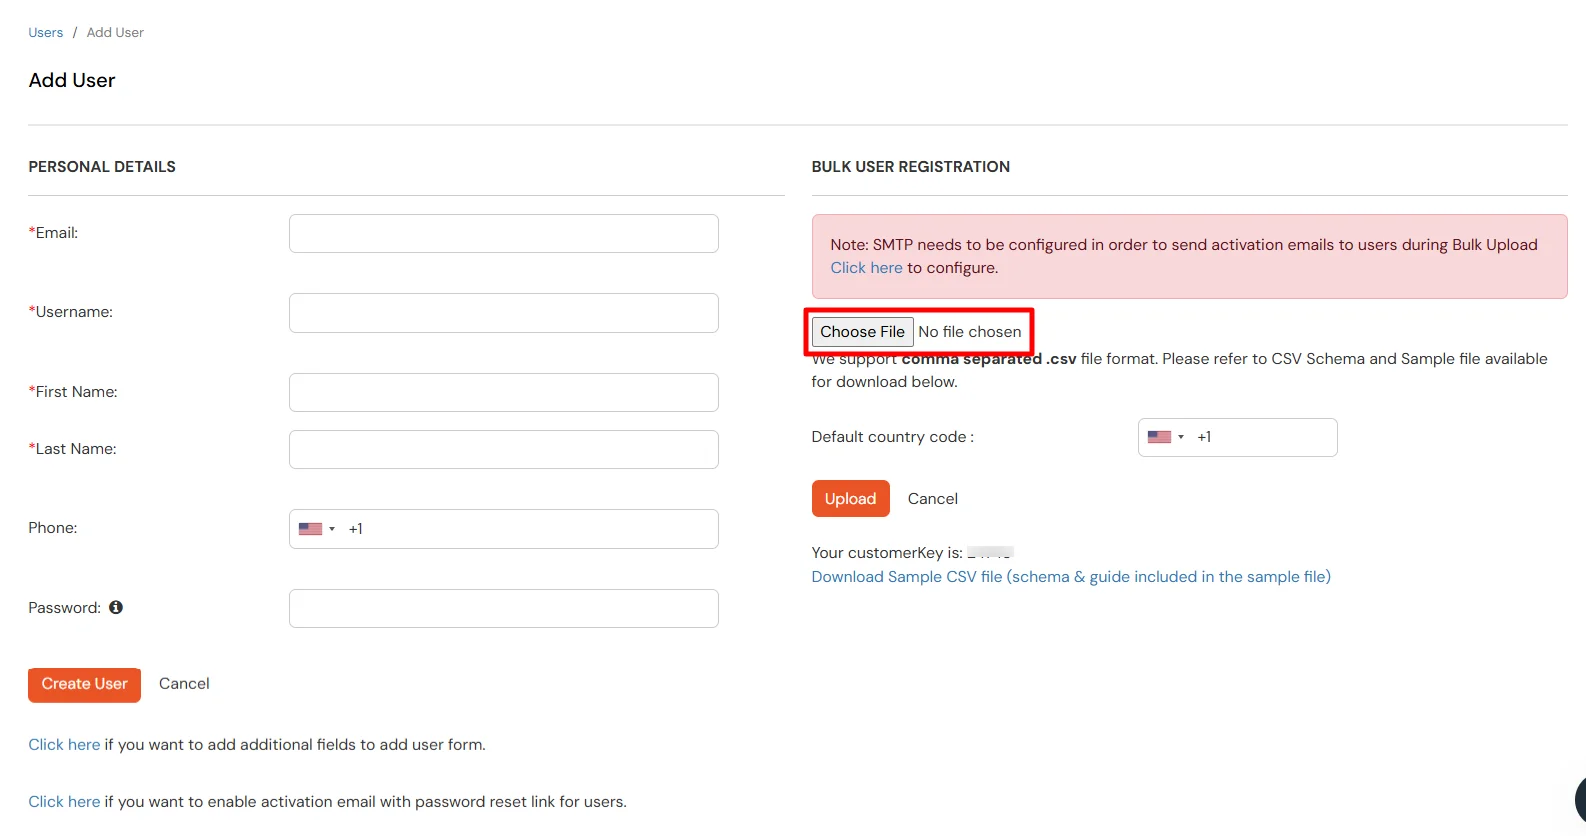
miniOrange provides user authentication from various external sources, which can be Directories (like ADFS, Microsoft Active Directory, OpenLDAP, AWS etc), Identity Providers (like Microsoft Entra ID, Okta, AWS), and many more. You can configure your existing directory/user store or add users in miniOrange.
Prerequisite:
- Login to your Salesforce account.
- Click on the Setup icon in the top-right section of page.
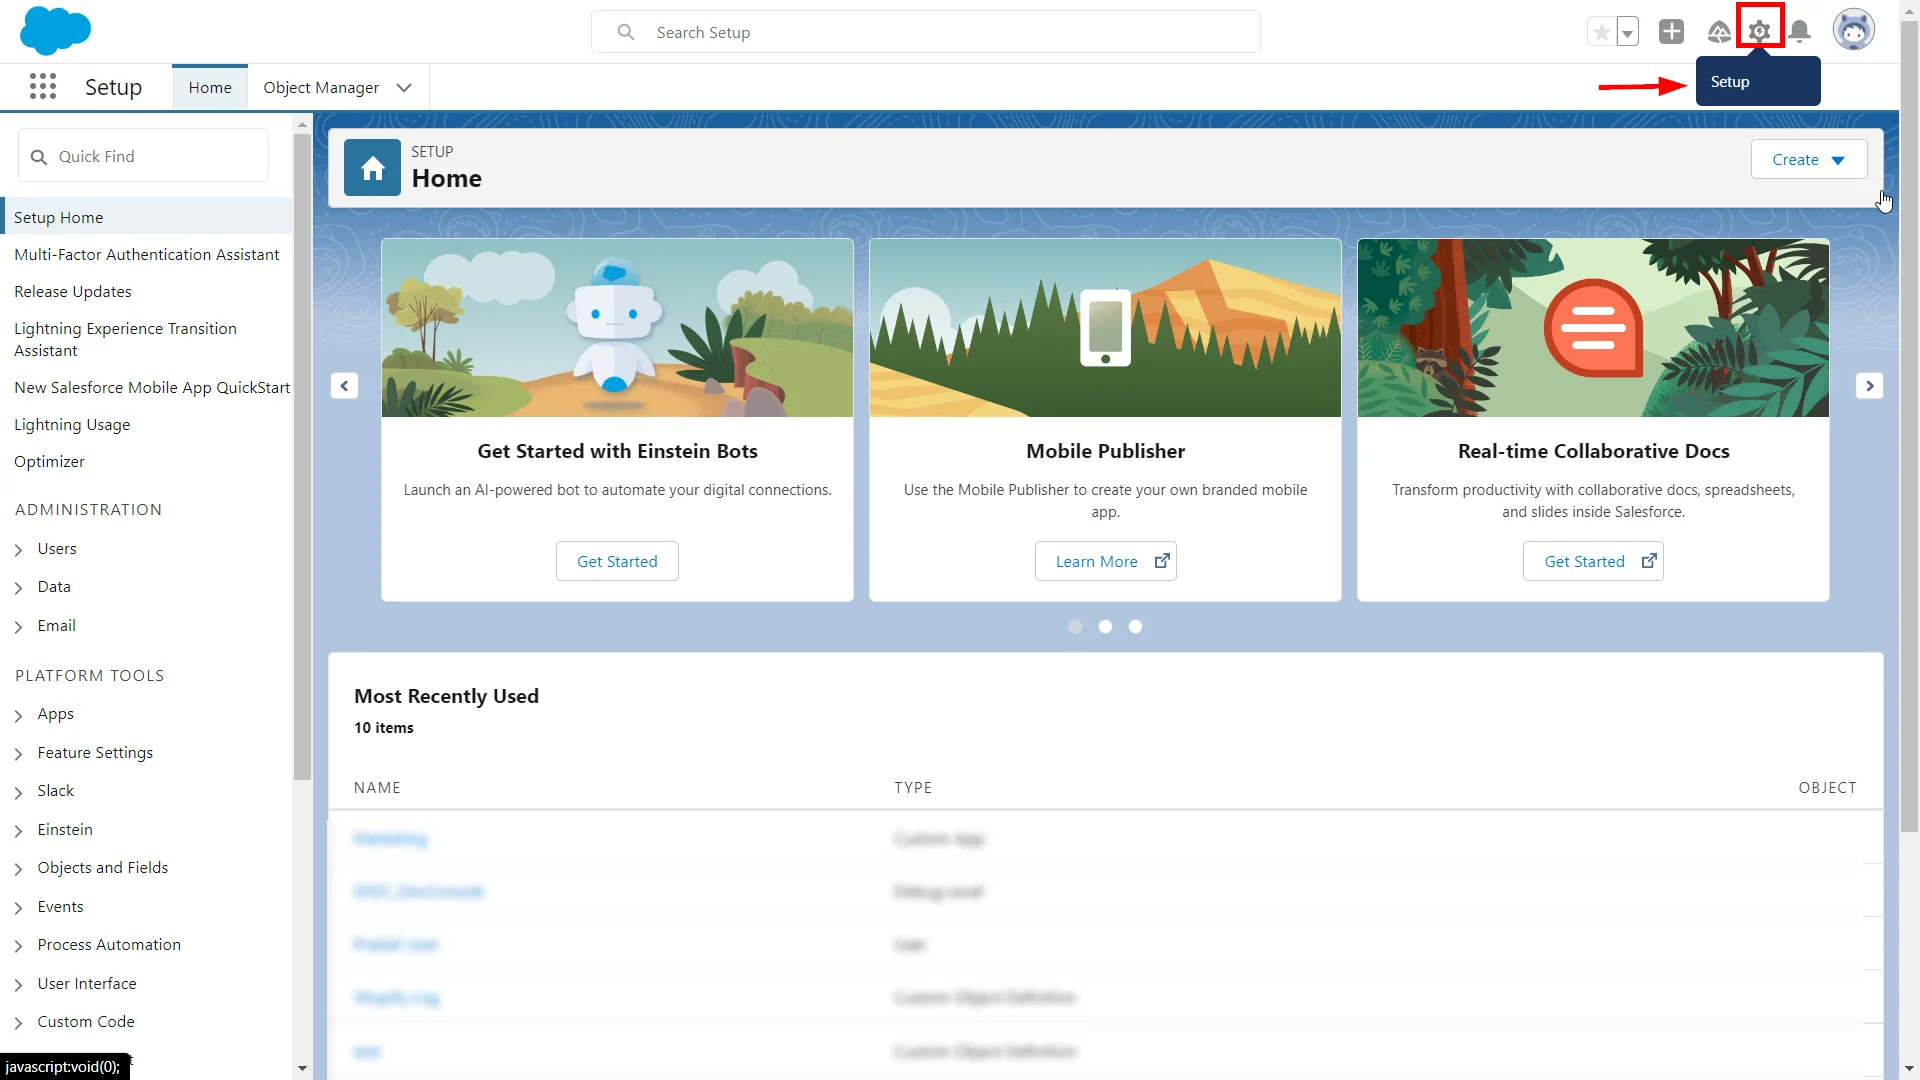
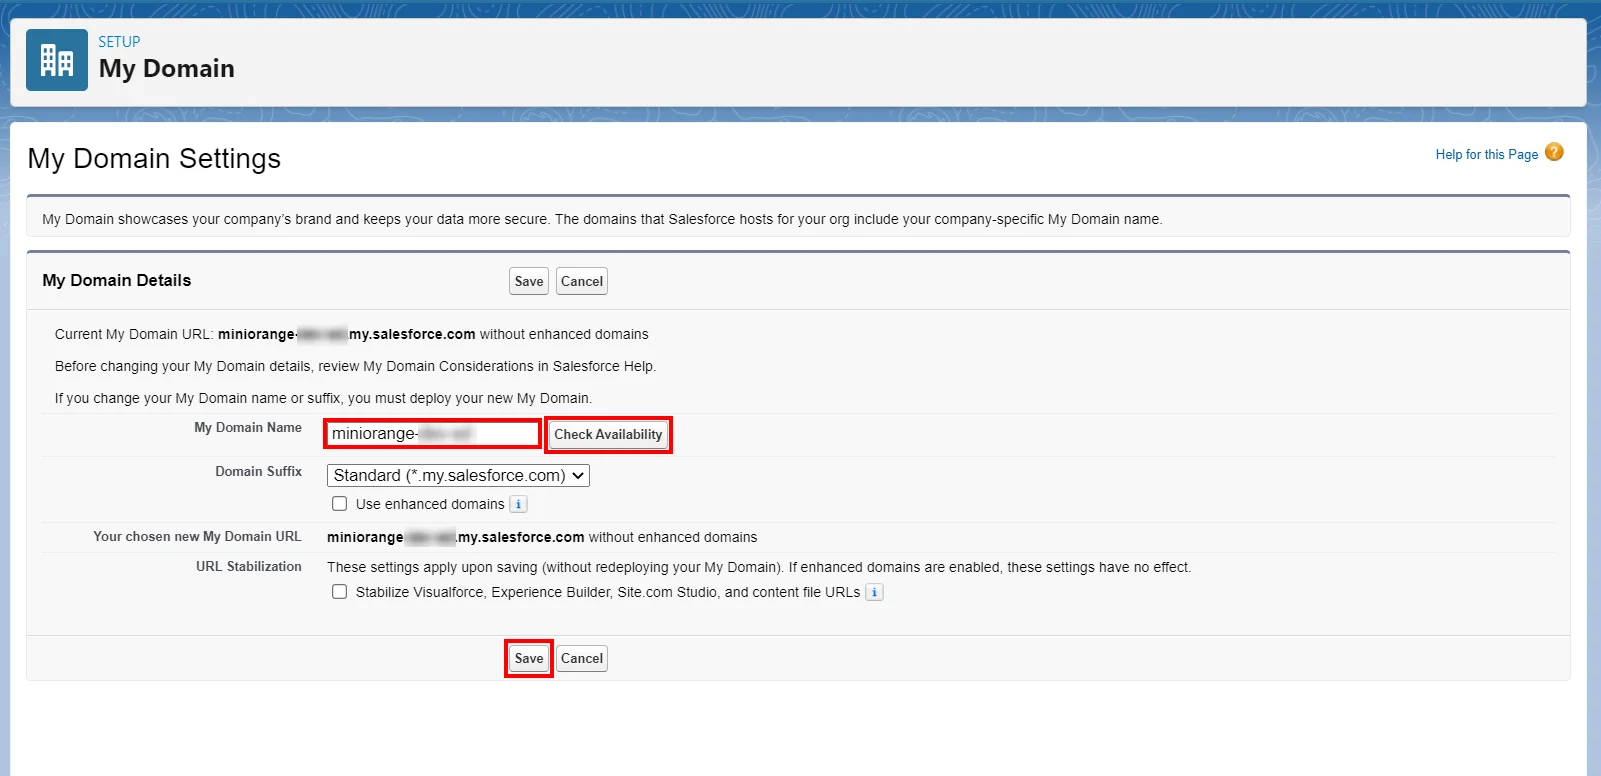
- Now in the search field, search for the My Domain Settings.
- Choose your domain name, check for availability and if available, proceed by saving the settings.
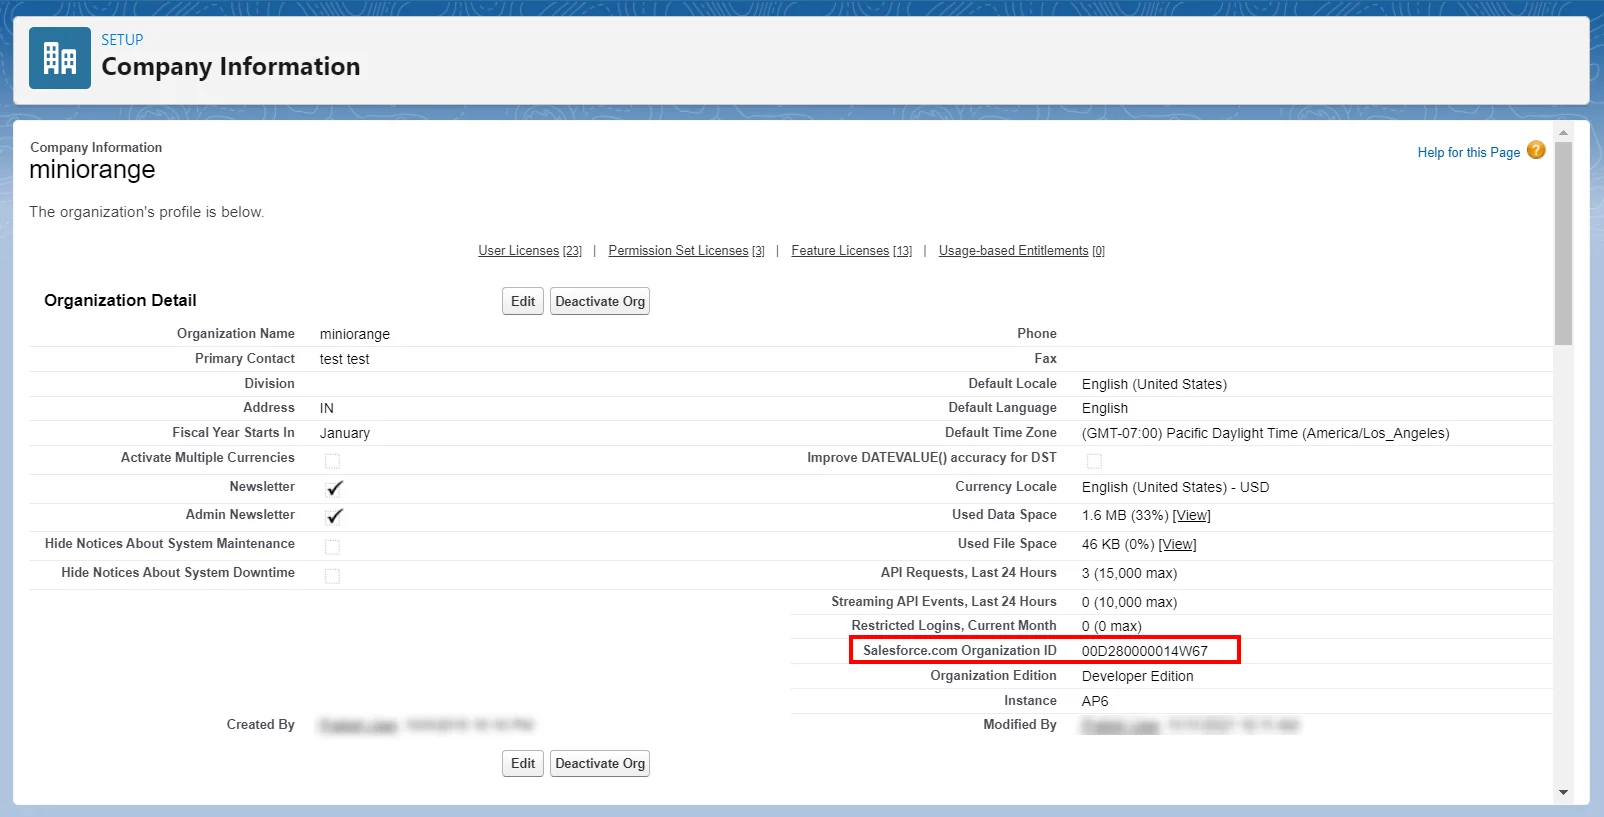
- Search for Company Information in the search bar.
- Copy the Organization Id. (This will be required later)
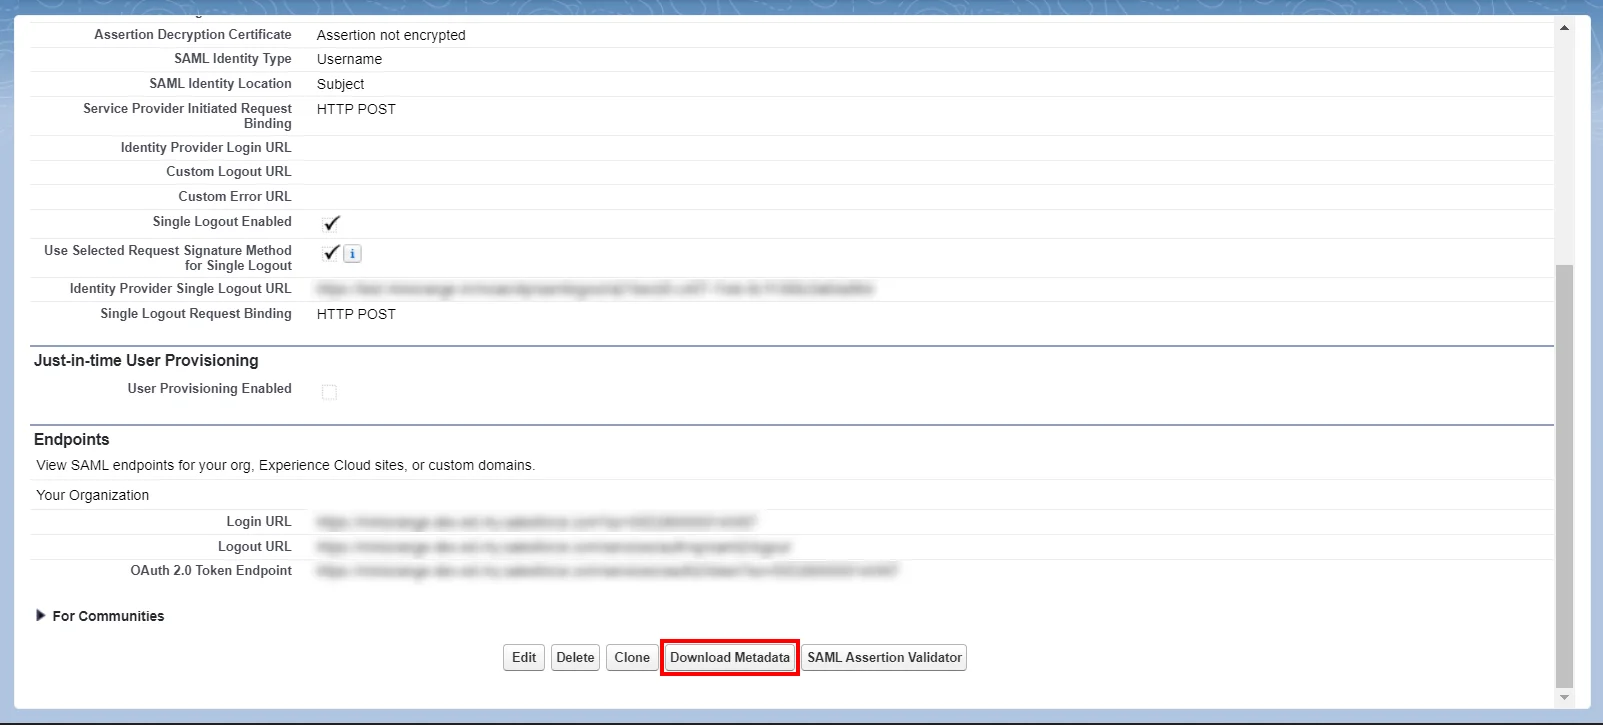
- Salesforce Metadata: After you have set up the SSO settings in Salesforce Admin Dashboard, you will get the Salesforce Metadata File. Click Download Metadata to download an XML file of your SAML configuration settings to send to your identity provider. The identity provider can then upload these configuration settings to connect to your Experience Cloud site.
Follow the step-by-step guide given below for Salesforce IP restriction
1. Configure Salesforce in miniOrange
- Log into miniOrange Admin Console.
- Go to Apps and click on Add Application button.
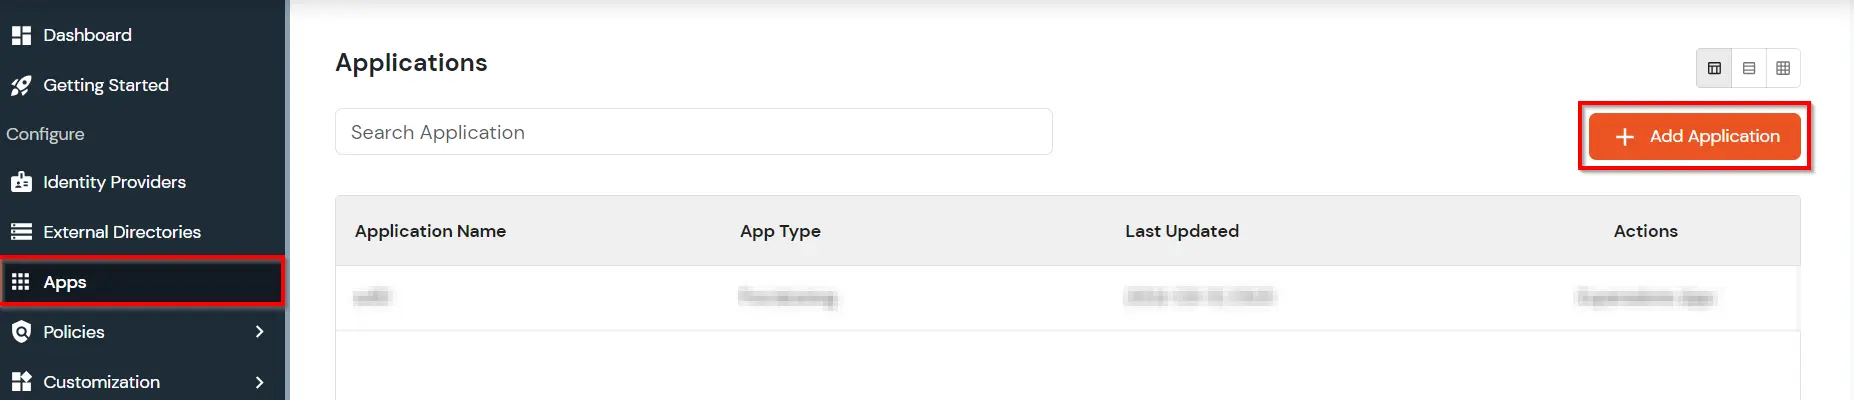
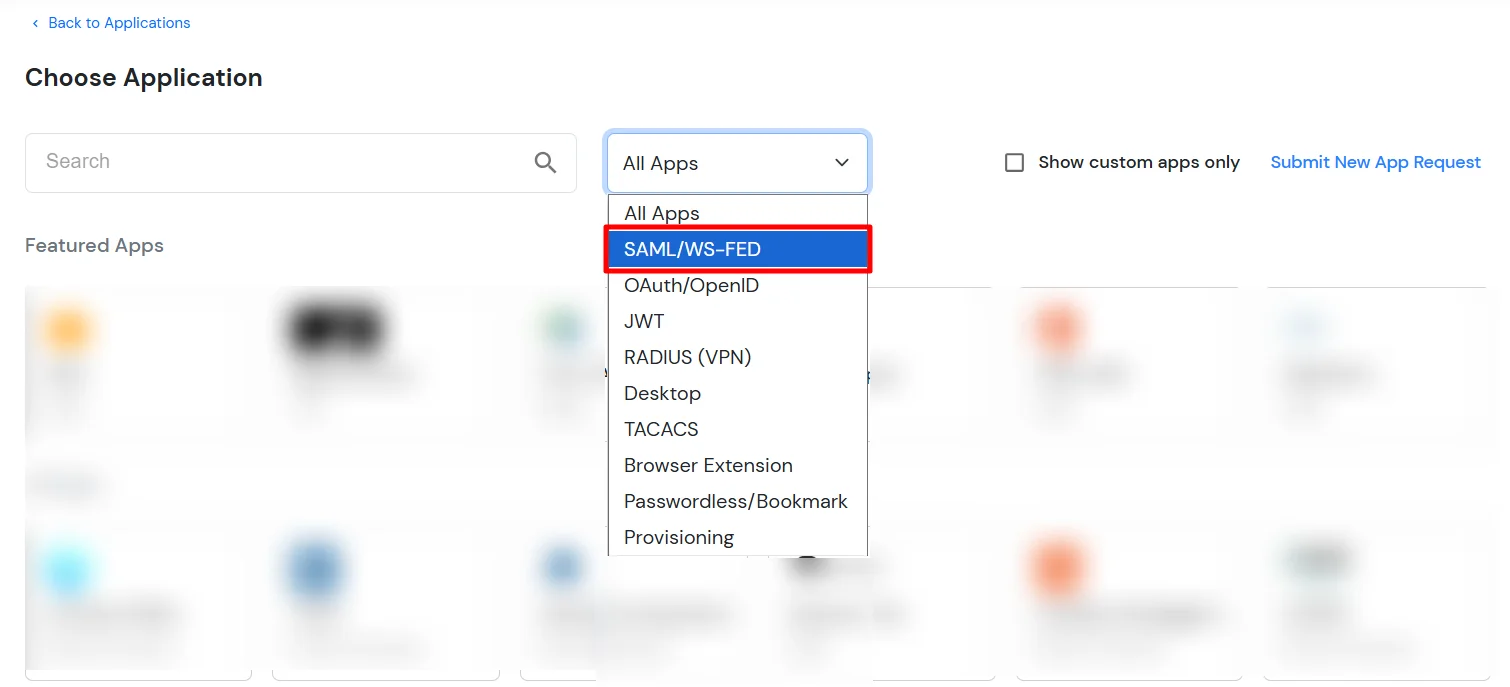
- In Choose Application Type click on Create App button in SAML/WS-FED application type.
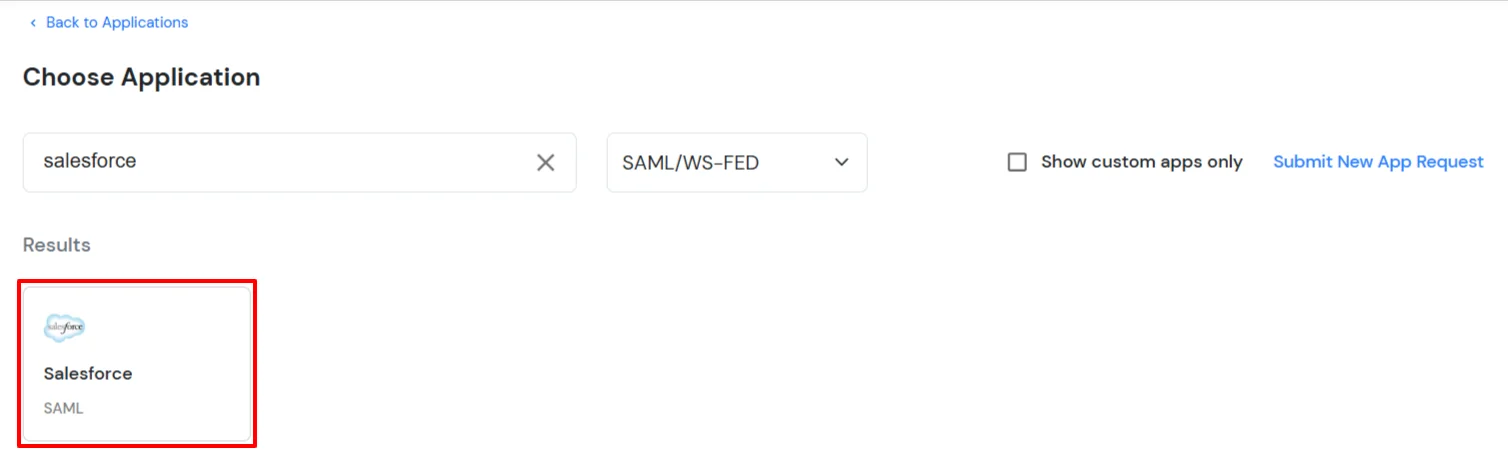
- Search for Salesforce in the list.
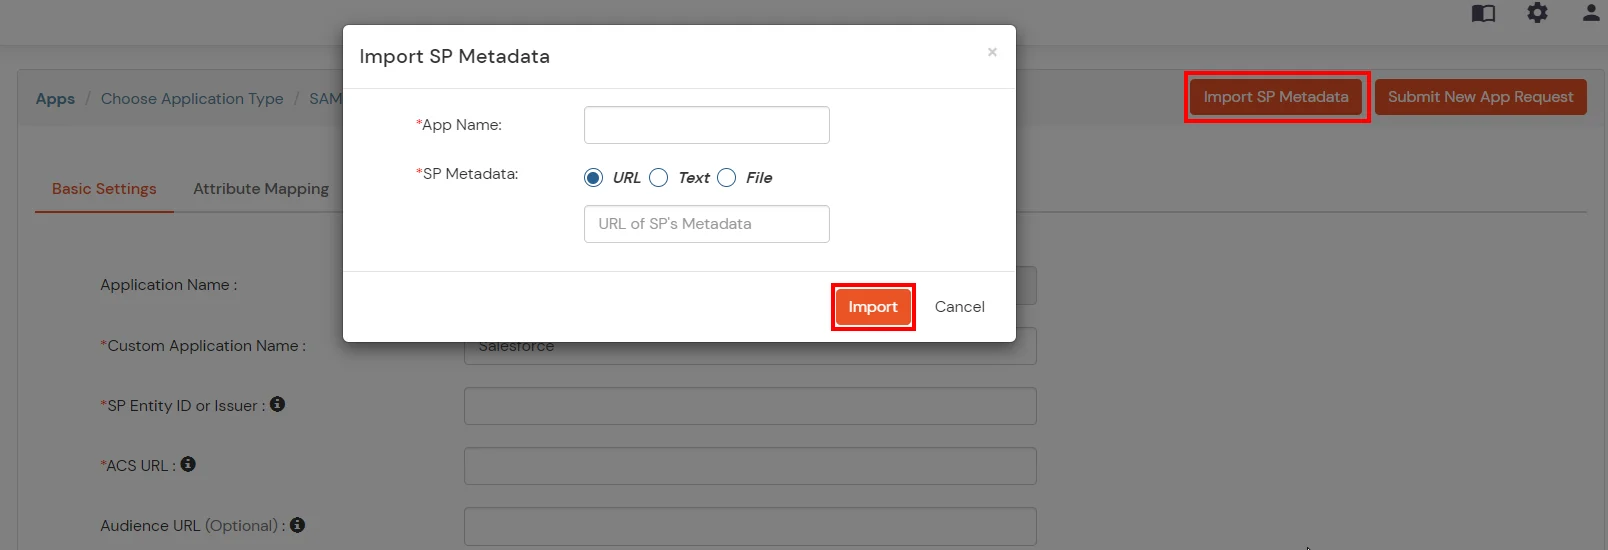
- Upload the XML metadata file from Salesforce in miniOrange Dashboard using the Import SP Metadata feature..
- Click Next, now in the Attributes tab configure attributes according to your choice.
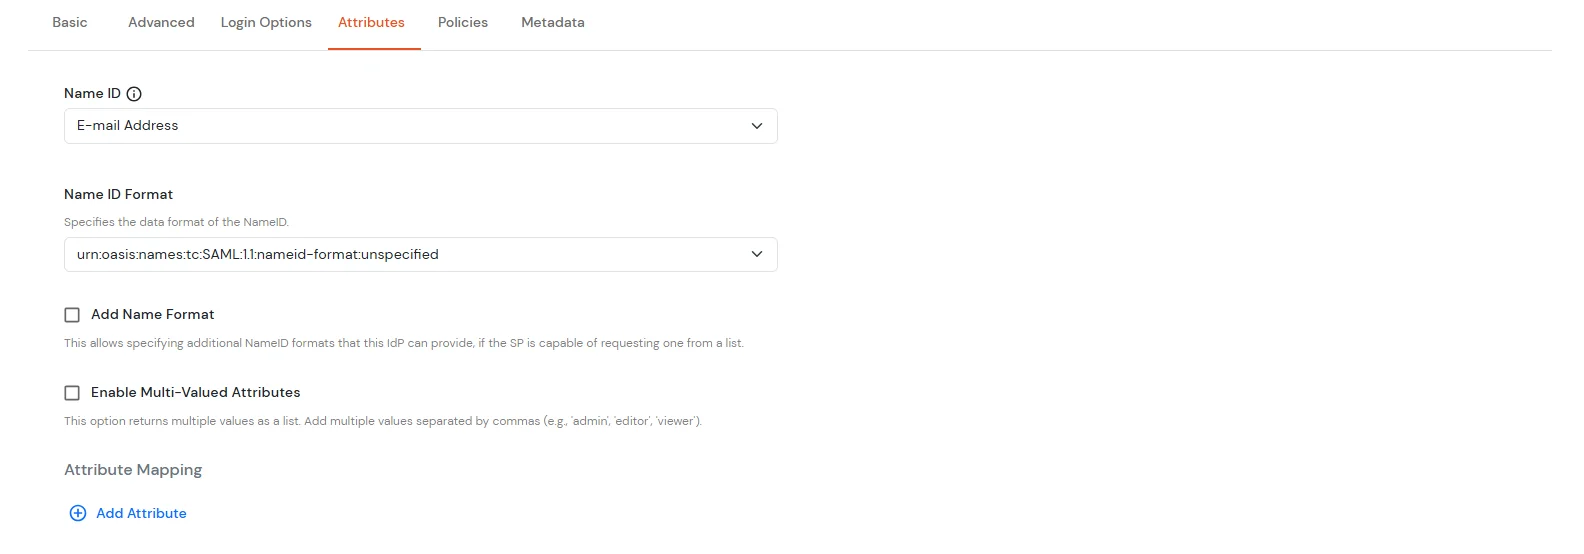
- Click on Save.
- Go to Apps >> Applications, search for your app, and click the three-dot icon under the Actions column.
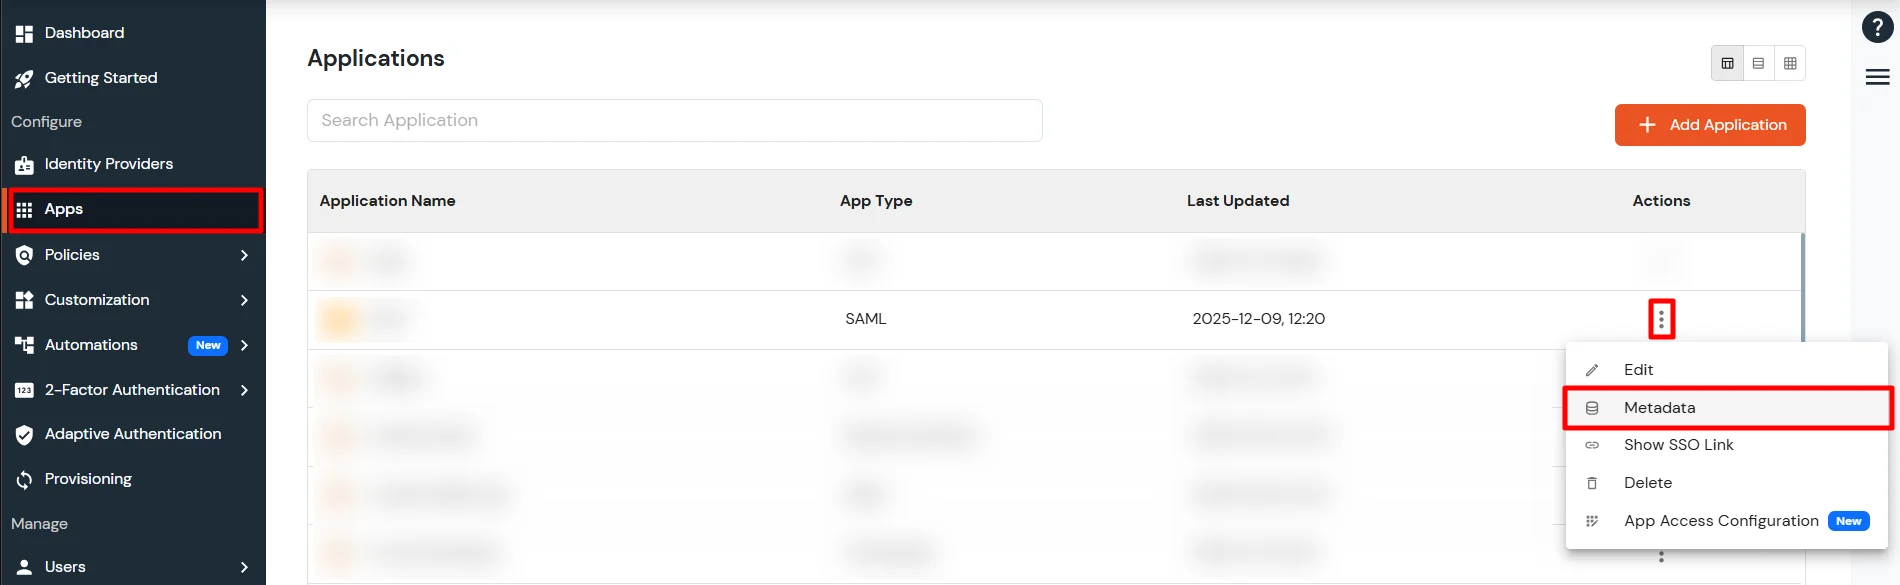
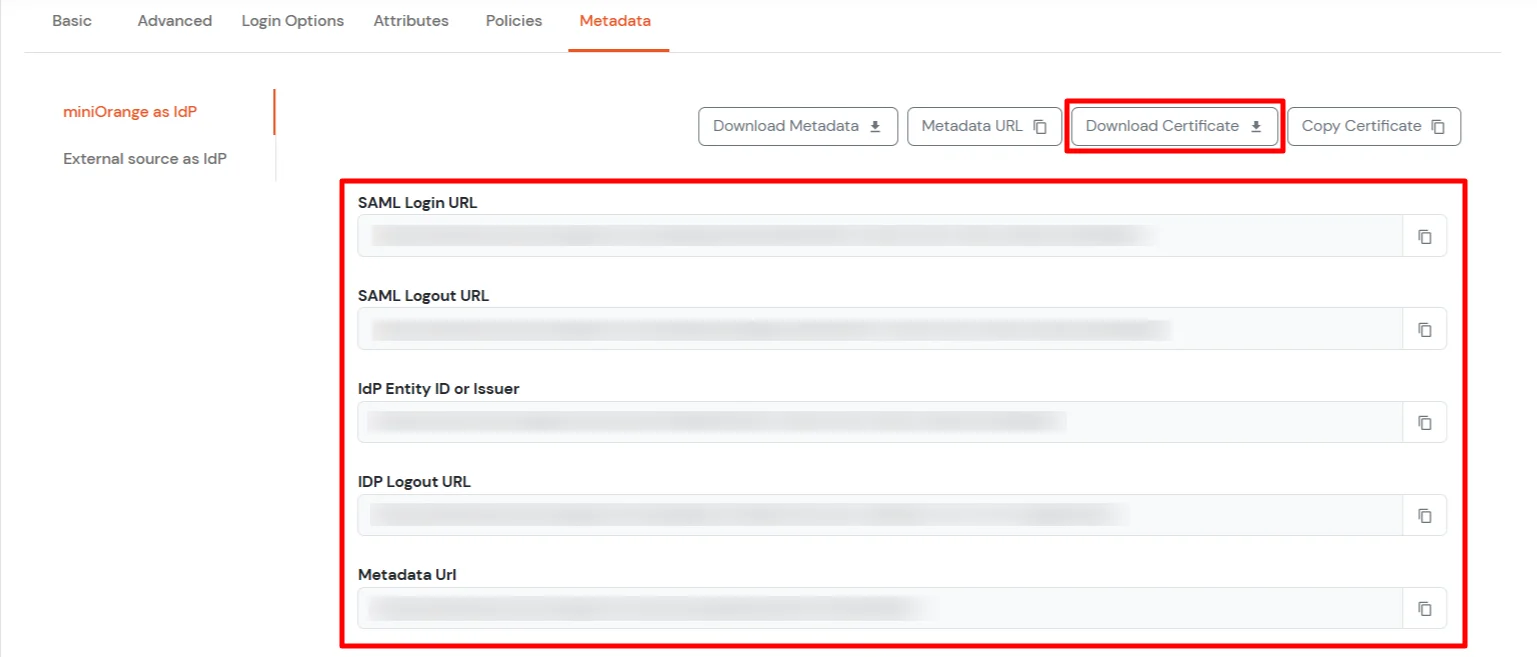
- Now, select Metadata. Here you will see 2 sections. If you are setting up miniOrange as IdP, copy the metadata from the first section. If you need to authenticate via external IdPs (Okta, Azure AD, ADFS, OneLogin, Google Workspace), get the metadata from the External source as IdP section as shown below.
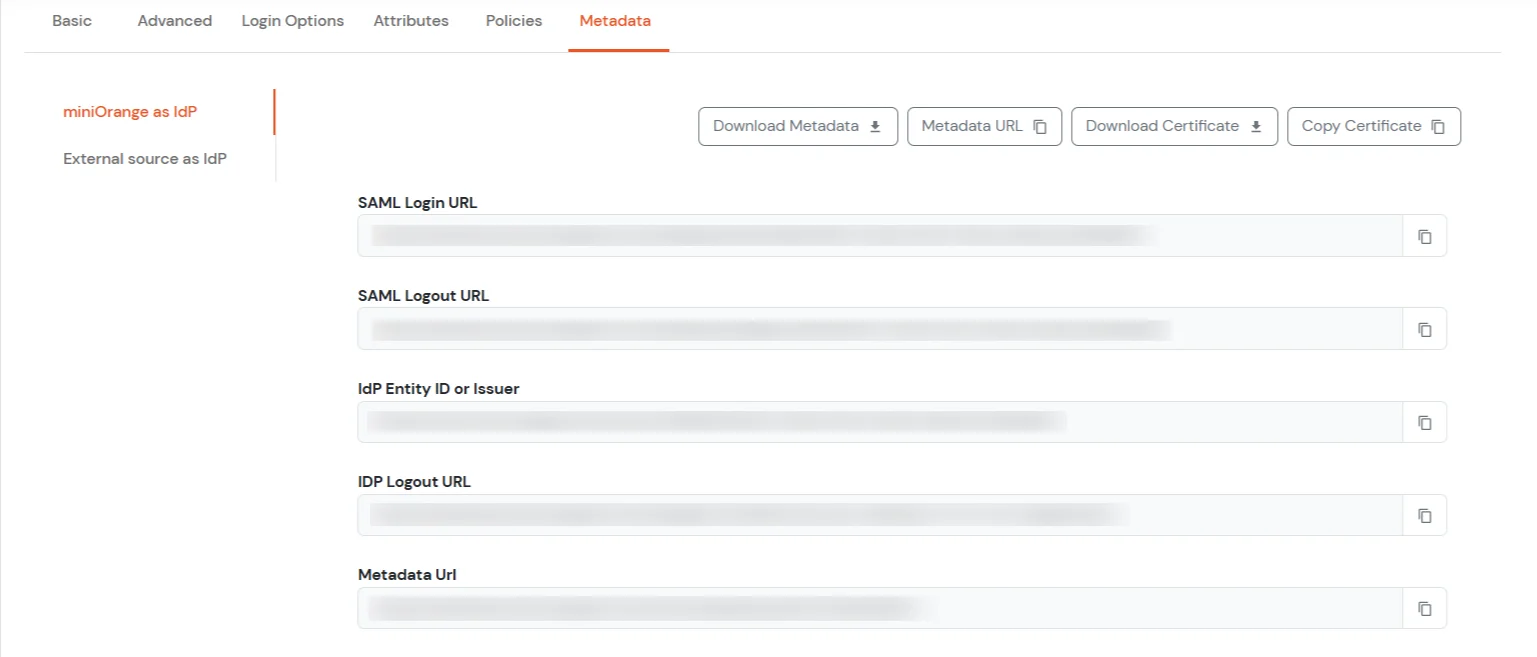
- Keep SAML Login URL , SAML Logout URL and click on the Download Certificate button to download certificate which you will require in Step 2.
2. Configure SAML Single Sign-On in Salesforce
- Go back to your Salesforce account.
- Now in the left pane, go to Identity >> Single Sign-On Settings or you can search for the Single Sign-On Settings in the Search box.
- Click Edit.
- To view the SAML SSO settings, select SAML Enabled.
- Save your changes.
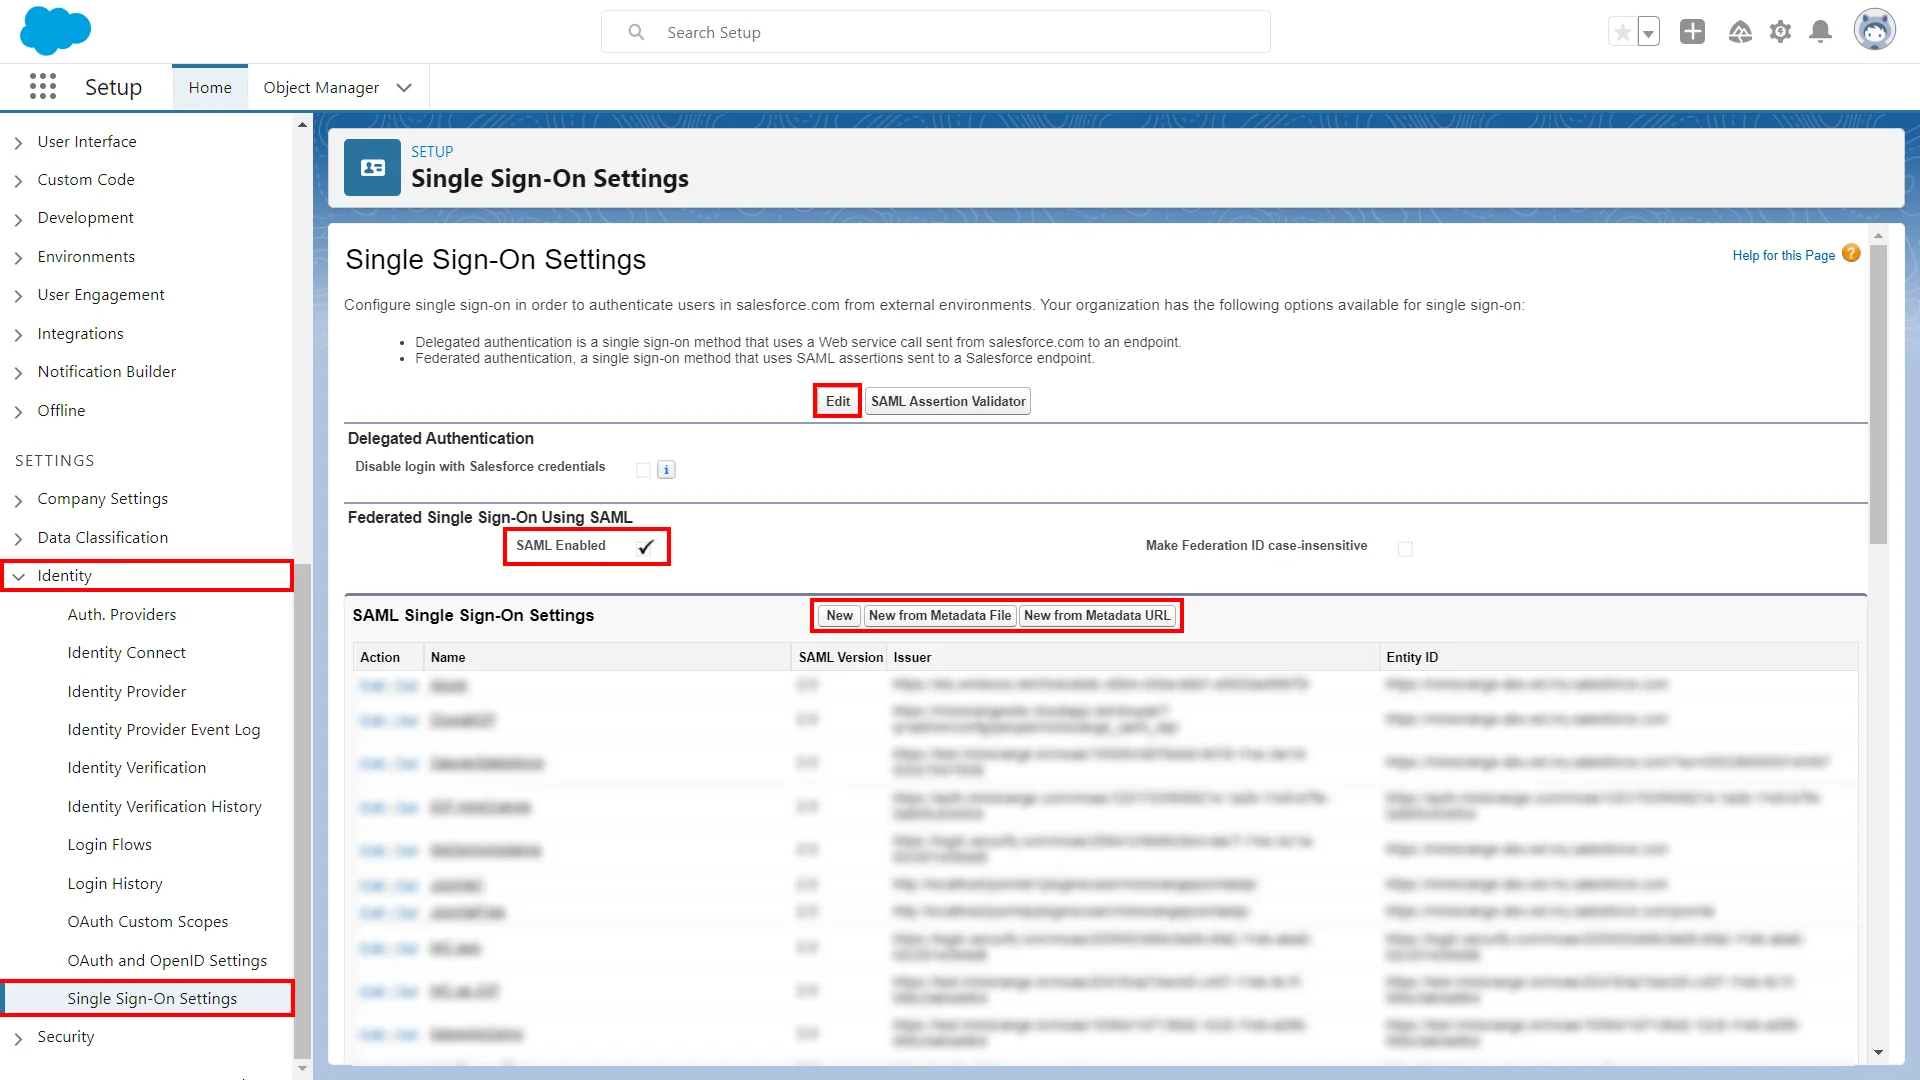
- In SAML Single Sign-On Settings, click any of the appropriate button to create a configuration:
- New: Specify all settings manually.
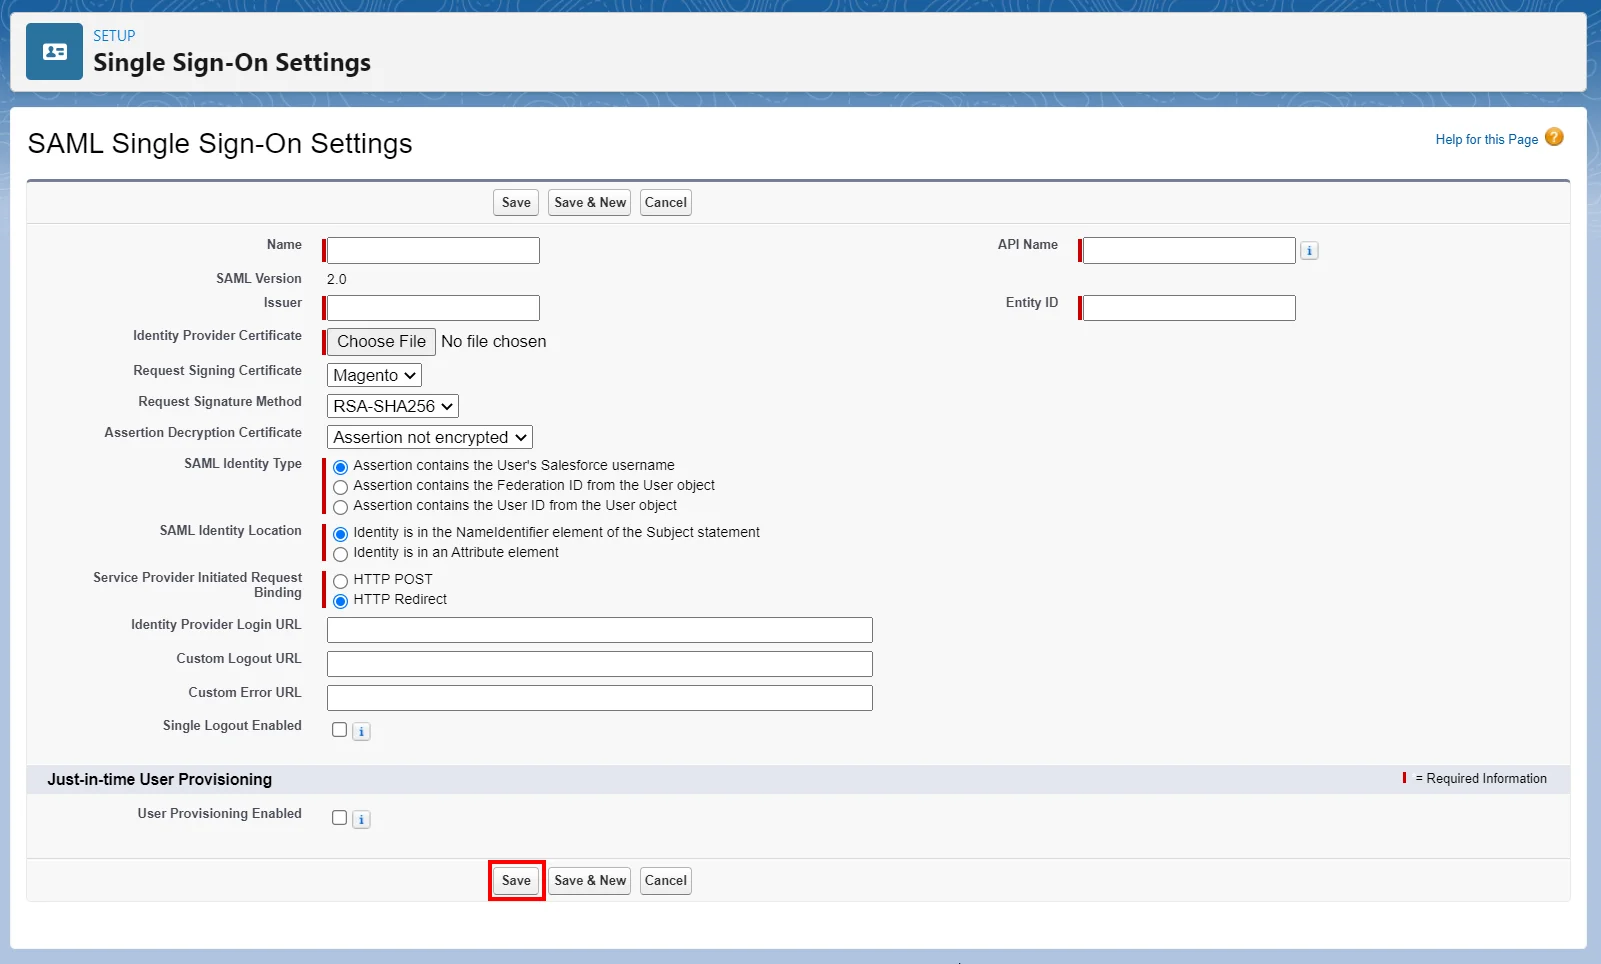
| Issuer |
IDP Entity ID/Issuer in miniOrange metadata |
| Entity ID |
https://[yourdomain].my.salesforce.com |
| Identity Provider Certificate |
Upload Certificate from miniOrange metadata |
| Request Signature method |
RSA-SHA256 |
| Assertion Decryption Certificate |
Not encrypted |
| *SAML Identity Type |
Assertion contains the User's Salesforce username |
| *SAML Identity Location |
Identity is in the NameIdentifier element of the Subject statement |
| *Service Provider Initiated Request Binding |
HTTP Redirect |
| Identity Provider Login URL |
SAML Login URL in miniOrange metadata |
| Custom Logout URL |
https://[yourdomain].my.salesforce.com |
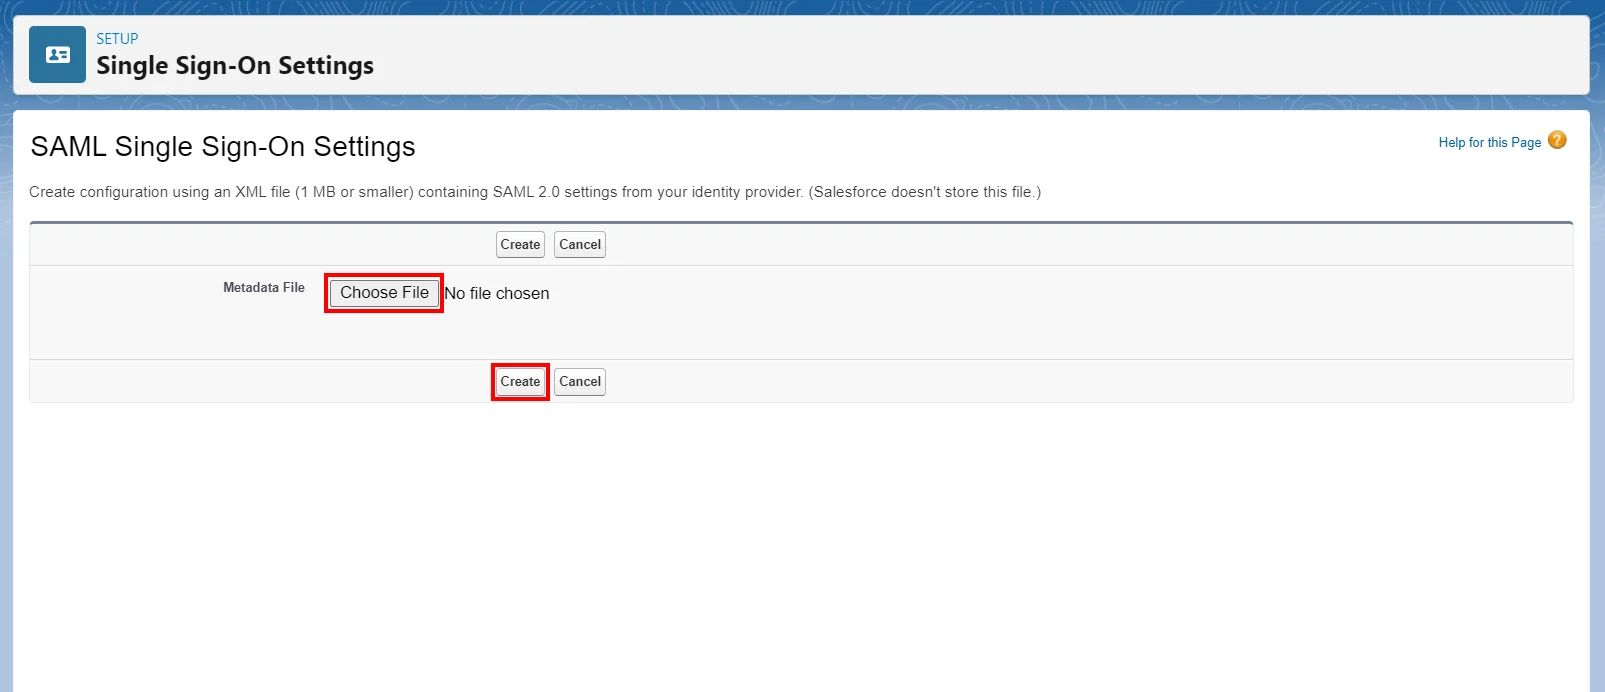
- New from Metadata File: Import SAML 2.0 settings from an XML file provided by miniOrange. This option uses the XML file to populate as many settings as possible.
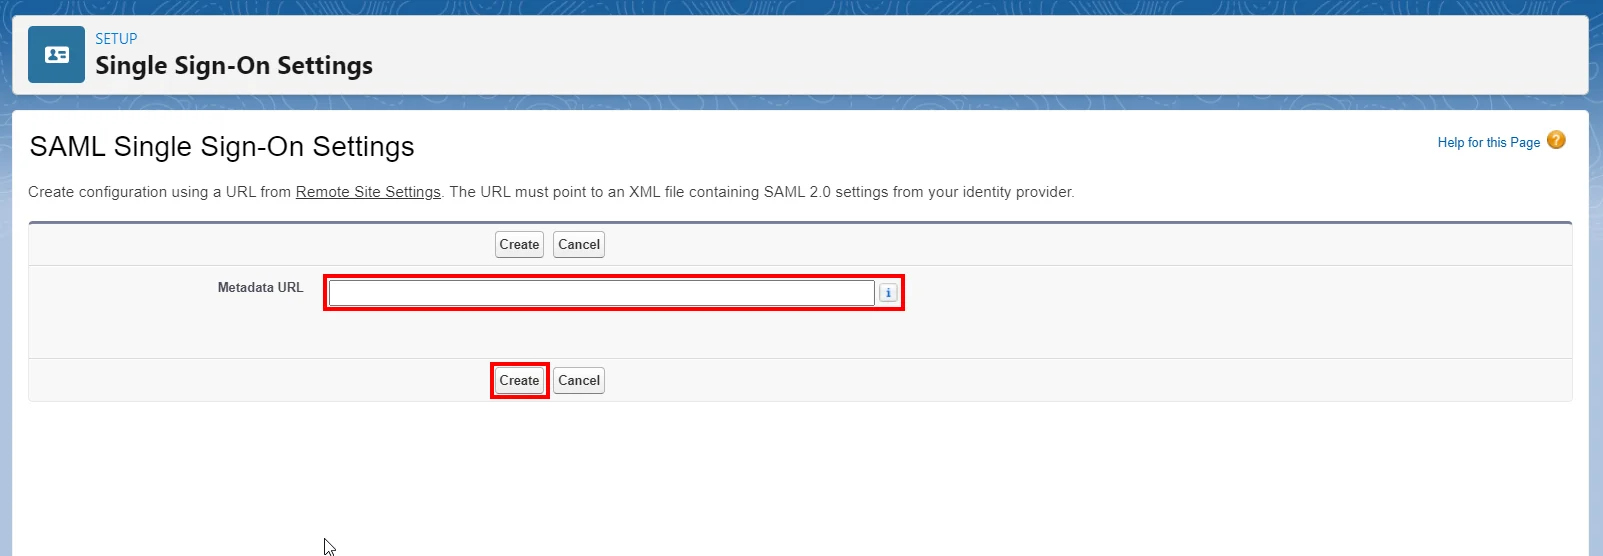
- New from Metadata URL: Import SAML 2.0 settings from miniOrange Metadata URL. This option reads the XML file at a public URL and uses it to populate as many settings as possible. To access the URL, add the URL to Remote Site Settings.
- Optionally, set up JIT provisioning. For more information, see Enable Just-in-Time user provisioning and About Just-in-Time Provisioning for SAML.
- Click Save.
3. Configure IP Restriction Policy
[Note: The Adaptive Authentication section has been moved from the left navigation menu. The IP-Based Access Restriction configuration is now available under Policies >> Adaptive Access Policy.]
IP Based Access Restriction allows administrators to control user access based on the source IP address of the login request. Administrators can configure trusted or restricted IP addresses and IP ranges and define the action to be taken when a user's IP address matches the configured criteria. During authentication, the user's IP address is evaluated against the configured policy and access is either Allowed, Denied or Challenged based on the selected configuration.
- Login to Self Service Console >> Policies >> Adaptive Access Policy section from the left side menu.
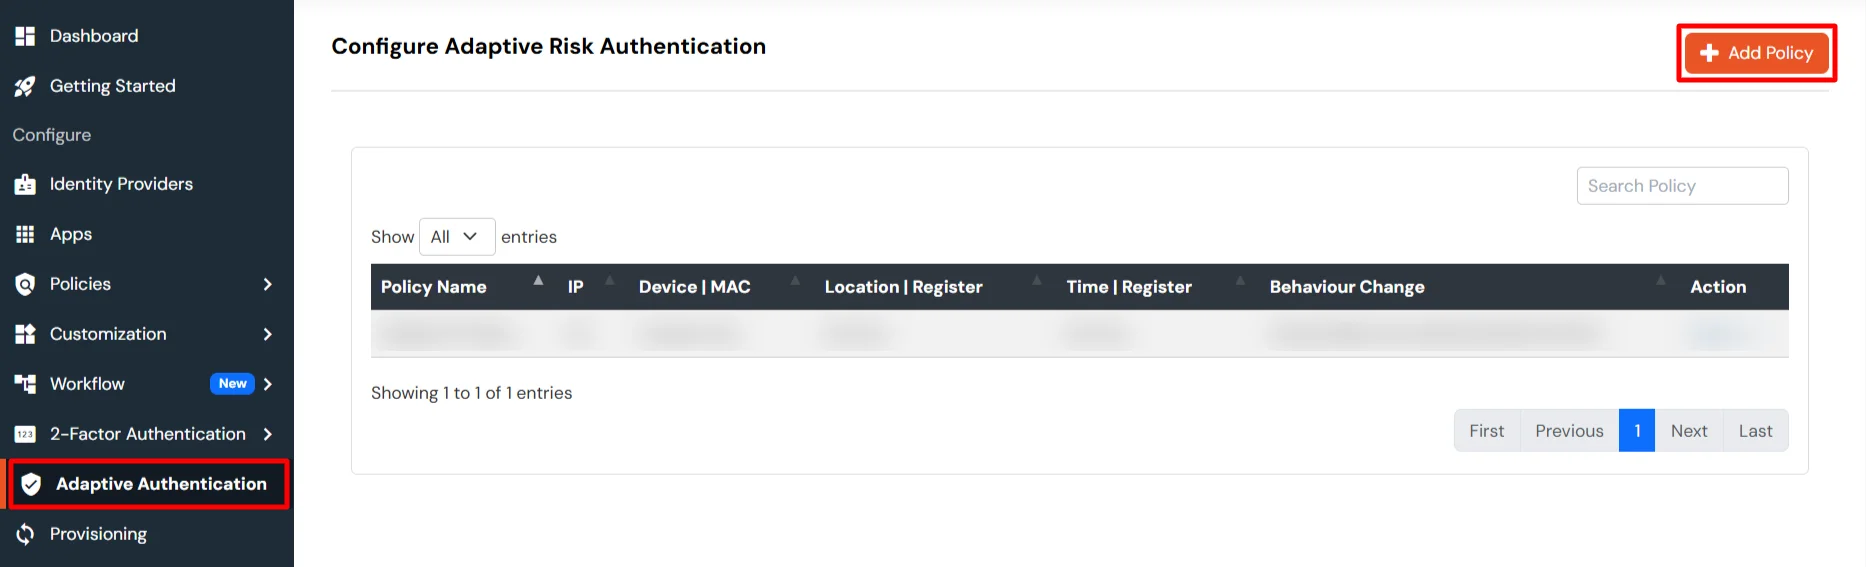
- Click on the Create Policy button on the upper right. Add a suitable policy name and click on Create Policy.
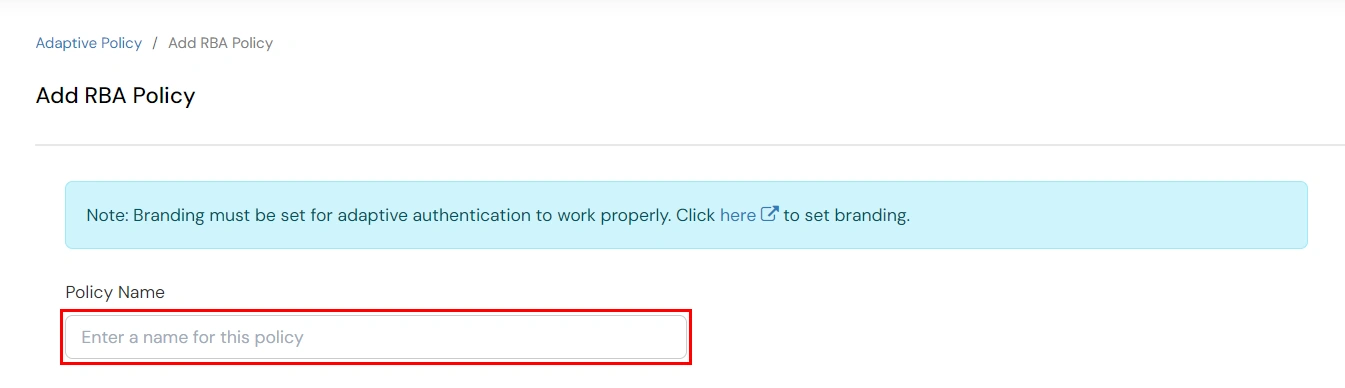
3.1 Policy Overview
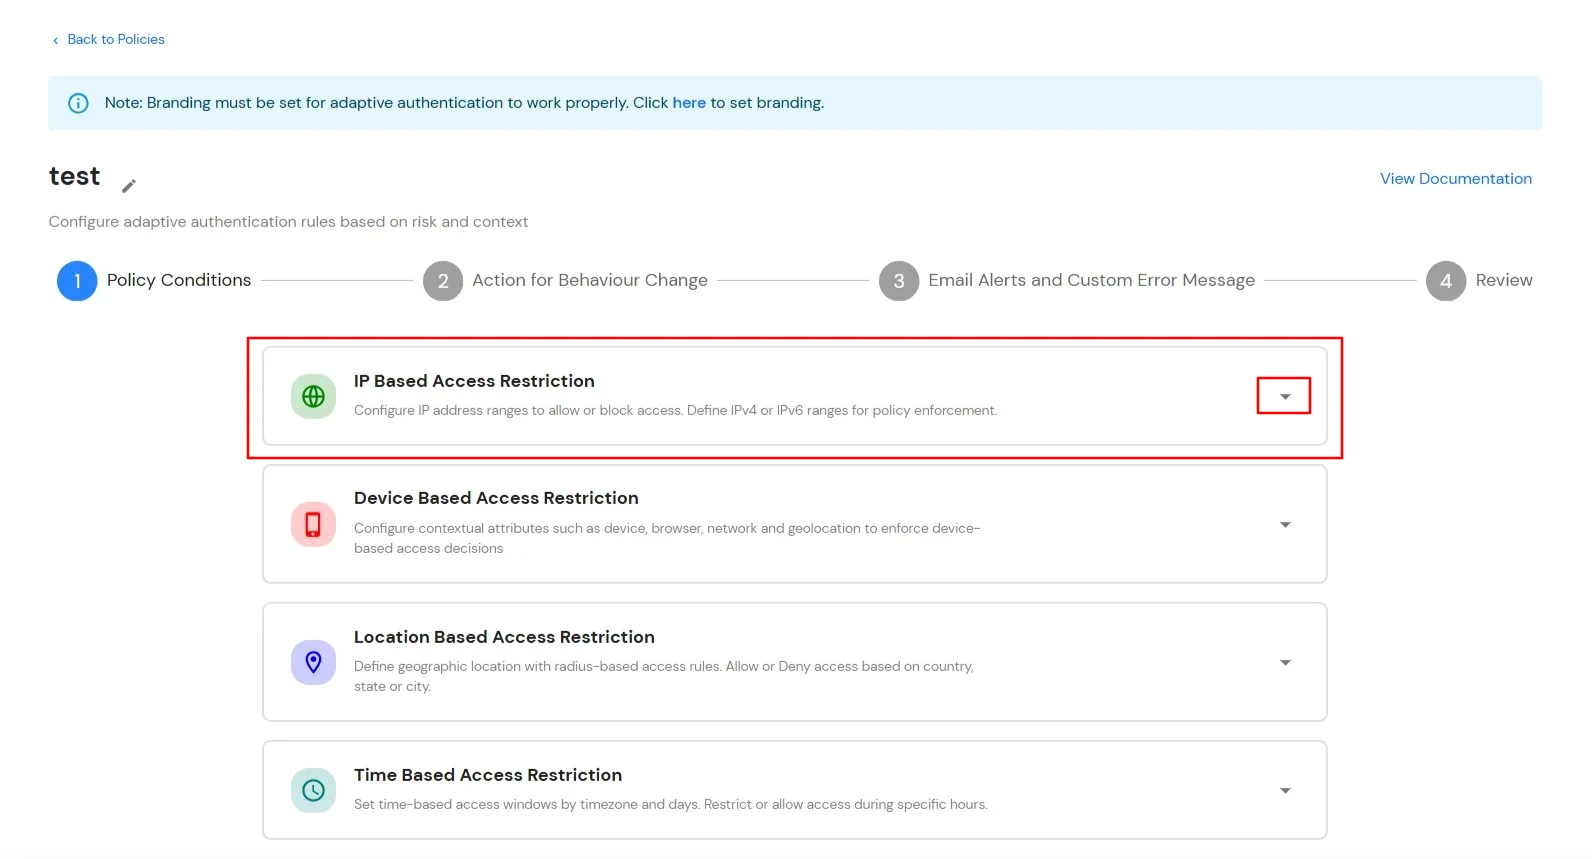
- Expand the IP Based Access Restriction section by clicking on the dropdown icon to configure IP-based access rules.
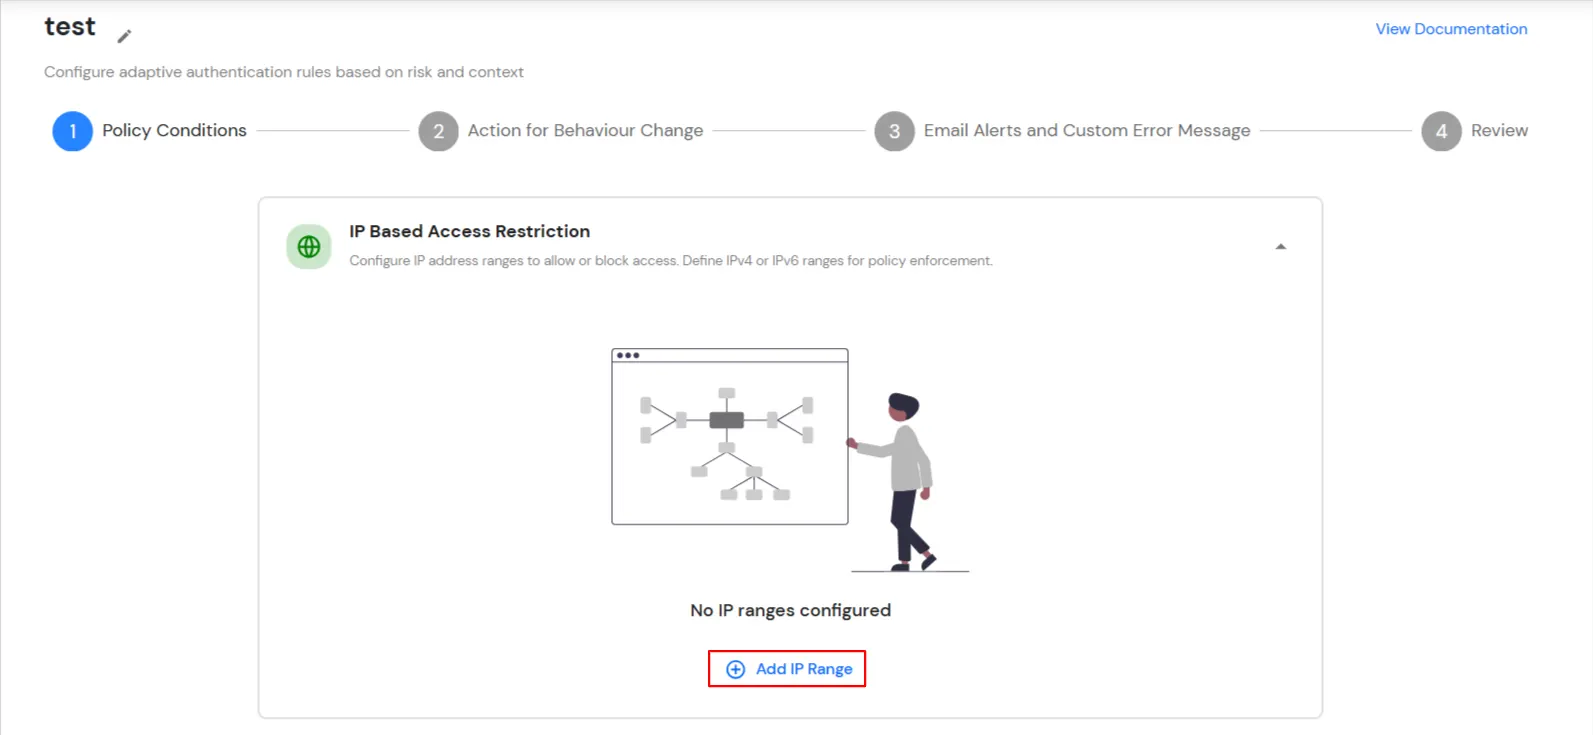
- Click Add IP Range to configure IP addresses or IP ranges for the policy.
- Specify the IP Address that you want to whitelist. For the IP Range other than the whitelisted one, you can select the above setting to reflect.
- Choose either Allow or Deny by selecting the corresponding option from the dropdown. If a user tries to login with the whitelisted IP address, they will always be allowed access.
- We support IP address range in three formats i.e., IPv4, IPv4 CIDR and IPv6 CIDR. You can choose whichever is suitable for you from the dropdown menu.
- You can add multiple IPs or IP ranges by clicking the + Add IP Range button.
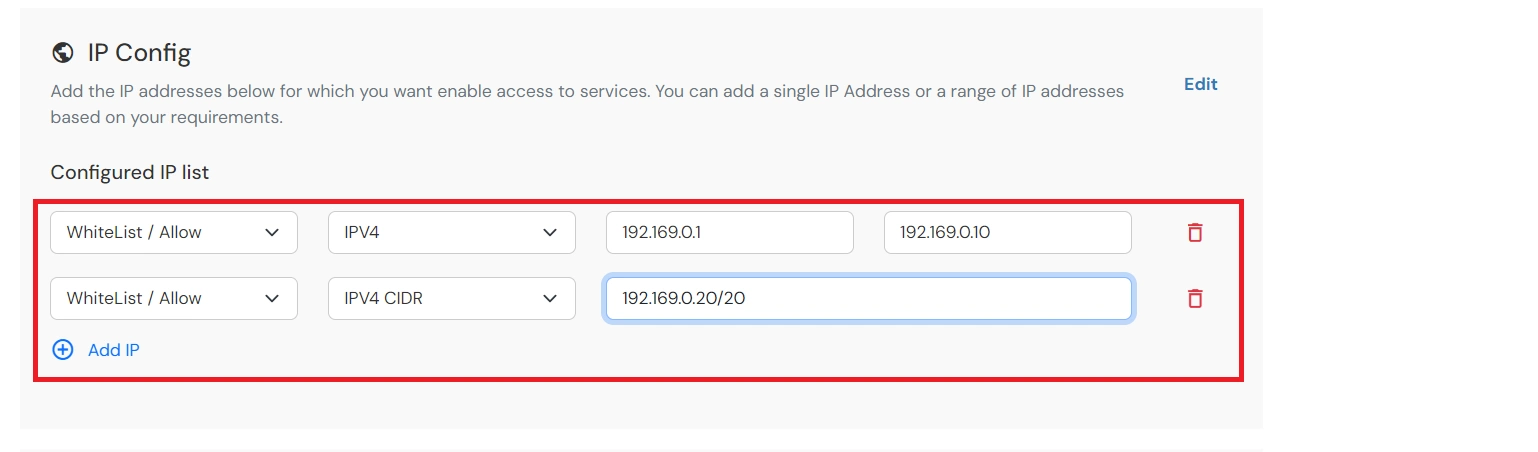
- Once the changes are made, click on Next.
3.2 Action for Behavior Change
- You can configure one of the three possible actions for your Adaptive Access Policy as explained below:
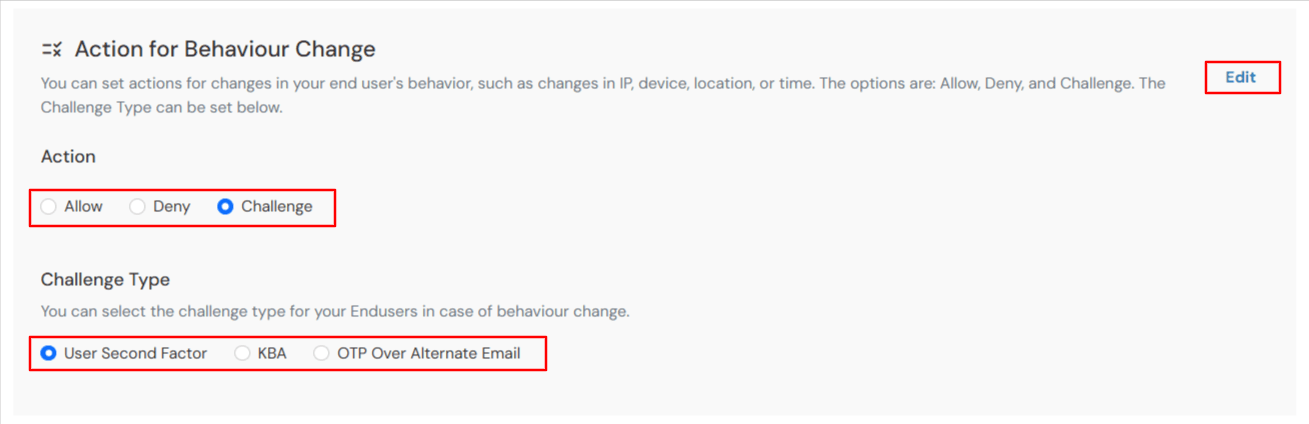
| Attribute |
Description |
| Allow |
Allow users to authenticate and use services if Adaptive Access Policy condition is true. |
| Deny |
Deny user authentications and access to services if Adaptive Access Policy condition is true. |
| Challenge |
Challenge users with one of the three methods mentioned below for verifying user authenticity. |
Challenge Type Options:
| Factors |
Description |
| User Second Factor |
The user needs to authenticate using the second factor they have selected or been assigned, such as
- OTP over SMS
- PUSH Notification
- OTP over Email and many more.
|
| KBA |
The system will ask the user for 2 of 3 questions they have configured in their Self-Service Console. Only after the correct answers to both questions will the user be allowed to proceed further. |
| OTP over Alternate Email |
User will receive an OTP on the alternate email they have configured through the Self Service Console. Once the user provides the correct OTP, they are allowed to proceed further. |
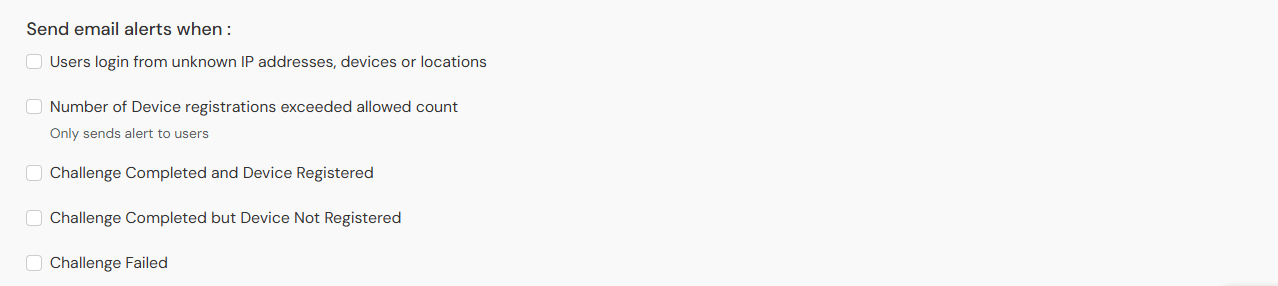
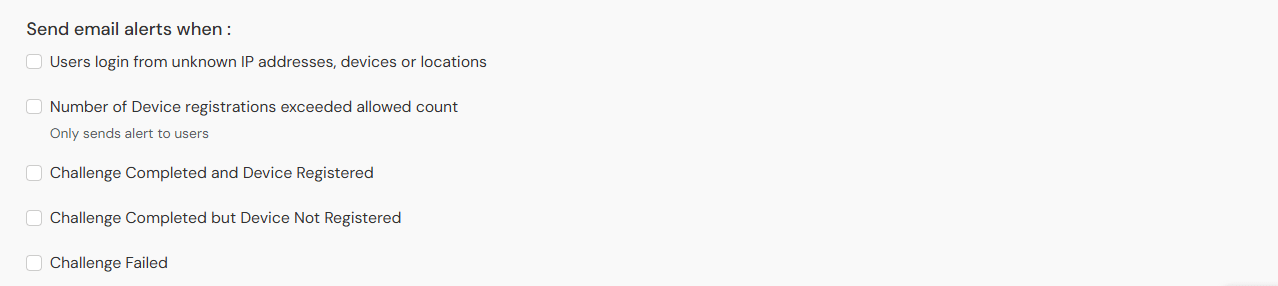
3.3 Email Alerts and Custom Error Message
3.4 Review
Review the configured policy conditions, behavior change actions, email alert settings and custom error messages before creating the adaptive authentication policy. This step provides a consolidated view of all configured settings, allowing you to verify the policy configuration and make any necessary changes before saving.
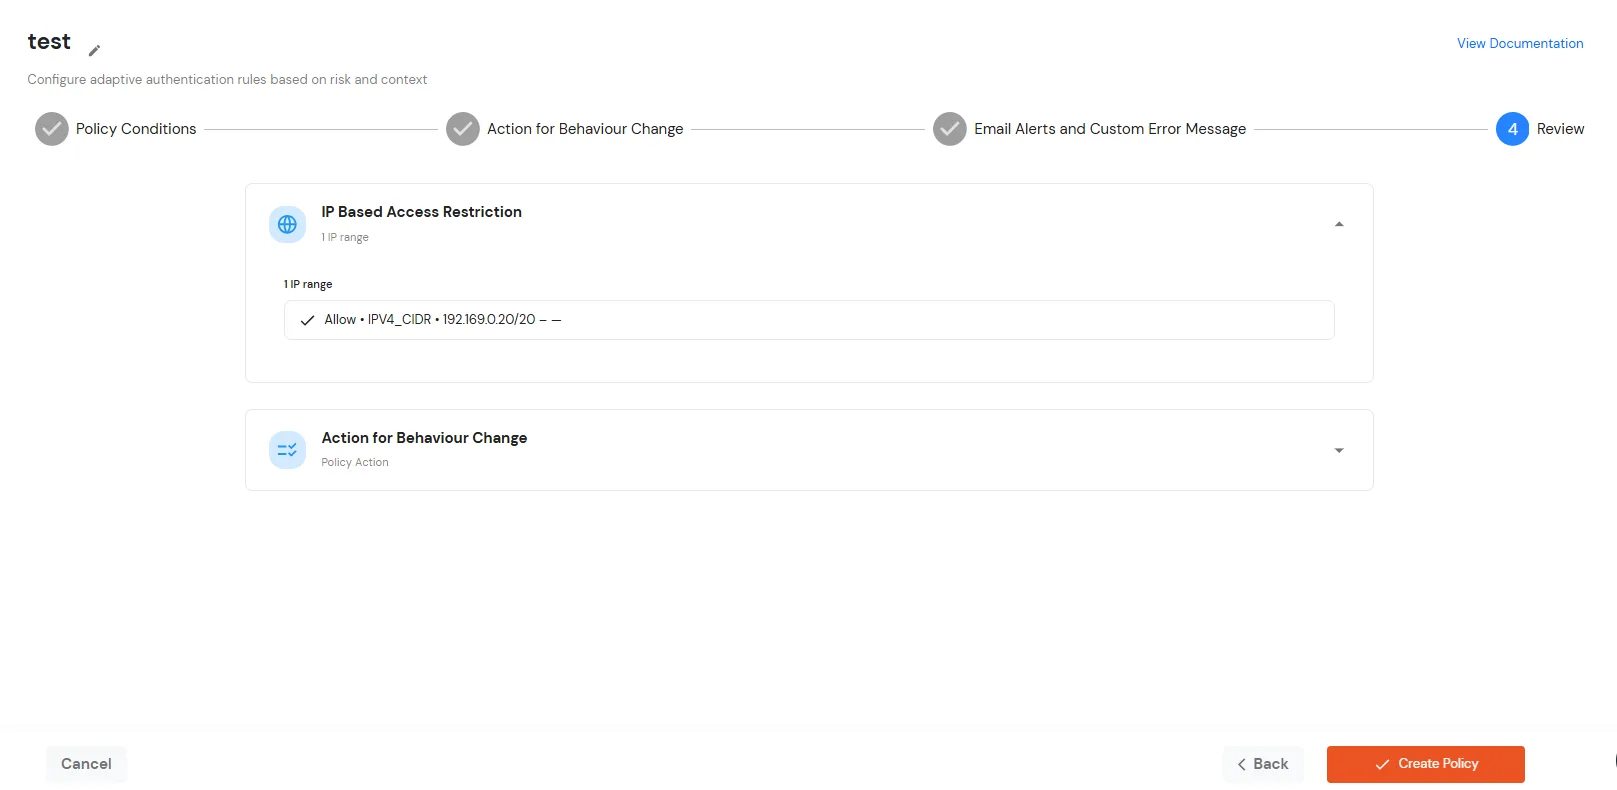
- Once you have verified all configurations, click Create Policy to save and activate the policy.
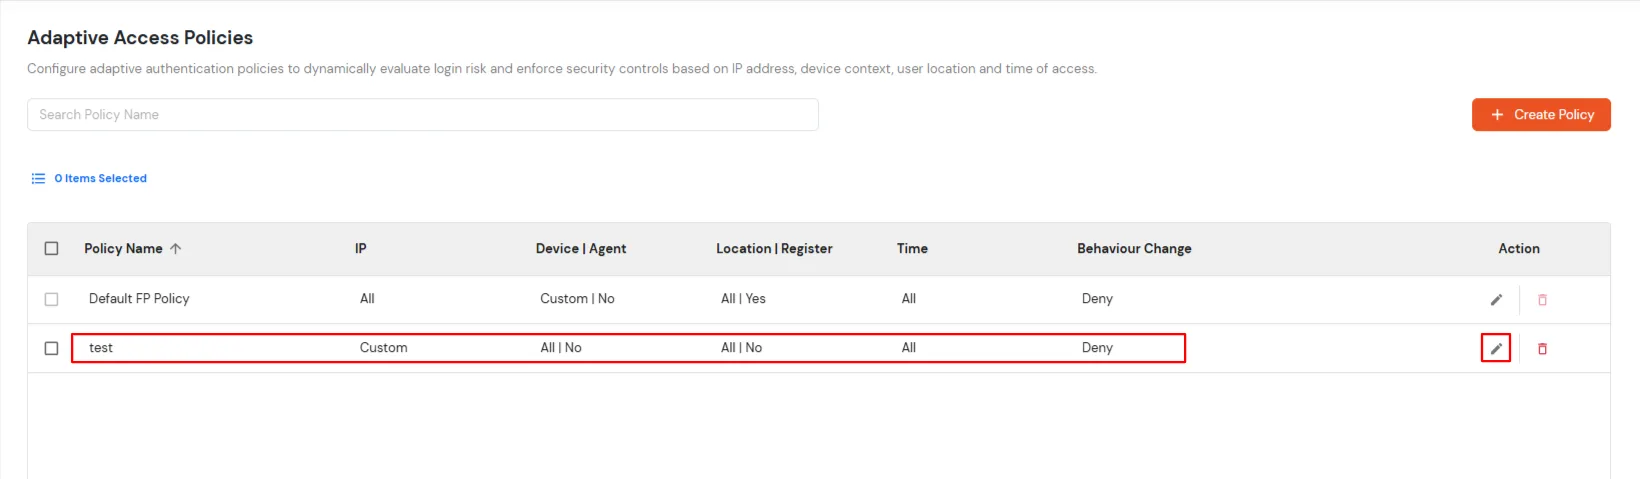
- You will see the policy listed once it’s successfully added.
4. Enable Restriction for Salesforce
- Login to Self Service Console >> Policies >> App Login Policy.
- Click on the Edit icon for the predefined app policy.
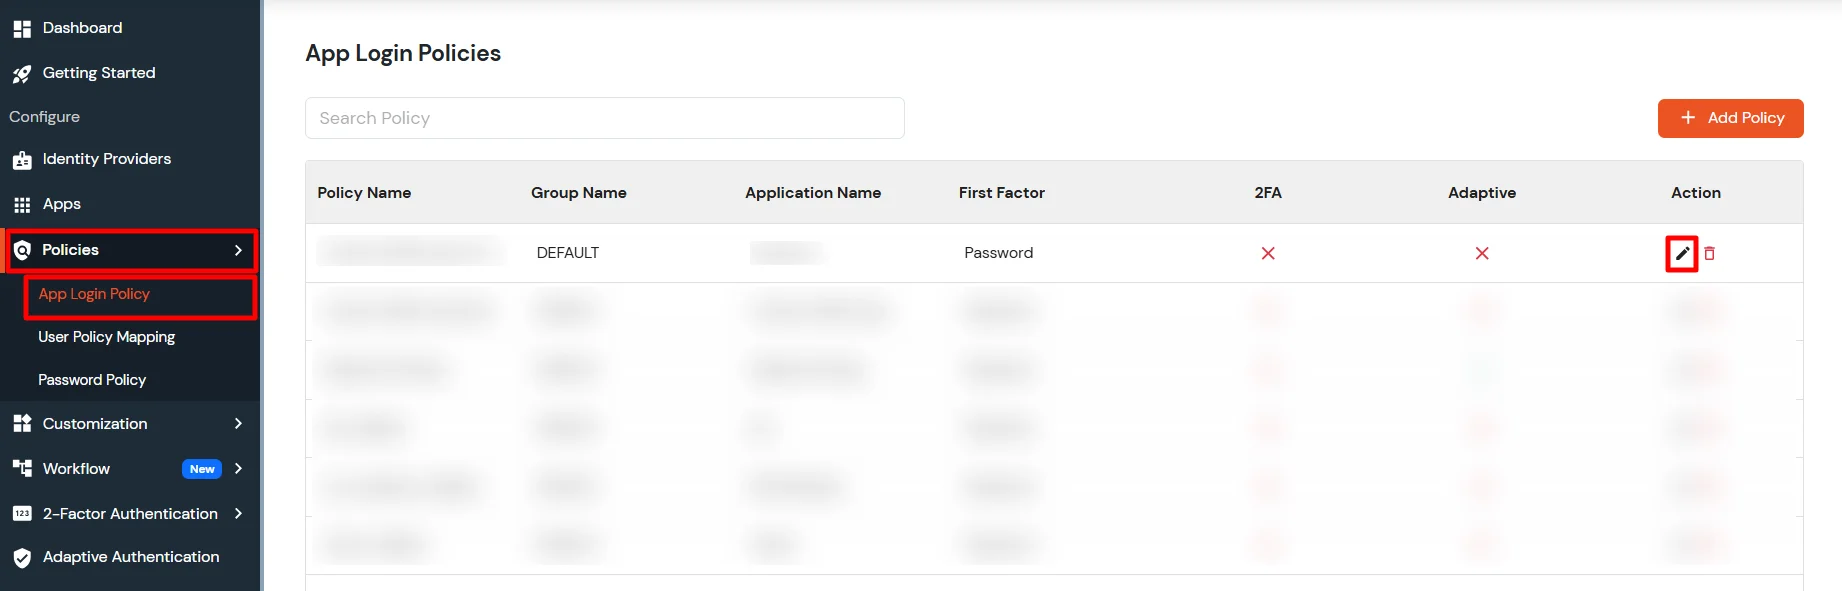
- Set Group Name and Policy Name as required. Select Password as First Factor.
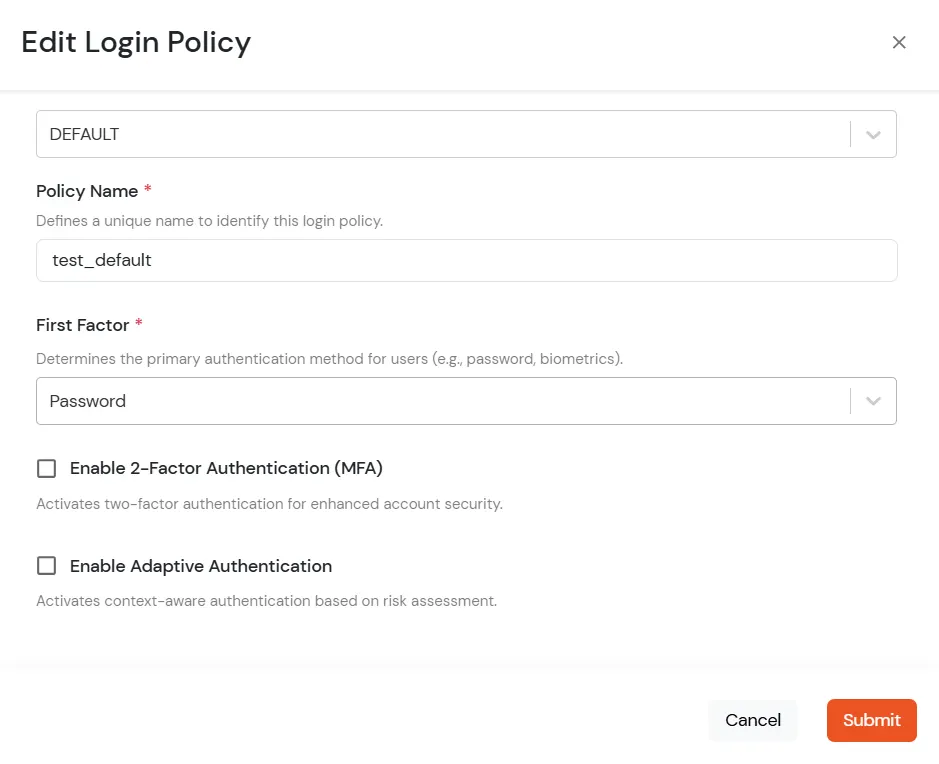
- Enable Adaptive Authentication on Edit Login Policy page and select the required restriction method as an option.
- From Select Login Policy dropdown select the policy we created in last step.
- Apply Restrictions Using: Select how IP Restriction should be evaluated when multiple adaptive authentication restrictions are configured.
- AND: The configured IP Restriction and all other enabled restrictions must be satisfied before access is granted.
- OR: The configured IP Restriction or at least one other enabled restriction must be satisfied before access is granted.
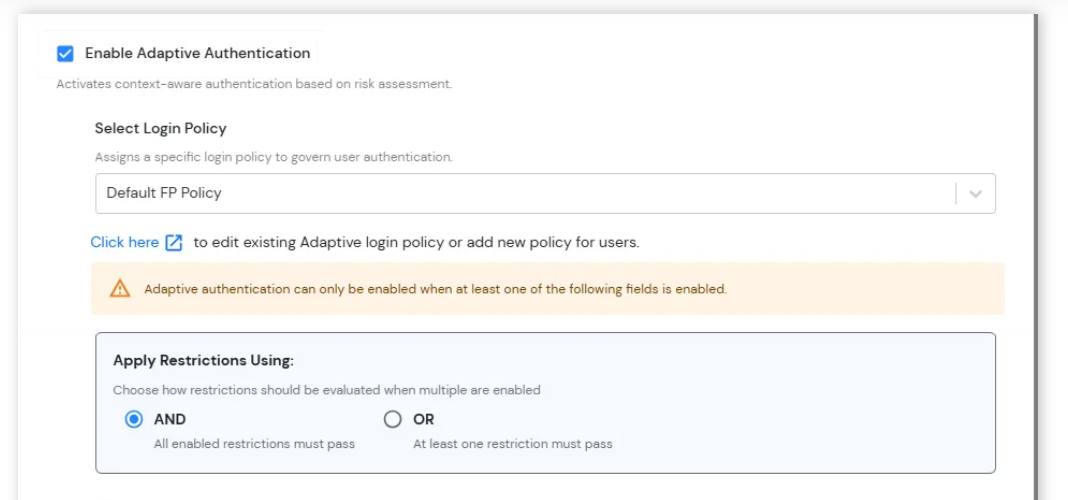
- Adaptive Authentication Restrictions: Configure additional login restrictions and verification conditions along with the existing configured Restriction to strengthen account security and control user access based on contextual risk factors.
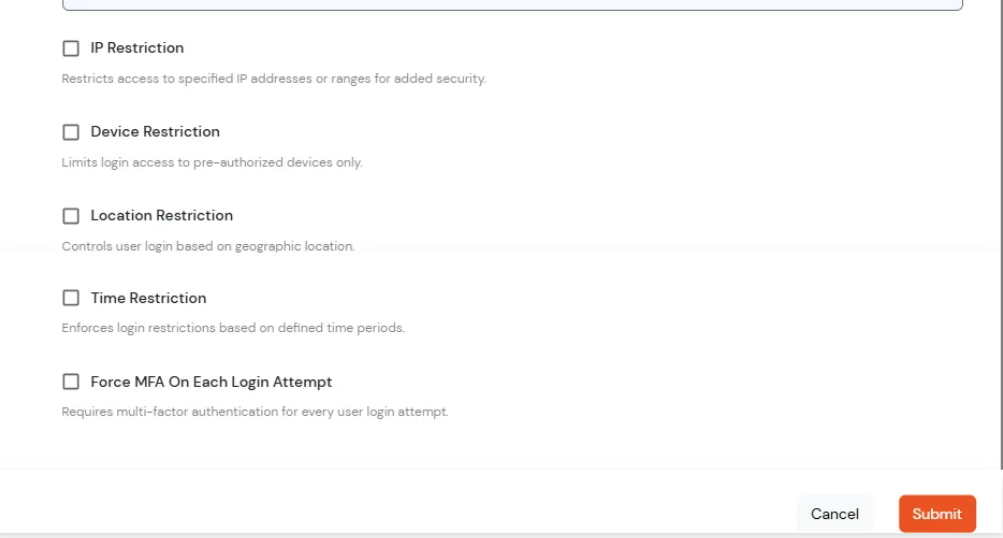
Need help to configure IP / Device / Location / Time Restriction for Salesforce?
Contact us or email us at idpsupport@xecurify.com and we'll help you setting it up in no time.
5. Configure Your User Directory (Optional)
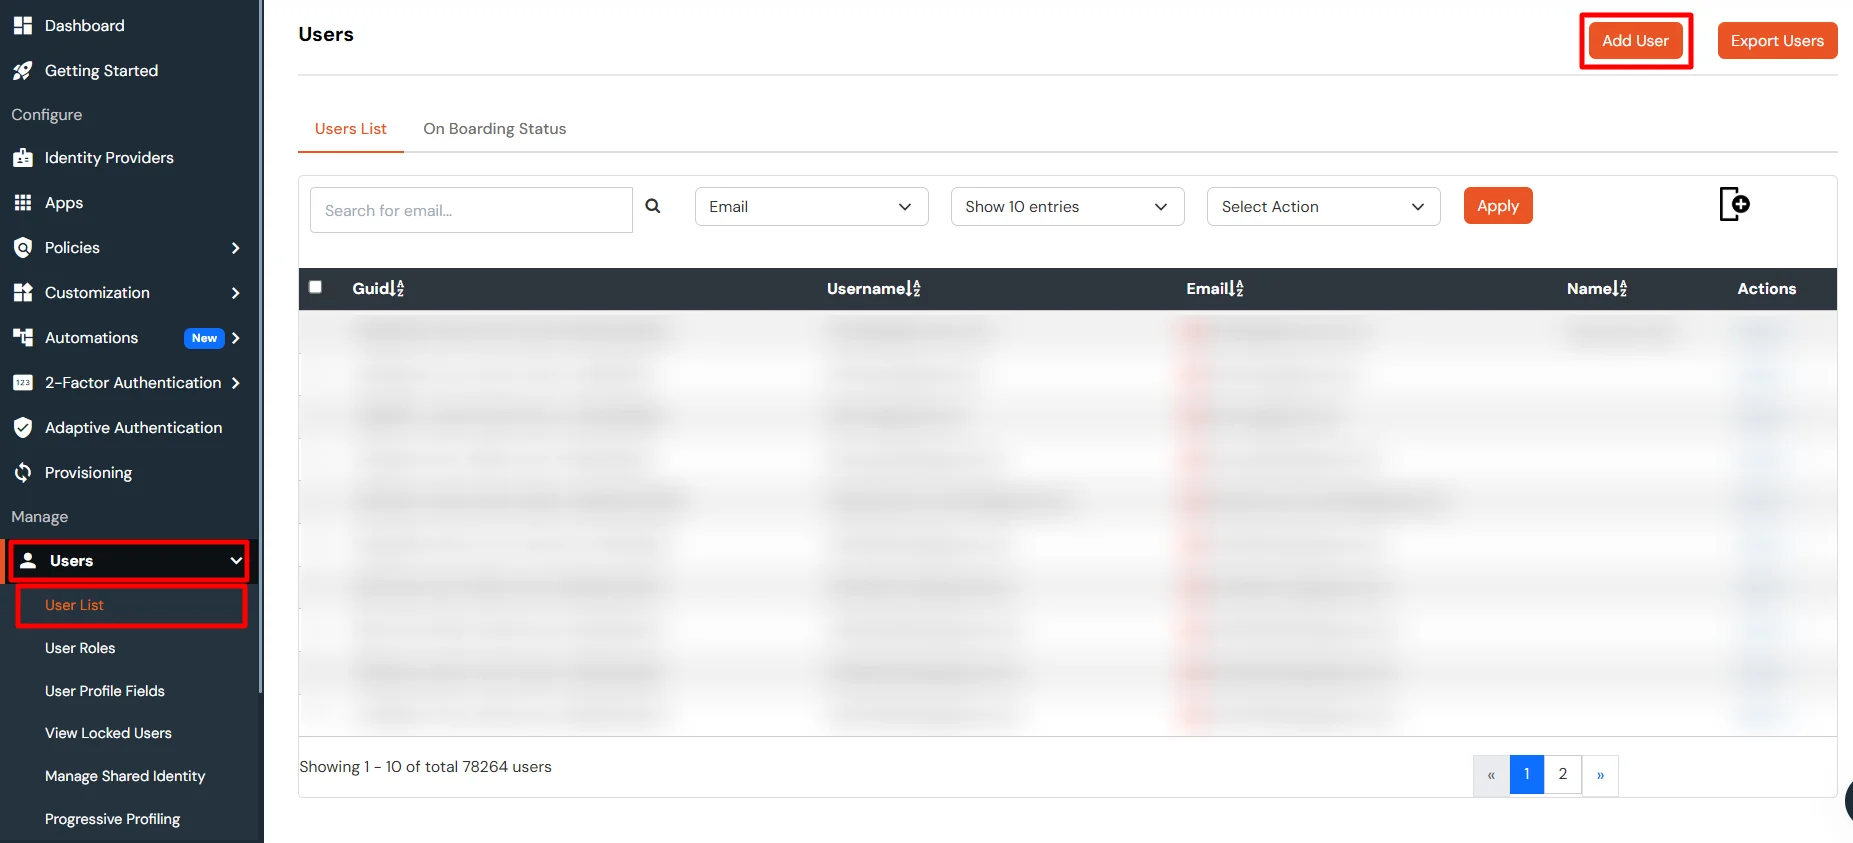
miniOrange provides user authentication from various external sources, which can be Directories (like ADFS, Microsoft Active Directory, Microsoft Entra ID, OpenLDAP, Google, AWS Cognito etc), Identity Providers (like Okta, Shibboleth, Ping, OneLogin, KeyCloak), Databases (like MySQL, Maria DB, PostgreSQL) and many more. You can configure your existing directory/user store or add users in miniOrange.
- Click on Identity Providers >> Add Identity Provider in the left menu of the dashboard

- In Choose Identity Provider, select AD/LDAP Directories from the dropdown.
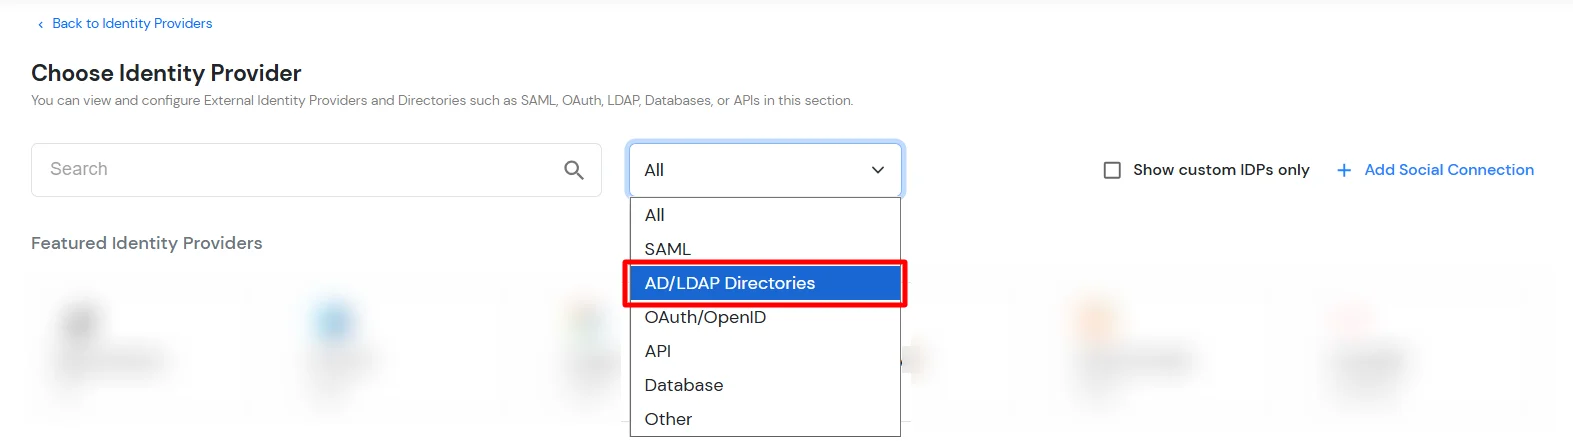
- Then search for AD/LDAP and click it.

- STORE LDAP CONFIGURATION IN MINIORANGE: Choose this option if you want to keep your configuration in miniOrange. If the active directory is behind a firewall, you will need to open the firewall to allow incoming requests to your AD.
- STORE LDAP CONFIGURATION ON PREMISE: Choose this option if you want to keep your configuration in your premise and only allow access to AD inside premises. You will have to download and install miniOrange gateway on your premise.

- Enter AD/LDAP Display Name and Identifier name.
- Select Directory Type as Active Directory.
- Enter the LDAP Server URL or IP Address against the LDAP Server URL field.
- Click on the Test Connection button to verify if you have made a successful connection with your LDAP server.

- In Active Directory, go to the properties of user containers/OU's and search for the Distinguished Name attribute. The bind account should have minimum required read privileges in Active Directory to allow directory lookups. If the use case involves provisioning (such as creating, updating, or deleting users or groups), the account must also be granted appropriate write permissions.

- Enter the valid Bind account Password.
- Click on the Test Bind Account Credentials button to verify your LDAP Bind credentials for LDAP connection.

- Search Base is the location in the directory where the search for a user begins. You will get this from the same place you got your Distinguished name.

- Select a suitable Search filter from the drop-down menu. If you use User in Single Group Filter or User in Multiple Group Filter, replace the <group-dn> in the search filter with the distinguished name of the group in which your users are present. To use custom Search Filter select "Write your Custom Filter" option and customize it accordingly.

- Click on the Next button, or go to the Login Options tab.
- You can also configure following options while setting up AD. Enable Activate LDAP in order to authenticate users from AD/LDAP. Click on the Next button to add user store.
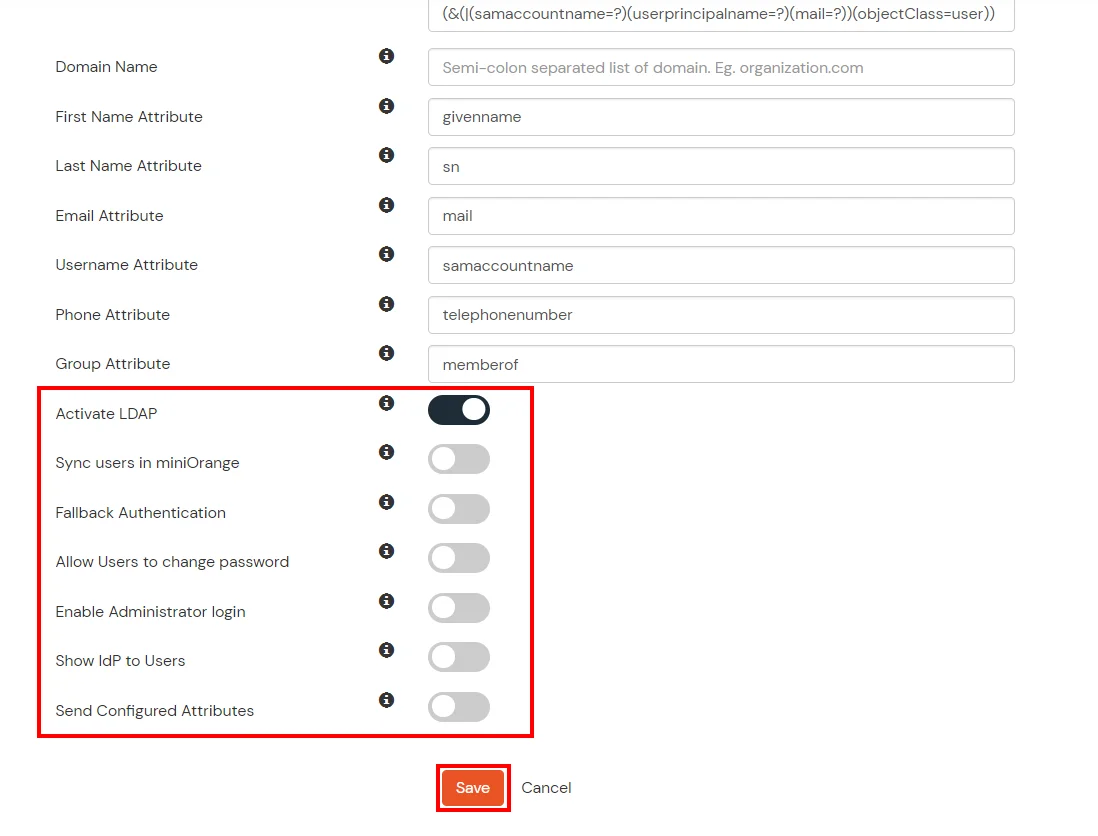
Here's the list of the attributes and what it does when we enable it. You can enable/disable accordingly.
| Attribute |
Description |
| Activate LDAP |
All user authentications will be done with LDAP credentials if you Activate it |
| Fallback Authentication |
If LDAP credentials fail then user will be authenticated through miniOrange |
| Enable administrator login |
On enabling this, your miniOrange Administrator login authenticates using your LDAP server |
| Show IdP to users |
If you enable this option, this IdP will be visible to users |
| Sync users in miniOrange |
Users will be created in miniOrange after authentication with LDAP |
- Click on the Next button, or go to the Attributes tab.
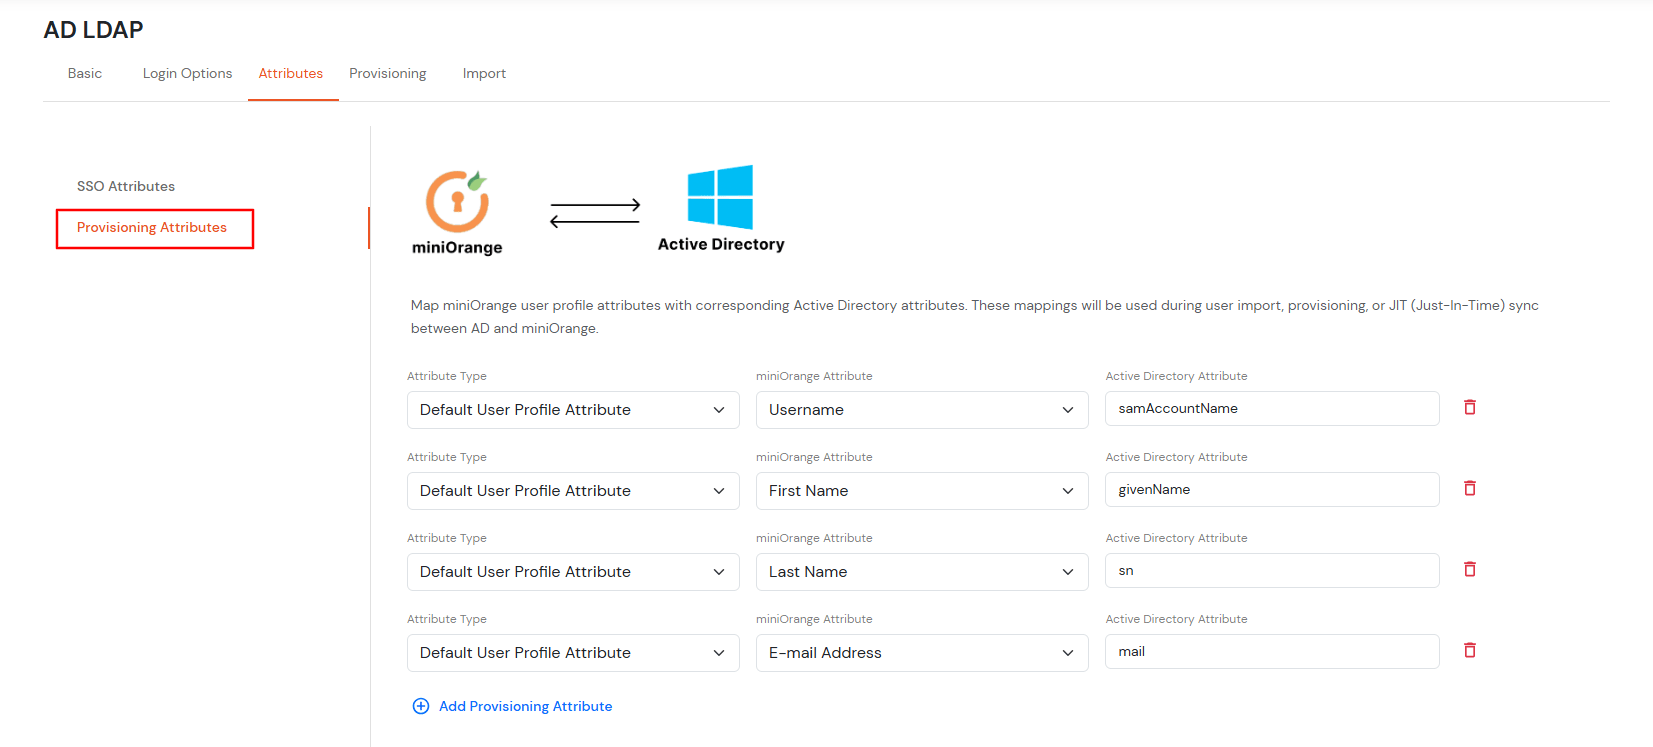
Attributes Mapping from AD
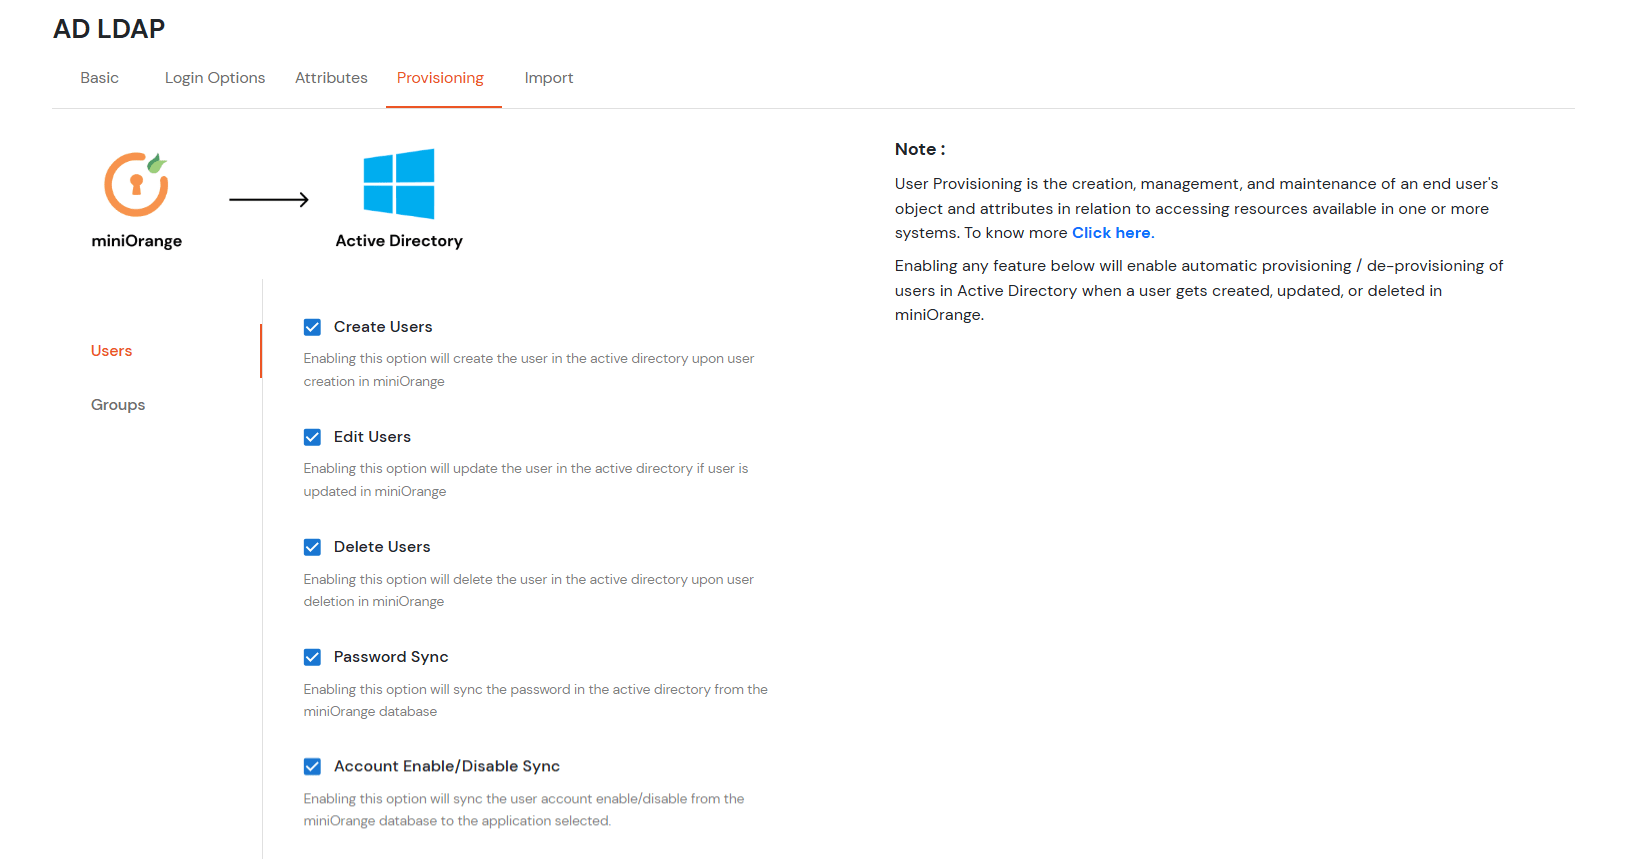
User Import and Provisioning from AD
- If you want to set up provisioning, click here for detailed information. We will skip this step for now.
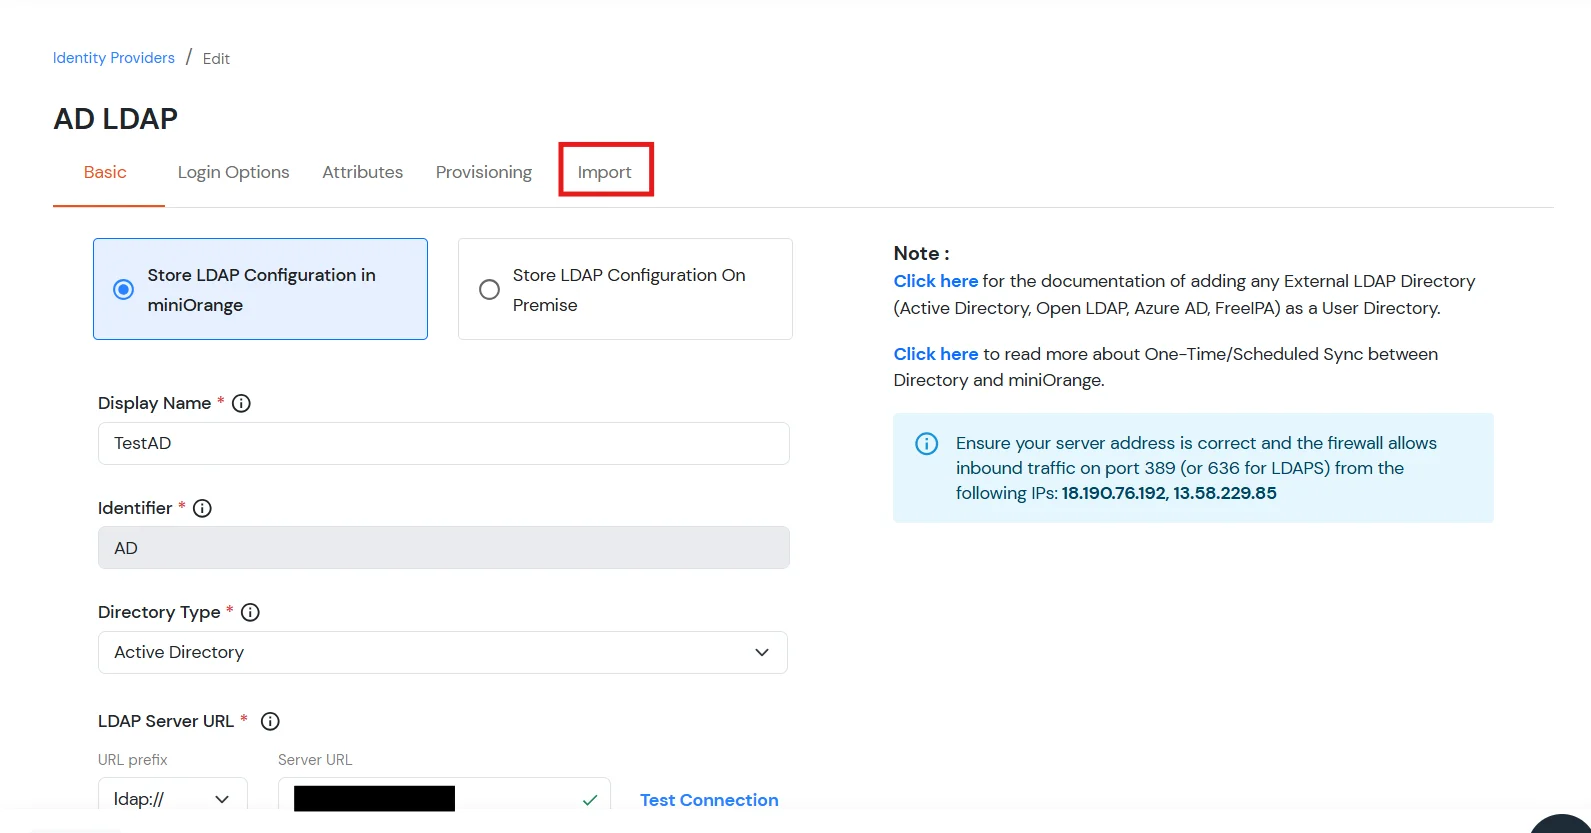
Import Password Policy from AD
- If you want to import your Active Directory password policy into miniOrange, click here for detailed information. We will skip this step for now.
Test Connections
- You will see a list of directories under Identity Providers. From the dropdown, select AD/LDAP Directories, search for your configured directory, click the three dots next to it, and select Test Connection.
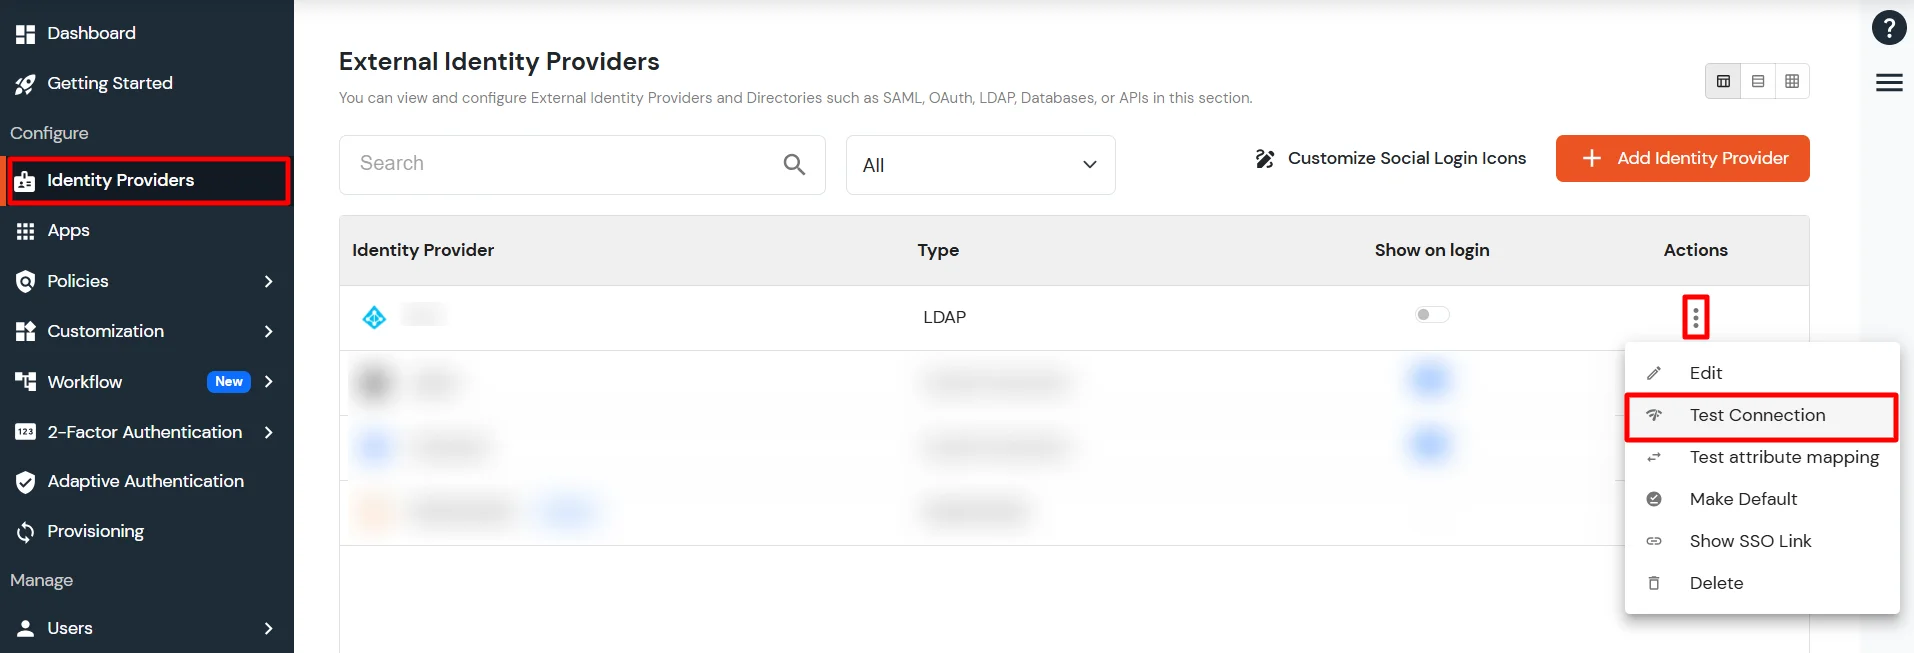
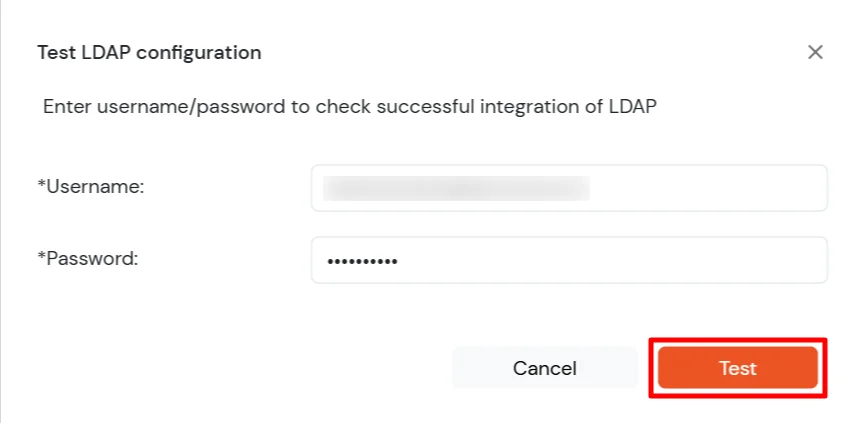
- A pop-up appears prompting you to enter a username and password to verify your LDAP configuration.
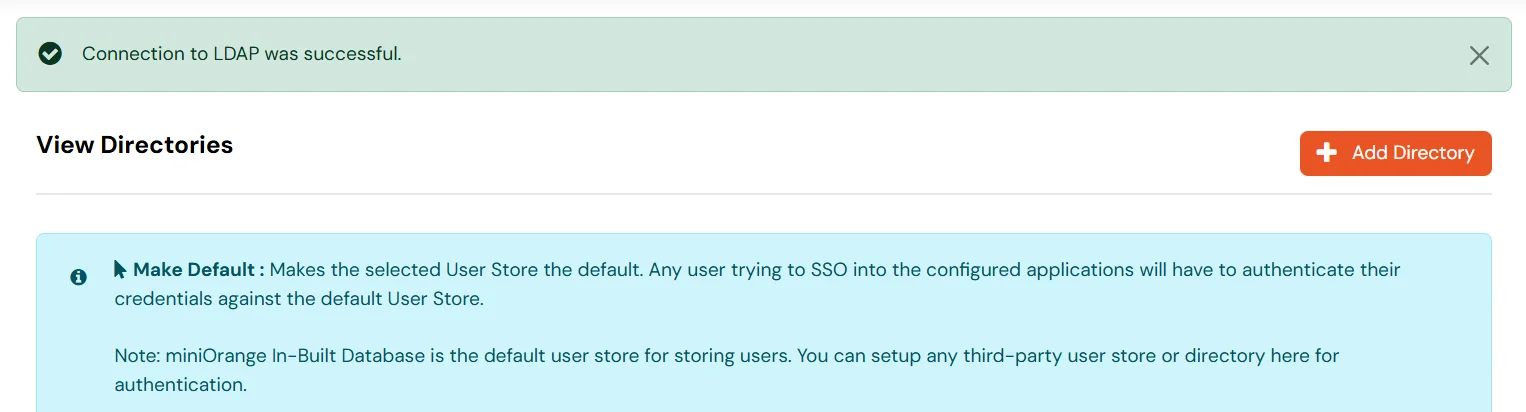
- On Successful connection with LDAP Server, a success message is shown.
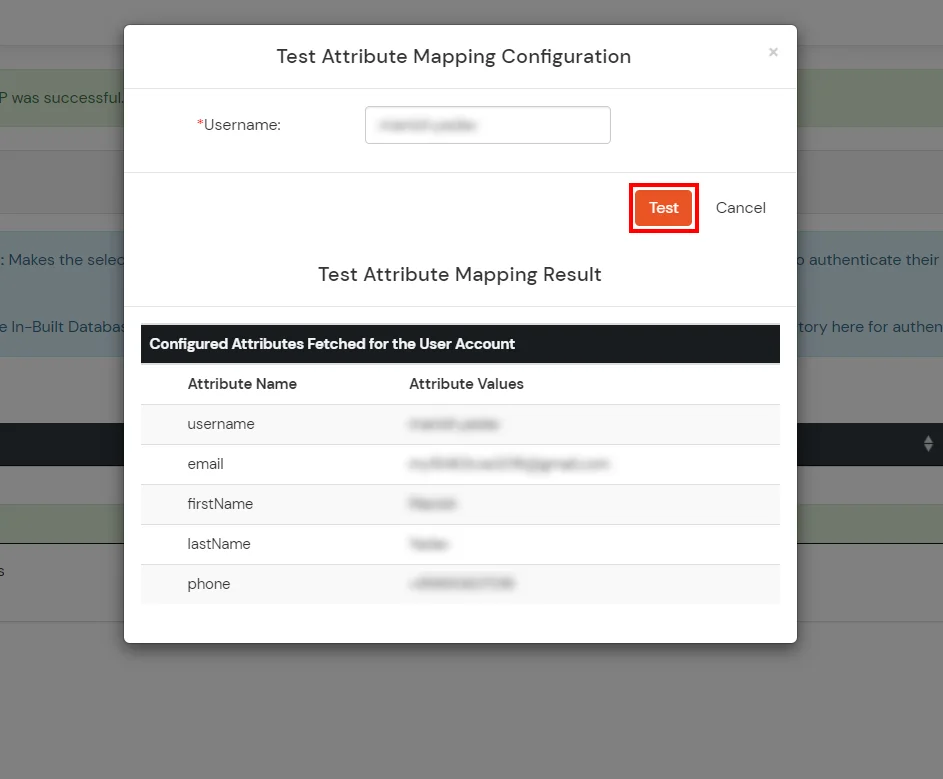
Test Attribute Mapping
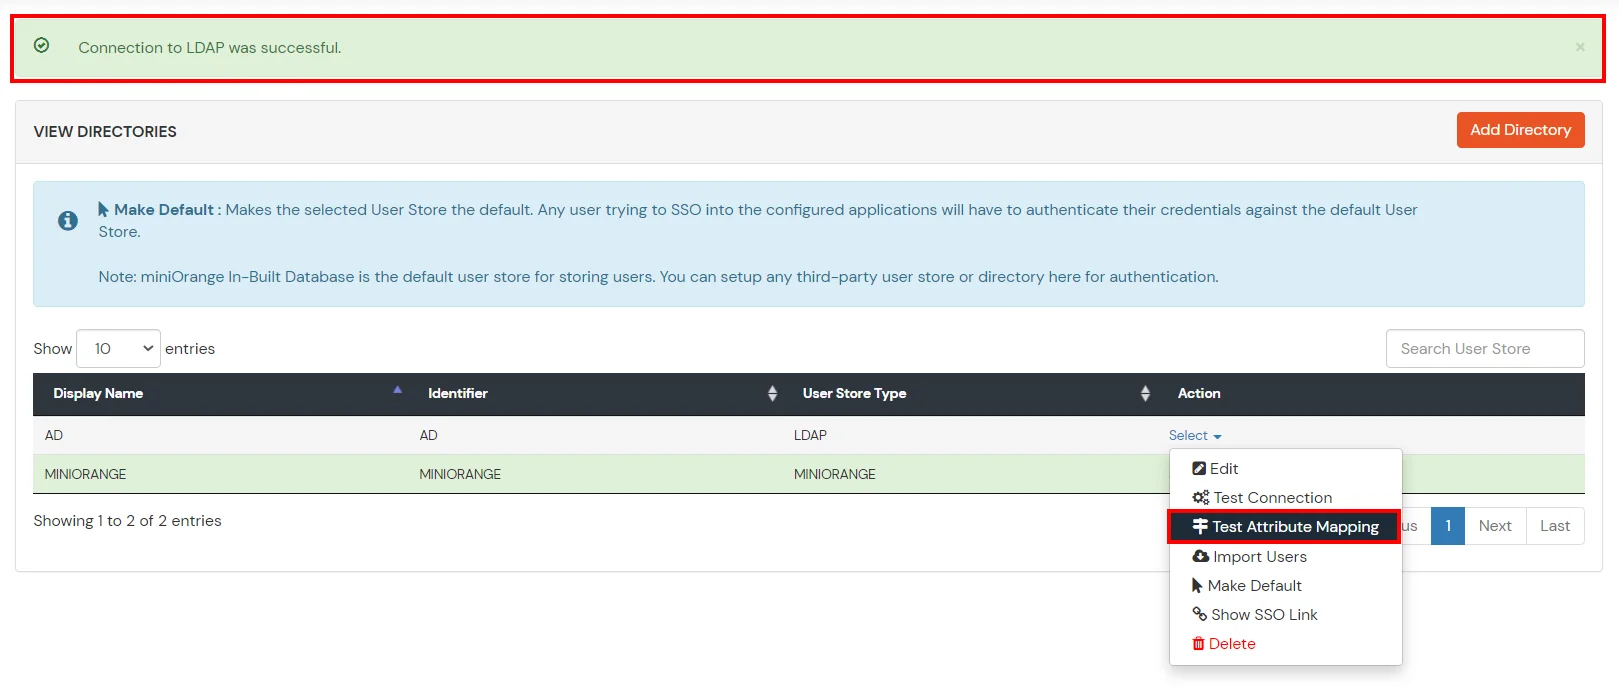
- You will see a list of directories under Identity Providers. From the dropdown, select AD/LDAP Directories, search for your configured directory, click the three dots next to it, and select Test Attribute Mapping.
- A pop‑up appears to enter a username and click Test.
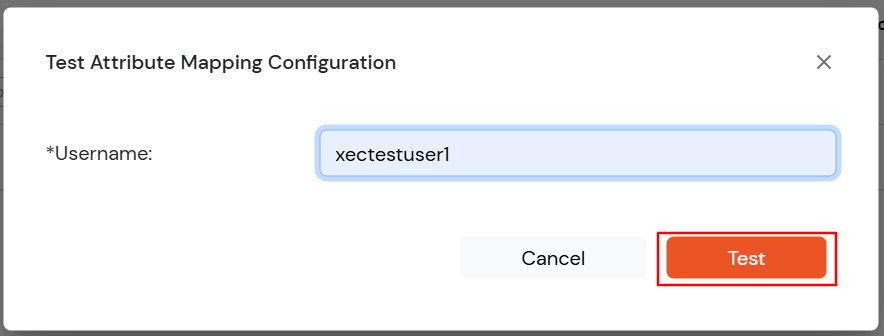
- The Test Attribute Mapping Result will be displayed.
Set up AD as External Directory configuration is complete.
Note: Refer our guide to setup LDAP on windows server.
miniOrange integrates with various external user sources such as directories, identity providers, and etc.
External References