Hello there!

Need Help? We are right here!

miniOrange Support
miniOrange Email Support
success

Thanks for your Enquiry.

If you don't hear from us within 24 hours, please feel free to send a follow-up email to info@xecurify.com

Search Results:

×

Privileged Access Management (PAM) Installation Guide Using Docker


Deploying miniOrange PAM with Docker offers a rapid, consistent, and scalable approach to securing privileged access across your infrastructure. As the PAM solution is fully containerized, it can be deployed seamlessly on-premises, in cloud environments, or on virtual machines, anywhere Docker is supported. This simplifies setup and reduces dependency issues, making it ideal for agile IT and security teams.

The containerized design includes all core PAM components. This includes vaults, session tracking, access workflows, and policy controls within modular, isolated services. This makes it easier to scale, maintain, and integrate with external tools, such as Identity Providers, SIEM, and helpdesk systems. It’s an efficient way to launch PAM without the overhead of traditional deployments.


Why This Setup Is Important

Docker-based deployment allows IT teams to:

  • Rapidly provision PAM in isolated and reproducible environments
  • Reduce manual configuration efforts and deployment errors.
  • Ensure portability across dev, test, and production systems.
  • Streamline updates, rollbacks, and version control.
  • Maintain flexibility across cloud, on-premises, or hybrid architectures.

Using Docker is particularly beneficial for organizations aiming to adopt PAM quickly while maintaining control, compliance, and operational efficiency from day one.


System Requirements

miniOrange PAM setup using Docker has the following system requirements. This section lists recommended versions and requirements.

    Operating System
  • Windows :
    Windows Server 2022 or above (Requires virtualization enabled and WSL 2 configured)
  • Linux :
    Ubuntu 22.04 or above
    CentOS 4.4 or above
    Red Hat Linux 9.0
    Red Hat Enterprise Linux 7.x
    Red Hat Enterprise Linux 6.x
    Red Hat Enterprise Linux 5.x
    Normally works well with any Linux flavor.
  • Other OS :
    Compatible with any OS that supports Docker.
  • Processor/CPU Core 8 Core or above
    RAM 16 GB or above
    Storage 256 GB or above
    Server Access Policies Port 80 - HTTP
    Port 443 - HTTPS
    Port 3389 - RDP Proxy
    Port 2222 - SSH Proxy

Install On-Premise Server

You can install miniOrange On-Premise server in following ways:

Install On Download Checksum
Any OS from above table Download
MD5 : 

Installation Steps

1. Install Docker

2. Pre-Installation Setup

  • Go to home directory of user and make sure you are not logged in as root user.
                      cd ~ 
                    
  • Update package manager:
                      sudo apt update
                    
  • Install unzip To extract the installation package:
                      sudo apt install unzip
                    
  • Move the downloaded .zip file to your home directory (if not already there).
  • Unzip the installation package:
                      sudo unzip <zip_file_name>
                    
  • Give recursive 777 permission for the entire folder:
                      sudo chmod -R 777 pam
                    
  • Navigate into the extracted folder:
                      cd <unzipped_folder_name>
                    

3. Running the Installation Script

  • Start the installation by executing the build script:
                      sudo ./start_pam_stack.sh
                    
  • Script prompts for IP and customer domain.
  • The script then prompts if user wants to install Database and Cache which gets installed with the script or use external Database and cache. External Database and Cache is required only in case of HA setup. In normal setup, type n and enter the password.
  • Then the script would prompt if user wants to use existing secret key or generate a new secret key. Use existing secret key if we are updating build or in case of HA.
  • Then all services will get installed automatically. At the end of the script all the containers must be started. If deployment fails, it shows message container mopam is unhealthy.

4. Post-Installation Setup

  • Once installation completes, you’ll see all container running.
  • Open your browser and go to the PAM URL using the IP address or domain you configured.
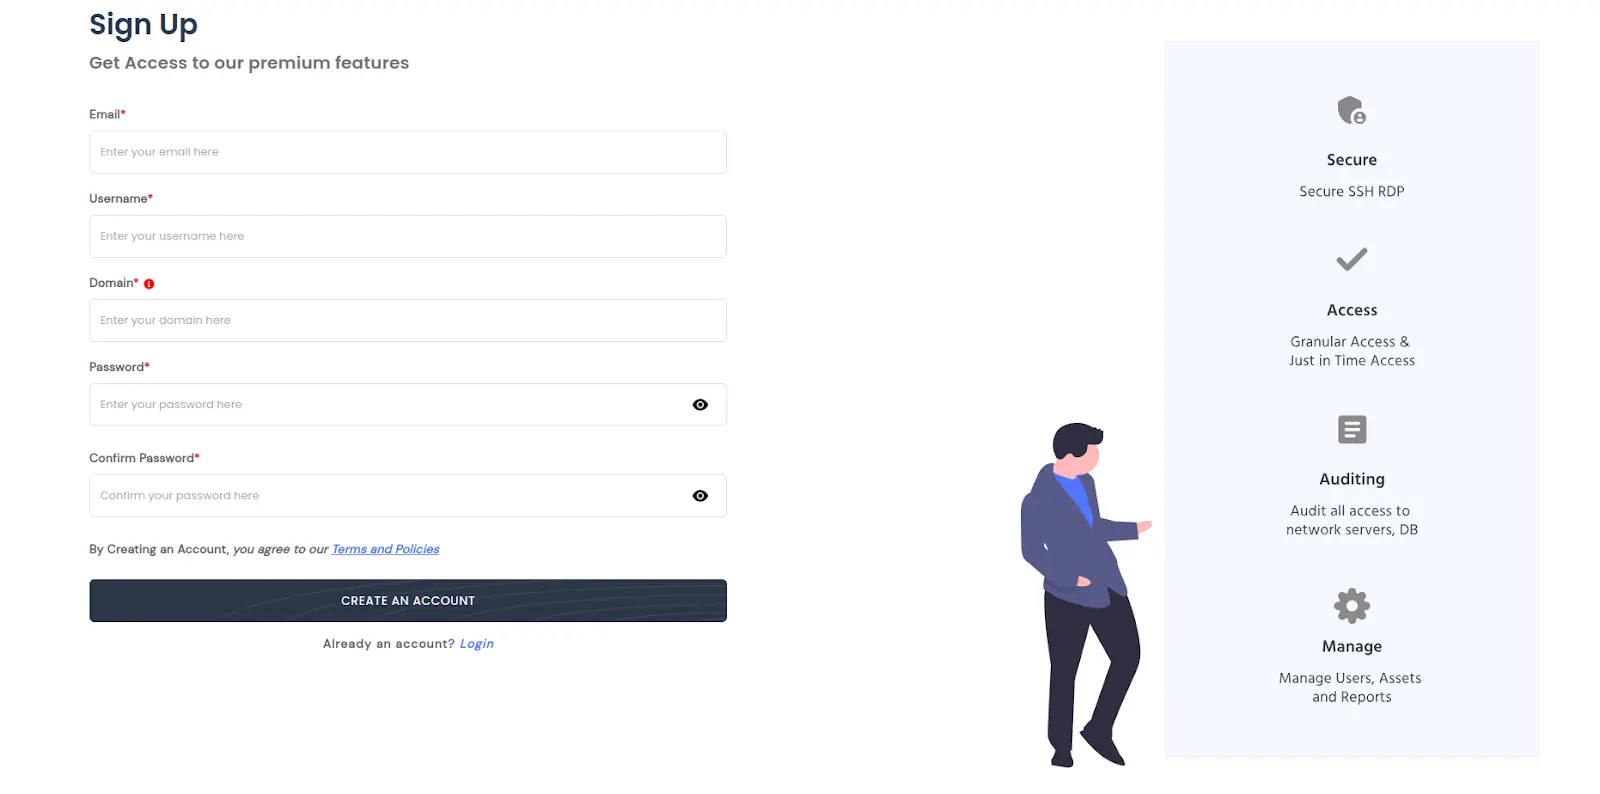
  • Complete the sign-up process to register your admin account.
  • miniOrange PAM sign-up dashboard screen

  • Log in to the dashboard using your newly created credentials.
  • miniOrange PAM login-up dashboard screen


Upgrade PAM to the Latest Build


Prerequisites: Download the latest PAM build .zip file and place it in the same directory where the existing (old) PAM version is located.


1. Backup the Existing PAM Directory

  • Before unzipping the new PAM build, rename the existing PAM directory as a backup:
                  mv pam pam_old
                

2. Unzip the New PAM Build

  •               unzip mo-pam-version.zip
                

3. Provide Required Permissions

  • Give recursive permissions to the newly extracted PAM directory:
                  chmod -R 777 pam
                

4. Navigate to the PAM Directory

  • Change your current working directory to the newly unzipped PAM folder:
                  cd pam
                

5. Run the Update Script

  • Start the update process by executing the update script:
                  ./update_pam.sh
                
    • During the update process, the script will prompt you to confirm the existing PAM backup folder path (default: /home/user/pam_old). Verify the details and press Enter to continue.
    • The script will then ask for the configured IP address, domain name, and other deployment-related details. Review the existing values and press Enter to confirm.
    • Once the update script completes successfully, PAM will be updated to the latest version.

6. Verify the Update

  • Access your PAM portal using the configured IP address or domain.
  • Log in using your existing credentials.
  • Verify that the PAM instance is running successfully on the updated version.

If you face any issues during installation or setup, contact our support team pamsupport@xecurify.com. We're here to help you every step of the way.


For detailed guidance on advanced configurations, user management, and best practices, refer to the official miniOrange PAM Handbook.


x

Work Email*


Name*


Usecase*


By clicking Download, you agree to our Terms of Service

Want To Schedule A Demo?

Request a Demo


Our Other Identity & Access Management Products