How to Enroll Your Apple iOS Device?
Mobile Device Management (MDM) provides a secure and efficient way to manage iOS, iPad, and MacOS devices within your organization. This guide walks you through enrolling your BYOD/unsupervised iOS/iPadOS devices in miniOrange MDM.
For more details, check out the miniOrange iOS MDM Solution.
Prerequistes
Before starting, ensure that you have registered with the Apple APNs service. Please follow the guide to setup APNs in miniOrange MDM
Follow the Step-by-Step Guide given below to Enroll iOS Device in miniOrange MDM
Step 1: Sign in with miniOrange
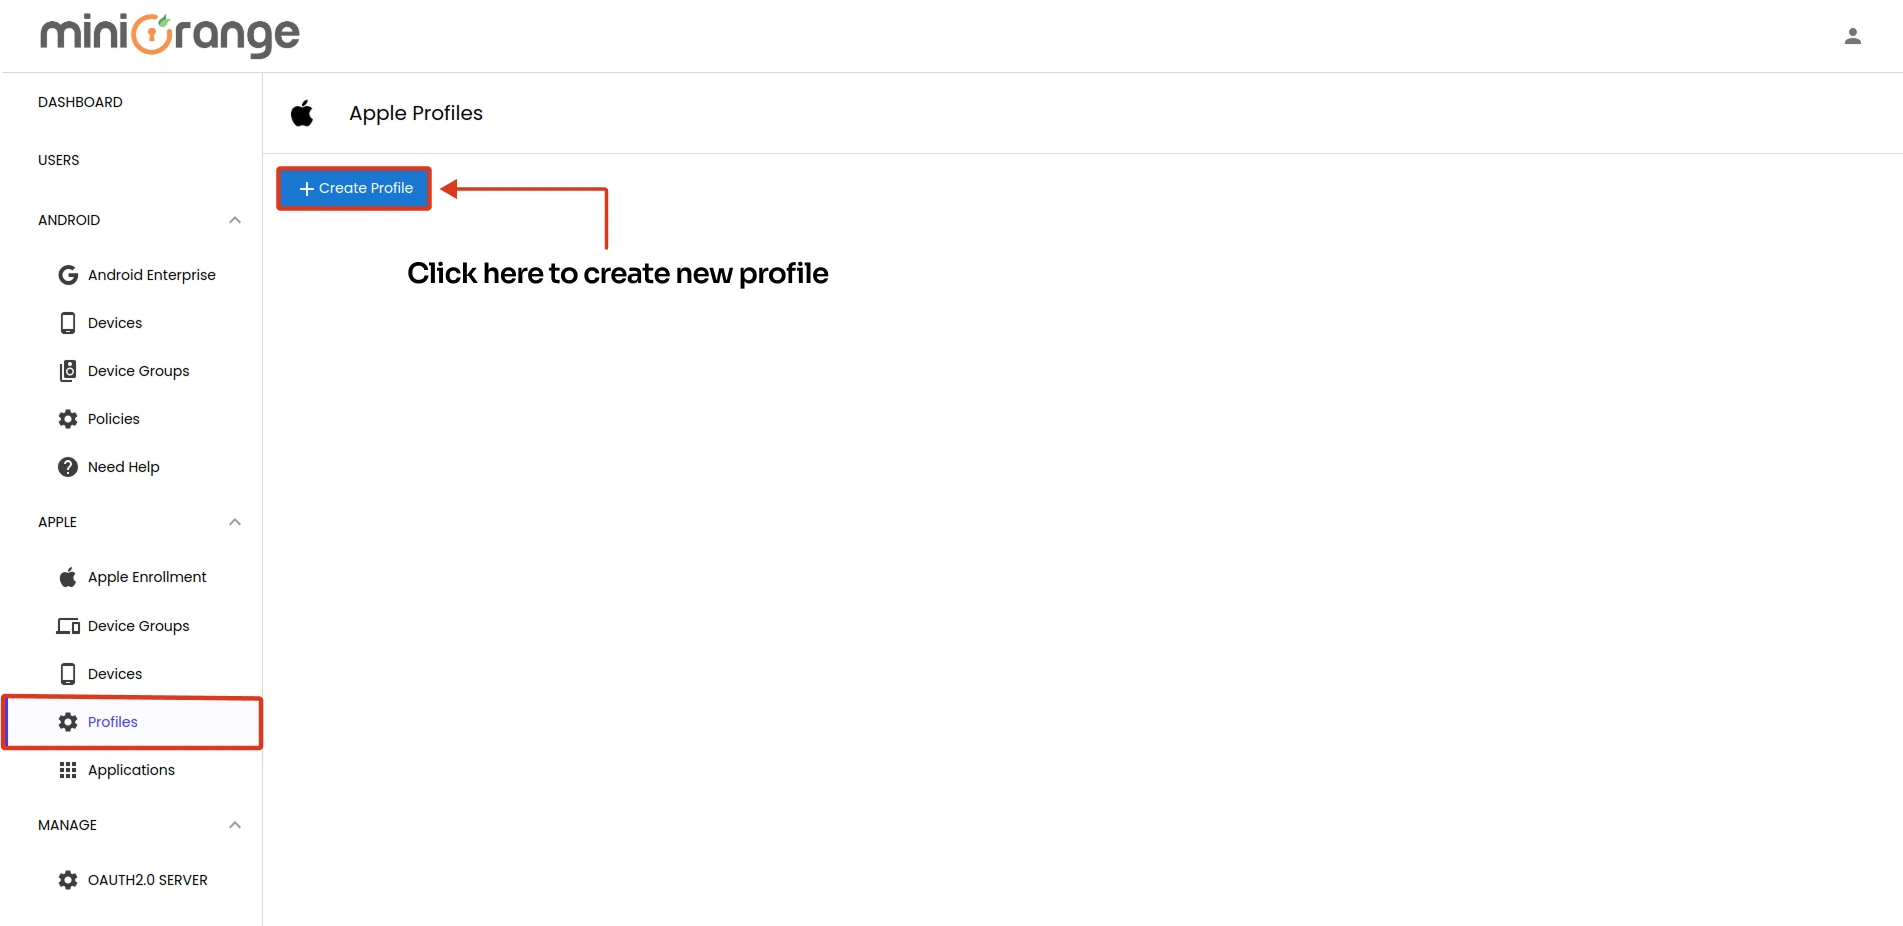
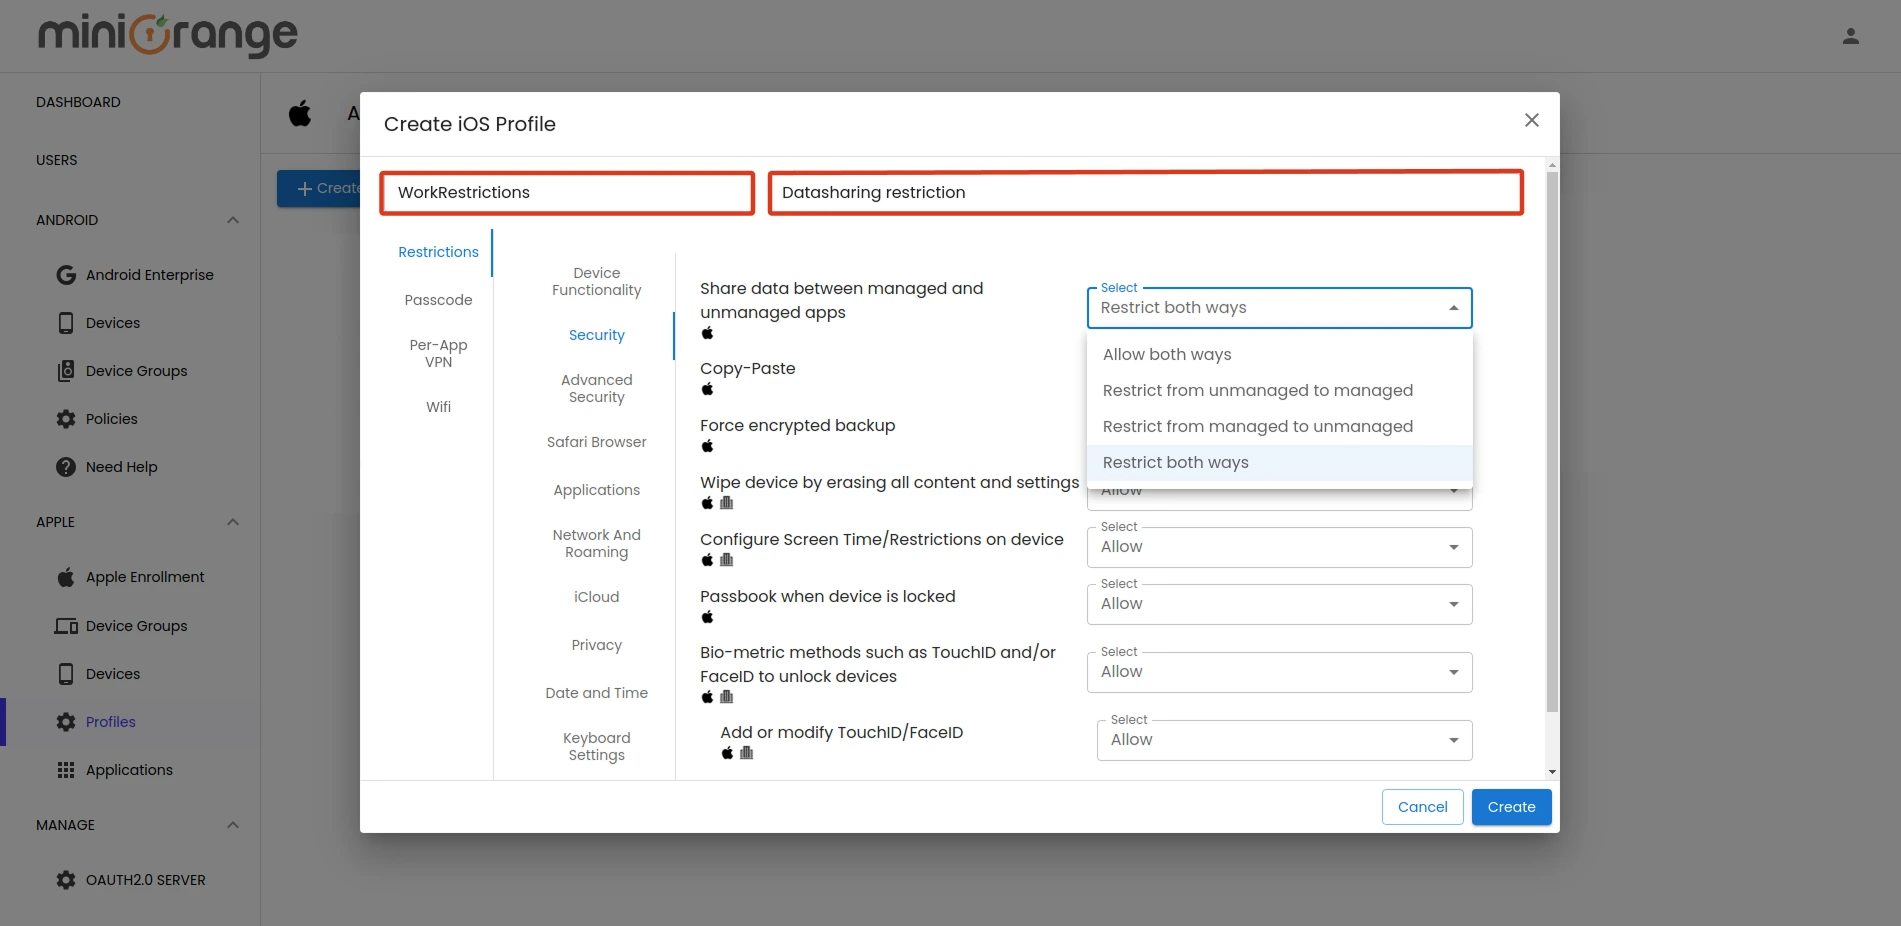
Step 2: Create a Profile
Profiles contain essential settings for securing data and managing the device, such as:
- Restricting data sharing between managed and unmanaged apps.
- Disabling screenshots.
- Blocking camera access.
- Now, Go to the Device Policies > Apple > Profiles and click on Create Profile to create the new policy.
- Select device type as iOS and click on it.
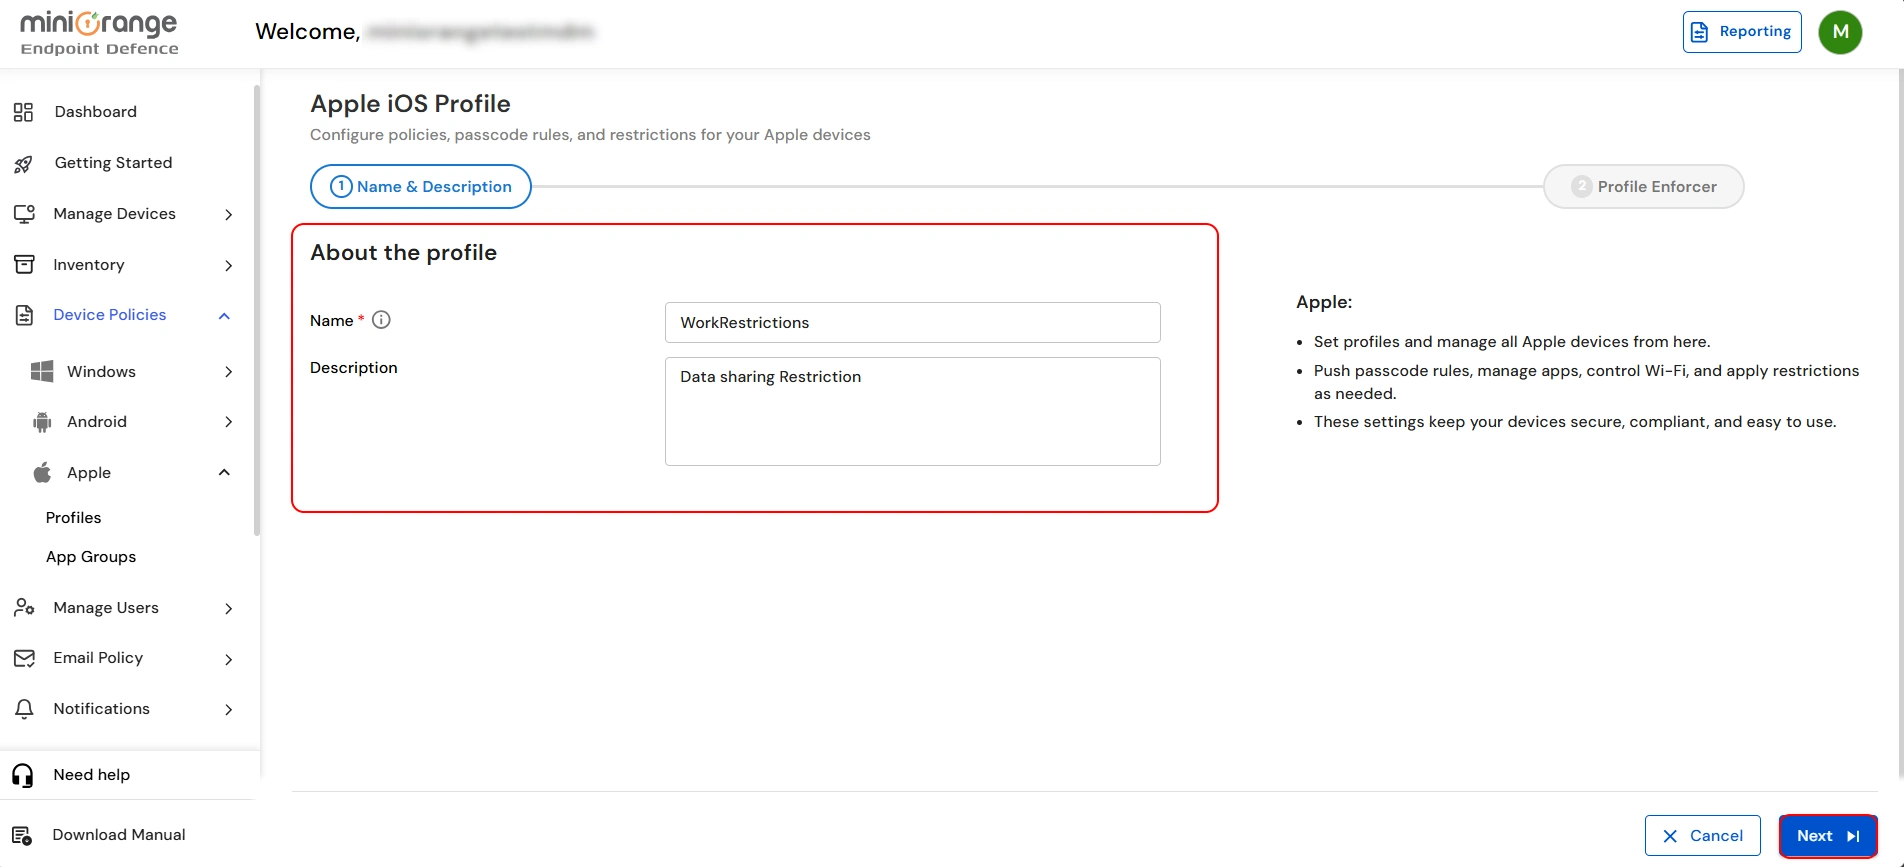
- Enter the Profile Name (e.g. WorkRestrictions etc.) and add a Description for your policy. Click Next.
- Adjust the profile settings to suit your needs (e.g. Screentime Restriction, restrict Copy-Paste, data sharing between managed and unmanaged apps, etc.).
- Once done, Click Submit to finalize and save the profile.
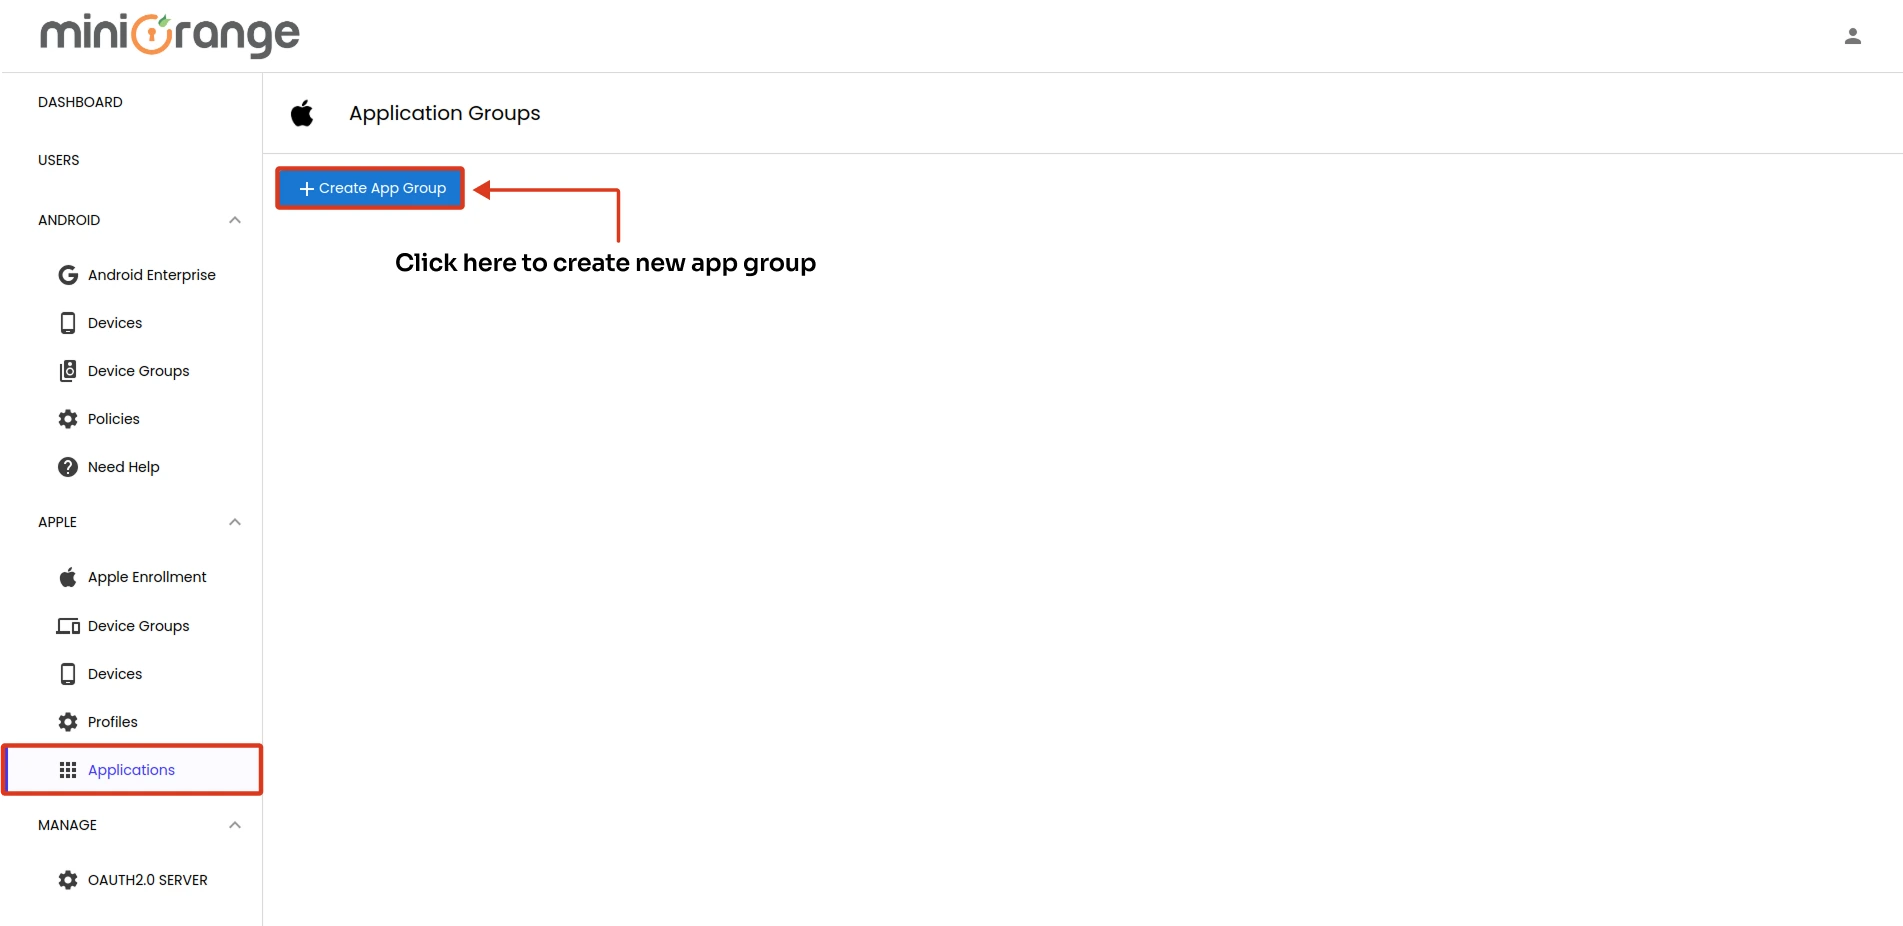
Step 3: Create an App Group
Note: App group contains a list of applications along with their configurations and settings that can be installed on a device.
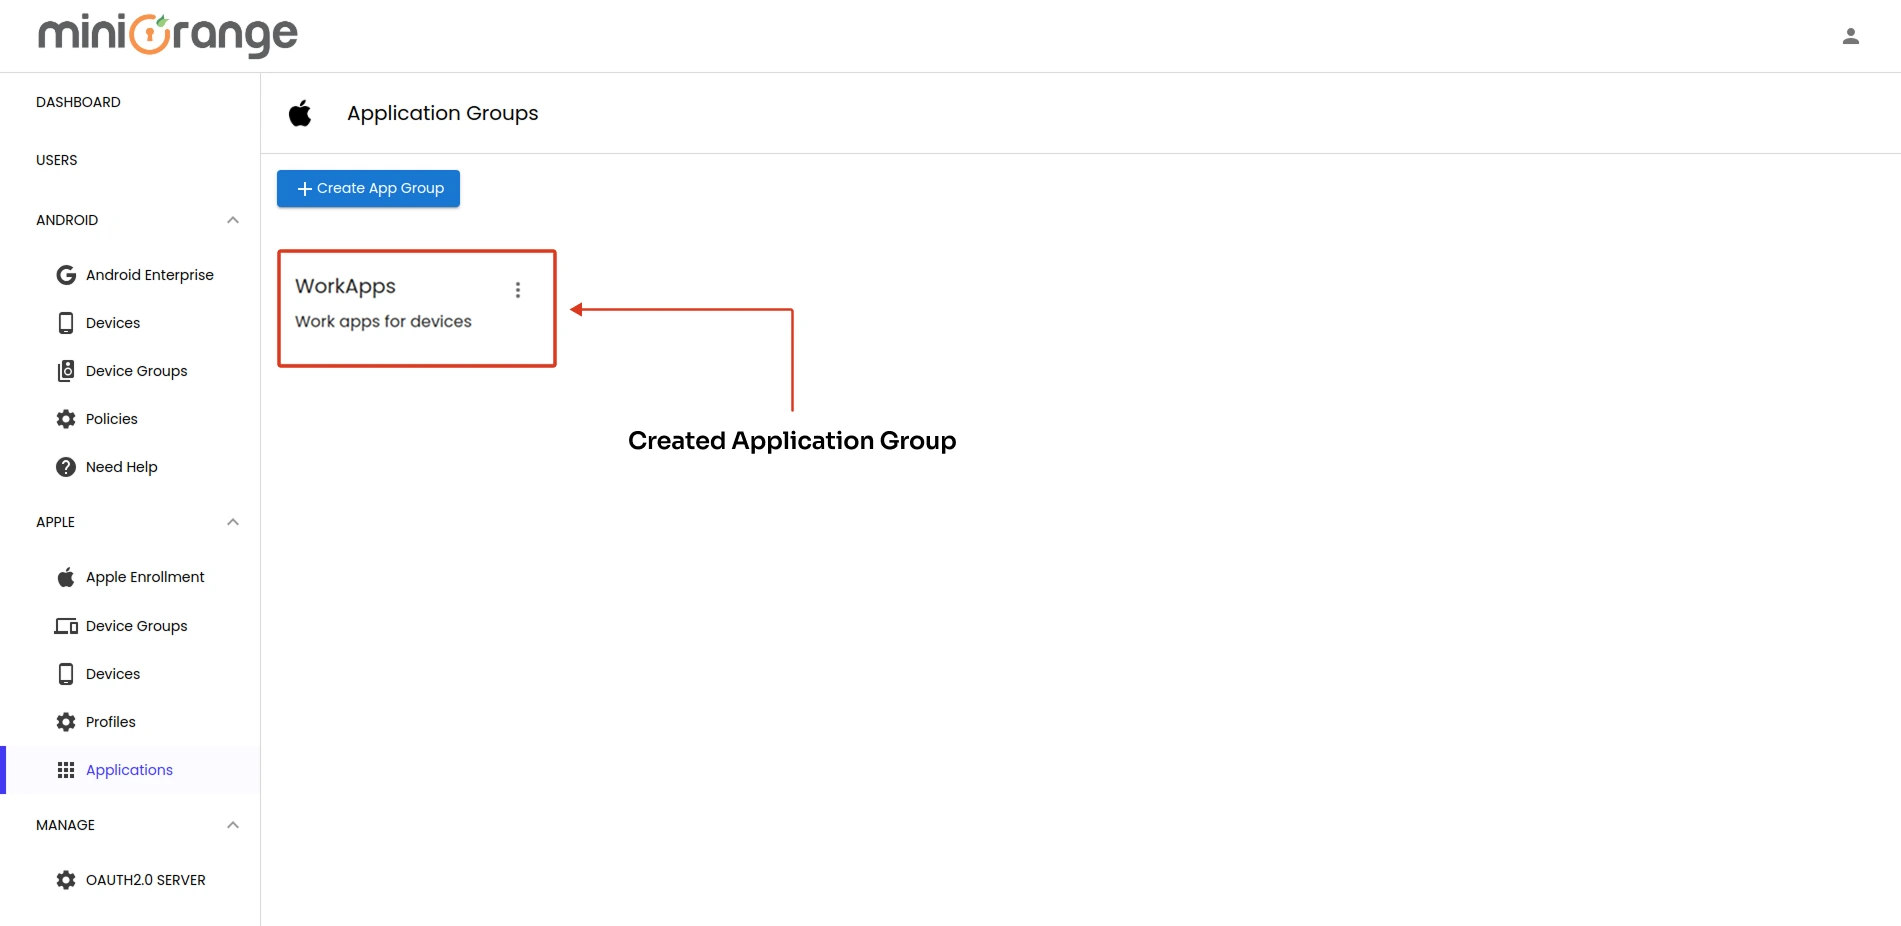
- Now, Go to the Device Policies > Apple > App Groups and click on Create App Group to organize related apps together.
- Enter the App Group Name (e.g. “WorkApps”, “CommunicationApps” or “ManagementApps” etc.) and add a Description.
- Click on the Add New Apps button to add the apps.
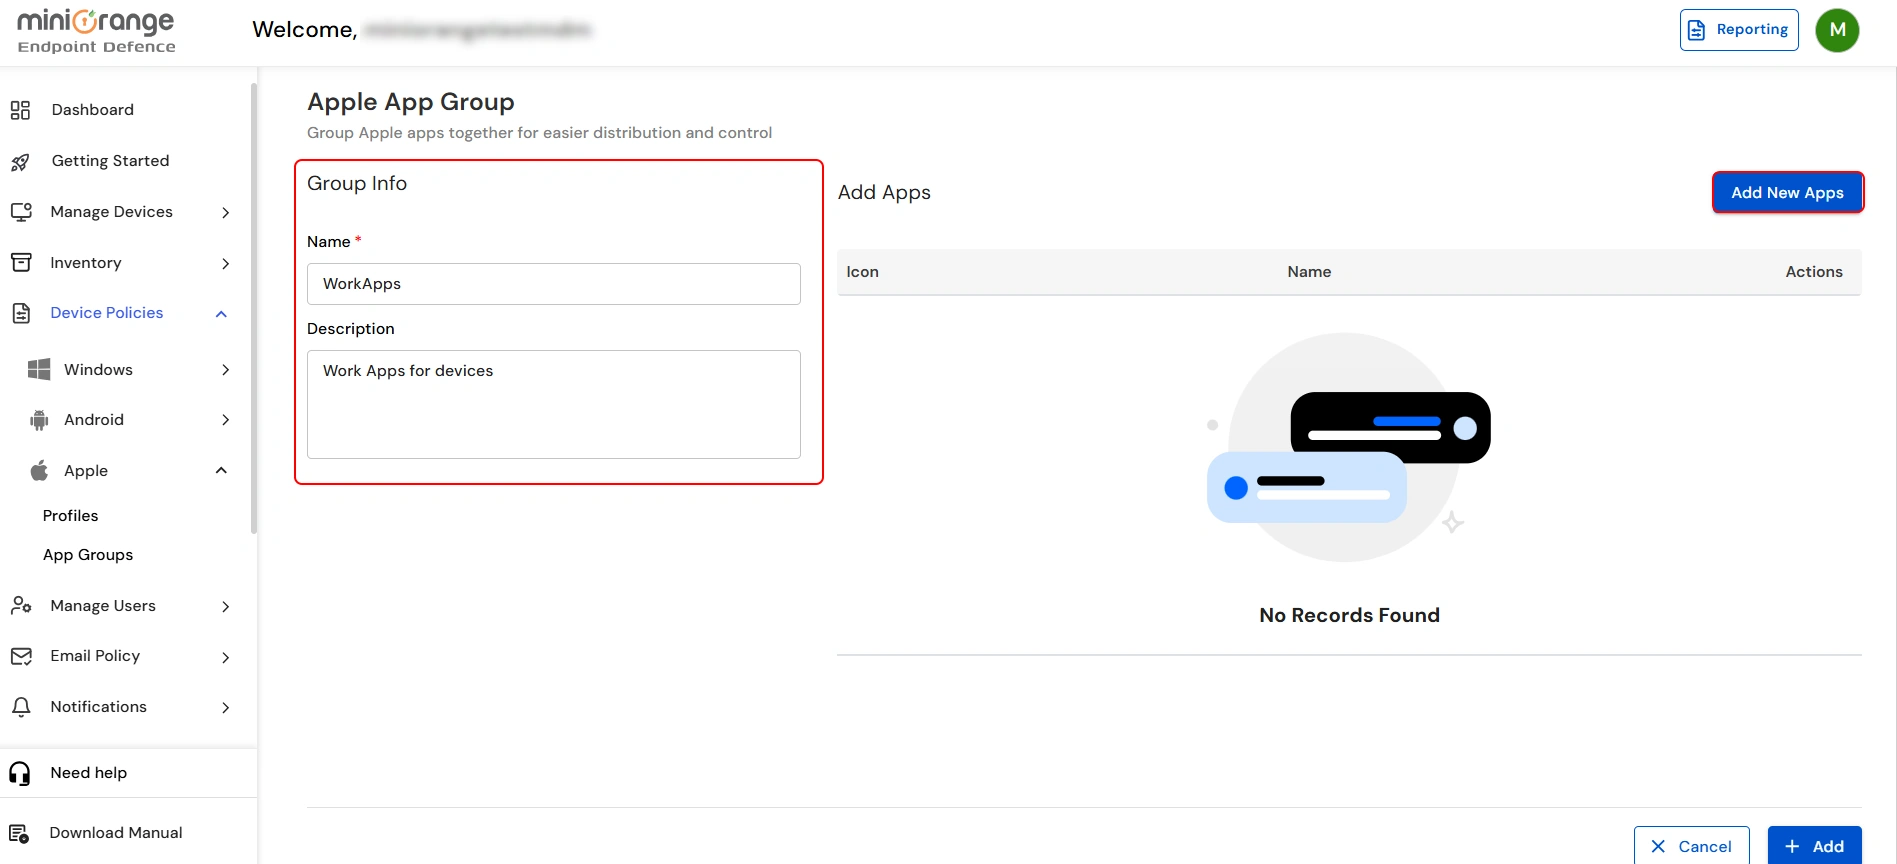
- The search bar will appear. Use it to find the apps you need, then click Search.
- Click the Add button for each app to include it in the group.

- Once done, click Close and then Add button to create and store the new app group configuration.
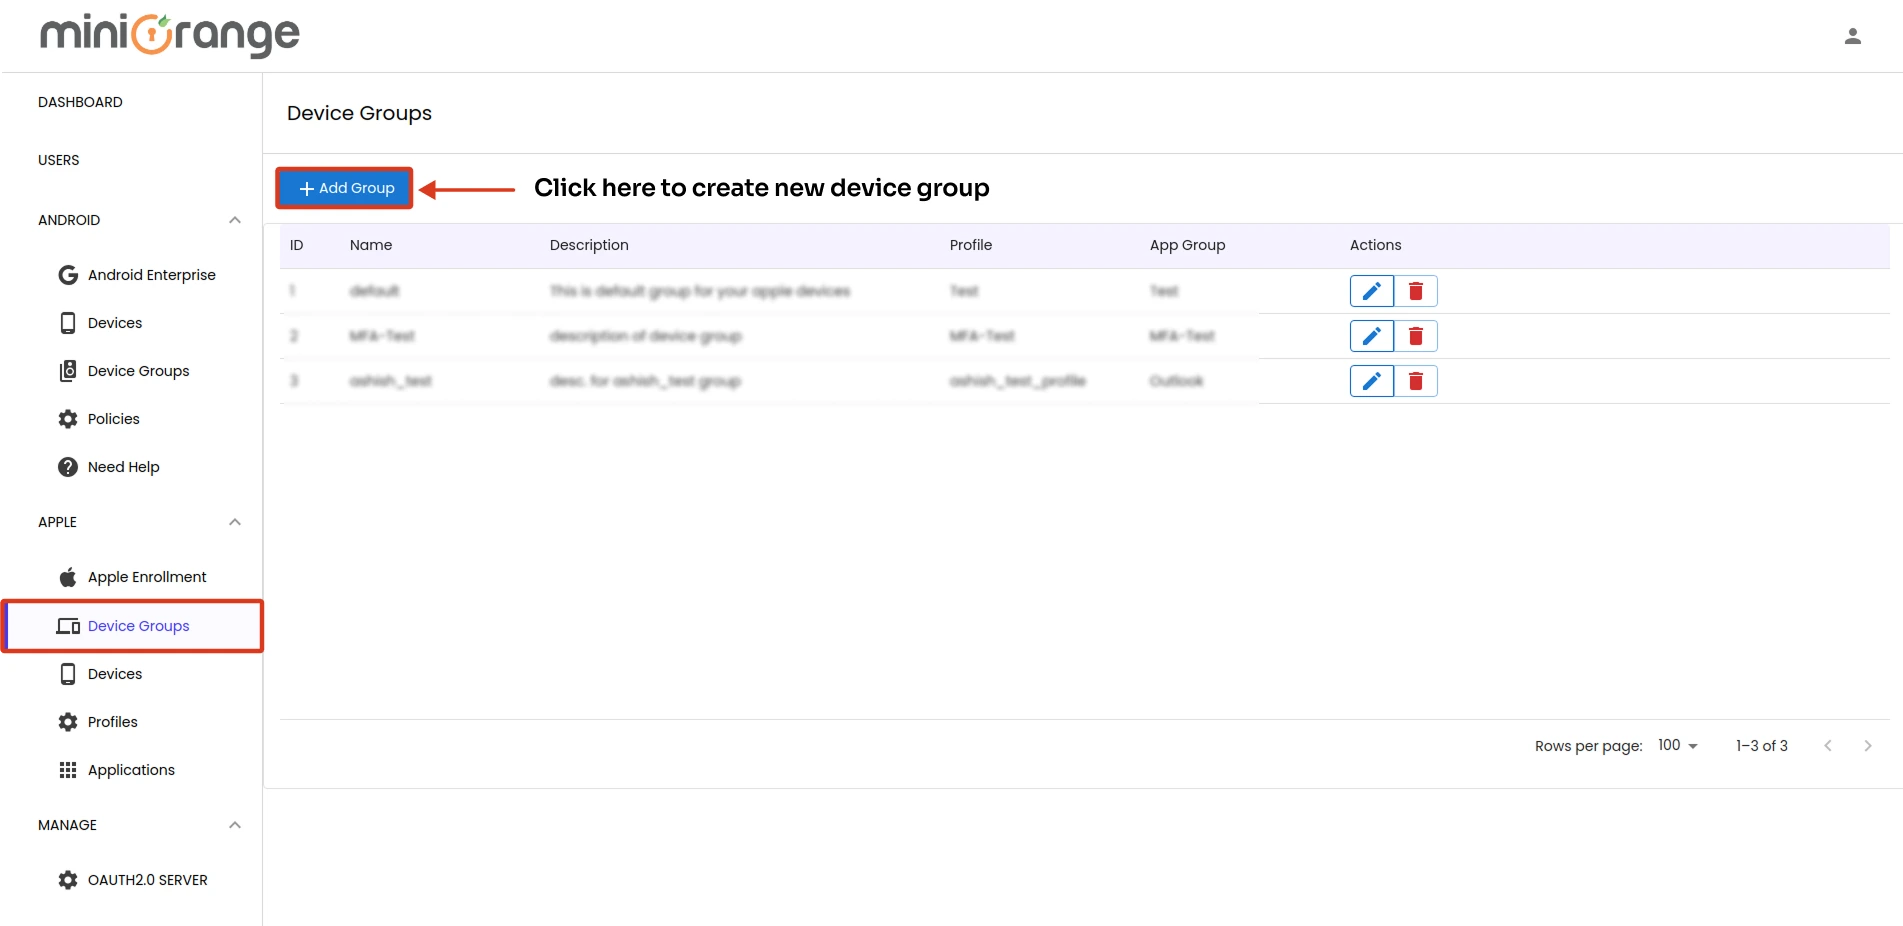
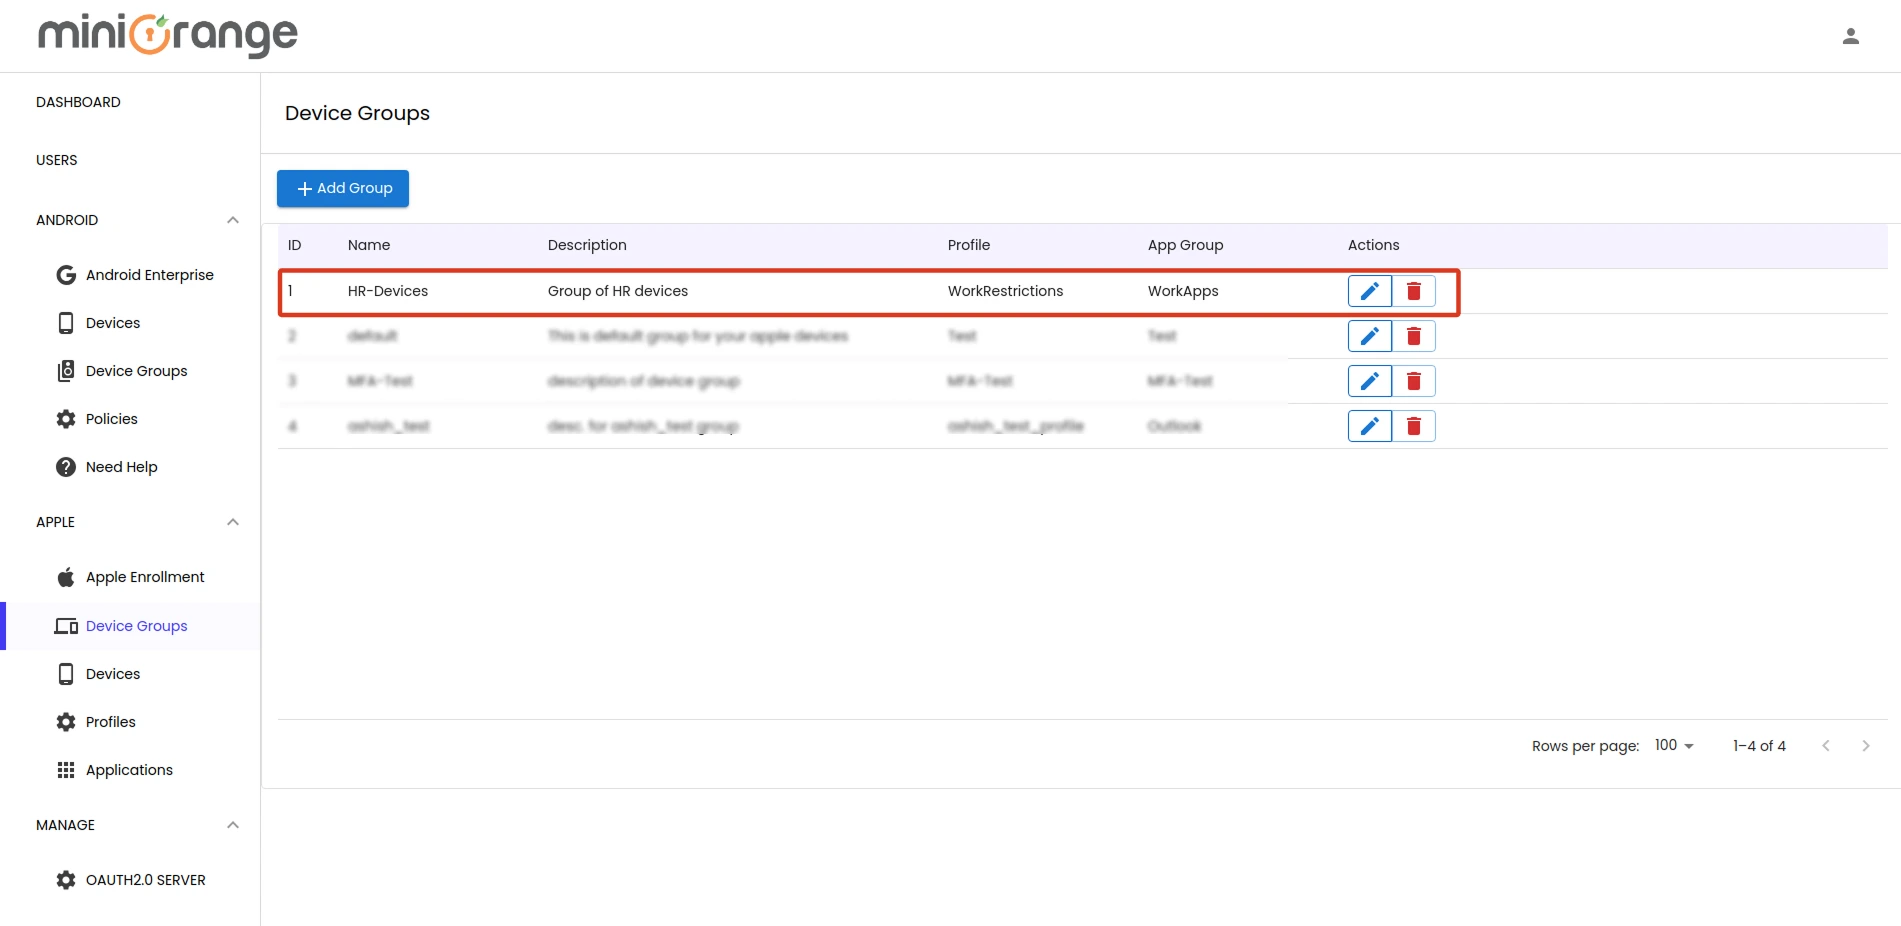
Step 4: Create a Device Group
Note: In miniOrange MDM, devices are grouped into Device Groups and one profile and one app group can be attached to a device group.
Tip: Choose clear and specific names so it’s easier to organize and find your device groups later.
- Go to Manage Devices → Device Groups → Apple. Click Add Device Group to create a new device group.
- Enter a Group Name that matches the group’s purpose (e.g., “HR Devices” or “Engineers Devices”). Add a Description to explain how the group will be used.
- Select a Profile and App Group that you want to assign to this device group (Optional).
- Click on Next.
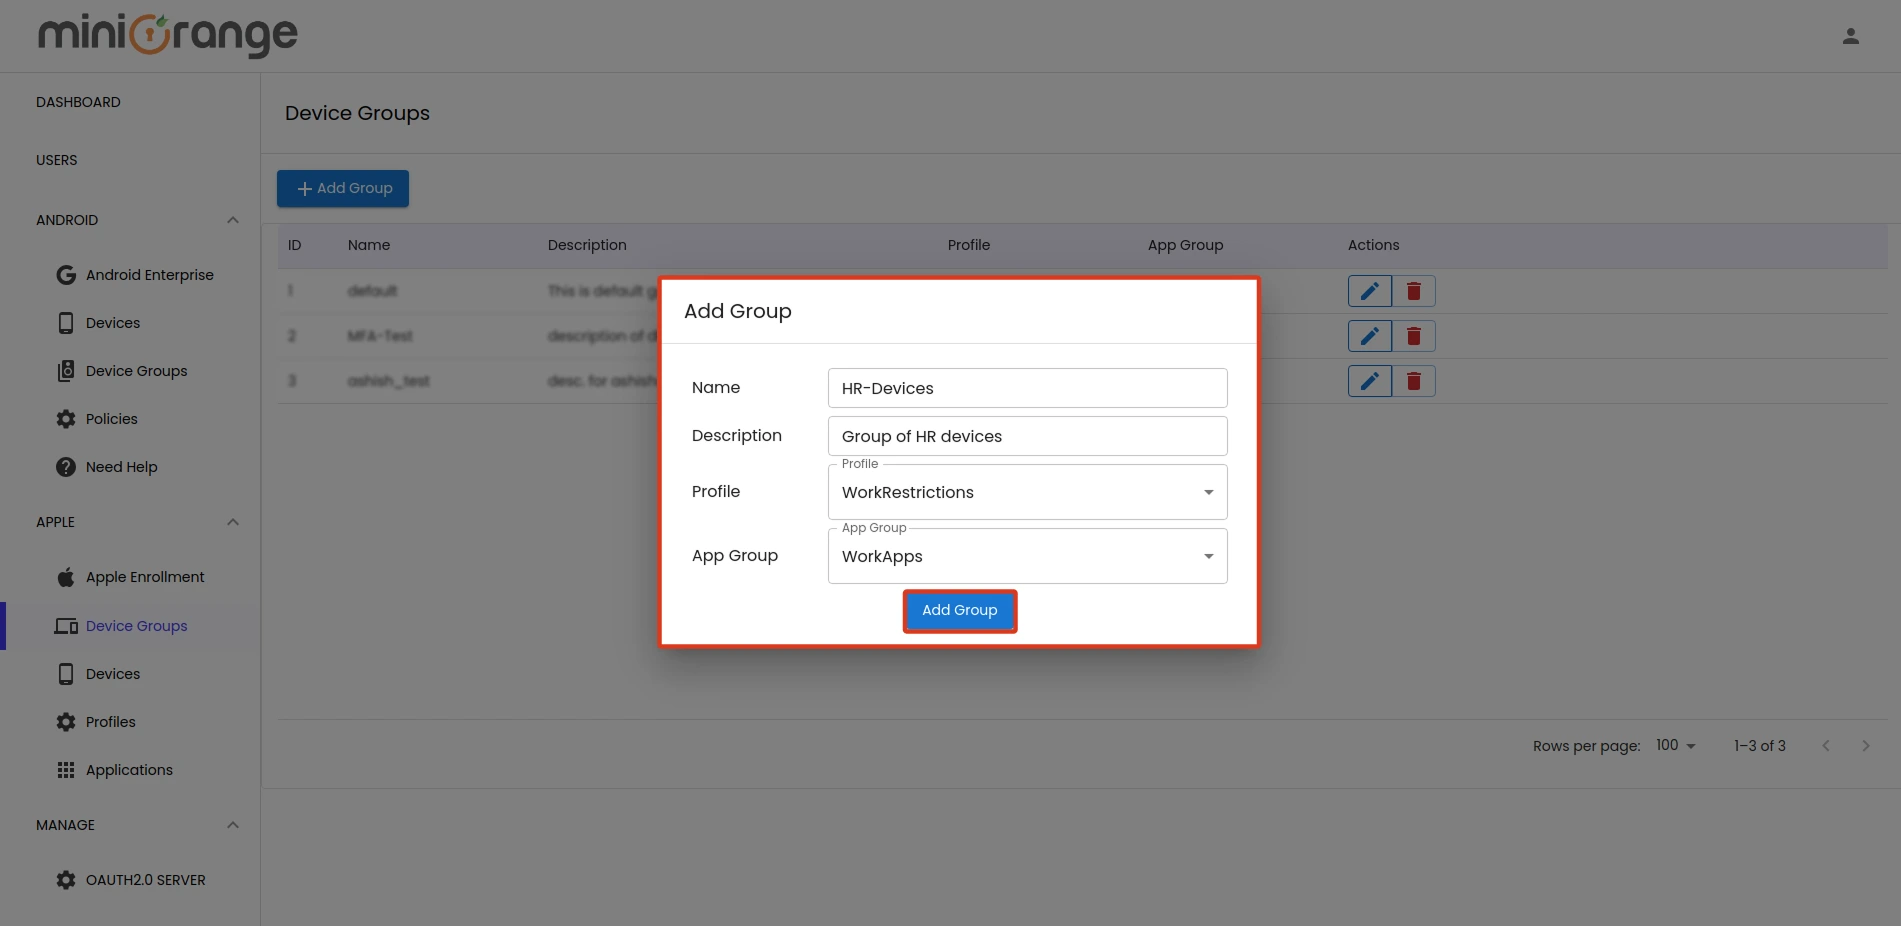
- Once done, click Add to save the new group.
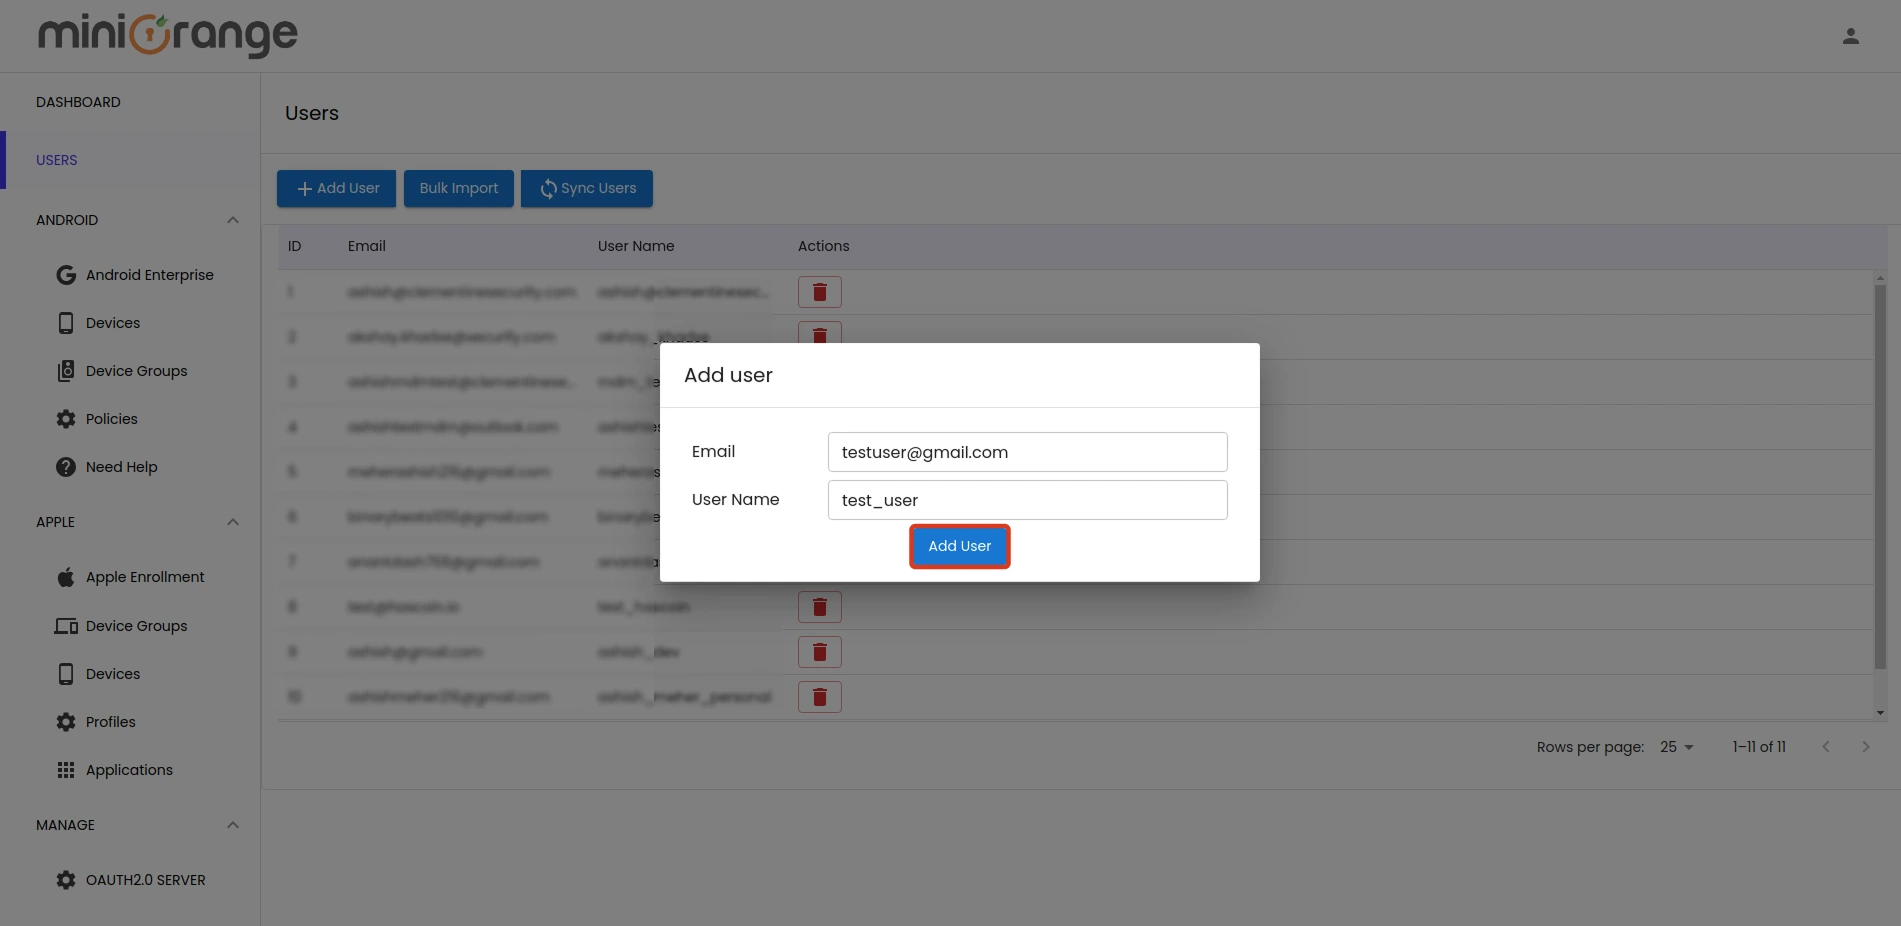
Step 5: Create a User
- Now, Go to the Manage Users -> Email Users tab and click on Add User to create a new user.

- A form will appear prompting you to enter the first name, last name, email, and username. After filling in the required details, click Add to create the user.
- Bulk Import Users
- For adding multiple users at once, click on the Bulk Upload button.
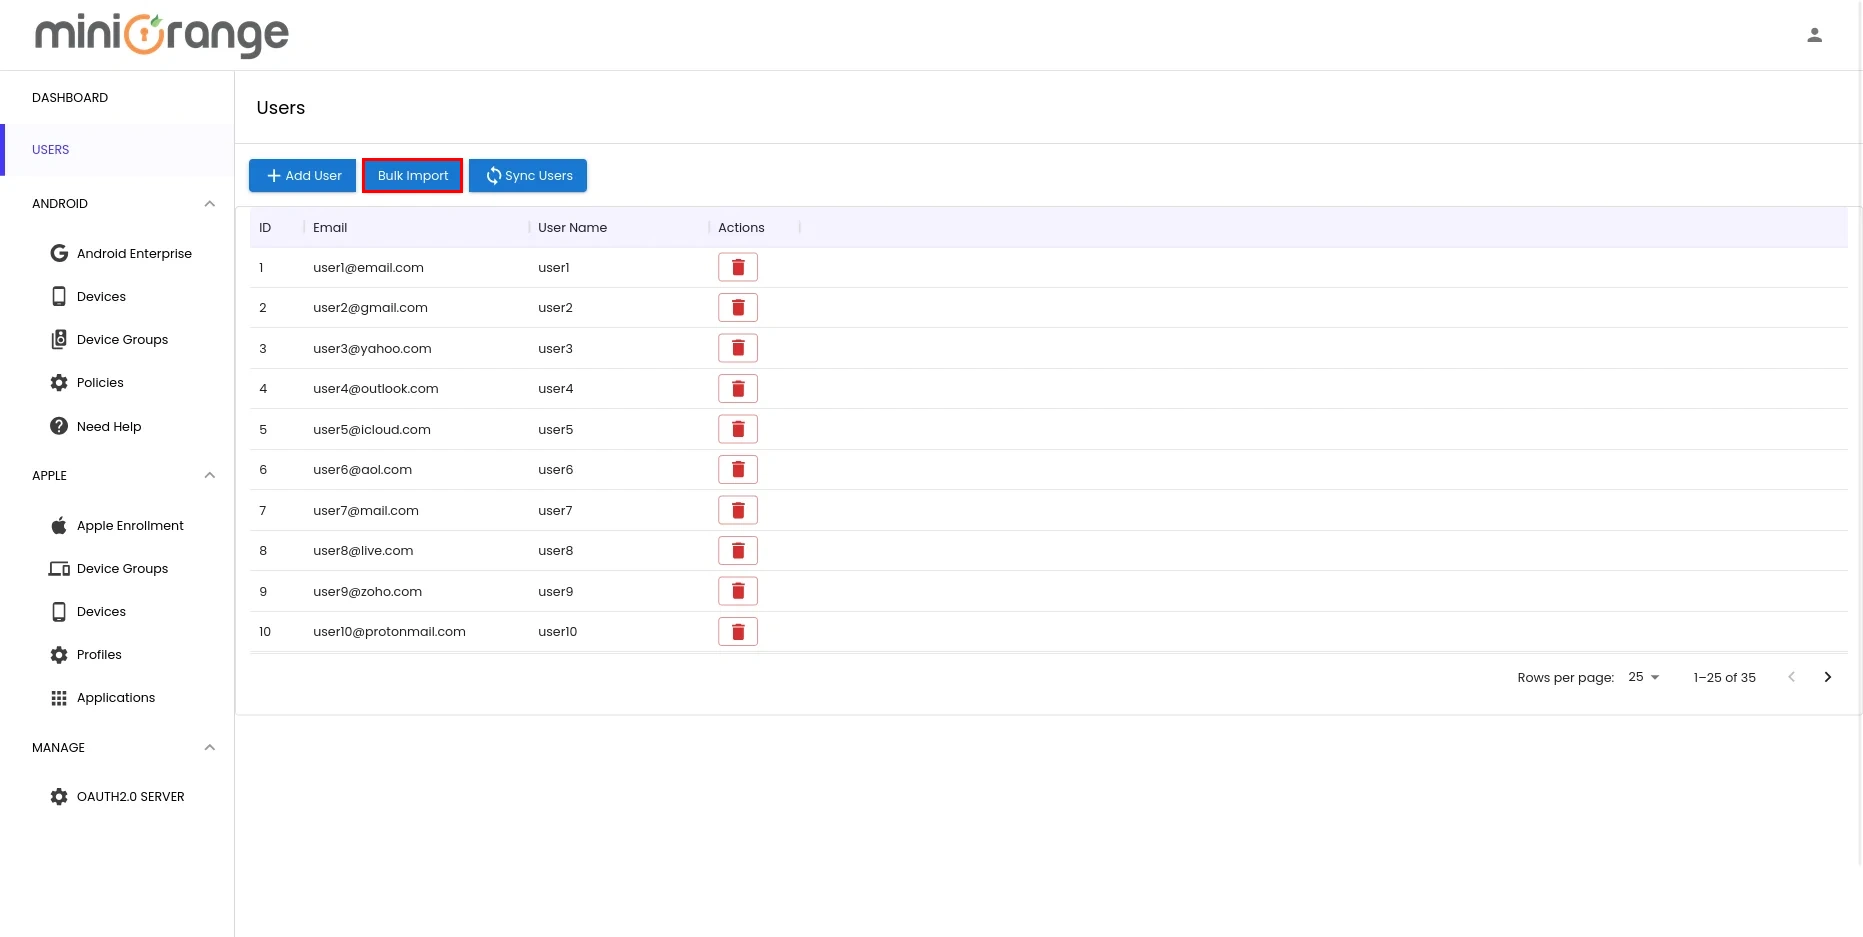
- Prepare a CSV file with “Email” and “Username” columns. (Click Download Sample File for the correct format.) Then, upload the CSV using the Choose File option and click Upload.
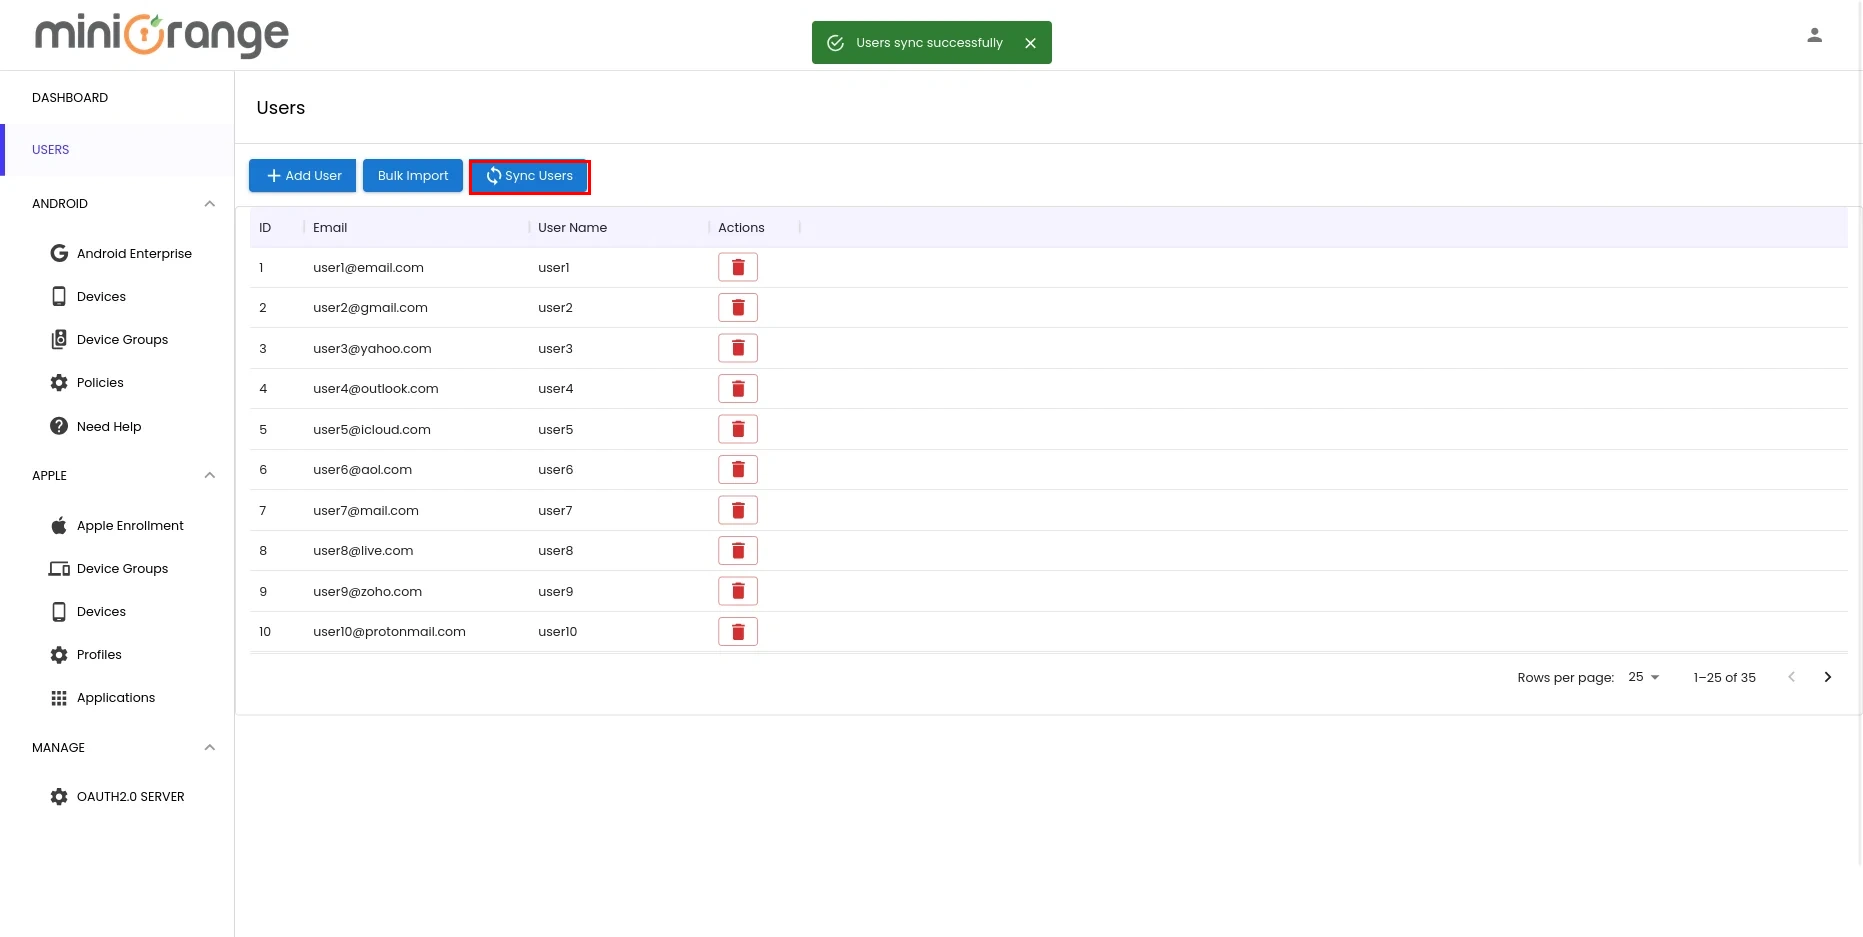
- You can now see that the user has been created successfully.

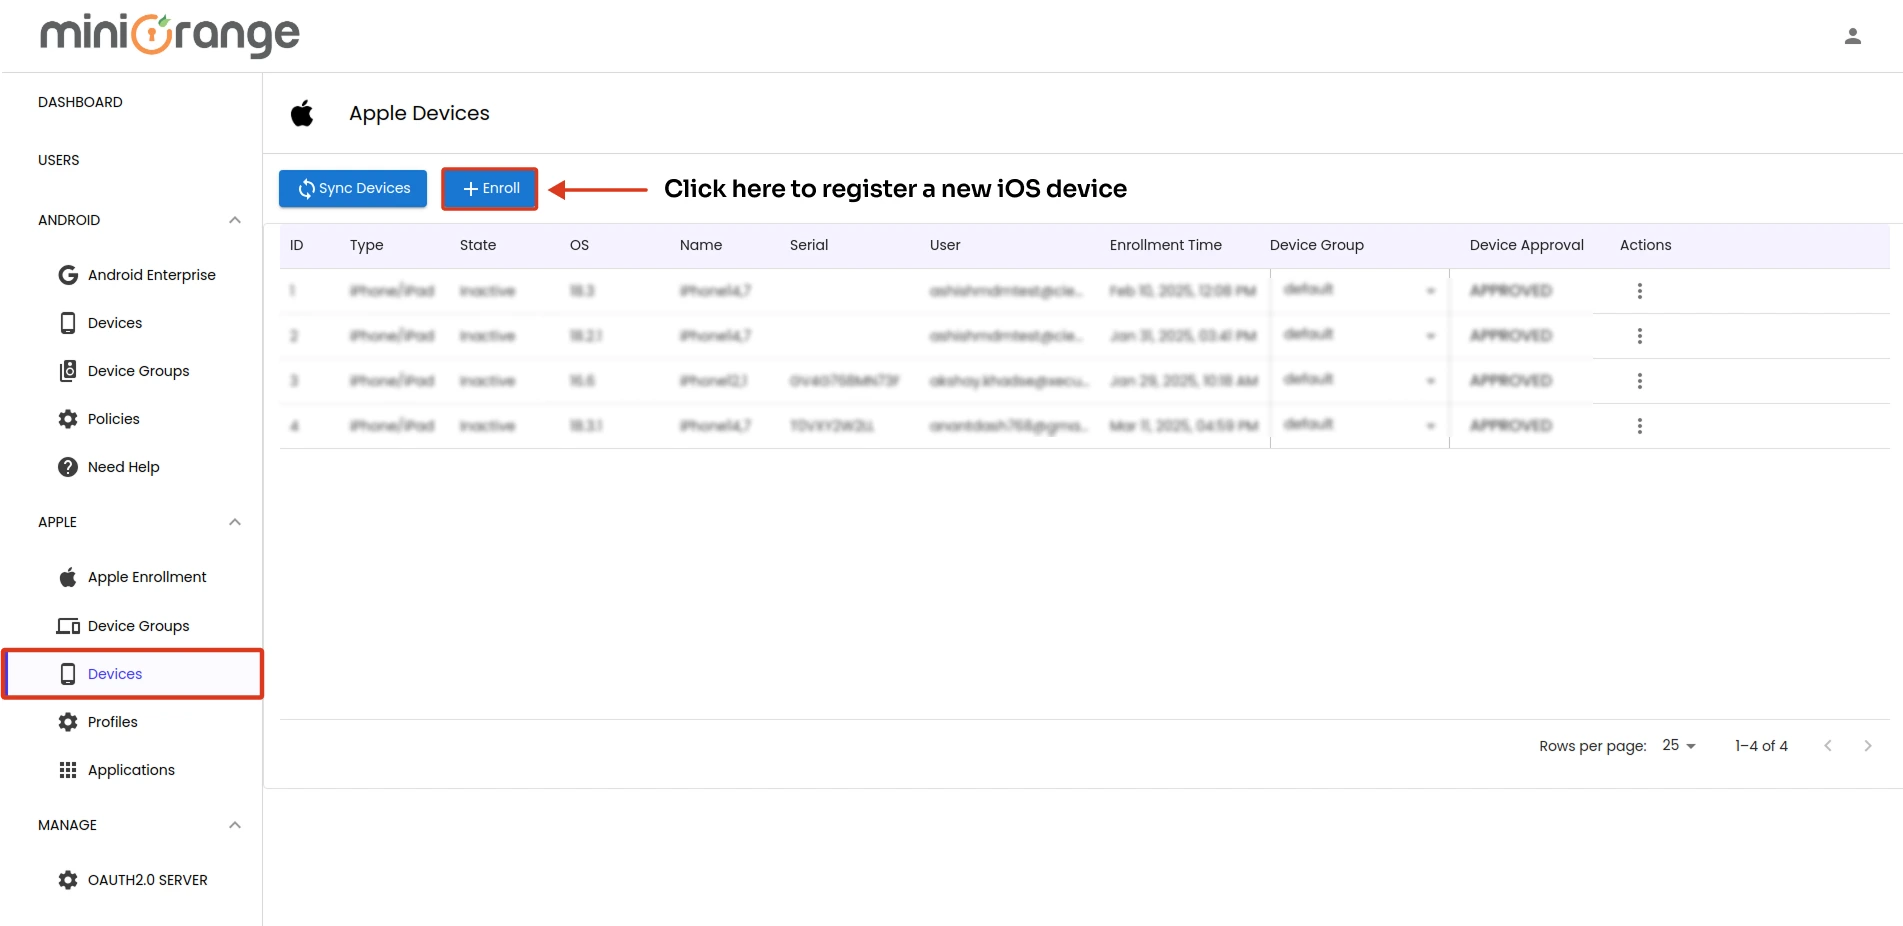
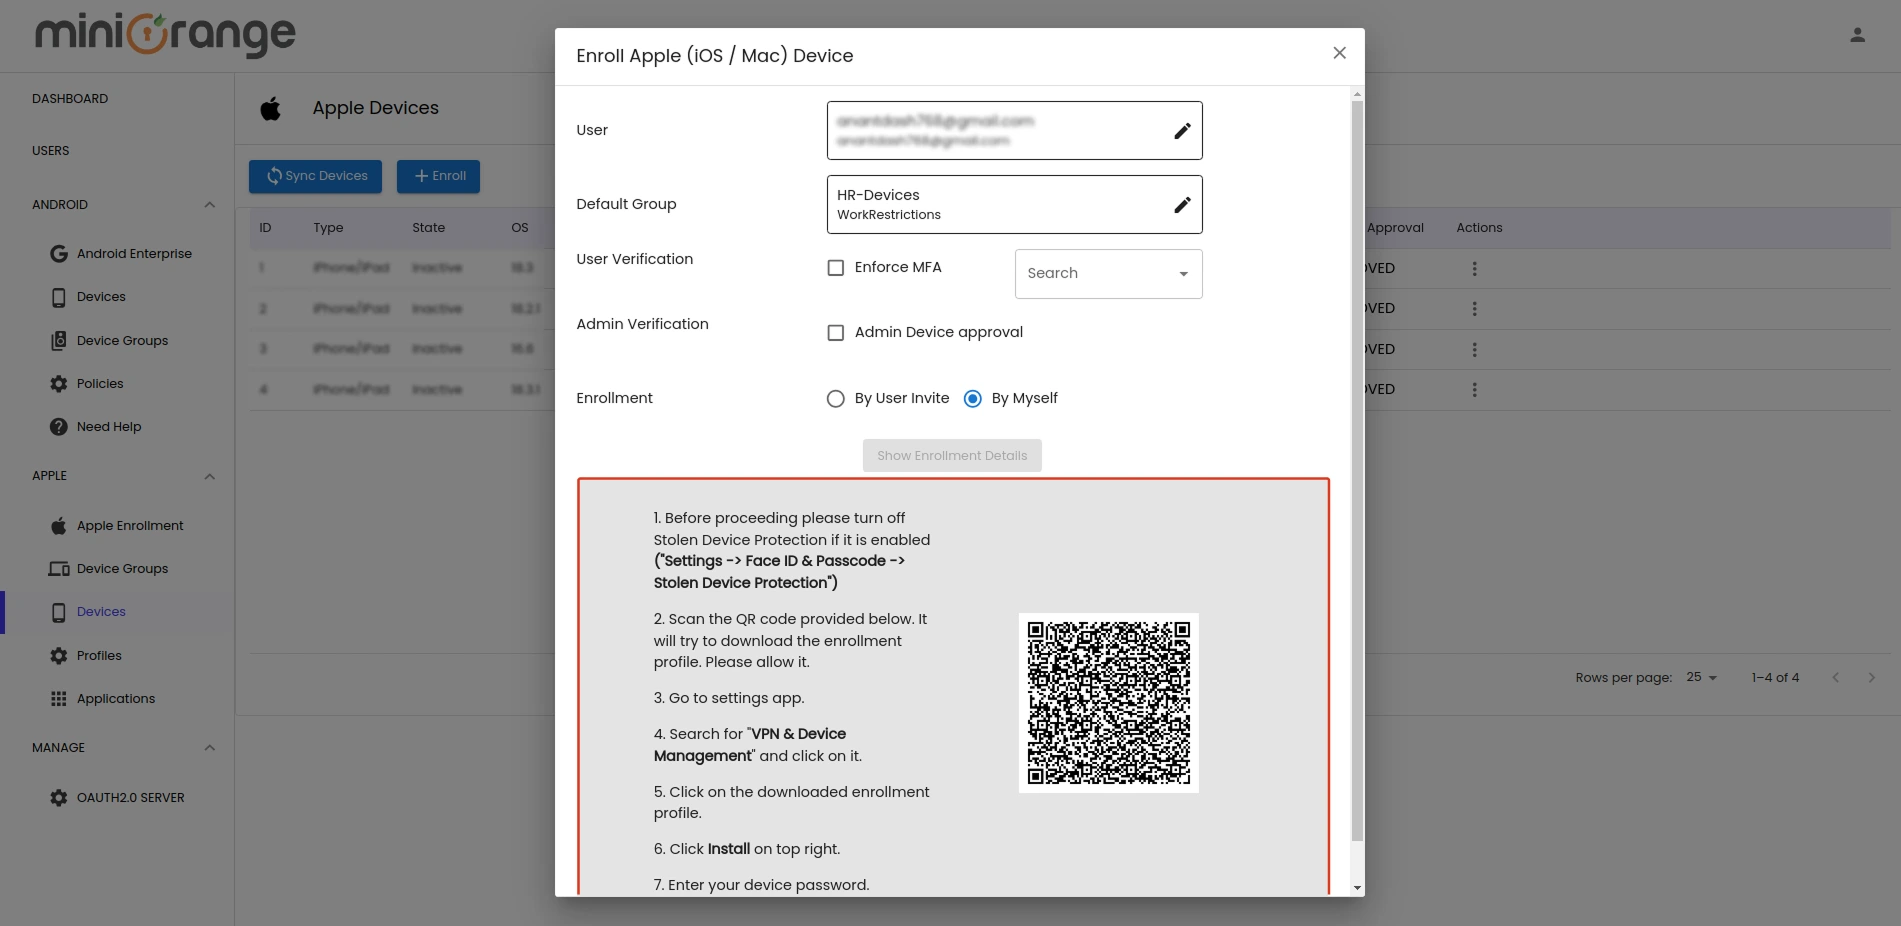
Step 6: Enroll an iOS device
- To enroll devices, go to Manage Devices → Devices → Apple and click Enroll Apple Device. You can also use the Bulk Device Enrollment button to enroll multiple devices at once.
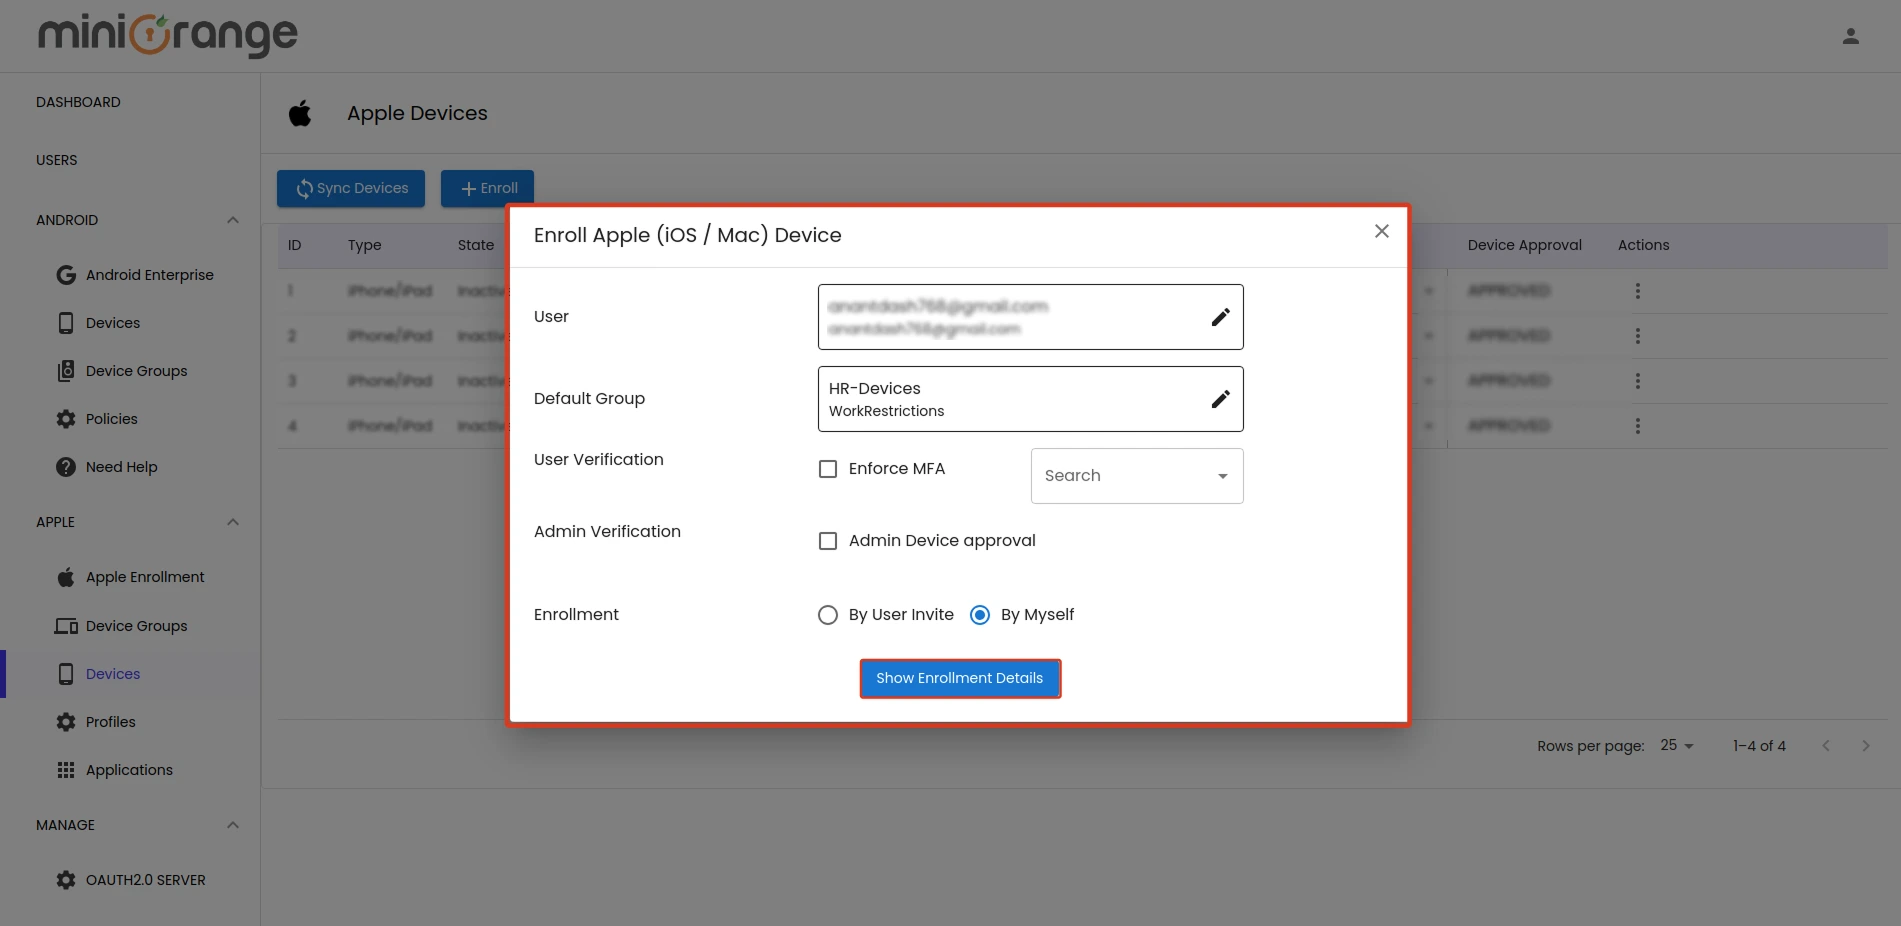
- Select the user from the dropdown which you want to send email and assign the device to a group from group dropdown.
- Choose enrollment type "By User Invite" or "By Myself".
- Send Email (User Invite): Select this option and click “Send Enrollment Email”. The user will receive an email with instructions to complete the setup.
- By Myself (Enroll via QR Code): Select this option and click “Show Enrollment Details”. Use this method if you are setting up the device personally or on-site.
- Admin Device Approval: If you want to change the device's group after you (the admin) approve the device, just tick the “Admin Device Approval” box. Once it's approved, you can manage the group assignment from the Devices screen.
- Once done, click on the Get Enrollment Details button.
- You will receive the enrollment details required to enroll the device. Follow the steps below to complete the enrollment.
Steps to Perform on the Device
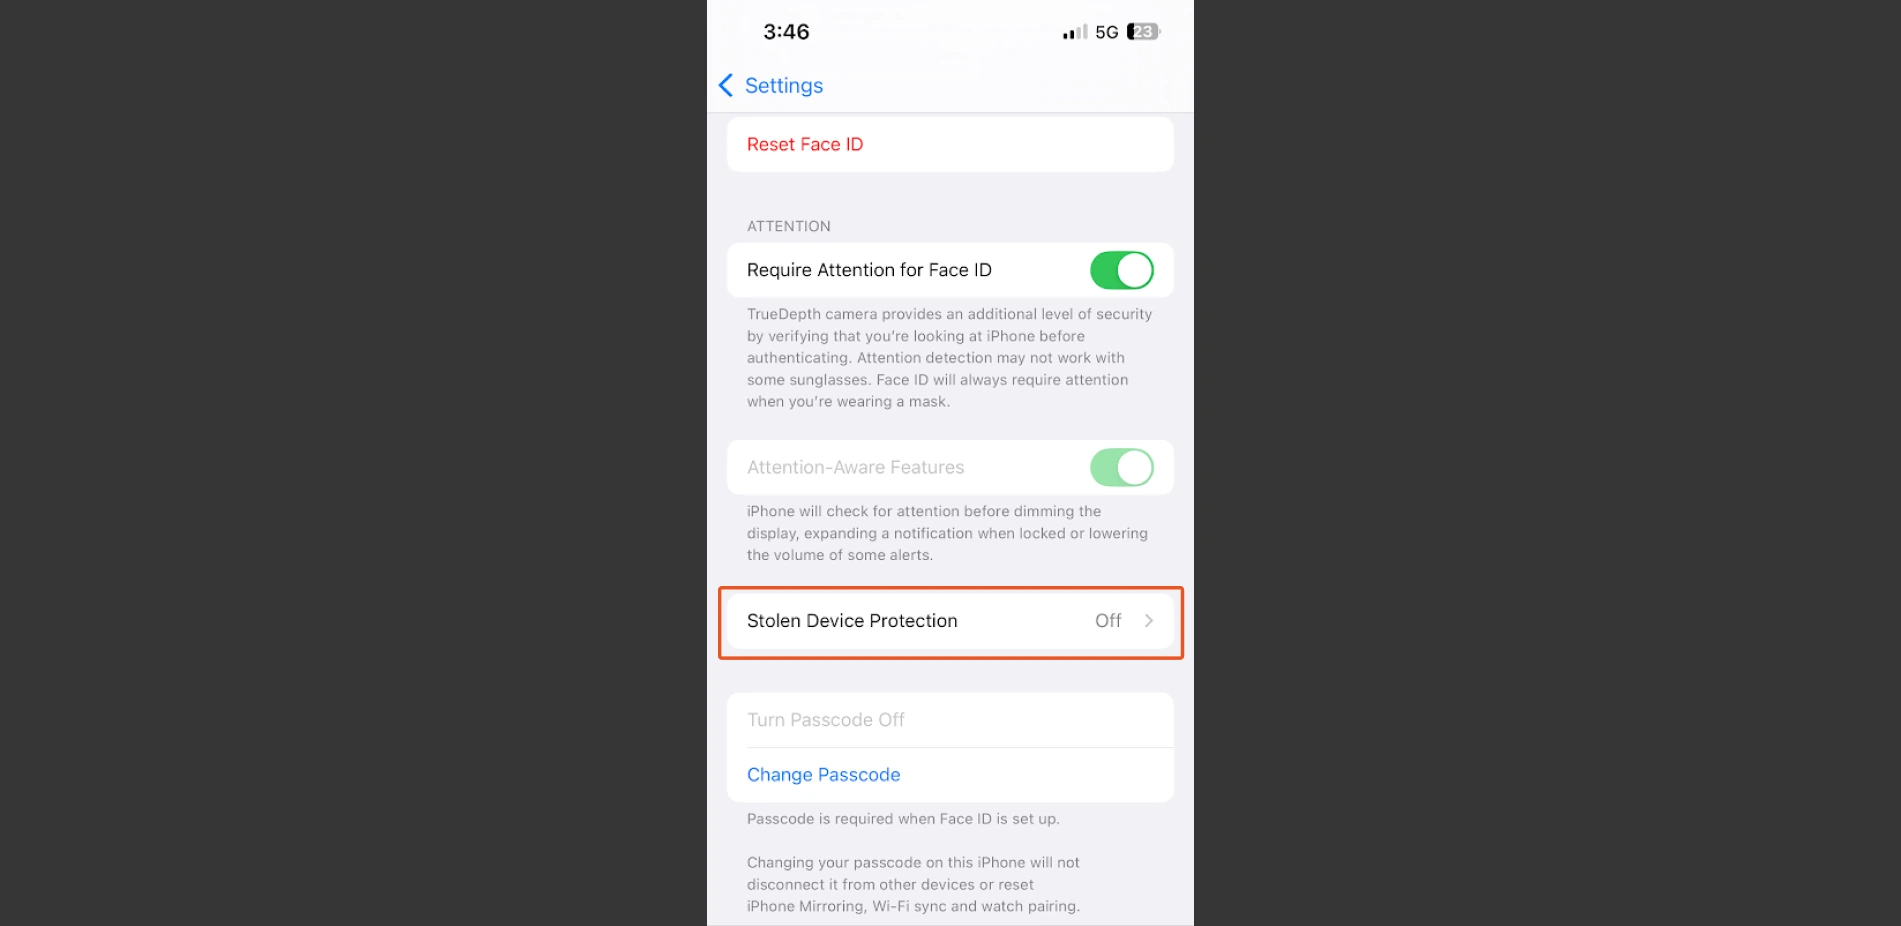
Step 1. Turn off Stolen Device Protection
- Note: This step applies only to iOS version 17.3.
- Go to Settings -> Face ID & Passcode -> Stolen Device Protection.
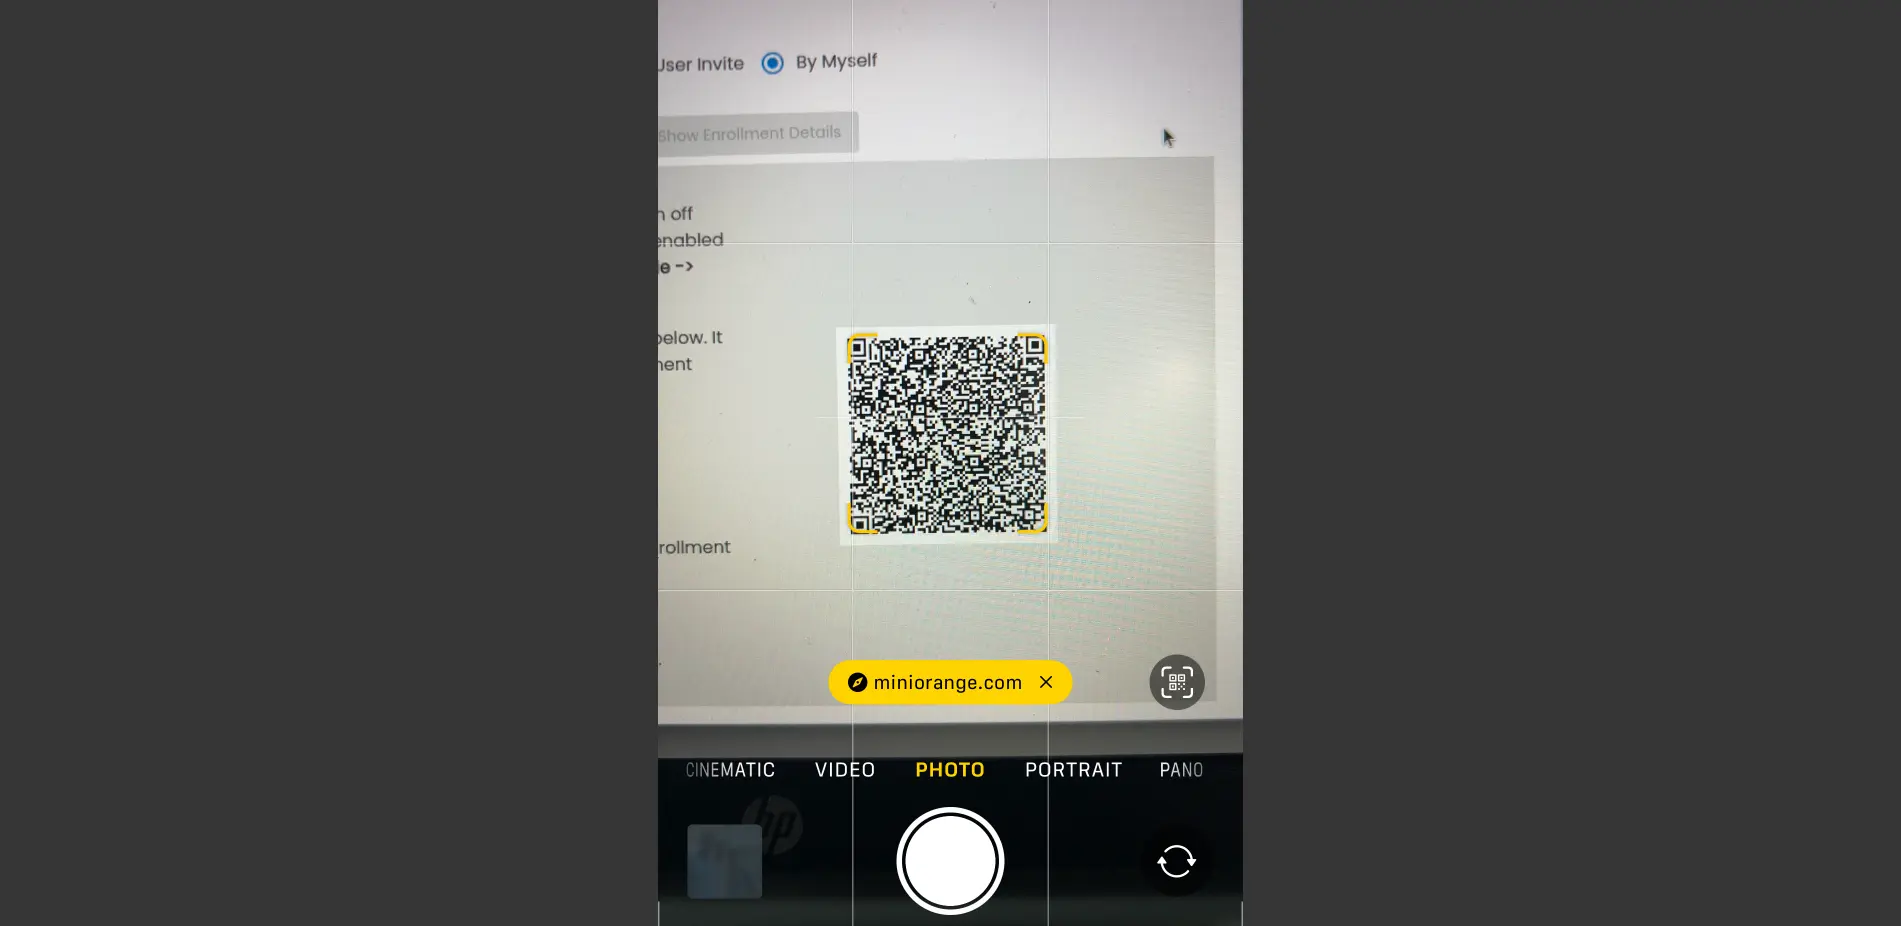
Step 2. Install Profile on the Mobile Device
- Scan the QR code from the enrollment screen using the Camera app or any other scanner.
- Tap the link that appears to start with the enrollment.
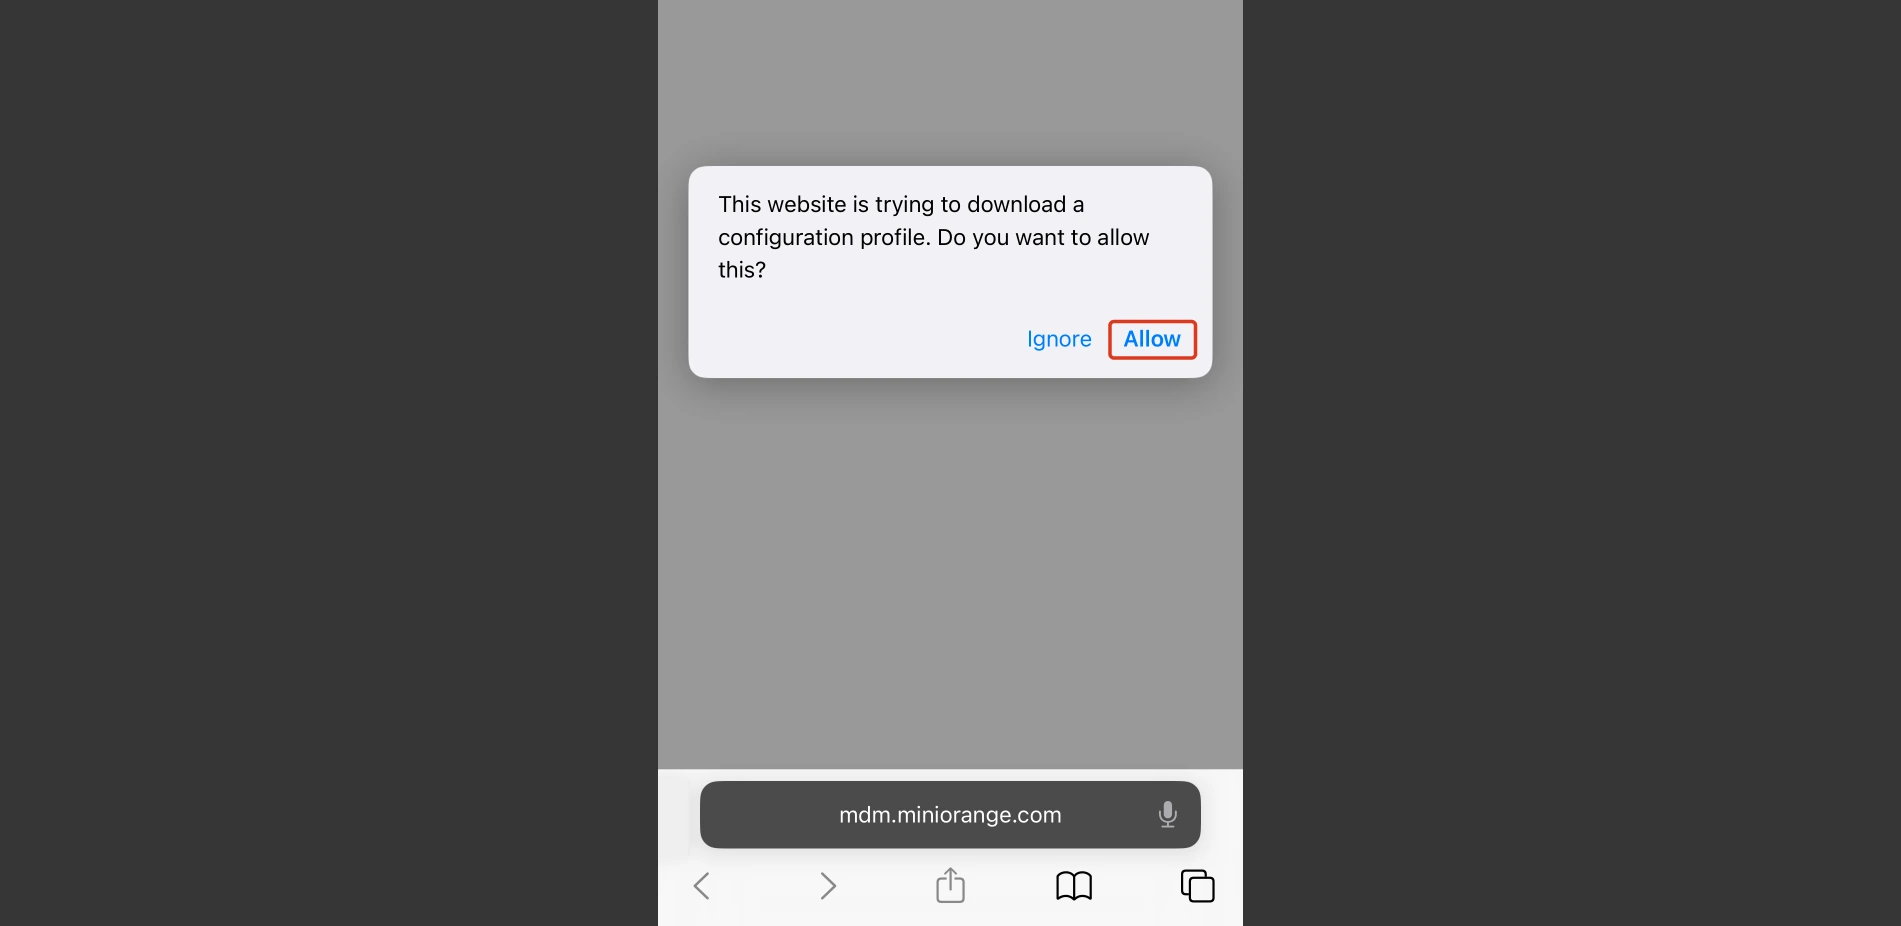
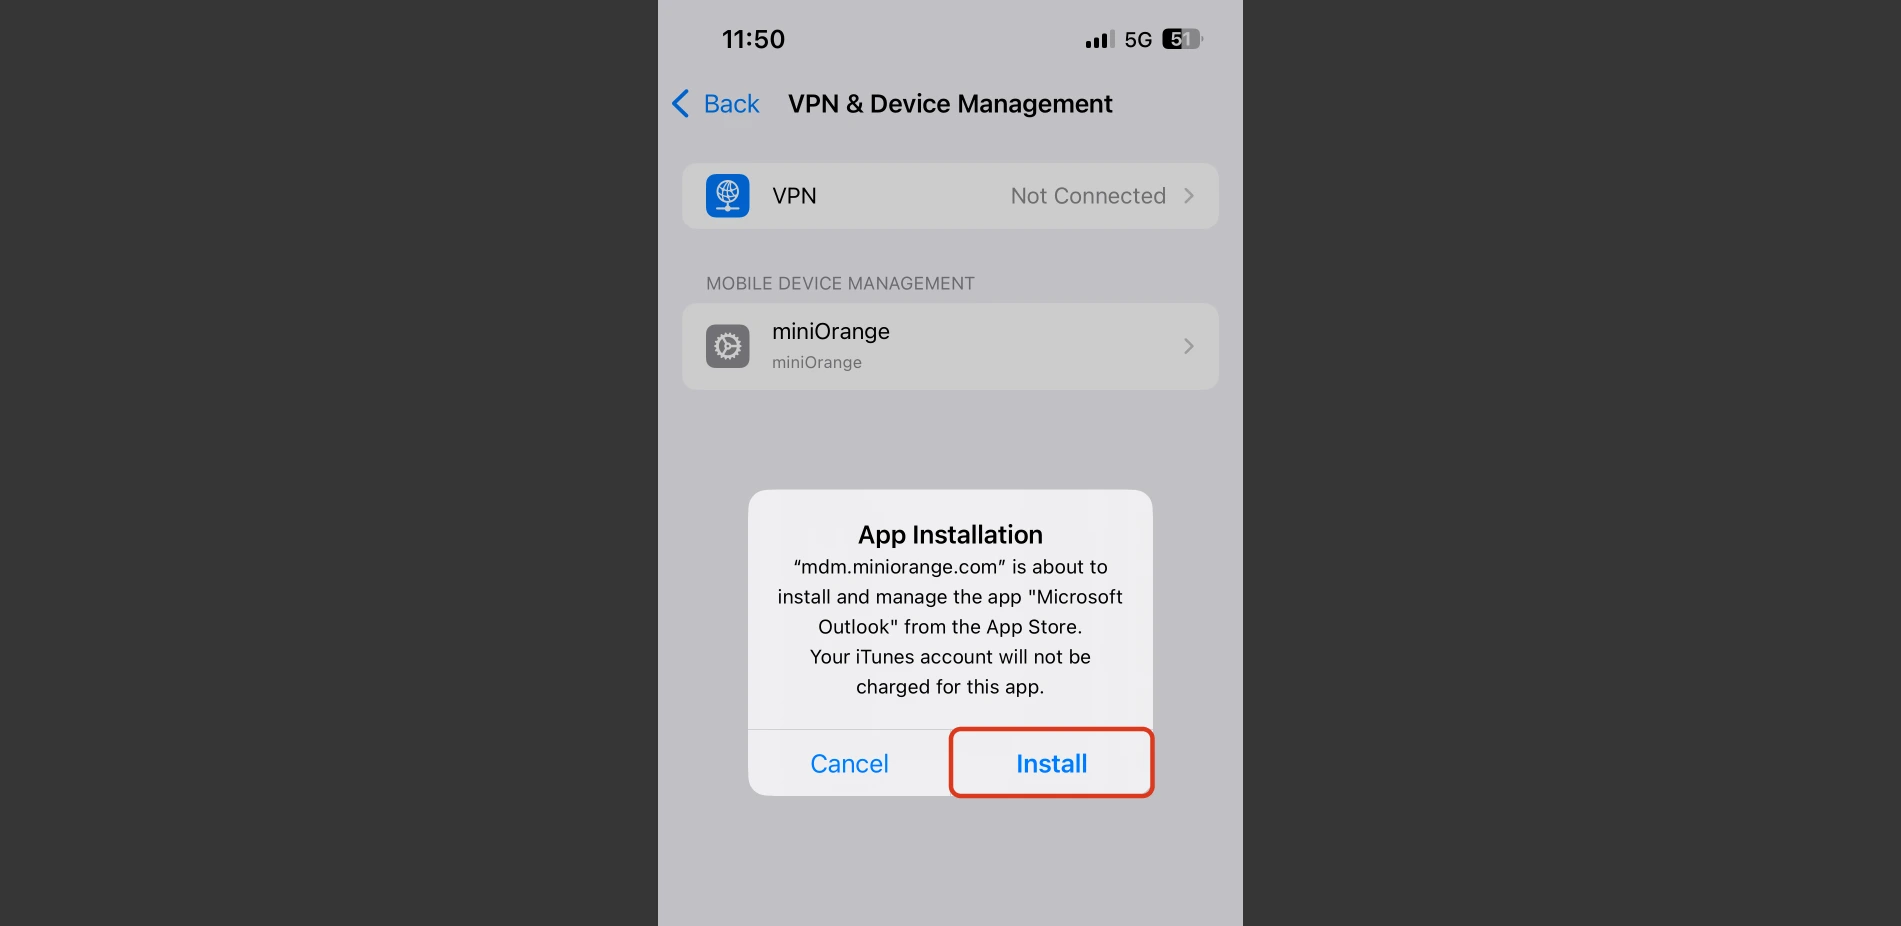
- Click “Allow” when prompted to allow the profile to download.
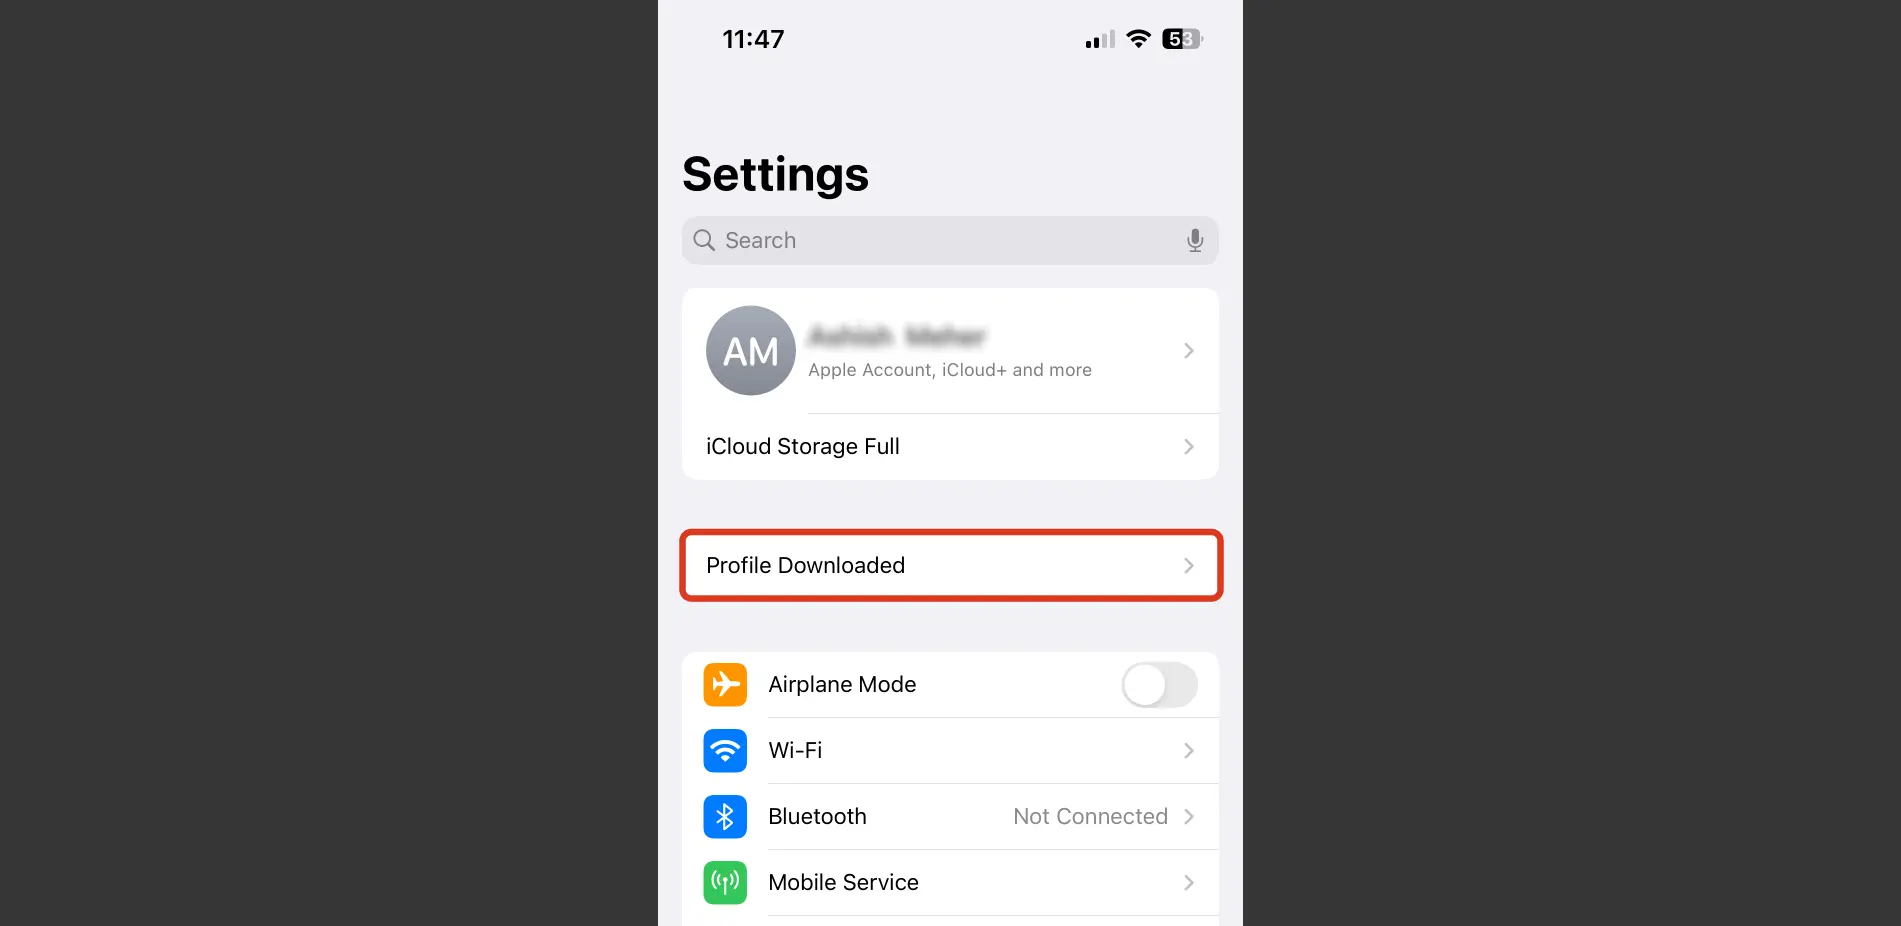
- Open Settings. Tap “Profile Downloaded” at the top.
- Tap “Install” on the top-right corner to begin the installation.
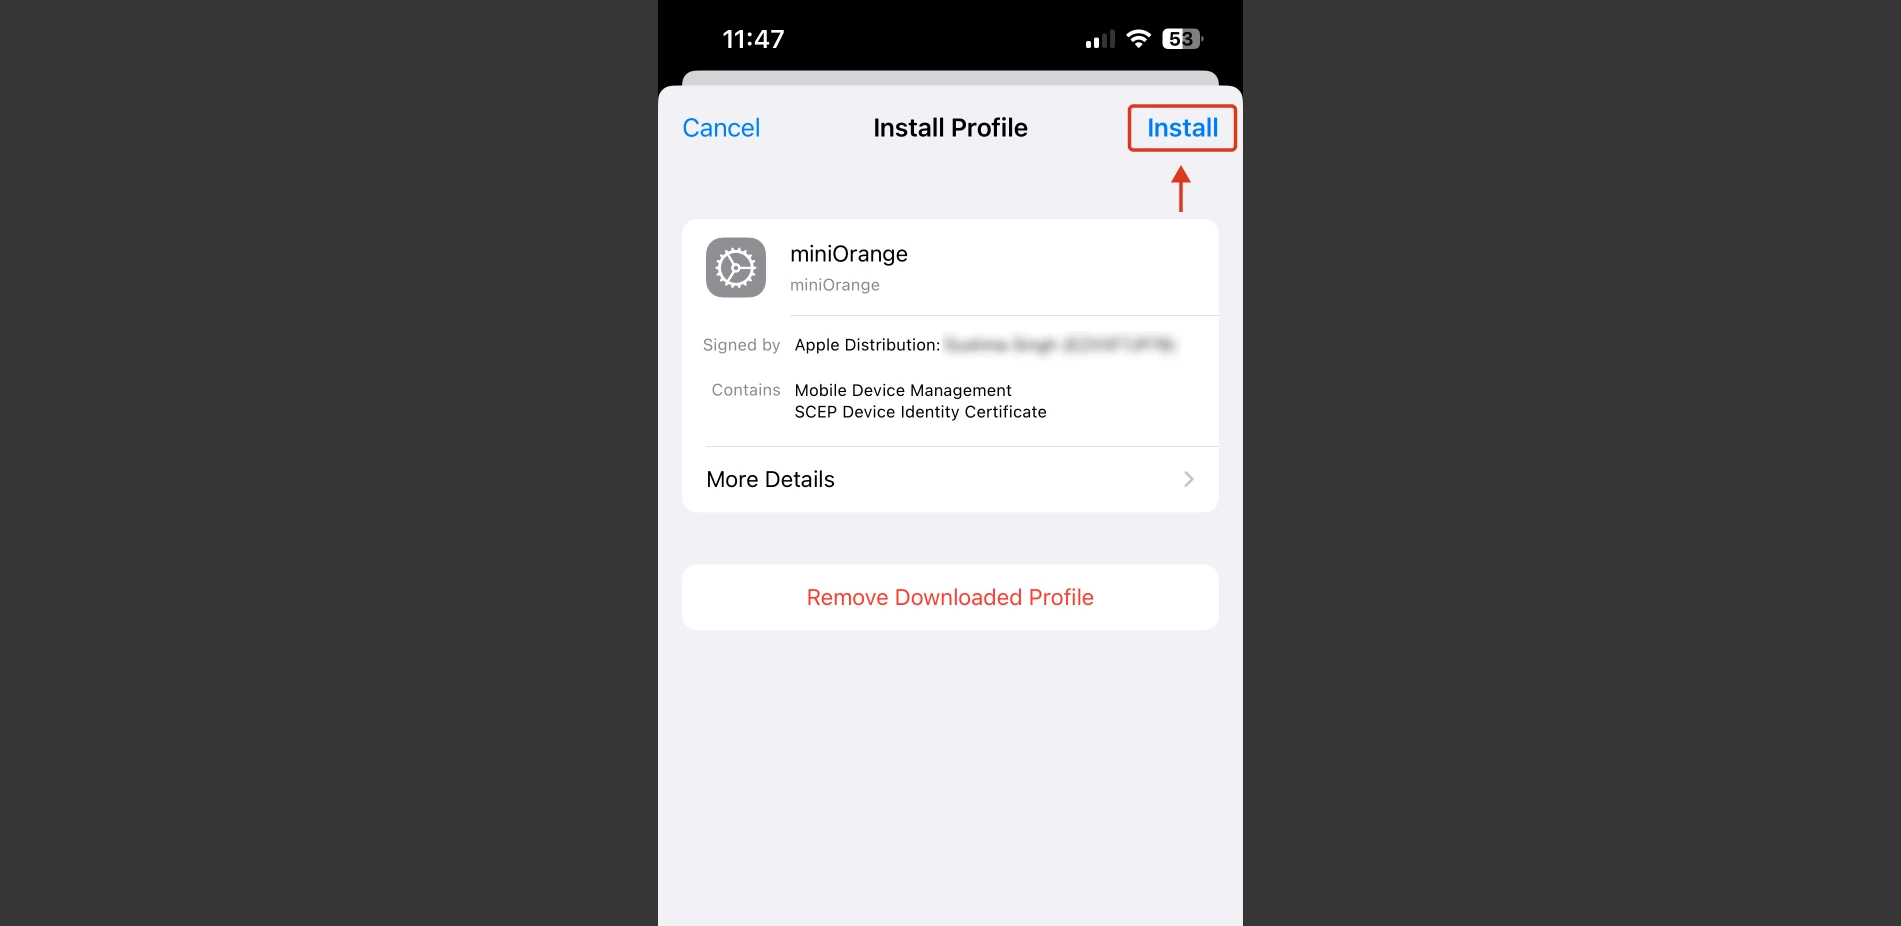
- Enter your device lock screen passcode if prompted.
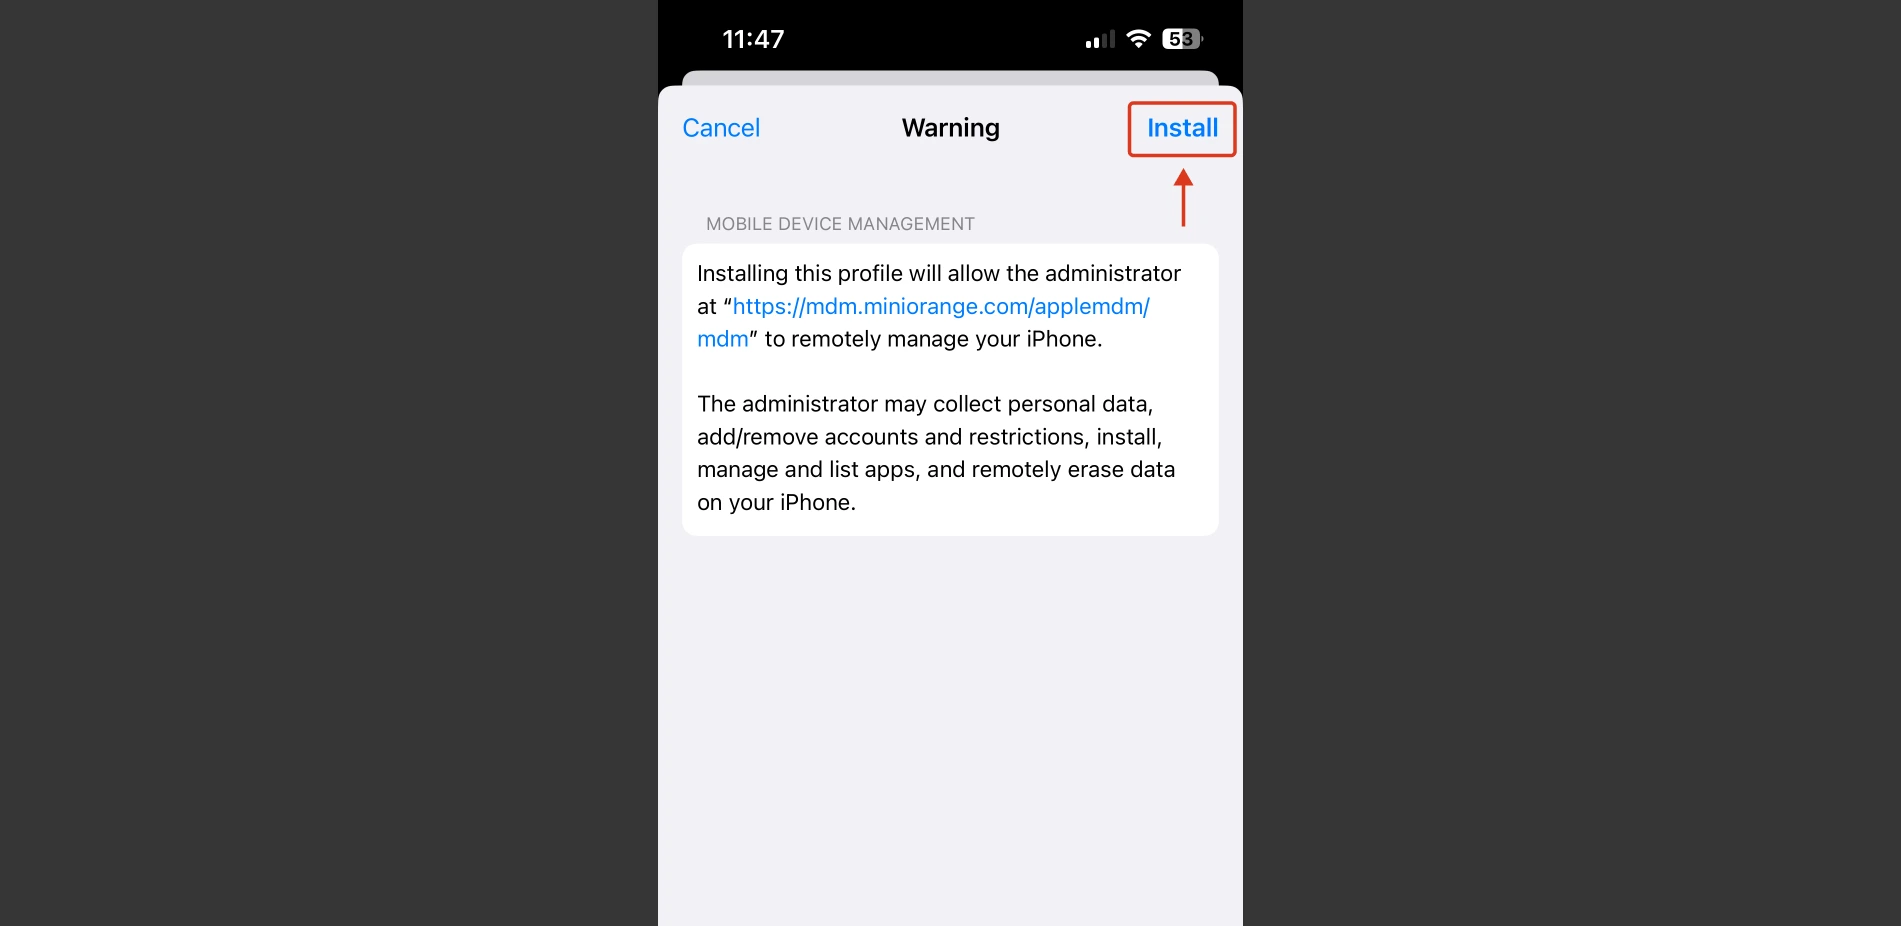
- On the warning screen, review the information, then tap “Install” again.
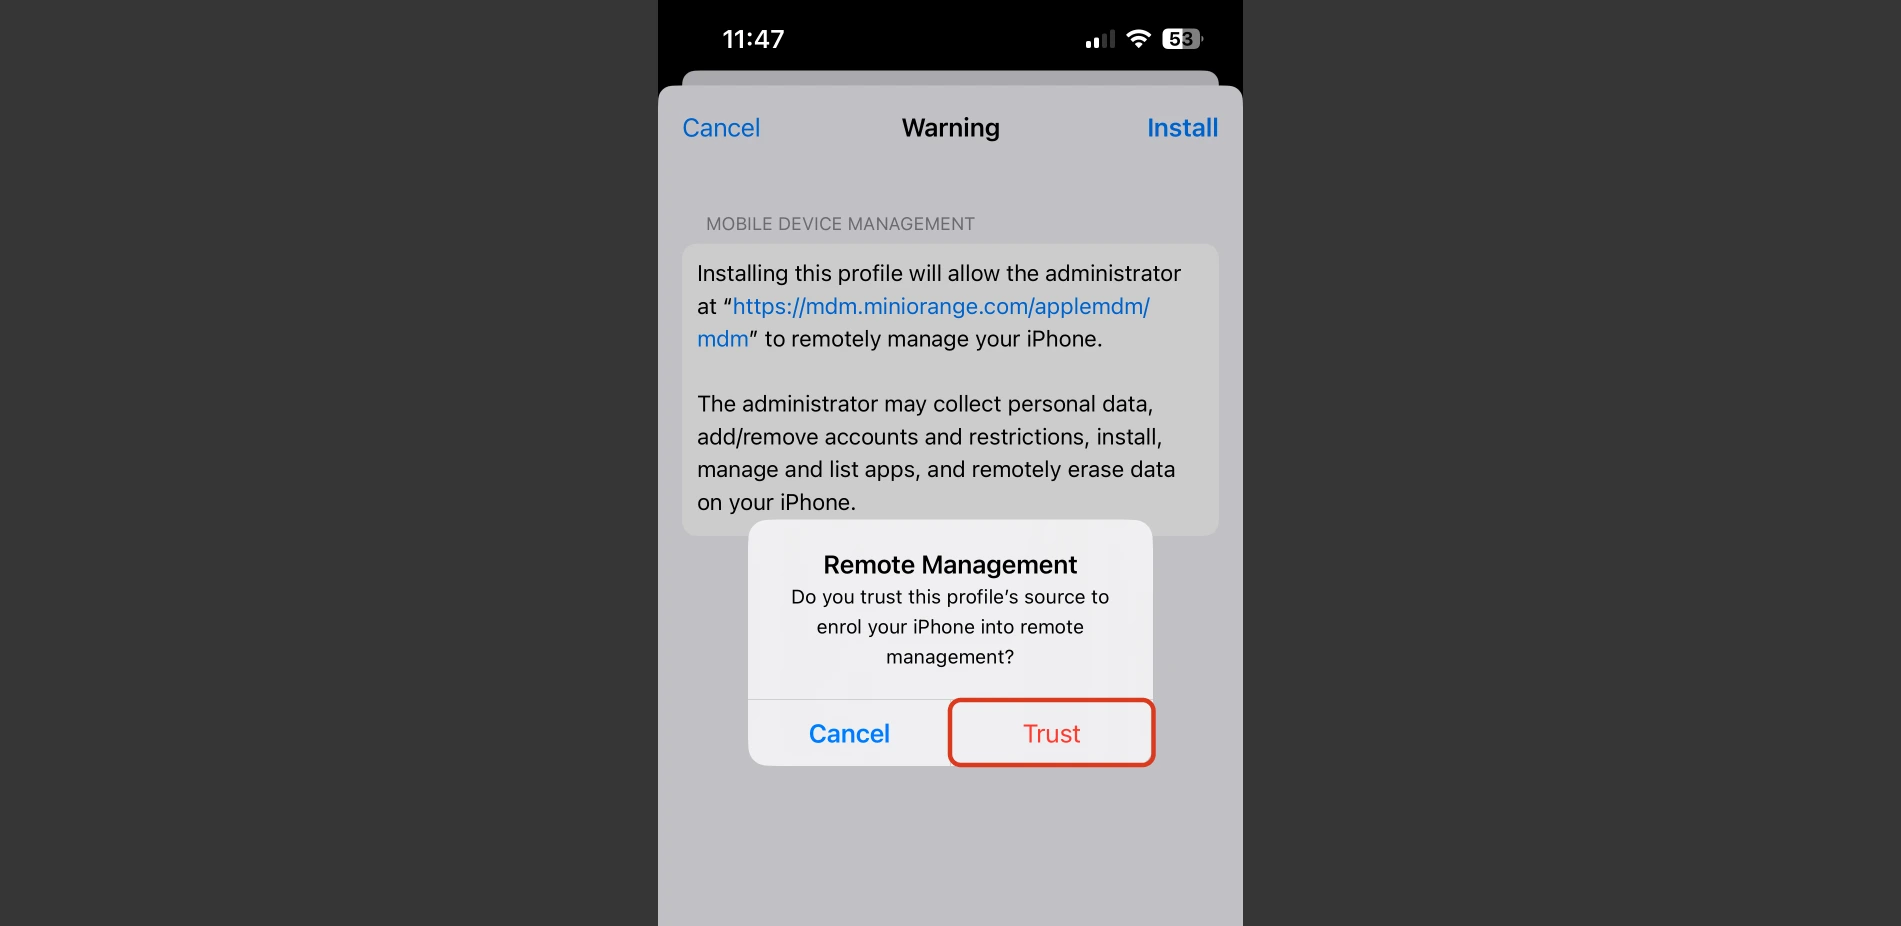
- When prompted for Remote Management, tap “Trust” to allow remote management.
- Once installation is done, tap “Done” in the top-right corner.
- If the device group was attached to an App Group, follow the on-screen prompts to install each app by clicking “Install” on each pop-up.
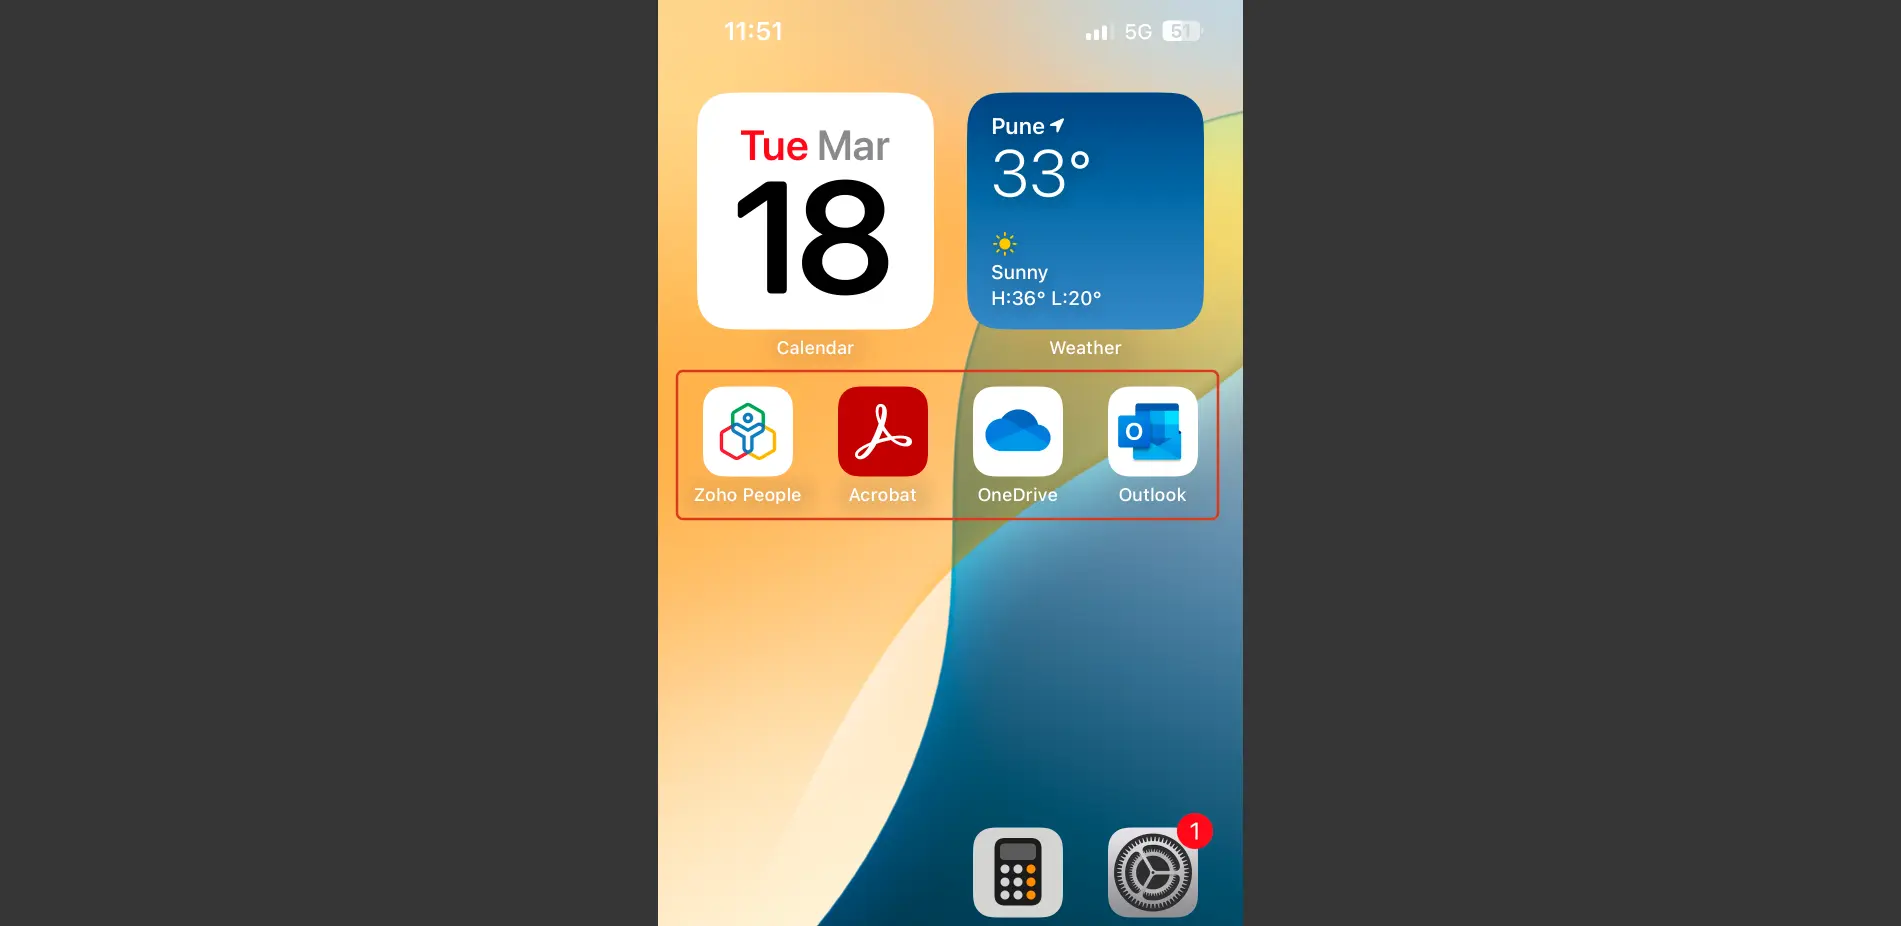
- You have successfully configured the iOS Device with MDM solution. As shown in the below image, the apps that you included in the group are now installed and managed on your iOS device.
- Note: Make sure you turn back on the Stolen Device Protection option after completing the enrollment process.
External References